Sewing patterns are indispensable tools in the world of fashion and design, helping crafters create stunning and well-fitting garments. One concern that arises when working with sewing patterns is whether they include seam allowances or not. Seam allowances are essential in ensuring a proper fit and secure construction, and understanding how they are incorporated in patterns will save time and prevent errors during the sewing process.
In general, commercial sewing patterns from major brands, such as Simplicity, McCall’s, and Butterick, include seam allowances within the pattern pieces themselves. These are typically set to a standard width, most commonly being ⅝ inch (1.5 cm), providing ample room for securing seams and making adjustments, if needed.
However, some independent designers or international pattern brands may not include seam allowances in their designs. In these cases, it is crucial to carefully read the pattern instructions to determine if you need to add seam allowances before cutting your fabric. This will often vary from designer to designer, so always double-check the specific pattern you are working with to avoid surprises during the sewing process.
Table of Contents
Understanding Seam Allowance
Definition and Purpose
Seam allowance, often abbreviated as SA, refers to the extra fabric width between the fabric’s raw edge and the stitched line. The purpose of seam allowance is to give both adequate space for the stitch and to ensure the seam’s strength.
Seam allowance is essential in sewing patterns because it allows for adjustments and prevents fraying of the fabric. It also contributes towards maintaining a neat and polished appearance on the final product.
Standard Seam Allowance Measurements
Standard seam allowance measurements vary depending on the type of sewing project, the fabric being used, and the pattern instructions. However, there are some common measurements that are generally followed:
- 1/4-inch (6 mm): Common for tight curves, collars, and cuffs
- 3/8-inch (1 cm): Often found on activewear and swimwear patterns
- 1/2-inch (1.3 cm): Widely used in quilting and home décor projects
- 5/8-inch (1.6 cm): The most prevalent seam allowance in garment sewing, especially for commercial patterns
- 3/4-inch (2 cm): Typically used for heavier fabrics like denim or upholstery
It is essential to follow the recommended seam allowance specified in the sewing pattern to ensure a proper fit and polished appearance. Please note that not all sewing patterns include seam allowance; it is crucial to double-check the pattern instructions for details regarding the seam allowance.
Seam Allowance in Sewing Patterns
When working with sewing patterns, it is important to know if seam allowance is included in the pattern pieces, as it will affect the overall fit and finish of the garment. In this section, we will discuss the seam allowance policies of popular pattern brands and how to identify seam allowance on pattern pieces.
Popular Pattern Brands and Their Seam Allowance
Here is a list of some popular sewing pattern brands and their seam allowance policies:
- Simplicity, Butterick, Vogue, New Look, and McCalls: These brands typically include a 5/8″ (1.5 cm) seam allowance on their pattern pieces.
- Burda: Burda patterns may or may not include seam allowance, depending on the publication. Magazine patterns usually do not include seam allowance, while envelope patterns often do. It is essential to read the instructions for each pattern to determine if seam allowance is included and, if not, how much to add.
Identifying Seam Allowance on Pattern Pieces
To identify if seam allowance is included in your sewing pattern pieces, follow these steps:
- Check the pattern instructions: The pattern envelope or instruction sheet should specify if seam allowance is included and what the specific allowance is. This information is usually found near the cutting layout and assembly instructions.
- Examine the pattern pieces: Sometimes, the pattern pieces themselves will have the seam allowance printed on them. This could be a dashed line, a text note, or an additional marked distance from the cutting edge. Note that not all patterns feature this indication, so always be sure to refer to the instructions first.
Remember, knowing if your sewing pattern includes seam allowance is an essential step to achieving a successful finished garment.
Fabric and Pattern Preparation
Selecting the Right Fabric
When choosing fabric for your sewing project, consider the type of garment being made. For example, a flowing dress may require a lightweight fabric such as chiffon, while a structured blazer may require a sturdier fabric, like wool. Pay attention to the fabric recommendations on the sewing pattern to ensure proper drape and fit.
For quilt projects, consider using 100% cotton fabrics, as they are easy to sew, have minimal stretch, and are compatible with most quilting techniques.
Cutting Fabric and Pattern Pieces
Before cutting the fabric, make sure it is properly ironed and placed on your cutting surface with the right sides facing together. This will ensure accurate cutting and later assembly. Follow the pattern’s grainline markings to align the fabric with the selvage for proper stretch and drape.
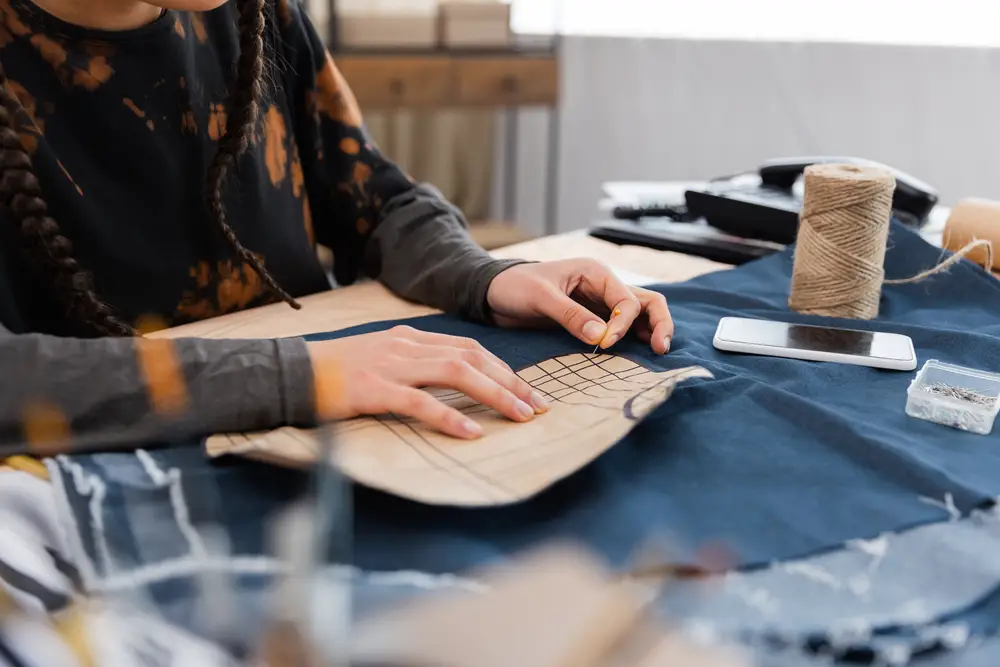
For the pattern pieces, pay attention to the included seam allowance as well as the markings for your garment features like neckline and armholes. It is important to transfer all pattern markings to the fabric using the appropriate marking tools, such as tailor’s chalk or fabric markers, for precise sewing.
- Lay out your fabric: Place your fabric on a clean, flat surface and fold it in half. Make sure the selvages are aligned and the fold is straight.
- Position the pattern pieces: Place the pattern pieces on top of the fabric, following the grainline and fold markings in the pattern instructions. Pin the pattern pieces to the fabric, avoiding the cutting lines.
- Cut the fabric and pattern pieces: Using sharp fabric scissors or a rotary cutter, carefully cut around the pattern pieces, following the cutting lines. Be mindful of the seam allowances that are included in the pattern to ensure accurate sizing and fit.
Once all the fabric and pattern pieces are cut, you are ready to assemble your garment or quilt project. Remember to always follow the sewing pattern instructions for the best results.
Adding Seam Allowance to Patterns
Step-by-Step Guide
- Gather your materials: This process will require a ruler, pencil, curve, scissors, and the pattern you’re working with.
- Identify the raw edges: Check the sewing pattern to determine the location of raw edges that need seam allowance (SA).
- Measure the seam allowance: Decide on the desired seam allowance width, usually between 1/4-inch and 5/8-inch, depending on the project.
- Draw the seam allowance: Using your ruler and pencil, draw a parallel line outside the pattern at the chosen distance (SA) along the raw edges.
- Smooth curves: For curved lines, use a curve tool to create a smooth seam allowance.
- Cut the new pattern: Use scissors to cut along the newly drawn seam allowance lines.
Adjustments and Customizations
- Standard vs. customized SA: Some patterns may come with SA included. However, you may still need to adjust the given SA based on the fabric type or construction method of your garment. In such cases, follow the same step-by-step guide above to adjust the SA widths as necessary.
- Different seams, different allowances: Depending on the construction of the garment, you may need different SA widths for different parts. When dealing with multiple seam allowances, it’s important to remain consistent with your measurements and clearly mark them on the pattern.
- Special considerations: When sewing garments that require a smooth or precise fit, such as tight-fitting or formal wear, it’s essential to make sure the SA is accurate and consistent. You might need to use special tools or techniques to achieve the desired results.
Remember, adding seam allowance to patterns is a crucial step in creating garments that fit well and look professional. Be diligent with your measurements and follow the step-by-step guide to ensure your finished projects turn out as intended.
Constructing the Garment
Sewing Techniques
When constructing a garment, it’s crucial to follow your sewing pattern’s instructions carefully to ensure a well-fitted and properly structured outcome. Sewing patterns often include seam allowances, which provide a buffer between the stitching line and the raw edge of the fabric. Seam allowances vary based on the pattern designer, but a common industry standard is 5/8 inch (1.5 cm).
To successfully sew your garment, pay attention to the pattern’s notches, which are small markings on the pieces that help align them properly. Sewists can use various sewing techniques, such as:
- Straight stitch: A basic stitch used to hold pieces of fabric together.
- Zig-zag stitch: A stitch used to finish raw edges and prevent fraying.
Finishing Seams and Hems
Properly finishing seams and hems contributes to the garment’s overall appearance and longevity. Here are some techniques:
- Serging: A technique that uses an overlock machine to create a finished edge.
- French seam: A seam consisting of two rows of stitches, which encase the raw edges inside the seam.
- Rolled hem: A method of creating narrow hems by rolling the fabric edge under twice and stitching it down.
Hems can be finished by hand or using a sewing machine:
- Hand-sewn: A blind hem stitch can create an invisible finish, often used for formal garments.
- Machine-sewn: A double-fold hem, where the raw edge is folded over twice, is a common method for a clean finish.
By following the sewing pattern’s instructions, applying appropriate techniques, and finishing seams and hems neatly, your garment construction will result in a professional-quality piece. Don’t forget to regularly press your fabric to keep it smooth and manageable throughout the process. Practice and patience will lead you to create beautiful garments with precision and ease.
Additional Tips and Tools
Using Different Fabric Types
When working with various fabrics, it’s essential to understand their characteristics. For woven fabrics, align the grain line with the fabric’s lengthwise grain. On the other hand, when using knit fabrics, make sure to place the pattern’s stretch line along the fabric’s greatest stretch. Delicate fabrics, like chiffon and silk, may require extra care while cutting and sewing.
Utilizing Pattern Markings
Utilize pattern markings as a guide for aligning pieces, creating seams, and adding details:
- Grain Line: Indicates the fabric’s direction; align the grain line with the fabric’s lengthwise grain.
- Cutting Line: Represents the edge of the fabric, including seam allowances; cut the fabric along this line.
- Notches: Help match corresponding pattern pieces; small triangle or diamond shapes on the pattern.
- Buttons and Pockets: Mark the placement of buttons, pockets, or other design elements.
Seam Finishes for Delicate Fabrics
For delicate fabrics, a proper seam finish can make a difference. Some options include:
- French Seams: Suitable for lightweight fabrics, encasing the raw edge within the seam to give a clean finish.
- Table:
| Fabric | Recommended Seam Finish |
|---|---|
| Chiffon | French Seams |
| Silk | French Seams |
| Cotton Knits | Overlocked or Zigzag Seams |
Remember to test your seam finish on a fabric scrap before applying it to your project.