
Christmas decor you sew yourself has a warmth that store-bought pieces never quite match. A stack of fabric scraps, a few evenings at the machine, and suddenly the mantel, the table, and the tree all feel a little more like home.
These 25 projects lean toward holiday decor and table linens, with a handful of quick stocking stuffers mixed in. Each one lists the time, skill level, fabric amounts, and the key steps, so you can pick a project and start cutting tonight.
1. Quilted Christmas Stocking
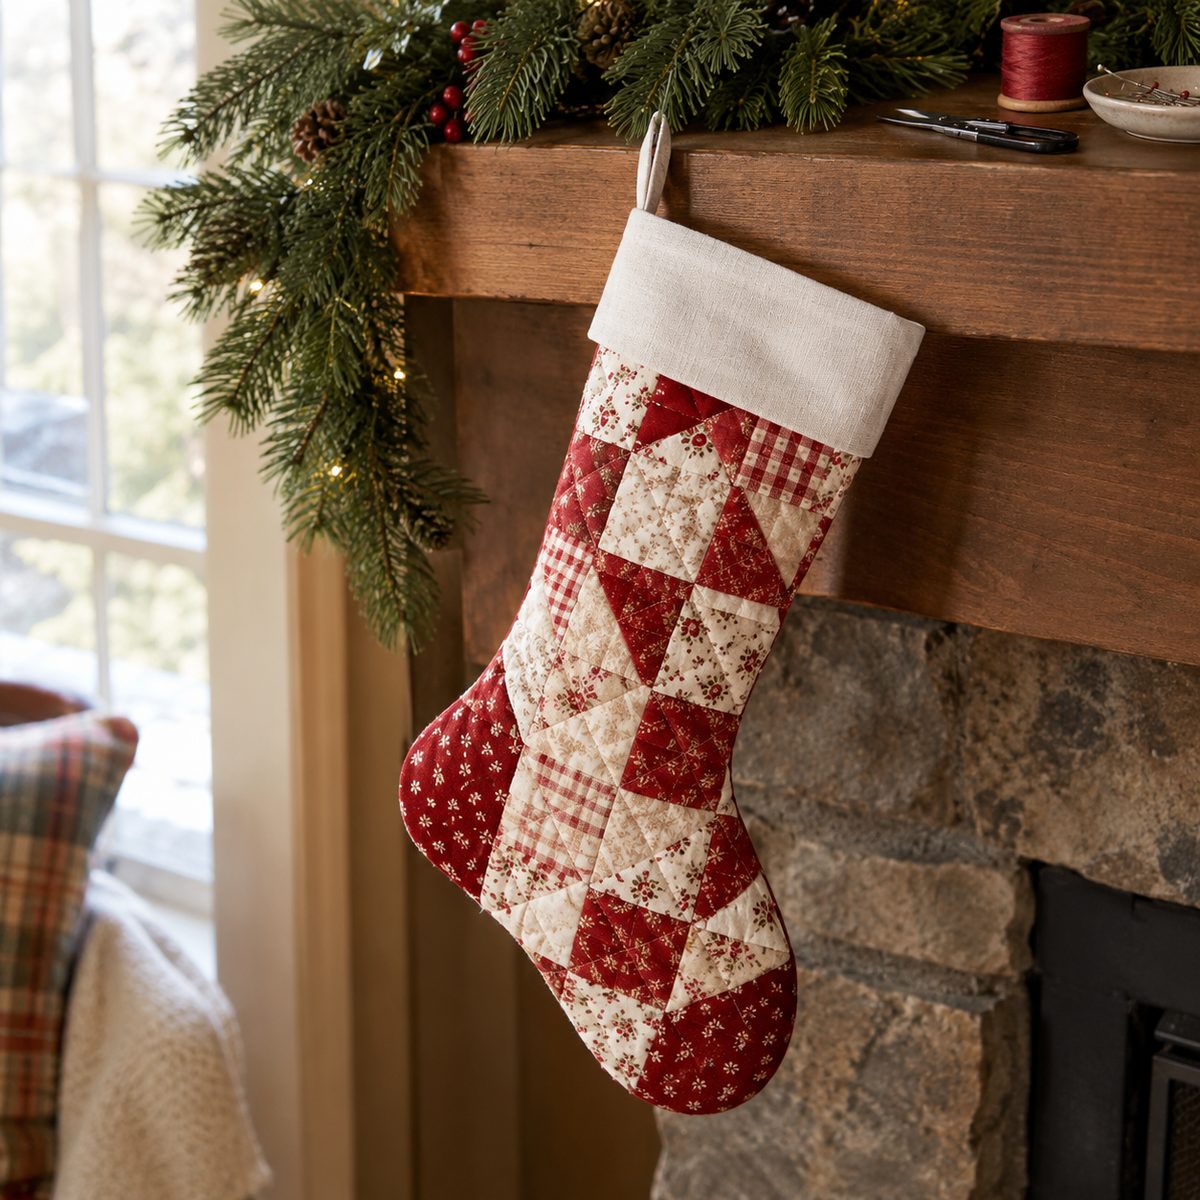
Time: 3 hours. Skill: Confident beginner.
Quilting gives a stocking body that lasts for years. You need 1/2 yard of outer fabric (or patchwork scraps), 1/2 yard of lining, 1/2 yard of low-loft batting, and a 5 x 16-inch strip for the cuff.
- Draw a stocking about 18 inches tall and cut two outers, two linings, and two batting pieces.
- Layer outer and batting, then quilt straight lines 1 inch apart.
- Sew outers right sides together, then the linings, leaving a 4-inch turning gap in the lining.
- Fold the cuff in half, add a hanging loop, and sew it around the top edge.
If you’re unsure which filling to buy, this guide to batting in sewing explains the lofts.
2. Mini Stocking Garland

Time: 2 hours. Skill: Beginner.
A row of tiny stockings strung along a mantel or window is pure charm. Plan on 1/4 yard of assorted cottons, a few felt scraps for cuffs, and 2 yards of twine or ribbon.
Cut a 6-inch stocking template and trace ten pairs. Sew each pair right sides together with a 1/4-inch seam, clip the curves, and turn. Top-stitch a folded felt cuff around the opening, then fold a 3-inch loop of ribbon into the back seam. Clip them to the twine with mini clothespins so they slide easily.
3. Fabric Christmas Tree Ornaments
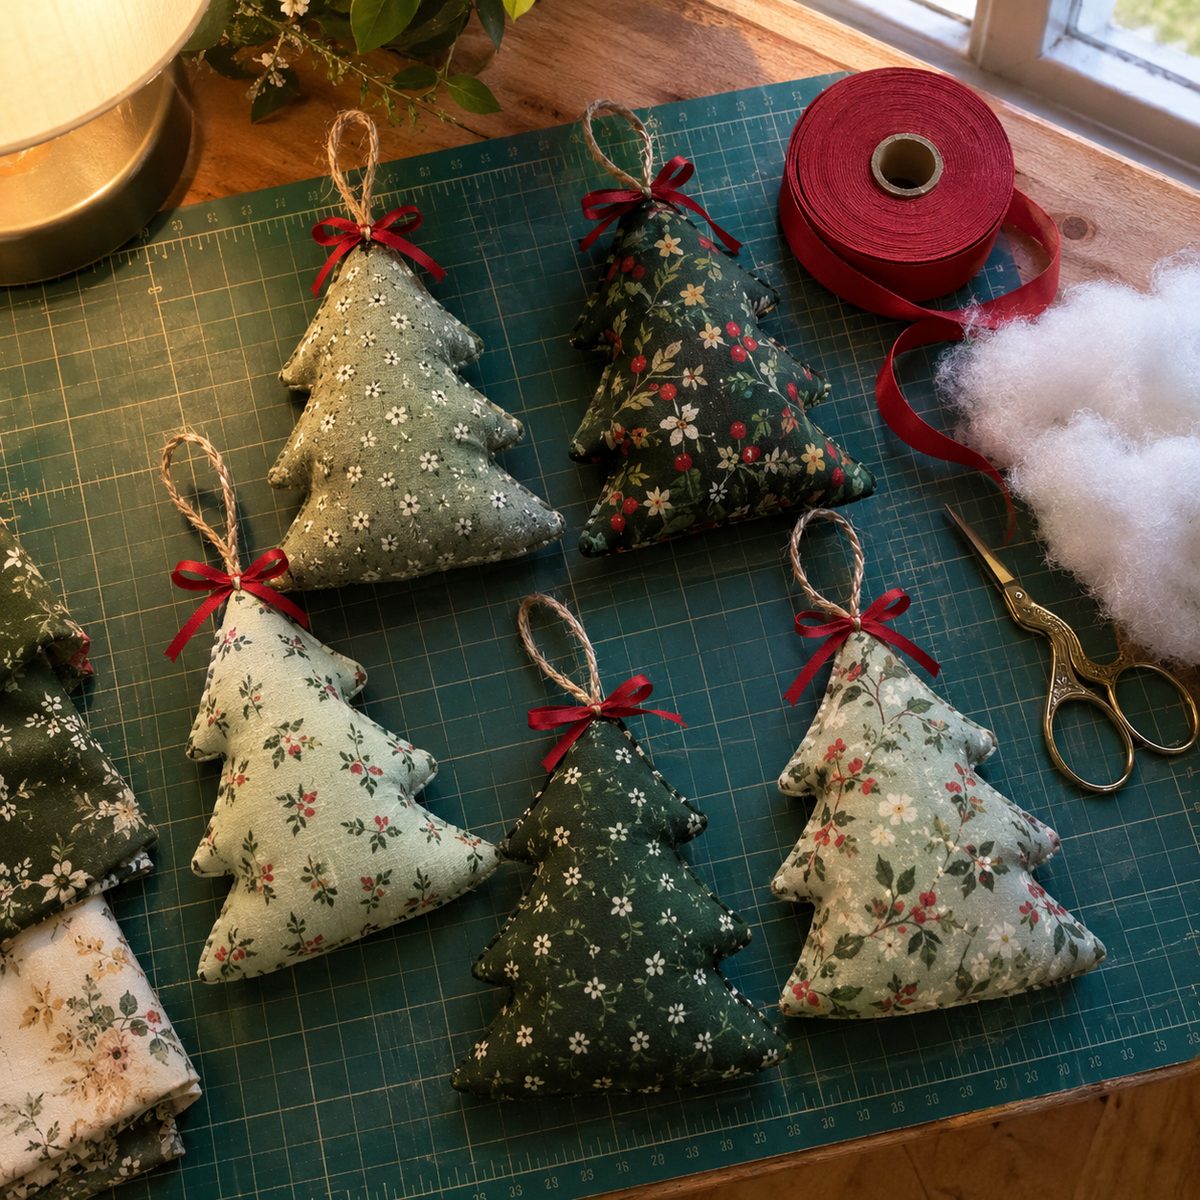
Time: 20 minutes each. Skill: Beginner.
Little stuffed fabric trees are a fast, scrap-friendly ornament that looks lovely in a mix of greens. Each one takes a 5 x 10-inch scrap, a small handful of fiberfill, and 6 inches of ribbon.
- Fold the scrap in half and trace a 4-inch triangle tree with a short trunk.
- Sew around the outline with a short stitch, leaving 1 inch open along one side.
- Trim to 1/8 inch, clip the points, turn, and stuff lightly with a chopstick.
- Slip-stitch the gap closed and tack a ribbon loop to the top.
Mix solids and small florals for a collected look.
4. Felt Gingerbread Ornaments

Time: 30 minutes each. Skill: Beginner.
Felt gingerbread people are the ornament kids ask to hang first. You’ll need brown wool-blend felt (a 9 x 12-inch sheet makes three), white felt or rickrack for icing, small buttons, and a bit of stuffing.
Cut two 4-inch gingerbread shapes per ornament. Stitch white rickrack across the arms and legs on the front piece, then add two buttons and embroidered eyes. Place front and back together, tuck in a ribbon loop, and sew around the edge 1/8 inch in, stuffing lightly before you close the last inch. Felt doesn’t fray, so no turning is needed. Yes, you can sew felt with a sewing machine, though blanket stitch by hand looks extra cozy.
5. Scandinavian Folded Star Ornaments
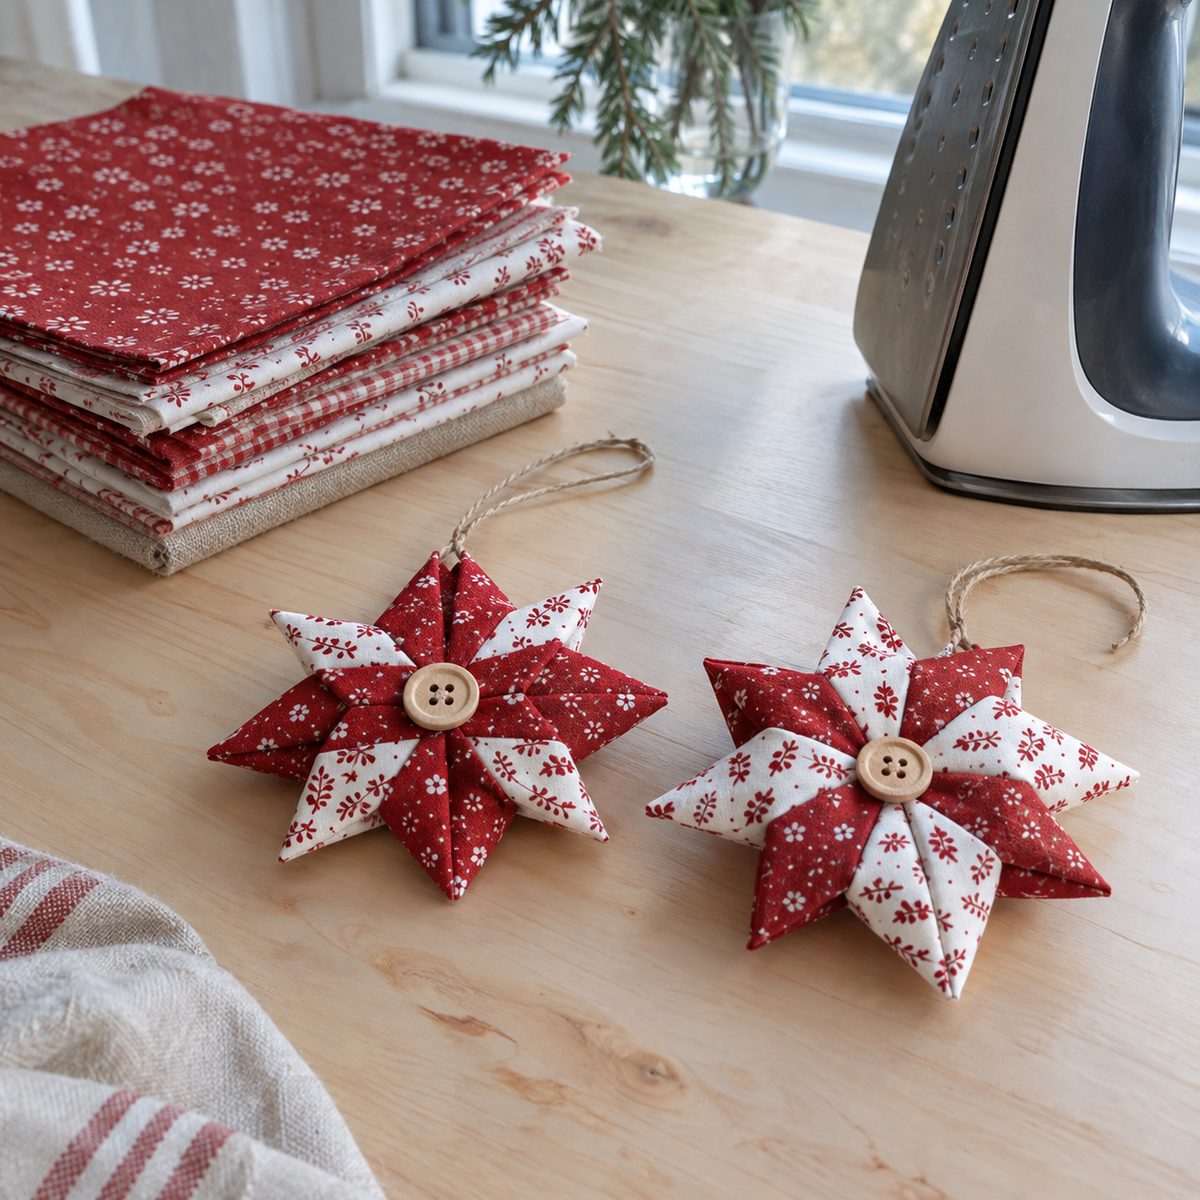
Time: 45 minutes. Skill: Intermediate.
Folded fabric stars give that crisp Nordic look, especially in red and white. For one 5-inch star you need eight 3-inch squares of quilting cotton, a 5-inch circle of felt for the base, and a strong press.
- Fold each square in half and press, then fold the two top corners down to the center to make a prairie point.
- Arrange four points on the felt circle, tips meeting at the center, and tack them down.
- Add the second round of four points, rotated 45 degrees, and tack again.
- Cover the center with a button and trim the felt behind the points.
A little spray starch makes the folds sharp and keeps the tips from lifting.
6. Patchwork Christmas Pillow Cover
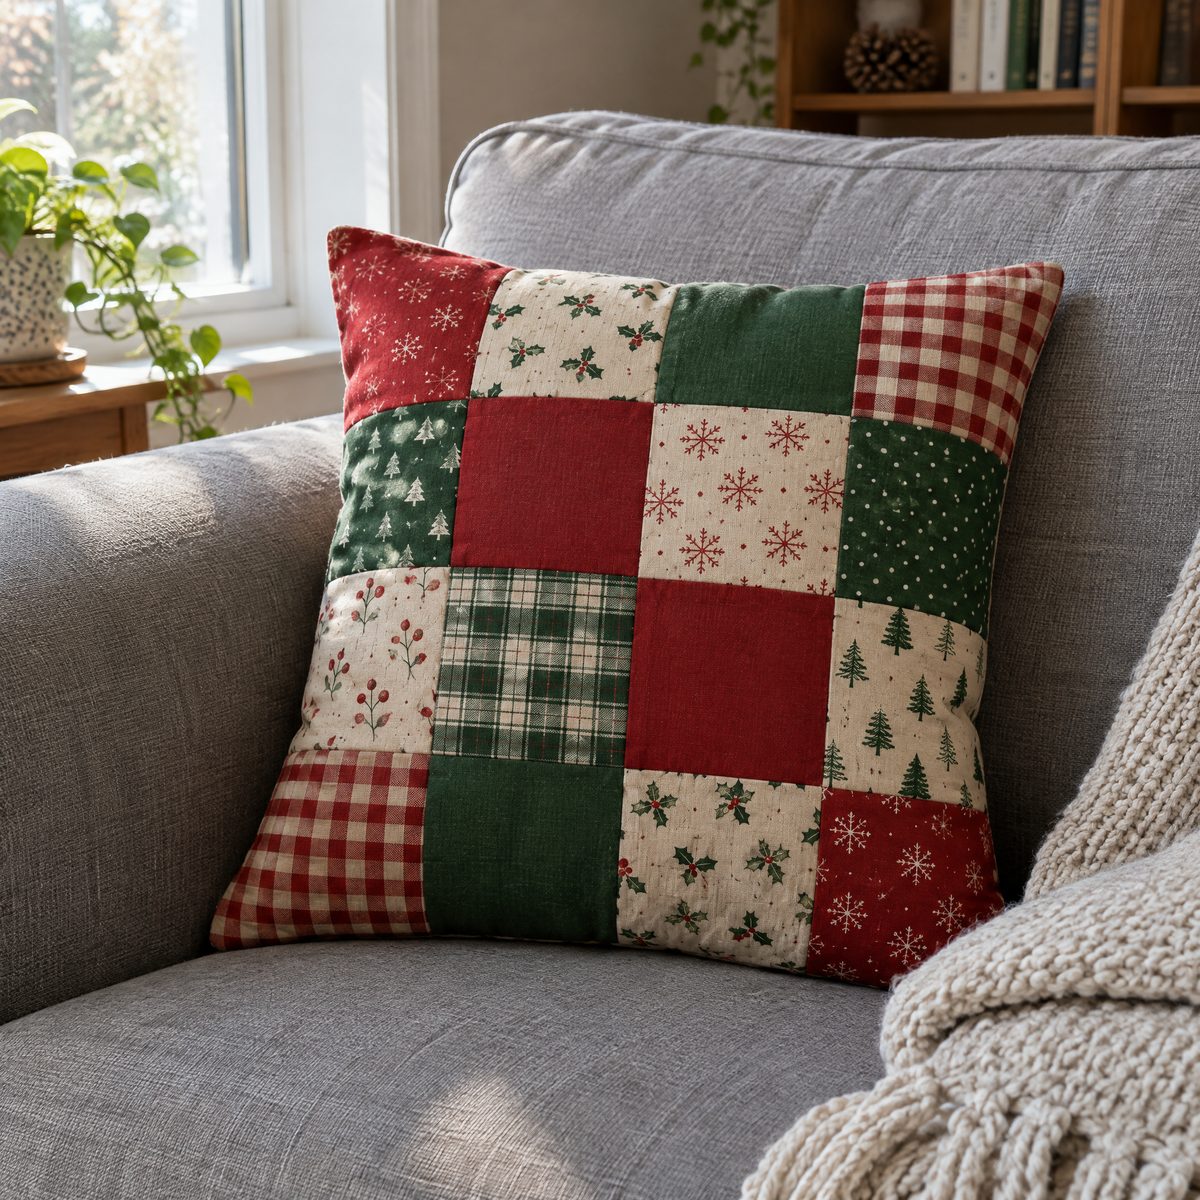
Time: 2 to 3 hours. Skill: Confident beginner.
Swapping in holiday pillow covers is the quickest way to make a sofa feel festive. For an 18-inch insert, cut thirty-six 3.5-inch squares from red, green, and cream prints, plus two 18 x 13-inch back panels for an envelope closure.
Sew the squares into six rows of six with 1/4-inch seams, pressing seams in alternating directions so the corners nest. Hem one long edge of each back panel, overlap them to 18 x 18 inches, and sew the front and back right sides together. Trim the corners, turn, and press. The envelope back means no zipper.
7. Christmas Tree Skirt

Time: 3 to 4 hours. Skill: Intermediate.
A handmade tree skirt sets the whole scene under the tree. For a 48-inch skirt you need 1.5 yards of 54-inch-wide top fabric (buffalo check and velvet both look great), 1.5 yards of lining, and optional batting for body.
- Fold the fabric in quarters and mark a 24-inch radius arc plus a 3-inch center circle.
- Cut through all layers, then cut one straight slit from edge to center.
- Sew top and lining right sides together all around, leaving 6 inches open.
- Turn, press, top-stitch, and add three ribbon ties along the slit.
A pom-pom trim basted into the outer seam adds a playful finish.
8. Quilted Christmas Table Runner
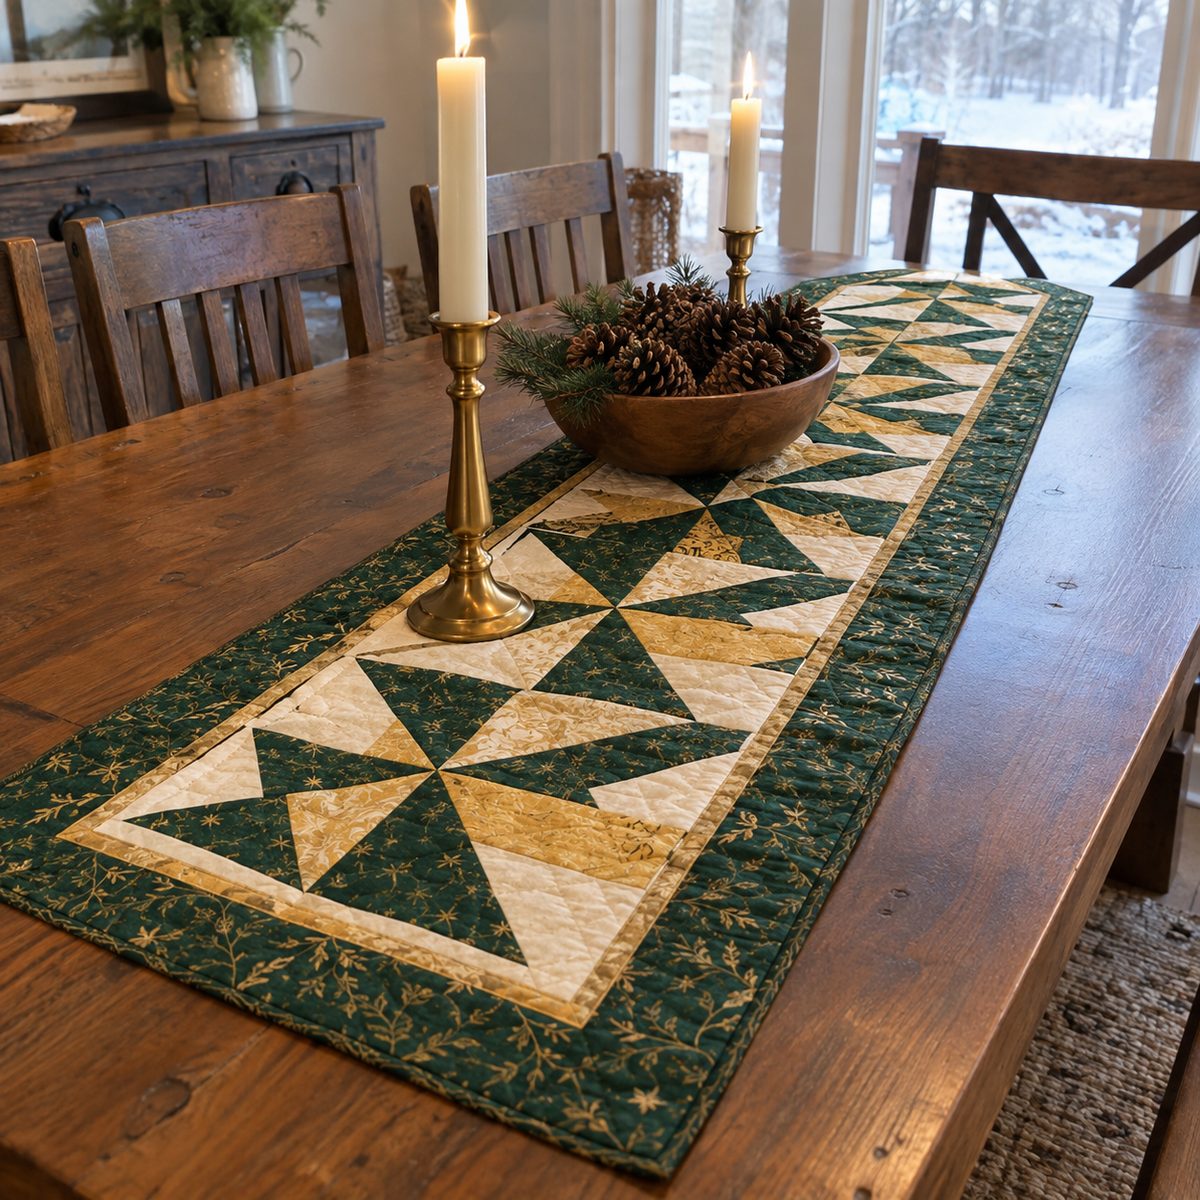
Time: 4 hours. Skill: Intermediate.
A quilted table runner is a small quilt with a big payoff. For a 14 x 48-inch runner, gather 1 yard of assorted prints for the top, 1.5 yards for backing, a 16 x 50-inch piece of batting, and 1/3 yard for binding.
Piece a simple strip or pinwheel top, then layer backing, batting, and top and baste. Quilt straight lines with a walking foot; a regular sewing machine can handle quilting at this size. Cut three 2.5-inch binding strips, join them end to end (here’s how to sew binding strips together), and stitch them around the edge, hand-finishing on the back.
9. Holiday Placemats
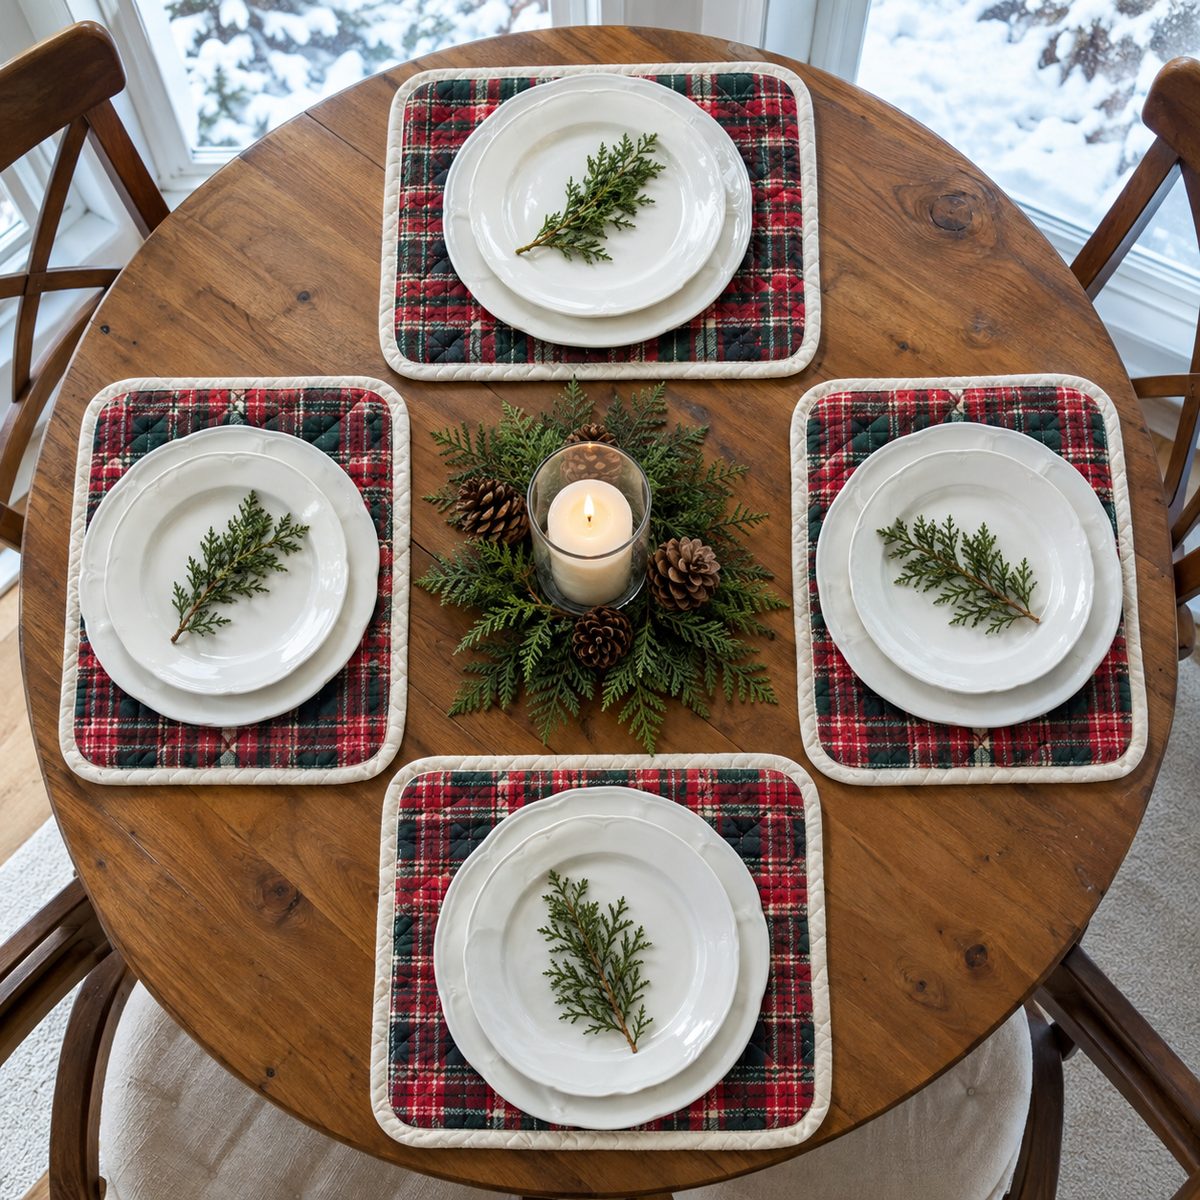
Time: 1 hour each. Skill: Beginner.
Placemats pair nicely with a table runner, and a set of four is a manageable weekend project. Each 13 x 19-inch mat needs a fat quarter for the front, a matching piece for the back, and thin cotton batting or fusible fleece.
Cut front, back, and batting to 14 x 20 inches. Layer the front and back right sides together with batting on the bottom, sew around with a 1/2-inch seam, and leave a 5-inch gap. Clip the corners, turn, and press the gap edges inward. Top-stitch 1/4 inch from the edge to close the gap, then quilt a few straight or wavy lines across the mat.
10. Cloth Napkins with Mitered Corners
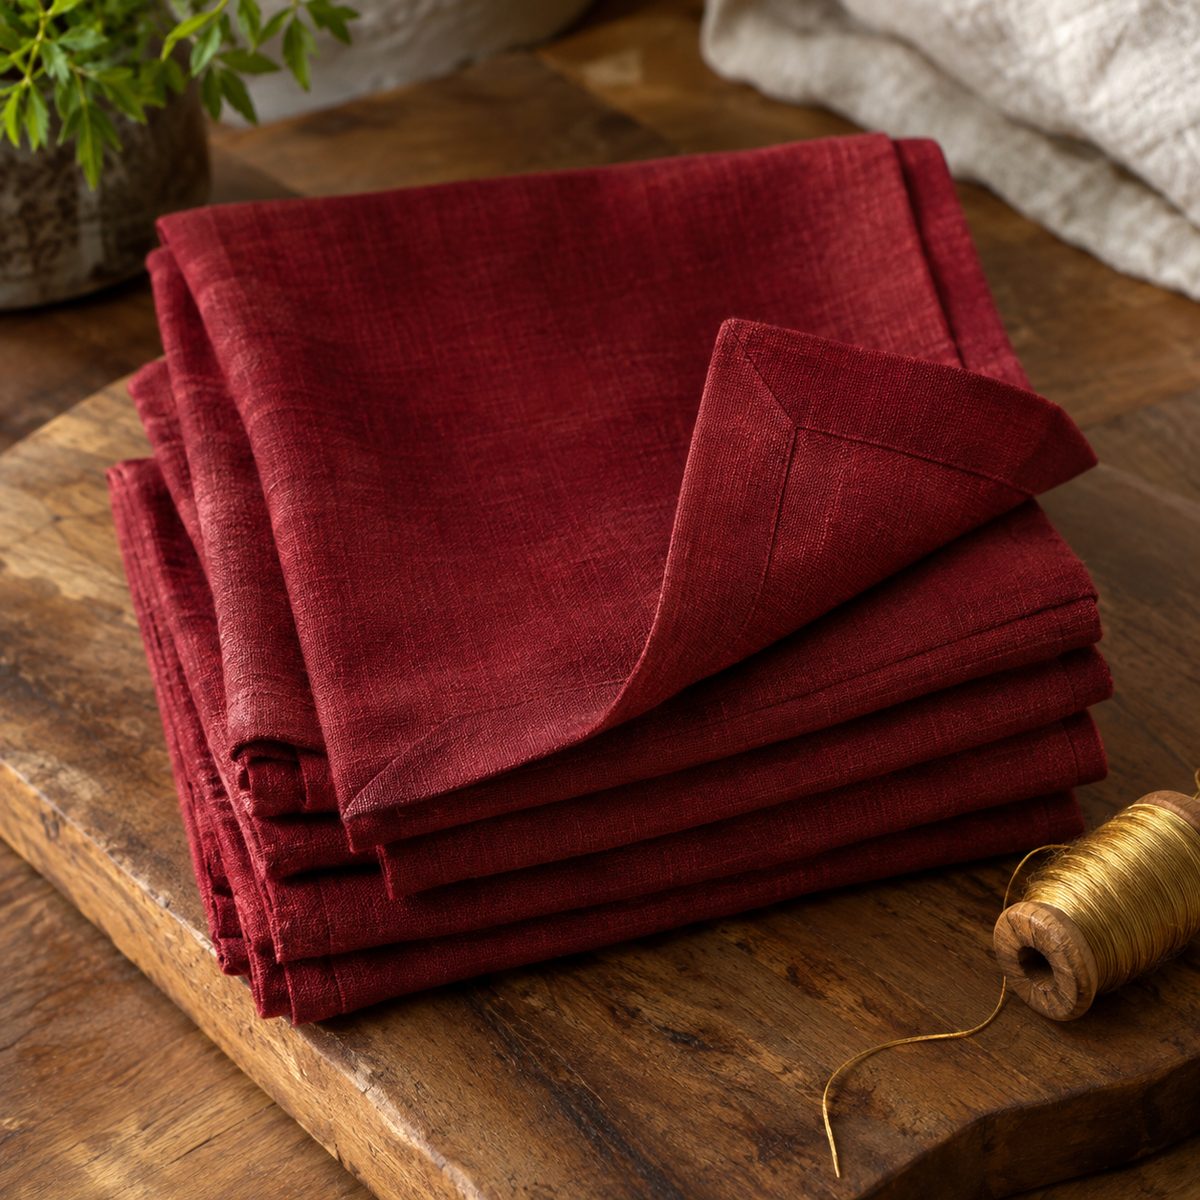
Time: 20 minutes each. Skill: Beginner.
Mitered corners turn a basic square napkin into something that looks professionally finished. Linen or cotton-linen is ideal; one yard of 54-inch fabric yields four 20-inch napkins.
- Cut 21-inch squares and press a 1/2-inch hem on all sides, then open it out.
- Fold each corner in diagonally so the pressed lines meet, and press.
- Refold the hems; the corners now form neat diagonal seams.
- Stitch close to the inner fold all the way around, pivoting at the corners.
Deep red, forest green, or natural linen with a metallic thread top-stitch read as festive but still work at New Year’s.
11. Fabric Gift Bags for Reusable Wrapping
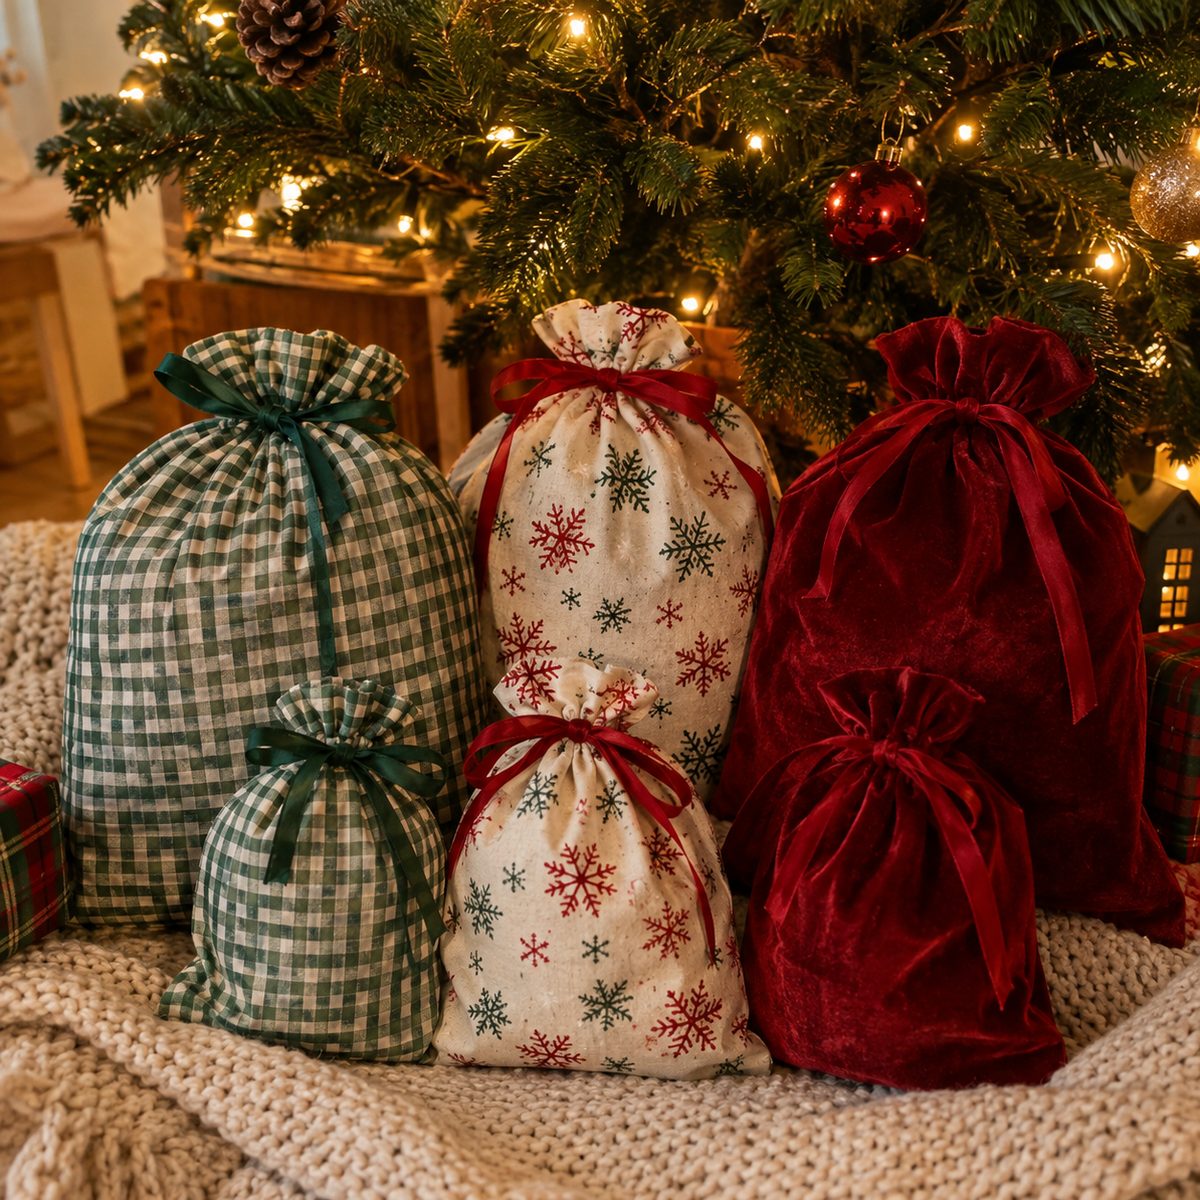
Time: 15 to 20 minutes each. Skill: Beginner.
Drawstring gift bags replace wrapping paper. A 10 x 12-inch bag uses a 21 x 13-inch piece of holiday cotton and 30 inches of ribbon or cord.
Fold the fabric in half and sew the bottom and side with a 1/2-inch seam, stopping 2 inches below the top on the side seam. Press that unsewn section open, fold the top down 1/4 inch and then 1 inch to form a casing, and stitch. Thread the ribbon through with a safety pin.
12. Advent Calendar Pockets
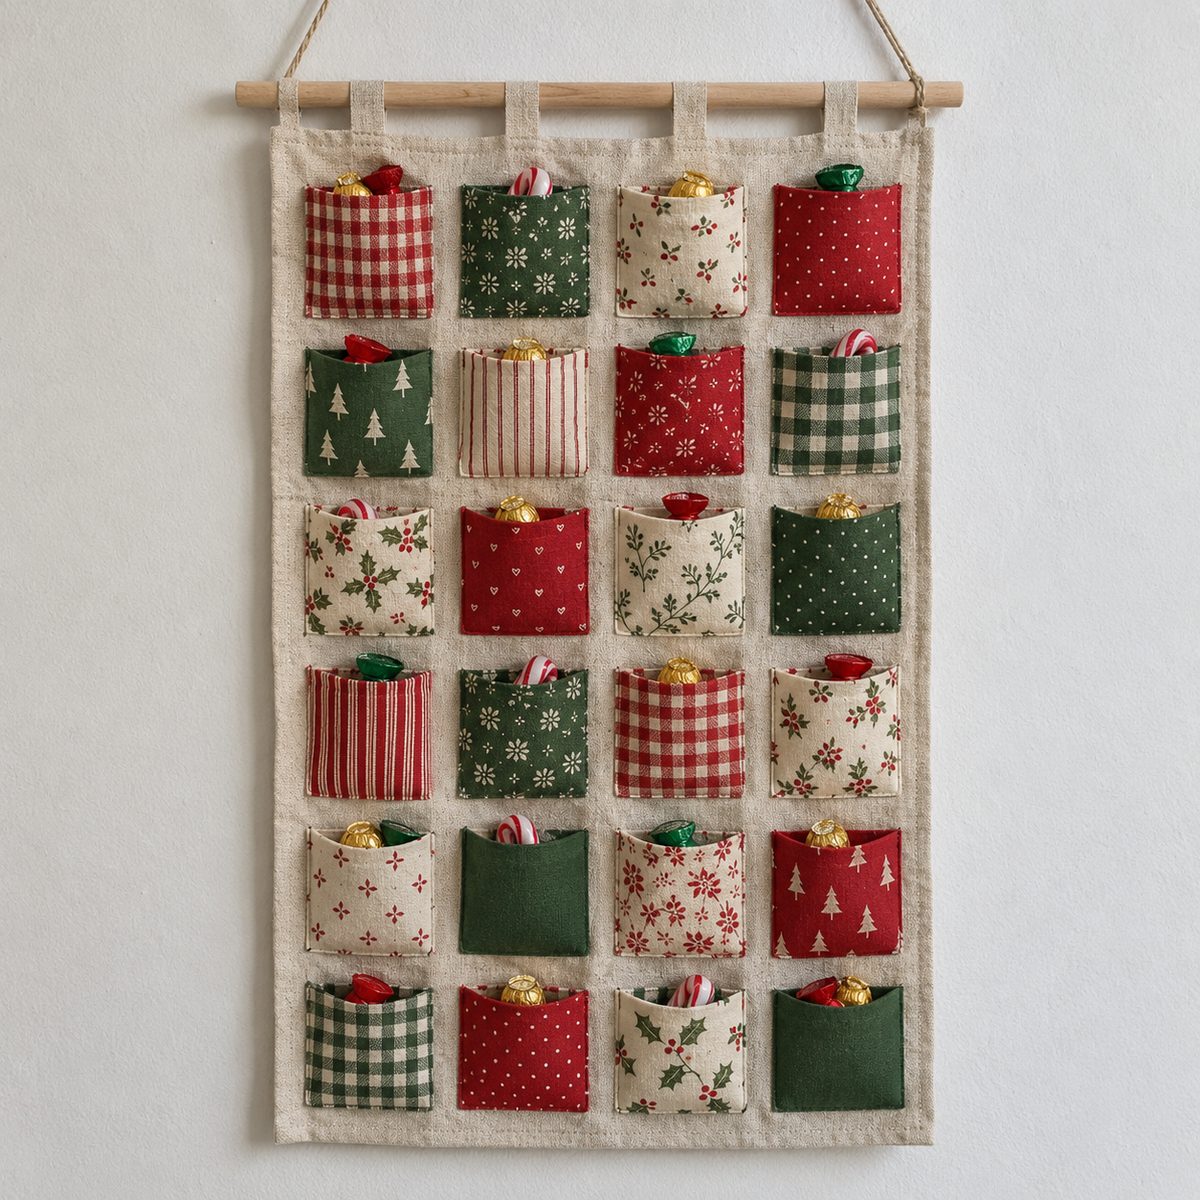
Time: 5 to 6 hours. Skill: Intermediate.
A fabric advent calendar becomes a family tradition that comes out every December. You’ll need a 24 x 36-inch background panel of canvas or duck, 1 yard of assorted cotton scraps for 24 pockets, and felt or iron-on numbers.
- Cut 24 pockets at 5 x 5.5 inches, fold the top edge twice, and hem.
- Press the remaining three raw edges under 1/4 inch.
- Arrange in a 4 x 6 grid on the panel and top-stitch each pocket on three sides.
- Hem the panel, sew a rod pocket at the top, and hang from a dowel.
Stiffen the panel with fusible interfacing so it hangs flat.
13. Christmas Mug Rug
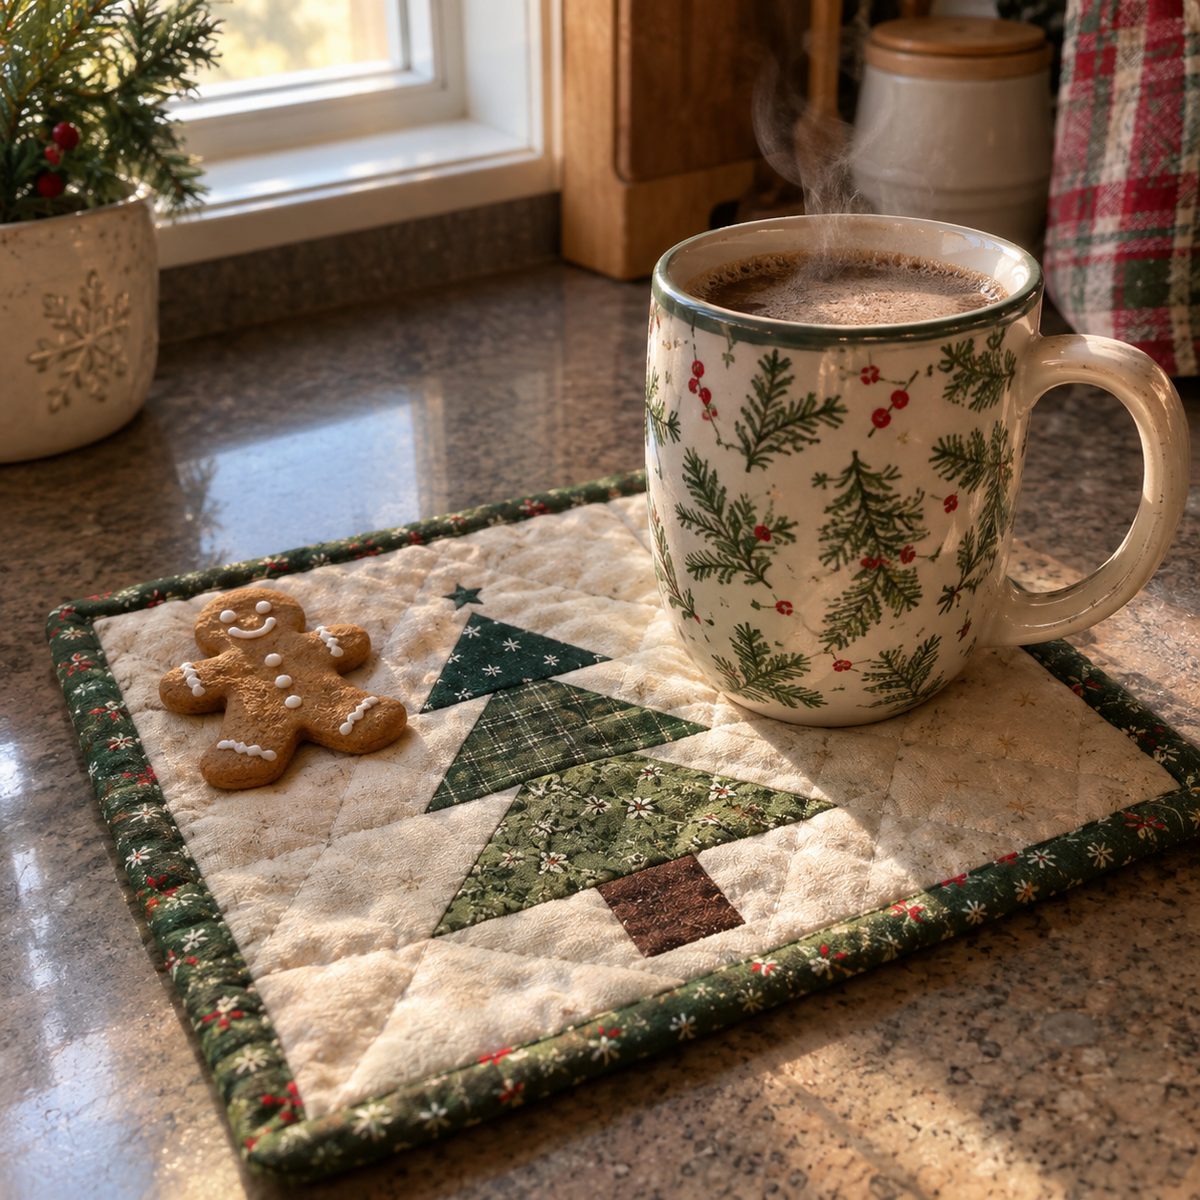
Time: 1 hour. Skill: Beginner.
A mug rug is an oversized coaster with room for a cookie. You need scraps for a 6 x 9-inch top, a matching backing, batting, and 36 inches of binding.
Piece a tiny tree from a green triangle and a brown stem, or just sew three festive strips together. Layer, quilt a few straight lines, trim to 6 x 9 inches, and bind with a 2.25-inch strip. Rounding the corners with a mug as a template makes binding faster. A set of four easily fits into one evening.
14. Holiday Tea Towel
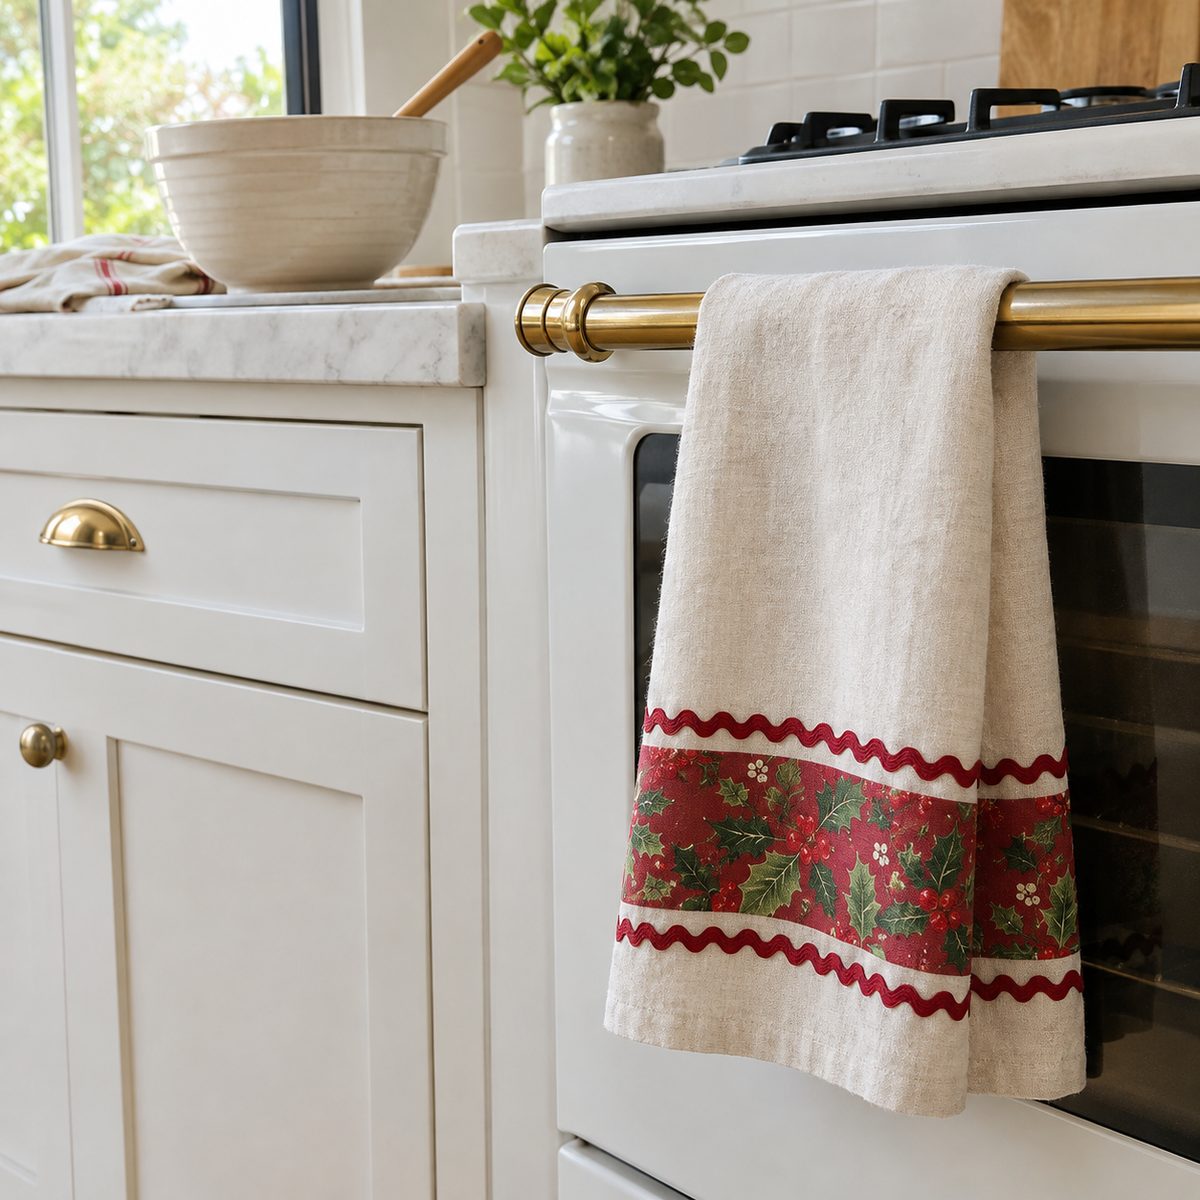
Time: 30 minutes. Skill: Beginner.
A tea towel with a festive trim band is one of the fastest holiday makes. Start with 3/4 yard of cotton-linen or flour-sack cotton and a 4 x 20-inch strip of Christmas print.
- Cut the towel to 19 x 28 inches.
- Press the print strip’s long edges under 1/2 inch and pin it 3 inches above one short end.
- Top-stitch both edges of the band.
- Double-fold all four towel edges 1/4 inch and stitch, adding a twill-tape hanging loop in one corner.
Pre-wash the linen first, since it shrinks.
15. Santa Hat
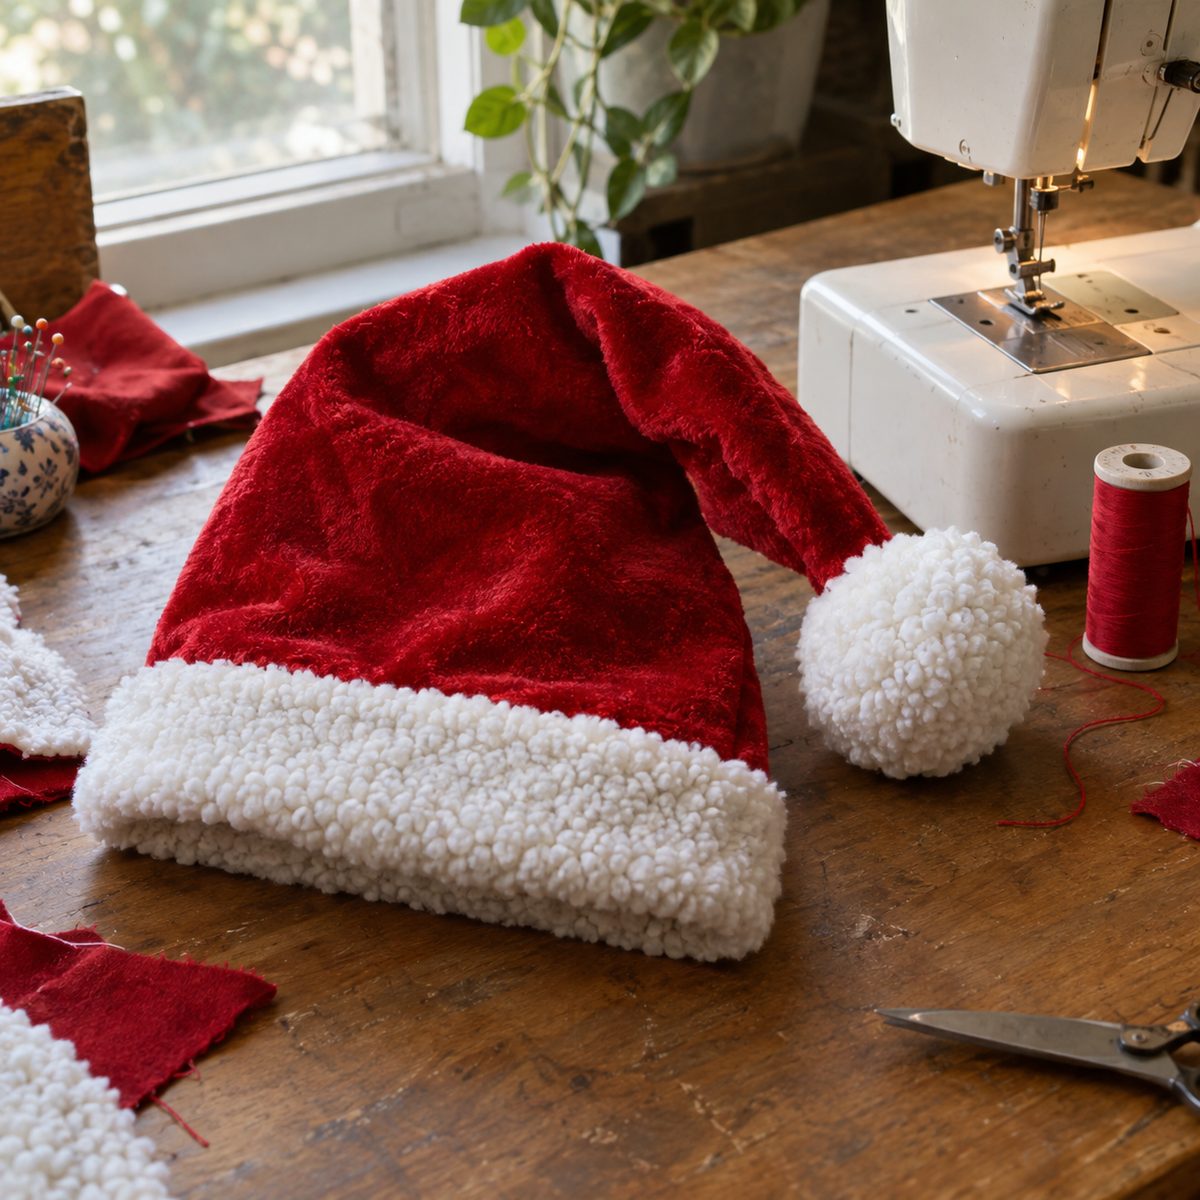
Time: 1 hour. Skill: Beginner.
A homemade Santa hat is sturdier and softer than the flimsy store versions. For an adult hat, use 1/2 yard of red fleece or velvet, a 5 x 24-inch strip of white faux fur or sherpa, and a faux-fur pom-pom.
Draw a tall triangle 12 inches wide at the base and 16 inches high, with a gently curved bottom edge. Cut two pieces, sew the long sides right sides together, and turn. Fold the fur strip in half lengthwise, sew its short ends into a loop, and stitch it around the hat opening. Hand-sew the pom-pom to the tip. Fleece stretches, so measure your head and add 1 inch of ease.
16. Fabric Christmas Gnome
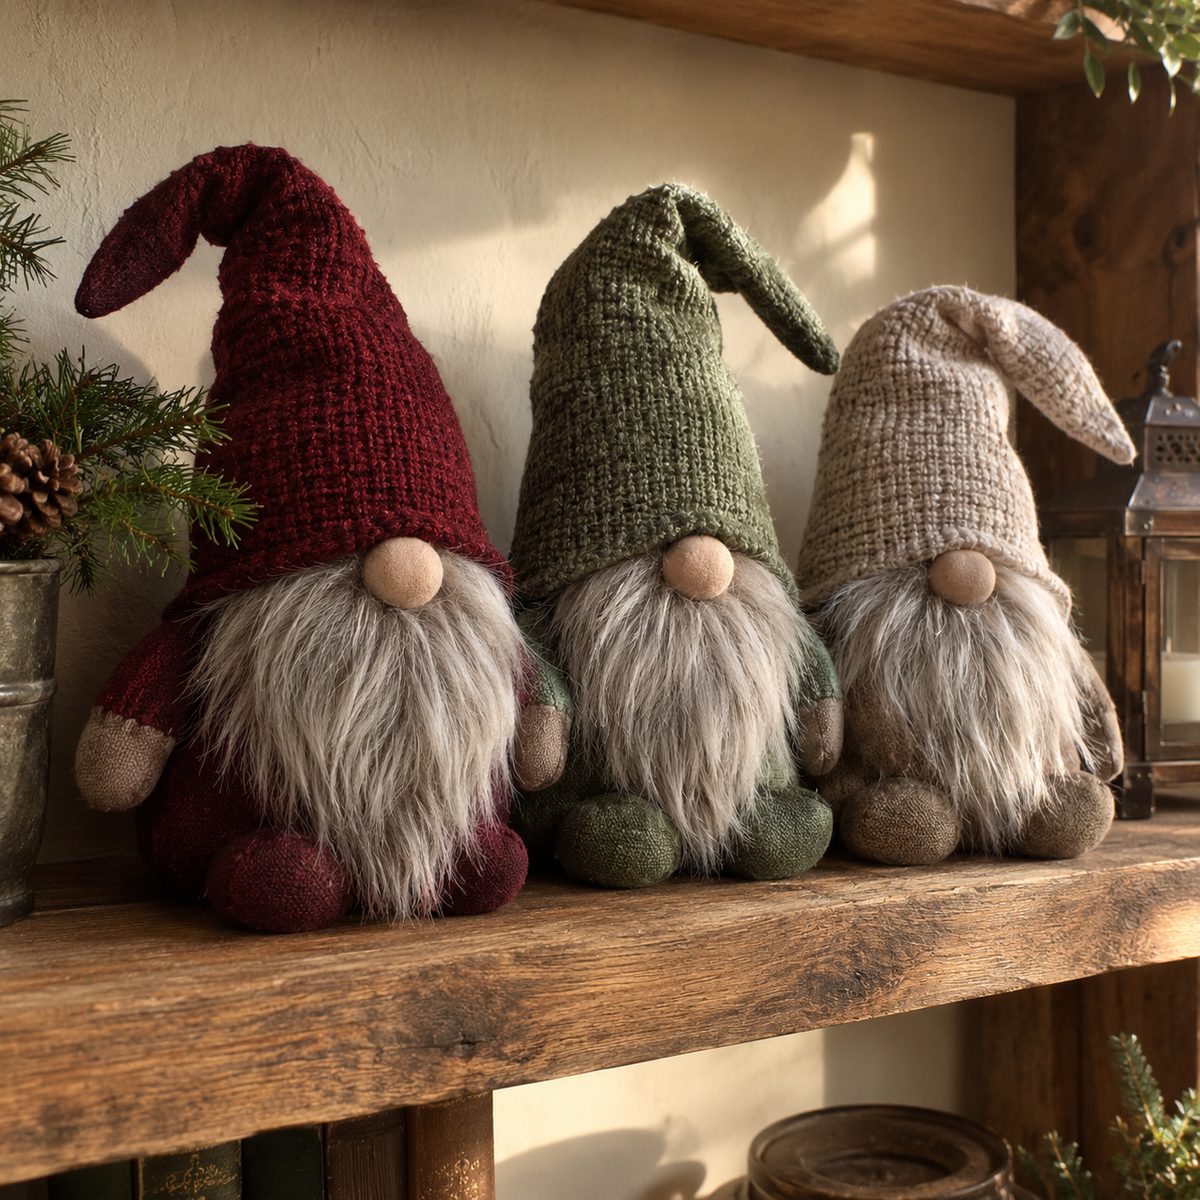
Time: 1.5 hours. Skill: Beginner.
Plump gnomes with long beards are surprisingly easy to sew. For a 10-inch gnome, you need a 12-inch square of knit or fleece for the hat, a 6-inch body circle of cotton, faux fur for the beard, and a wooden bead nose.
- Sew the body into a pouch, fill it with rice or pellets in a bag plus fiberfill, and gather the top closed.
- Cut a cone-shaped hat, sew the back seam, and turn.
- Glue or stitch a teardrop of faux fur to the front of the body.
- Pull the hat down over the beard and attach the bead nose.
17. Standing Fabric Christmas Tree
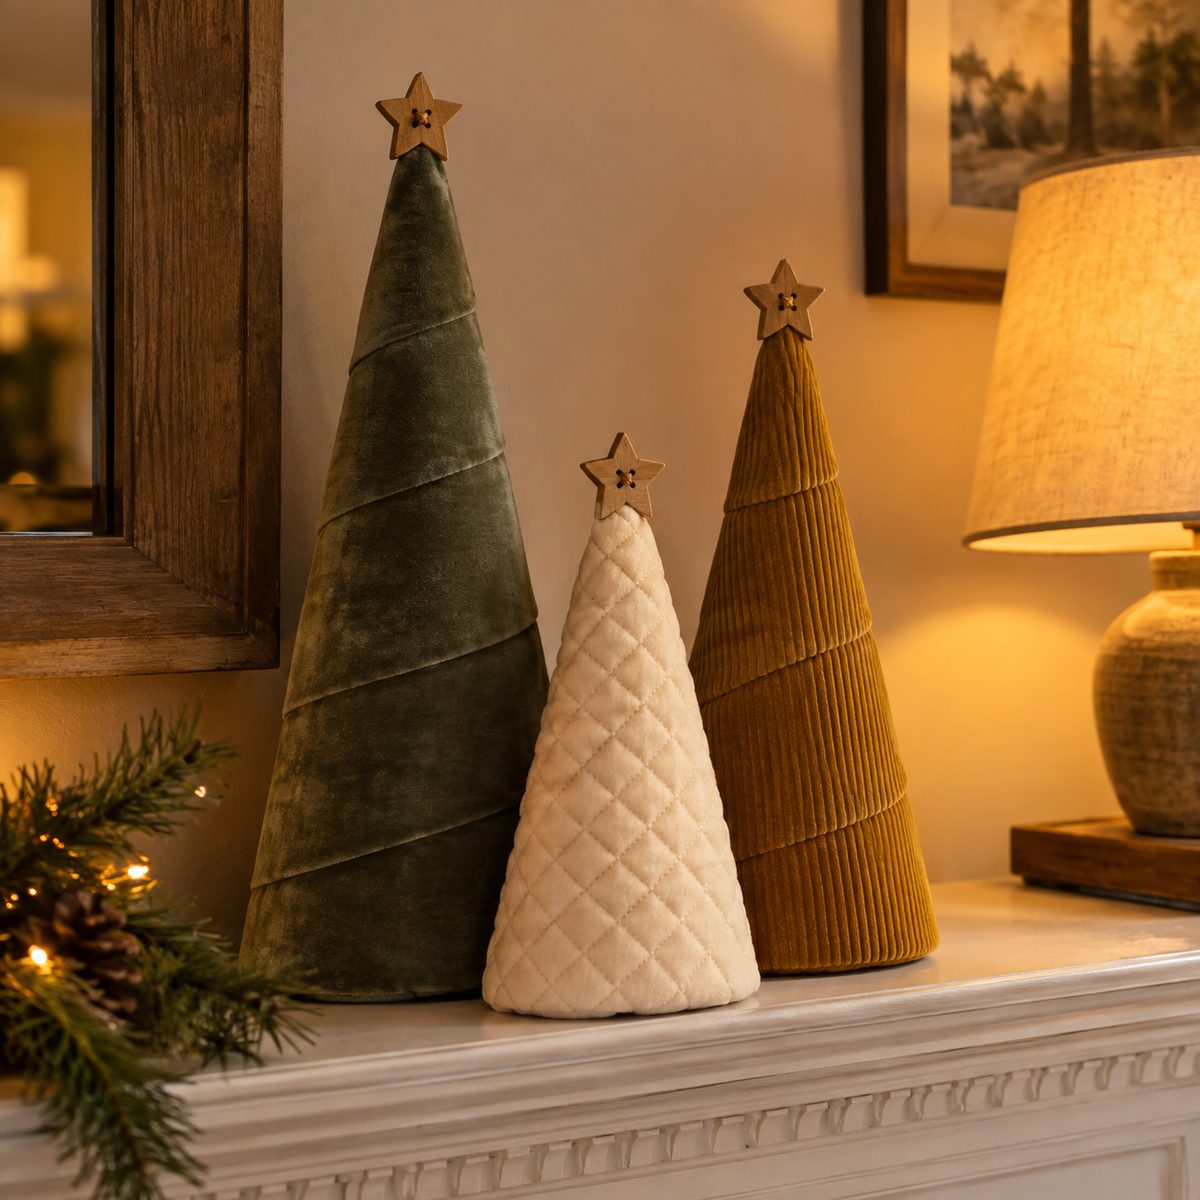
Time: 2 hours. Skill: Beginner.
Standing fabric cone trees make an instant tabletop forest on a mantel or sideboard. For a 12-inch tree, you need a 14 x 20-inch piece of cotton, velvet, or quilted fabric, a matching circle for the base, and fiberfill or poly pellets.
Draw a quarter circle with a 13-inch radius and cut it out; this rolls into a cone. Sew the straight edges right sides together, turn, and fill firmly, adding pellets in the bottom for weight. Cut a base circle to fit, turn the raw edge under, and slip-stitch it in place. Stitch a star button to the tip. Make three heights (8, 12, and 16 inches) in coordinating fabrics for a grouped display.
18. Fabric Rag Wreath
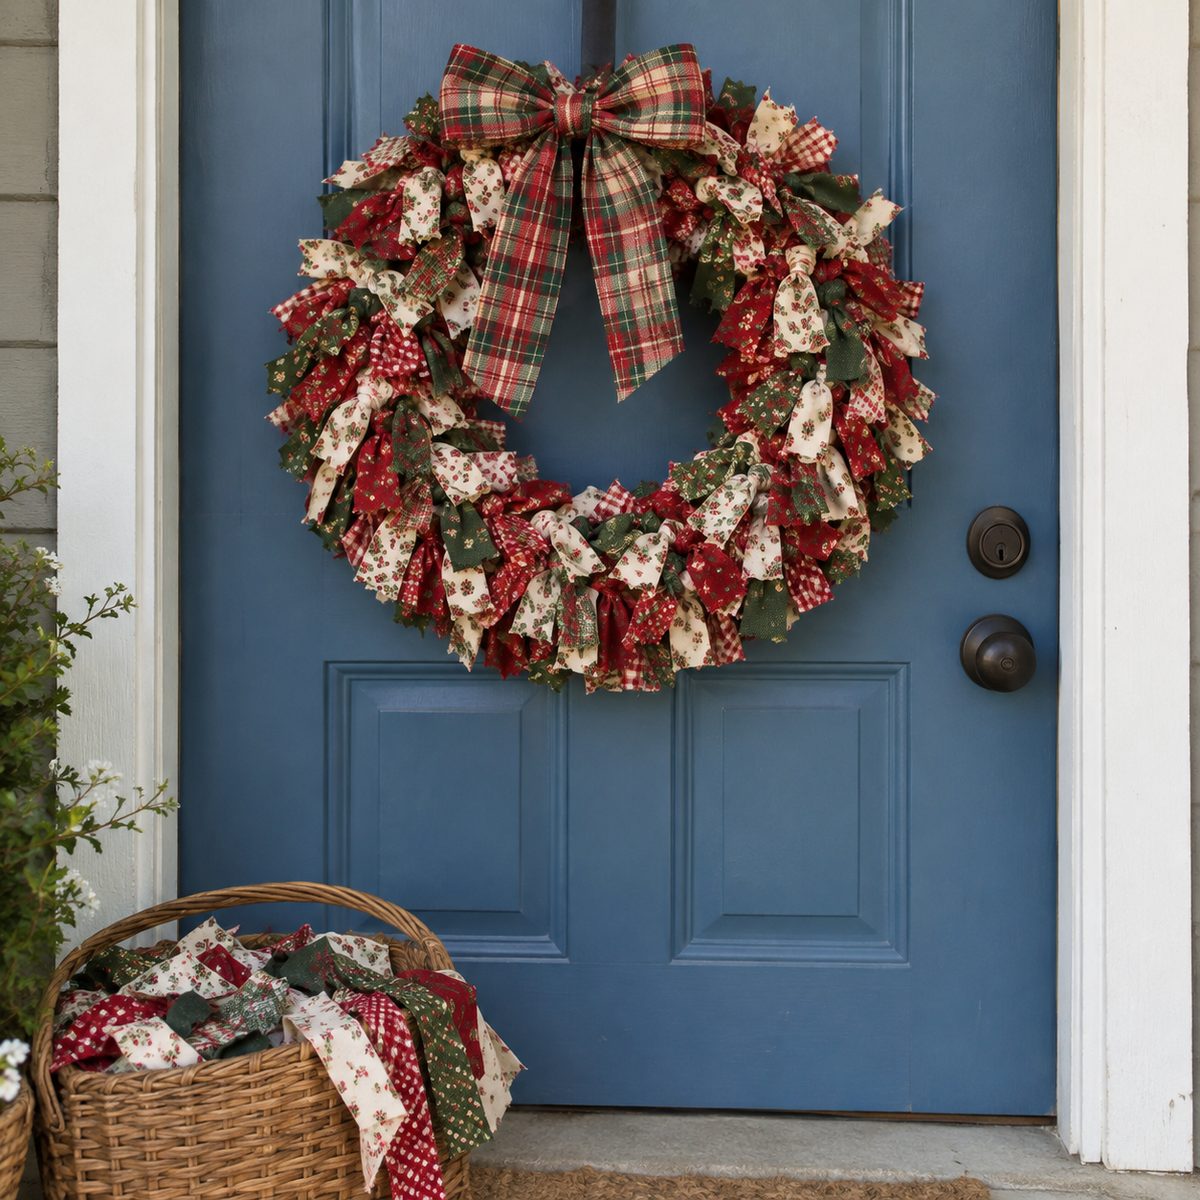
Time: 2 to 3 hours. Skill: Beginner.
A rag wreath is the most scrap-hungry project here and needs almost no sewing skill. You need a 12-inch wire wreath frame and about 1.5 yards of assorted cotton cut into 1 x 7-inch strips (roughly 300 strips).
Tie each strip around the wire rings with a simple knot, pushing the knots tightly together as you go. Alternate prints randomly or work in color sections for a striped look. Finish with a sewn fabric bow: a 6 x 22-inch strip folded, stitched, turned, and cinched in the middle with a smaller band.
19. Christmas Fabric Bunting

Time: 2 hours. Skill: Beginner.
Triangle bunting brings color to a mantel, bookshelf, or doorway. For a 10-foot string, cut 16 triangles (8 pairs) at 7 inches wide by 8 inches tall, and gather 4 yards of double-fold bias tape.
- Sew each triangle pair right sides together down the two long sides.
- Clip the tip, turn, and press to a sharp point.
- Space them 1 inch apart inside the folded bias tape.
- Stitch the tape closed along its entire length, leaving 12-inch tails for tying.
Mix plaid, polka dot, and snowflake prints, or alternate red and white for a candy-cane effect.
20. Christmas Oven Mitt
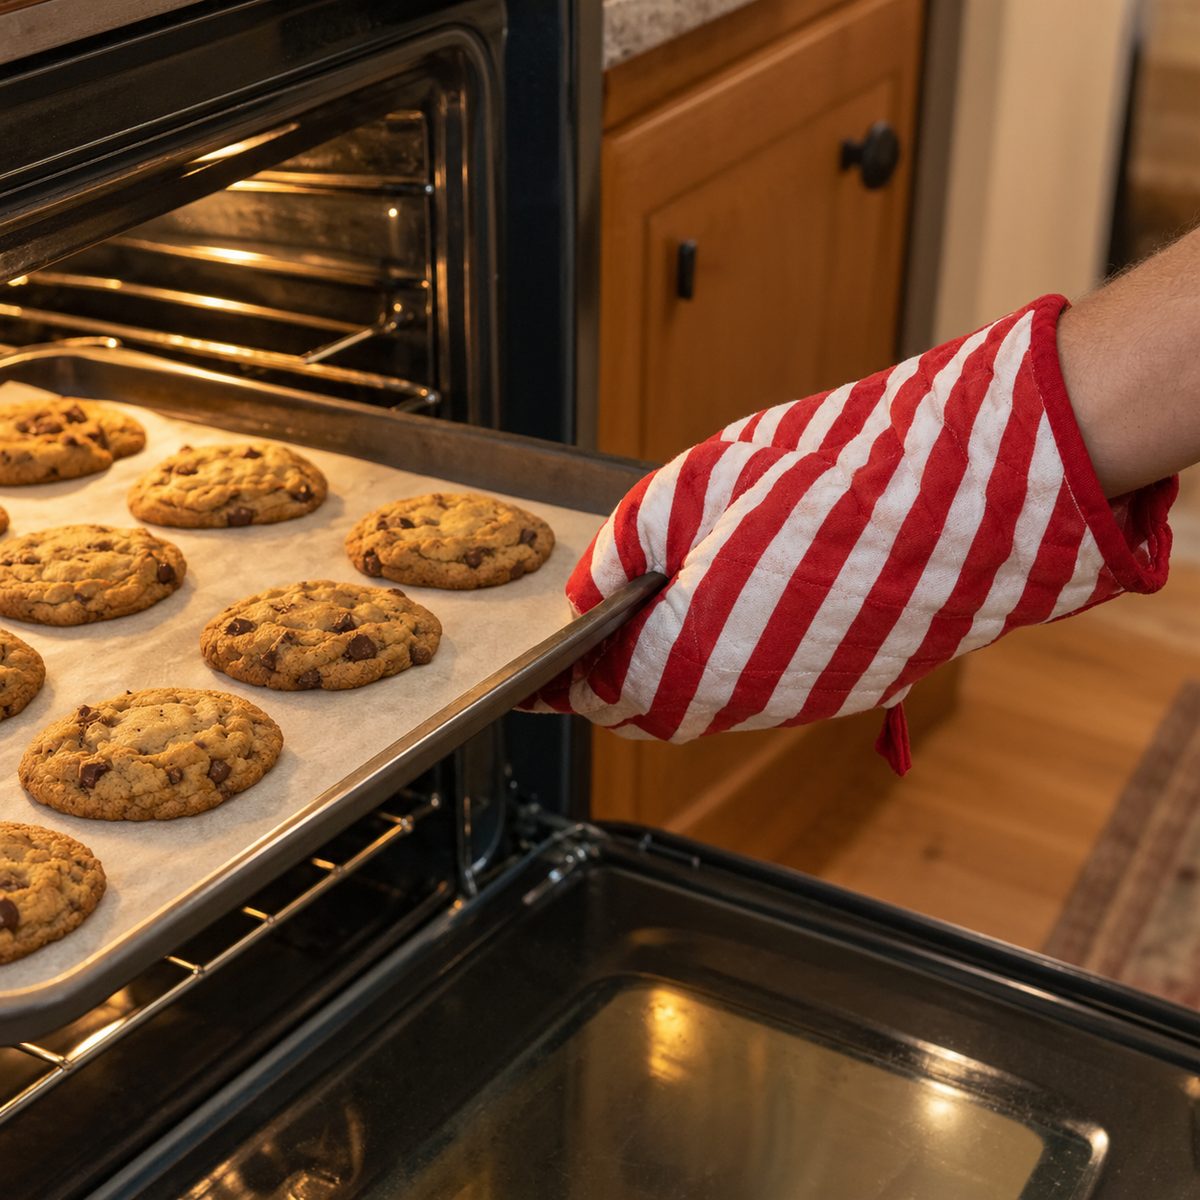
Time: 1.5 hours. Skill: Confident beginner.
A holiday oven mitt makes cookie season a little more festive. You need 1/3 yard of cotton print, 1/3 yard of lining, and two layers of heat-resistant insulated batting.
Trace your hand with 1.5 inches of ease to make a mitt template about 12 inches long. Cut two outers, two linings, and four insulated batting pieces. Layer outer, two batting layers, and lining for each side, and quilt them in a grid. Place the two quilted sides together and sew around, leaving the cuff open. Finish the edges with a zigzag, turn, and bind the cuff with a 2.5-inch strip, adding a hanging loop. The insulated batting has a shiny side; face it toward your hand.
21. Christmas Apron
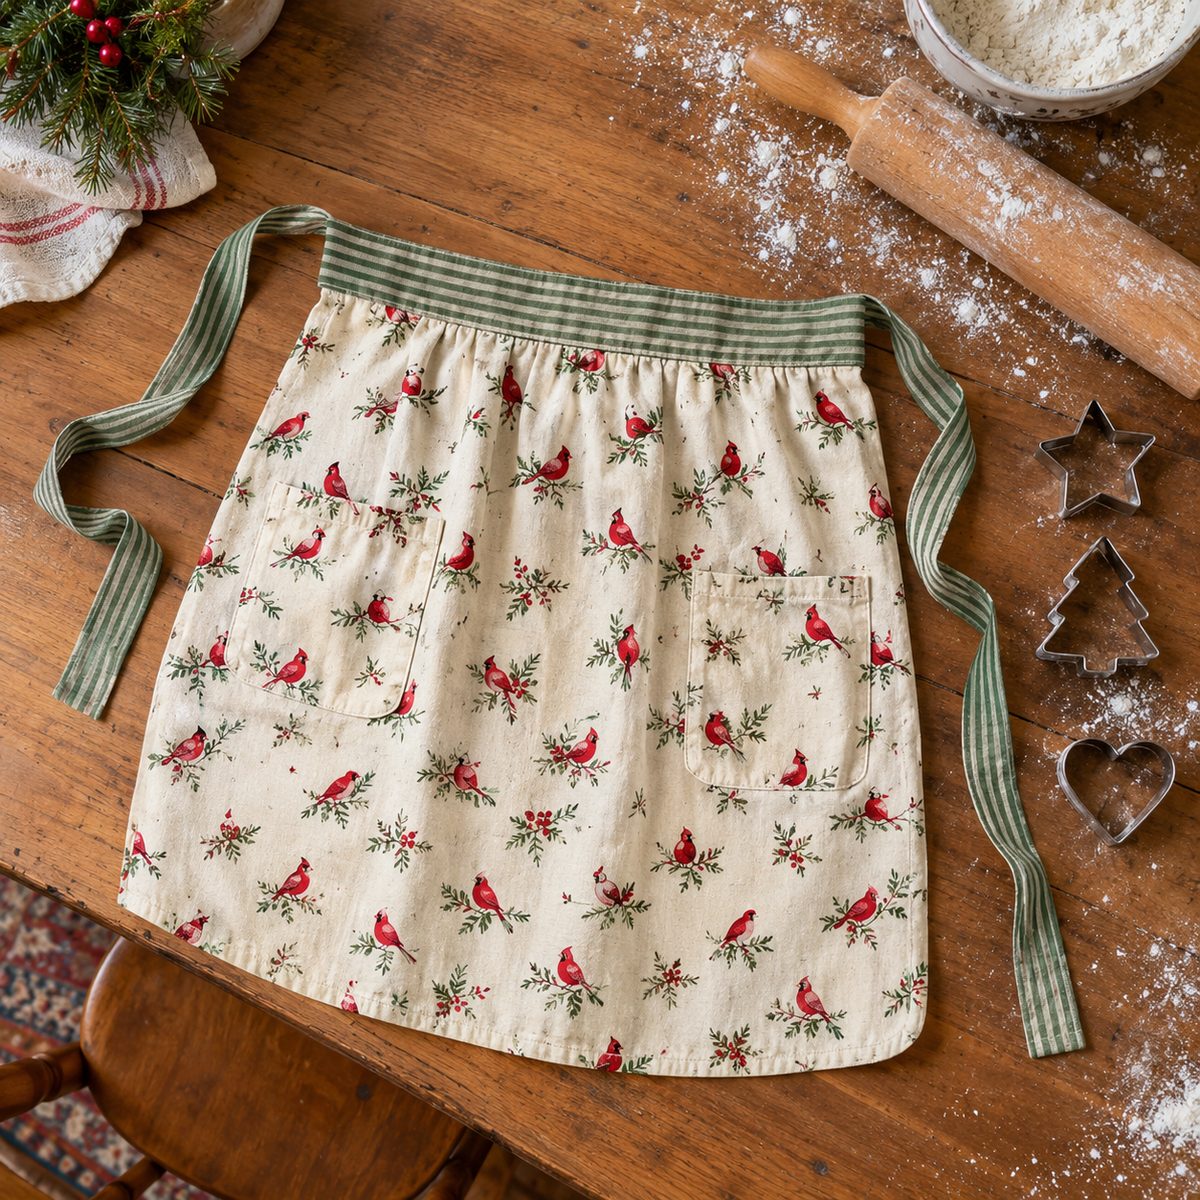
Time: 2 hours. Skill: Beginner.
A holiday apron is a bright, cheerful thing to wear while baking and hosting. For an adult half apron, you need 1 yard of cotton print for the body and pocket, plus 1/2 yard of a coordinating print for the waistband and ties.
- Cut a 22 x 18-inch body and a 10 x 7-inch pocket.
- Double-fold and hem the sides and bottom of the body.
- Gather or pleat the top edge to 18 inches.
- Sew on a 4-inch-wide waistband with 30-inch ties on each side.
Top-stitch the pocket in place with a center divider so it holds a phone and a recipe card.
22. Stocking Gift Card Holder
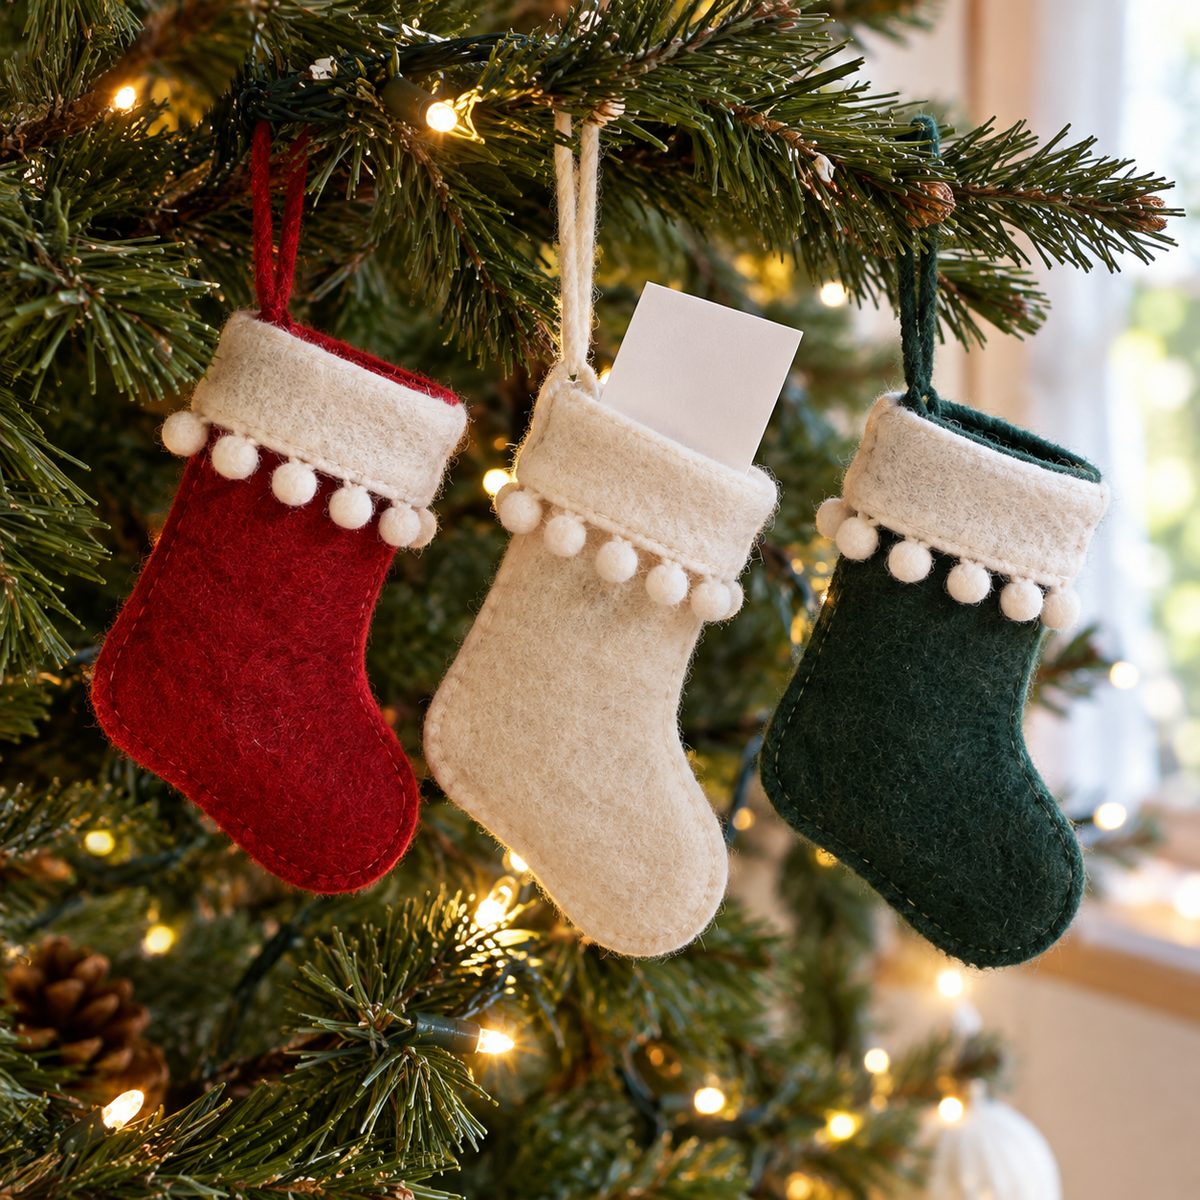
Time: 20 minutes. Skill: Beginner.
A gift card holder shaped like a tiny stocking makes a plain gift card feel thoughtful. Each one needs two 5 x 7-inch pieces of felt or cotton, a cuff scrap, and 6 inches of ribbon.
Trace a 5-inch stocking with an opening at least 3 inches wide so a standard gift card slides in easily. Sew the two pieces together with a 1/4-inch seam (felt can be sewn right sides out with no turning). Add a folded cuff and a ribbon loop at the heel side.
23. Jingle Bell Fabric Ornaments

Time: 30 minutes each. Skill: Beginner.
Fabric ball ornaments with a tiny jingle bell hidden inside ring softly when the tree gets bumped. For each 3-inch ornament, cut six orange-slice panels from scraps using a 4-inch-long, 1.5-inch-wide template.
- Sew the panels together along the long edges, one at a time, to form a ball.
- Leave a 1-inch gap in the last seam.
- Turn, stuff firmly, and push a small jingle bell into the middle of the stuffing.
- Close the gap and sew a ribbon loop and a larger bell to the top.
Alternating two prints on the panels gives a striped peppermint look.
24. Cozy Flannel Christmas Pillowcase

Time: 45 minutes. Skill: Beginner.
A festive flannel pillowcase is a Christmas Eve tradition in many homes. For a standard pillow, you need 3/4 yard of flannel for the body, 1/4 yard for the cuff, and a 2 x 42-inch accent strip.
Use the classic burrito method: layer the cuff, accent strip, and body, roll the body inside the cuff, and sew once to enclose all the seams. Turn and press. Then fold the case in half and sew the side and bottom with French seams for a clean inside. Pre-wash the flannel before cutting since it can shrink up to 5 percent.
25. Pet Christmas Bandana
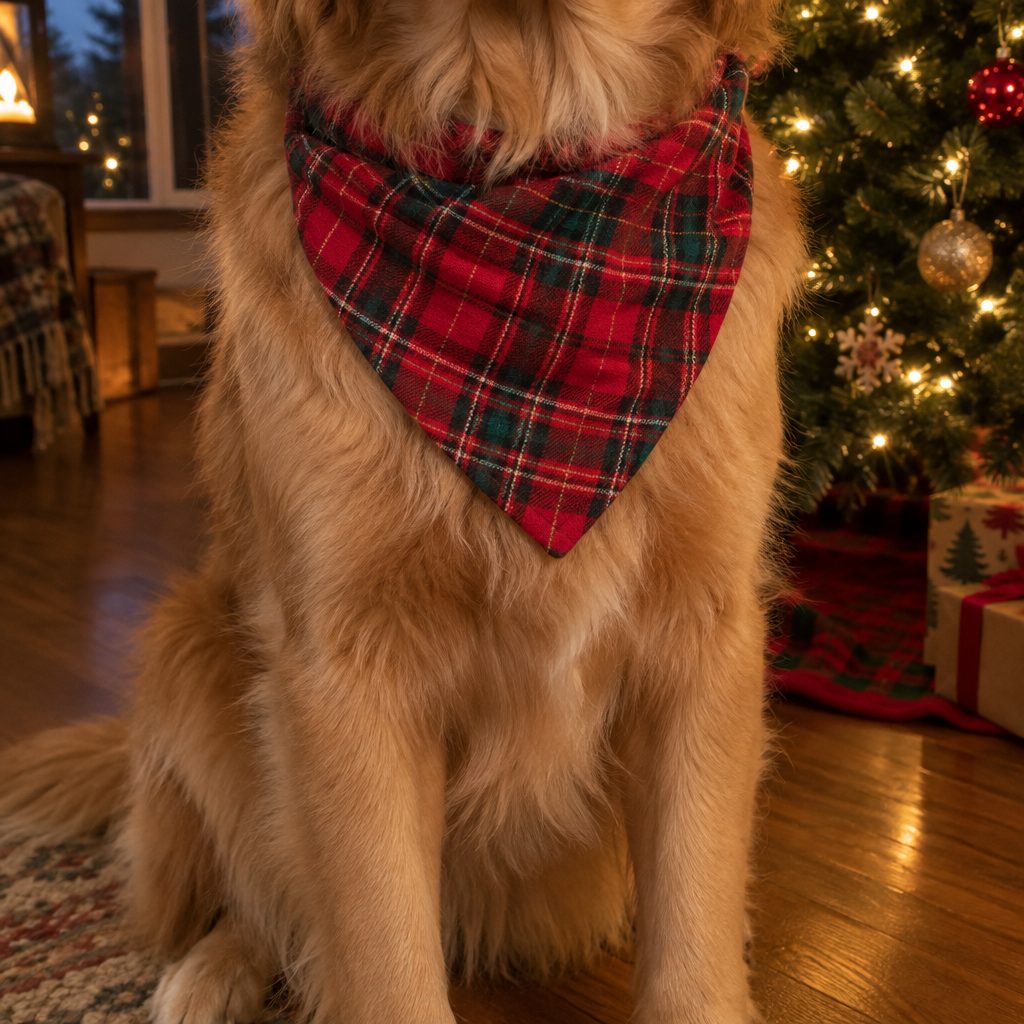
Time: 20 minutes. Skill: Beginner.
A reversible holiday bandana gets your dog or cat ready for the family photos. Measure the pet’s neck, then cut two triangles of cotton with a base that is neck measurement plus 4 inches (about 18 inches for a medium dog).
- Place the triangles right sides together and sew around, leaving a 3-inch gap.
- Clip the points, turn, and press.
- Top-stitch around the edge to close the gap.
- Add Velcro or a snap at the tips, or sew a channel so it slides onto a collar.
Use a plaid on one side and a Christmas print on the other so it can be flipped for New Year’s.
Pick One and Start This Weekend
The best holiday sewing plan is a short one. Choose one decor piece for the house, like the tree skirt or table runner, and a few quick makes such as the ornaments, gift card stockings, or mug rugs to fill in the gaps. Cut everything in one sitting and keep scraps nearby for the small projects. By mid-December you’ll have a home full of handmade touches that come back out every year.