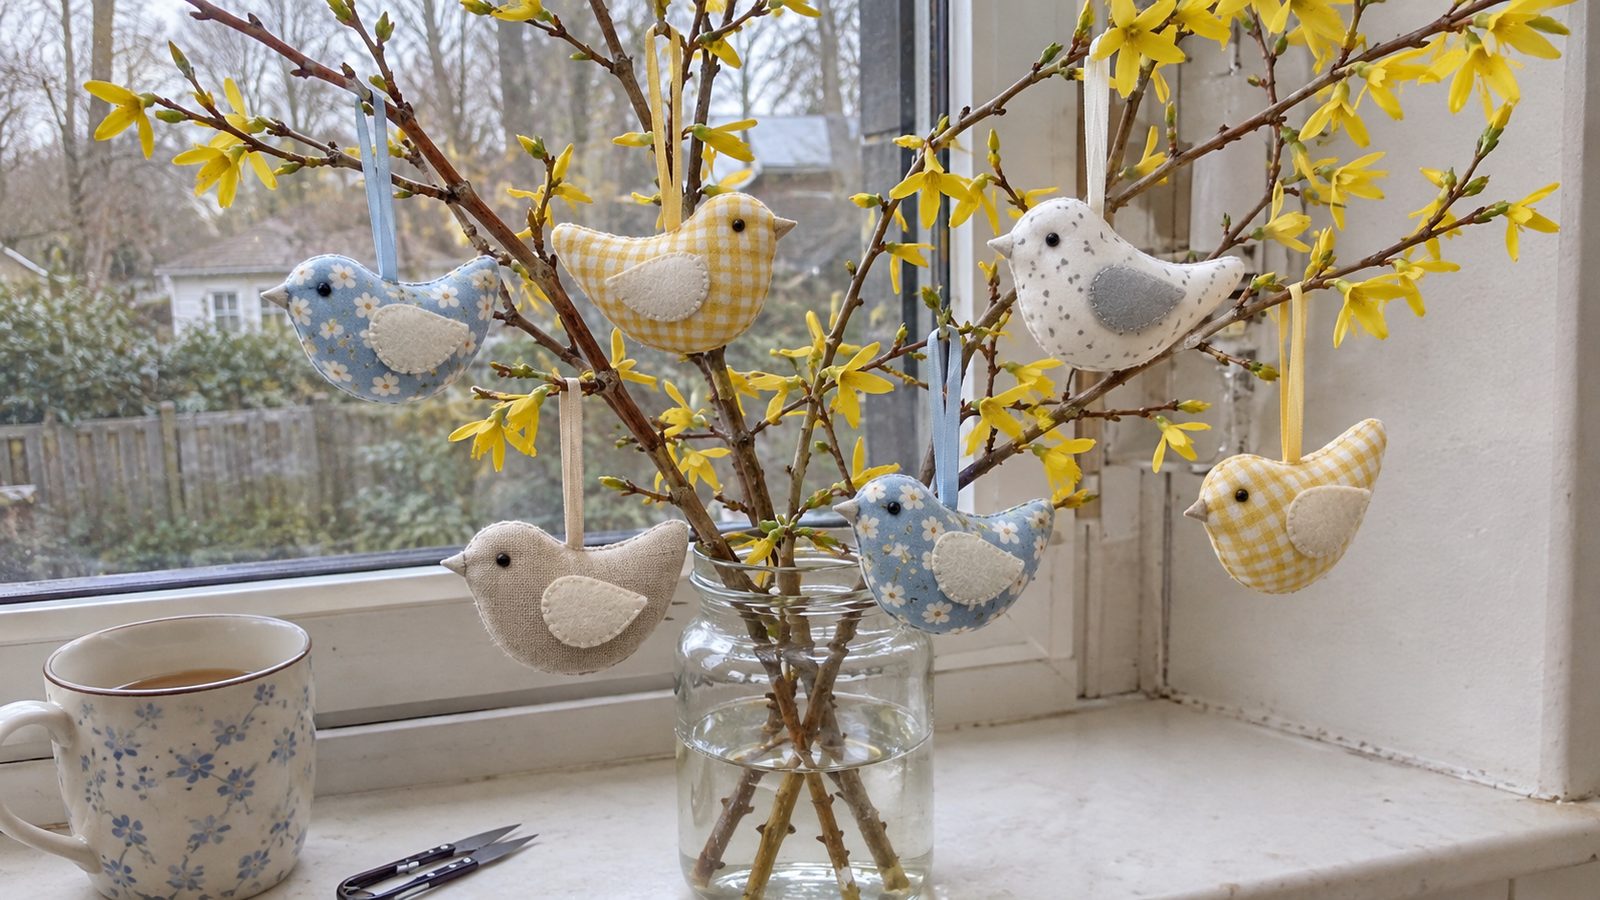
Fabric bird ornaments are the small three-piece stuffed birds you see tied to spring branches and hung on Christmas trees: two side pieces, one belly gusset, a loop on the back, and a knot for an eye. Each is about 4 inches from beak to tail. The first takes about 45 minutes because you draft the pattern. After that they run 25 minutes each.
This is a confident-beginner project. The seams are short, but every one of them curves.
What makes a bird look like a bird instead of a lumpy fish is the clipping at the beak and tail. Clip right and the points turn out sharp. Skip it and the beak rounds off into a nub.
What you’ll need
- Quilting cotton, linen, or wool-blend felt: a 6 by 10 inch piece makes one bird, a fat quarter makes 6 to 8
- Lightweight fusible interfacing, 6 by 10 inches, for cotton only
- Polyester fiberfill, about a tennis ball of fluff per bird
- Wool-blend felt scrap, 3 by 3 inches, for the wings
- Matching all-purpose thread, plus black or dark brown perle cotton size 8 for the eyes
- Narrow ribbon, baker’s twine, or jute, 8 inches per bird
- Machine needle 80/12 universal, a size 7 sharp for hand sewing, and an embroidery needle
- A chopstick, a fabric pencil, paper, and a ruler
| Piece | Cut size | Qty |
|---|---|---|
| Side body | 4 3/4 by 2 3/4 inch bird shape, drafted below, seam allowance included | 2 (a mirrored pair) |
| Belly gusset | 6 by 1 1/2 inch leaf shape, pointed at both ends | 1 |
| Wing, felt | 1 3/4 by 1 inch teardrop | 2 |
| Wing, folded fabric (alternative) | 2 1/2 by 2 inch rectangle | 2 |
| Hanging loop | 8 inch length of 1/8 inch ribbon or twine | 1 |
Fabric and prep
Quilting cotton is the easiest to sew and the hardest to make look good. It is thin, so stuffing lumps show through. Fuse lightweight interfacing to the back before cutting and they vanish. Small prints work best. A 3 inch print puts half a flower on the head and nothing on the tail.
Linen is my favorite. It has enough body to skip interfacing and turns a sharp beak without a fight. Use a mid-weight shirting linen, not a loose upholstery weave that frays while you look at it.
Wool-blend felt makes the fattest bird and needs no clipping. Skip acrylic craft felt, which stretches at the seams and pills in a month.
No prewash, since these never get washed. Press, fuse, and trace on the wrong side with a fabric pencil. These are one of the best scrap fabric projects I know of.
Draft the pattern on paper
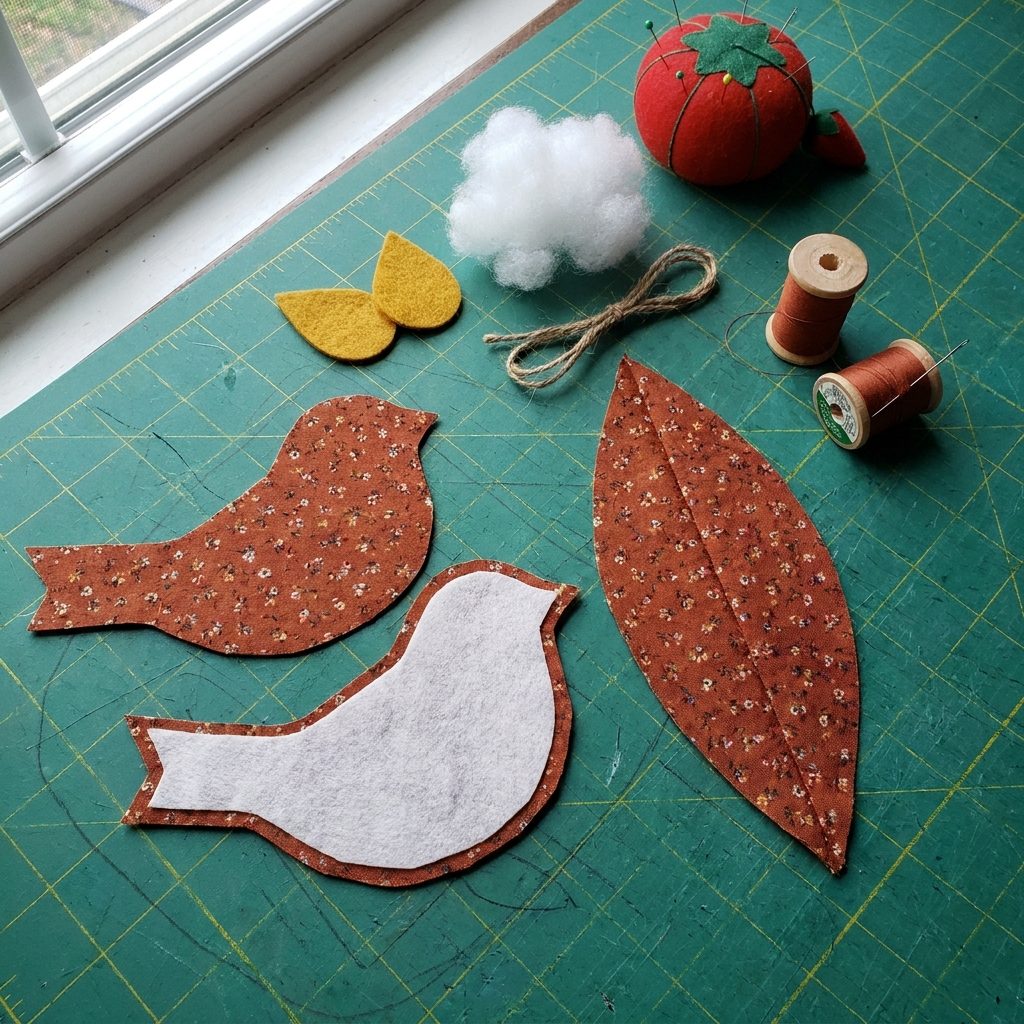
The bird is a teardrop on its side with a pointed beak and a squared-off tail. Draw it once on card stock and keep it.
- Draw a rectangle 4 3/4 inches wide and 2 3/4 inches tall. On the left edge, mark the beak point 1 inch down from the top. On the right edge, mark the tail as a flat 3/4 inch line running down from the top right corner.
- Draw the back: from the beak point, curve up to touch the top edge 1 1/2 inches in (the top of the head), dip to 1 inch below the top edge at the 3 inch mark, then rise to the top right corner. That dip is the waist. Without it the tail looks like a brick.
- Draw the belly: from the beak point, curve down to touch the bottom edge 2 inches in, then sweep up in one long curve to the bottom of the tail mark. The chest should be fuller and deeper than the head.
- For the gusset, fold a sheet of paper lengthwise and draw half a leaf along the fold: 6 inches long, 3/4 inch out from the fold at the widest point, with that point 2 inches from one end. Cut and unfold. Walk a tape measure on its edge along the belly curve of the side piece. The gusset must match that length, longer than the bird looks, because a curve is longer than a straight line. Trim the tail end if it runs long.
- Fold the fabric right sides together and cut the side body through both layers for a mirrored pair. Cut one gusset and two felt wings, and mark the beak points and the widest point of the gusset on the wrong side.
Sew the belly gusset to both sides
Set the machine to a 2 mm stitch with an 80/12 universal needle (my notes on needle size for cotton cover why). Every seam is 1/4 inch.
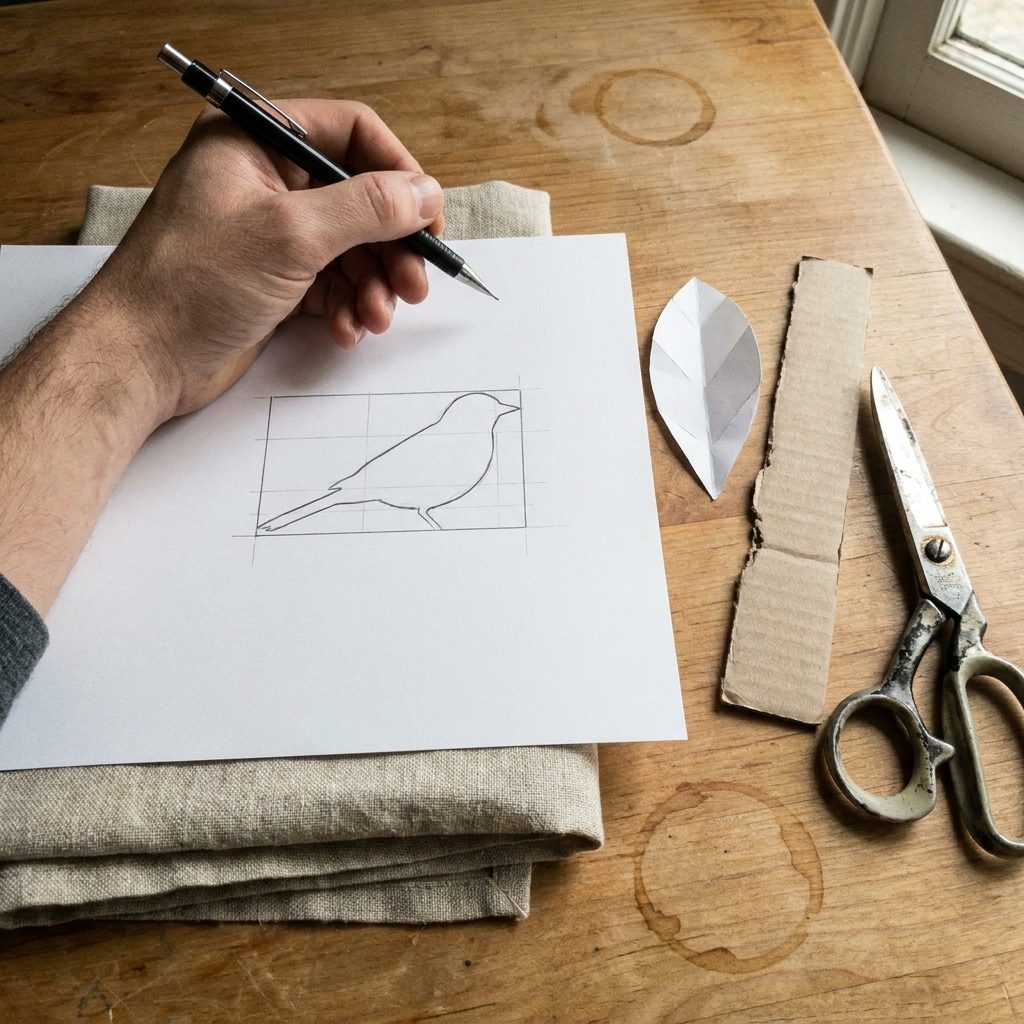
- Pin the gusset to one side piece, right sides together, along the belly curve: beak points first, then tail points, then the widest point of the gusset to the deepest part of the chest, then a pin every inch between. The pieces will not lie flat, and that is normal.
- Sew from beak to tail with the gusset on the bottom, against the feed dogs, which ease the longer edge in. Stop with the needle down every inch and swing the fabric to follow the curve. The seam should run a steady 1/4 inch from the edge with no tucks.
- Pin the second side to the other edge of the gusset the same way, leaving a 1 1/2 inch opening centered on the widest part, marked with two pins set crosswise so you cannot sew past them.
- Sew this seam in two runs, backstitching at the opening. Opened out, you should have a flat shape like a bird with its belly unzipped.
Sew the back seam, clip, and turn
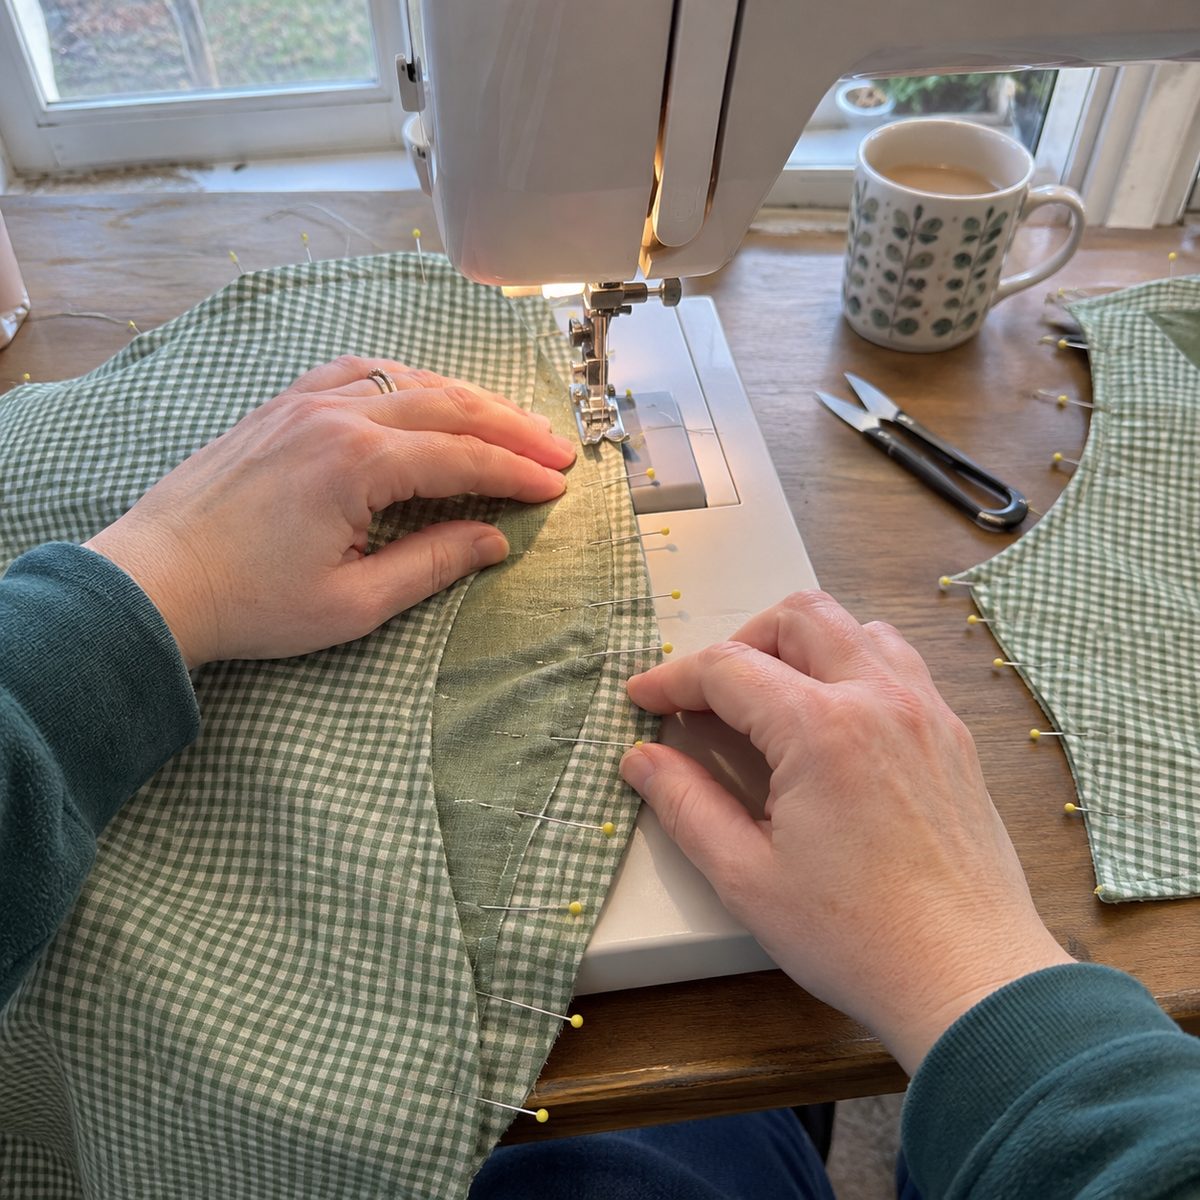
- Fold the bird so the two sides lie right sides together with the gusset folded inside. Pin from the beak point over the head, along the back dip, and around the flat tail end, matching the dip on both sides so the tail is not twisted.
- Sew from 1/4 inch before the beak point. Shorten the stitch to 1.5 mm for the last 1/2 inch into the beak, take one stitch straight across the tip, and pivot. Continue over the head, down the dip, pivot at each tail corner, and finish at the gusset point with a backstitch.
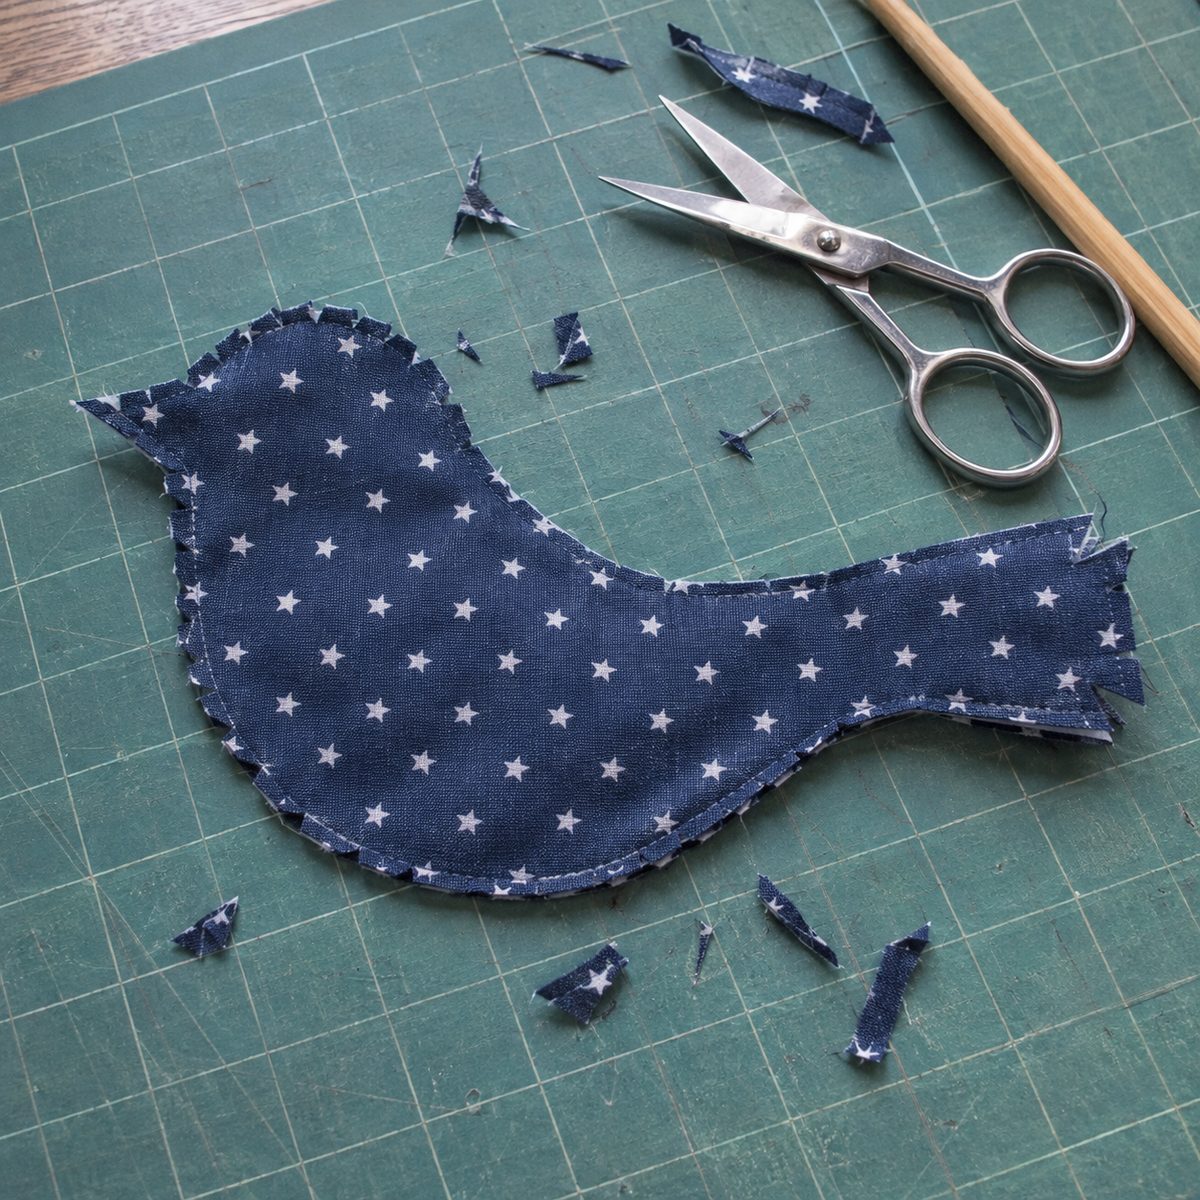
- Trim the beak seam allowance to 1/8 inch for the last inch and cut the tip off straight across just outside the stitching. Snip the tail corners off diagonally. On the concave curves (throat and back dip) clip straight in to within a thread of the stitching every 3/8 inch. On the convex curves (head and chest) cut small V notches every 1/2 inch. It should look fringed.
- Turn through the belly opening, tail first with your fingers, then the beak with the chopstick pushing gently from inside. Run the chopstick around every seam and press lightly with the iron tip. You should have a flat bird with a sharp beak, square tail corners, and smooth curves.
Stuff firm and close the belly
- Start at the beak. Twist a grape-sized pinch of fiberfill to a point and push it in with the chopstick until the tip is hard. A hollow beak folds over within a day.
- Fill the head, then the tail corners, then the body, in walnut-sized pinches pressed against the seams. One big wad leaves a lumpy bird with soft seams. A 4 inch bird takes about a tennis ball of loose fiberfill, which will feel like too much.
- Squeeze it. A thumb pressed into the chest should barely dent it. Roll the bird between your palms to smooth the surface.
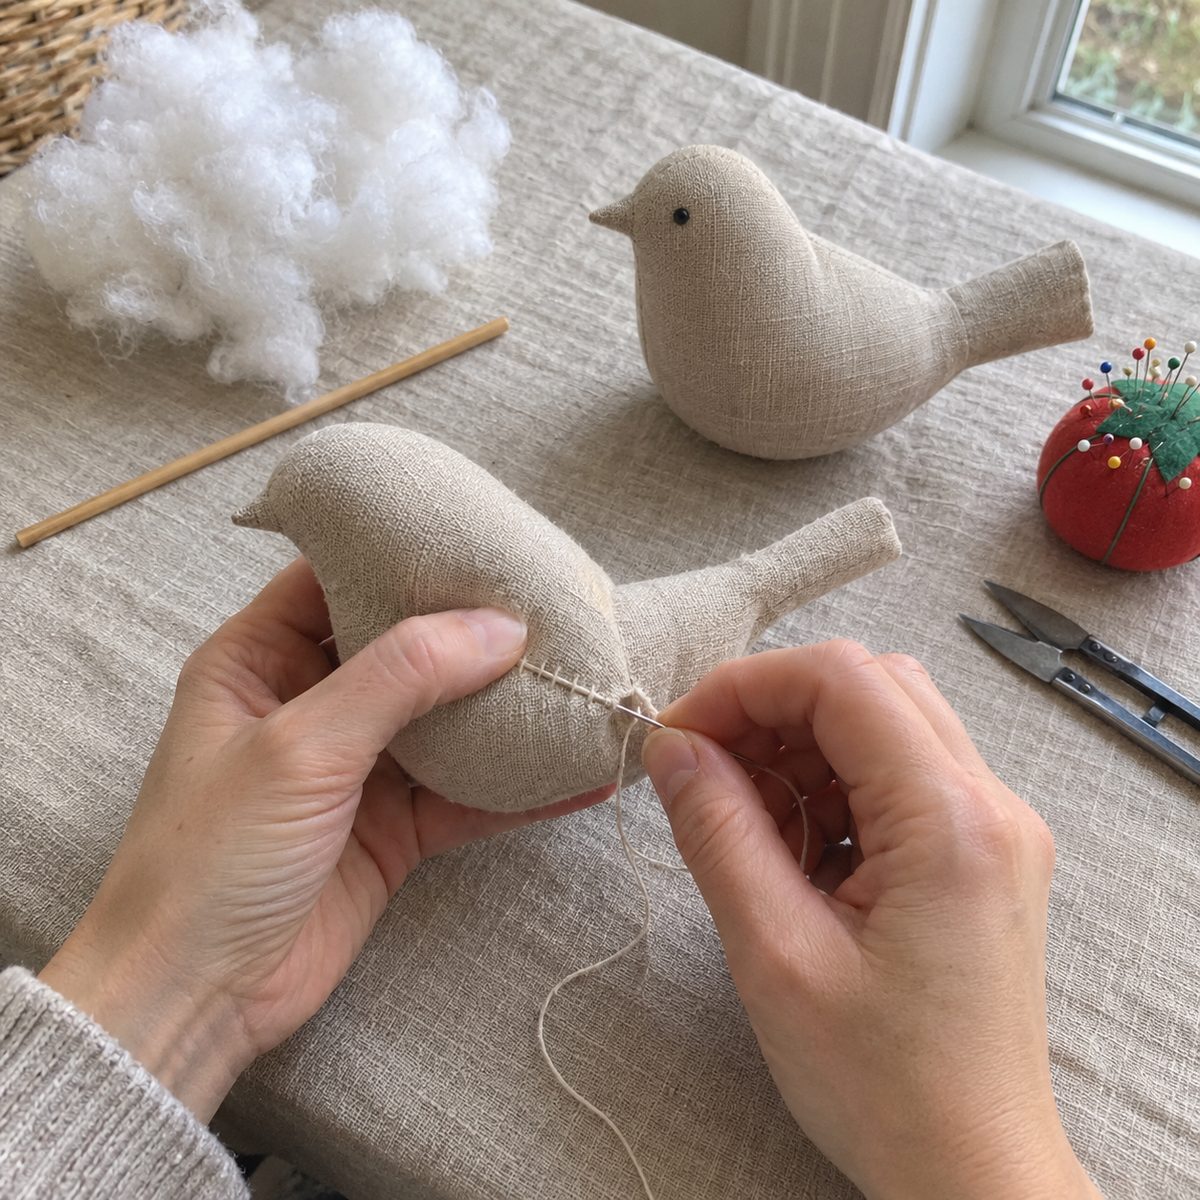
- Close with a ladder stitch using a doubled 18 inch length of matching thread. Fold the seam allowance in along the 1/4 inch line on both sides and finger-press. Come up through one fold, take a 1/8 inch stitch inside the opposite fold, then one back inside the first, and keep going. Every 4 or 5 stitches pull snug and the folds draw together like a zipper.
- To finish, pull tight, take a tiny backstitch, push the needle in at the seam and out 2 inches away, pull so the knot pops inside, and snip flush. The closed section should look like the machine seam.
Add the eye, the wing, and the hanging loop
- Mark each eye with a pin, 3/4 inch back from the beak tip and halfway between the back and belly seams, and check the pins against each other from the front. A bird with one eye higher than the other looks worried.
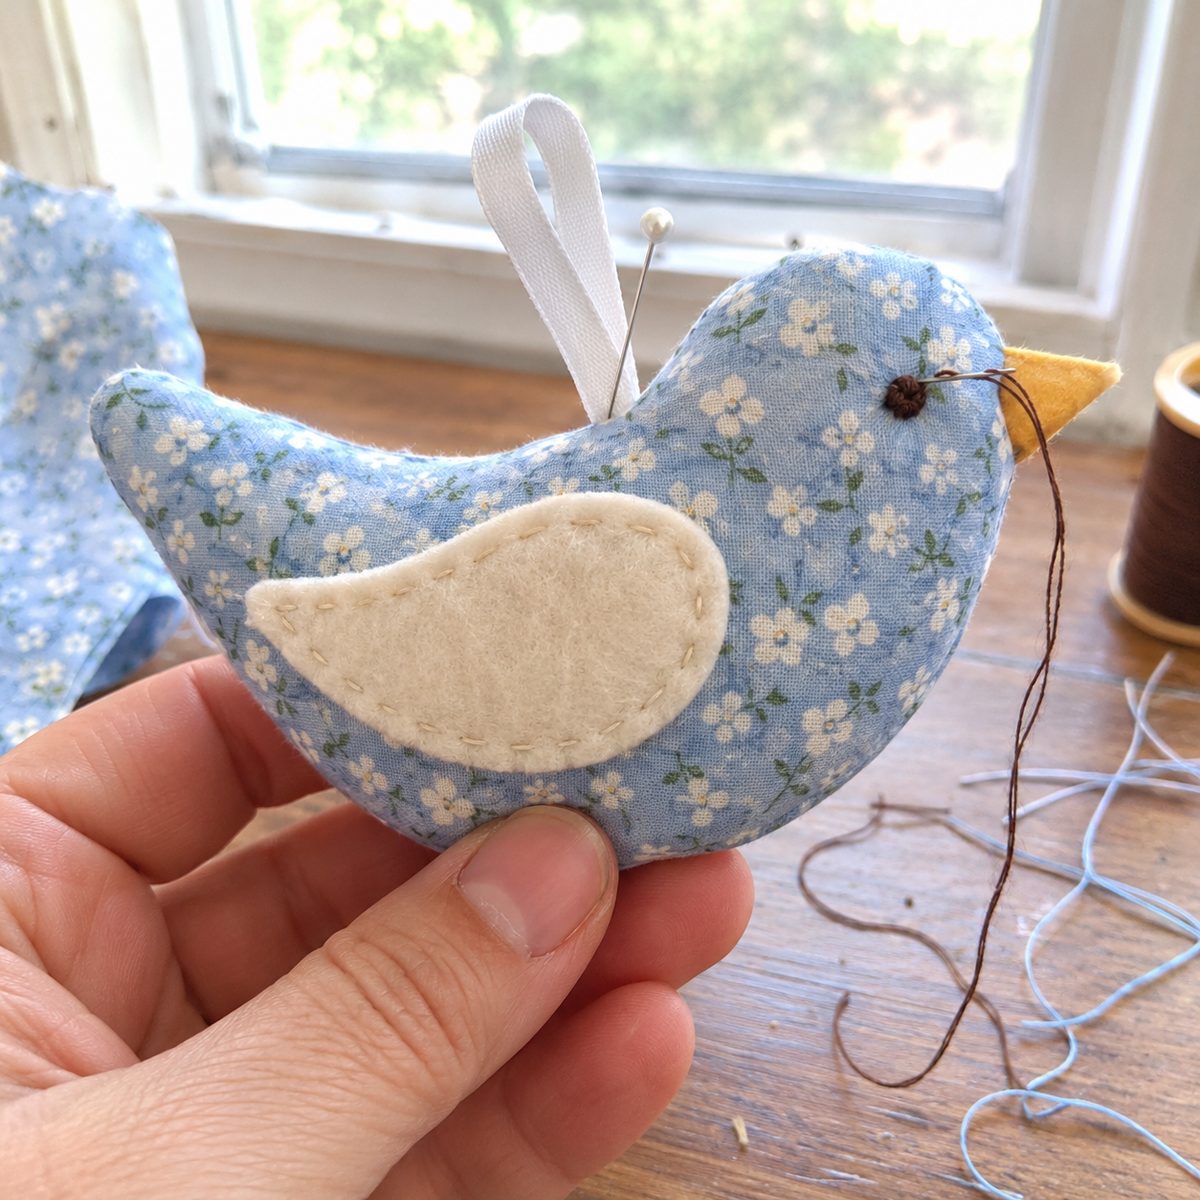
- Knot 18 inches of perle cotton in the embroidery needle. Go in at one eye mark, straight through the head, out at the other, and pull so the knot pops inside. Wrap the thread around the needle three times, hold the wraps snug, and push the needle back down right beside where it came out. The French knot should sit up like a bead about 1/8 inch across. Repeat on the other side, then run the thread out through the body and snip flush.
- For a felt wing, set the wide end of the teardrop 1/2 inch behind the eye, point angled toward the tail, and sew across the wide end only with three or four straight stitches. The loose point lifts a little. For a fabric wing, fold the 2 1/2 by 2 inch rectangle in half lengthwise, fold both top corners down to the center like a paper airplane, press hard, and stitch the flat base to the body, point toward the tail.
- Find the balance before sewing the loop. Fold the ribbon in half, pin the fold to the back seam about 1 3/4 inches behind the beak tip, and lift the bird. Nose down, move the pin 1/4 inch toward the beak. Tail down, move it back. When it hangs level, sew the loop on with six small stitches, knot, and bury the tail. I used to sew the loop into the back seam at the machine. Every third bird hung nose-down and I could not move it.
Fixes for the things that go wrong
The beak is round instead of pointed
The seam allowance is still full width inside the tip, or you sewed a sharp V instead of one stitch across the point. Before stuffing, trim the beak allowance to 1/8 inch. Once stuffed, push the tip out from inside with the chopstick and pack a hard pinch of stuffing into it. That sharpens it more than you would think.
The belly seam puckers or has a tuck
The gusset was longer than the belly curve and got eased in unevenly, usually because the side piece was on the bottom. Trim the gusset to match the curve and sew with it against the feed dogs. For a single tuck, unpick 1 inch either side and resew, spreading the extra along the seam.
The bird hangs nose-down or tail-down
The loop is in the wrong spot. A hard, heavy beak balances farther forward than a soft one. Snip the loop off, pin and lift to find the balance point, and resew. A 1/4 inch move makes a visible difference on a 4 inch bird.
Variations and batch making
For spring, make six in pale blue, soft yellow, and white tiny florals and tie them to a clipped forsythia or pussy willow branch standing in a jar. Mix one solid with every two prints so the branch does not look busy.
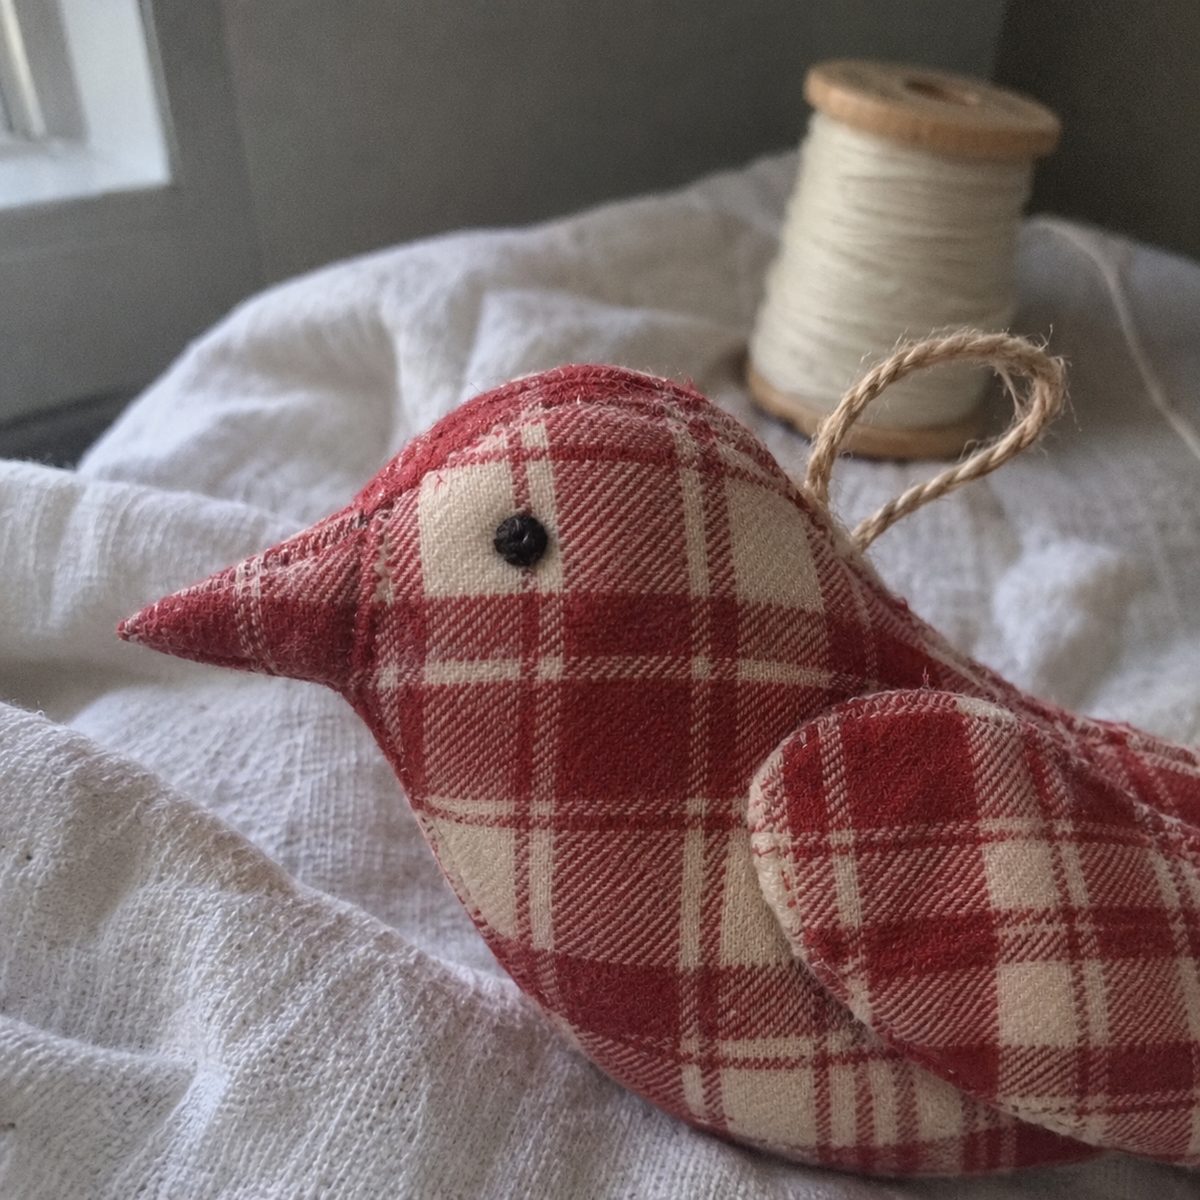
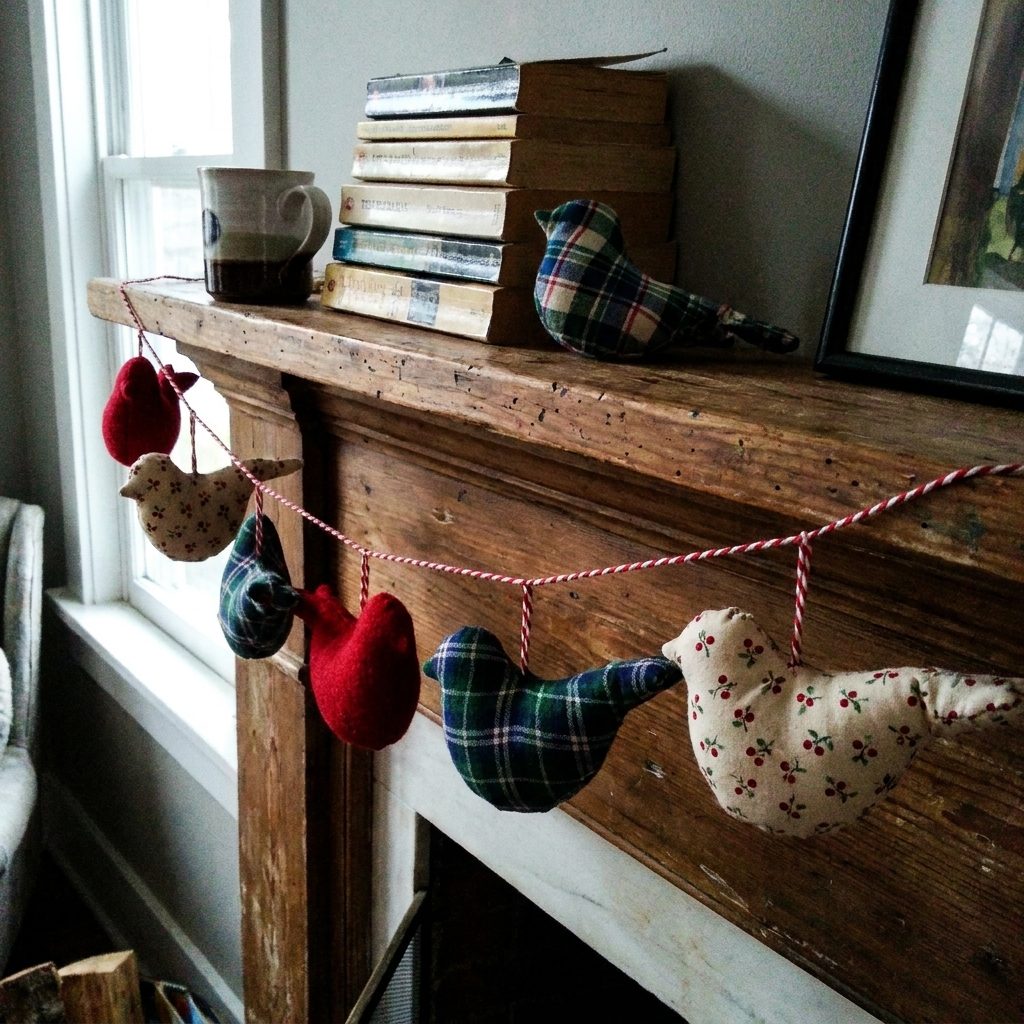
For Christmas, sew them in red and green wool felt or plaid flannel with jute or gold twine loops. They sit well next to stuffed fabric tree ornaments from the same scrap pile, and a box of six in matching plaid makes a three-dollar gift. More ideas are in the fabric Christmas ornaments roundup.
For a mobile, hang five from a 10 inch embroidery hoop on fishing line cut 6 to 14 inches long. For a garland, string seven on baker’s twine 5 inches apart with a lark’s head knot through each loop. For a batch, cut six at once, chain-piece all the belly seams, then all the backs, clip and turn the lot, and stuff the next evening. Six birds take about two and a half hours this way.
Frequently asked questions
Can I sew fabric bird ornaments by hand?
Yes. Draw the 1/4 inch seam line on the wrong side and backstitch along it at 10 to 12 stitches per inch, belly seams first and then the back. Clip and turn exactly as for a machine-sewn bird. A hand-sewn linen bird takes about an hour, and felt is faster.
How do I make a bigger or smaller bird?
Scale all three pieces by the same percentage on a copier. At 150 percent you get a 6 inch bird that takes twice the stuffing. At 75 percent you get a 3 inch bird, about as small as a beak will turn. Keep the 1/4 inch seam and re-check the gusset against the belly curve.
Are these safe for a nursery mobile?
Use a French knot for the eye and sew the wing on. Never use beads, buttons, or glued-on eyes on a bird a baby could reach, since small parts like those are a choking hazard for children under three. Hang the mobile out of reach and take it down once the baby can push up on hands and knees.
Make one bird to learn the pattern and six more the same afternoon. By the third you will stop pinning every inch and start trusting the feed dogs. That is when the beaks get sharp and the birds hang level on the first try.