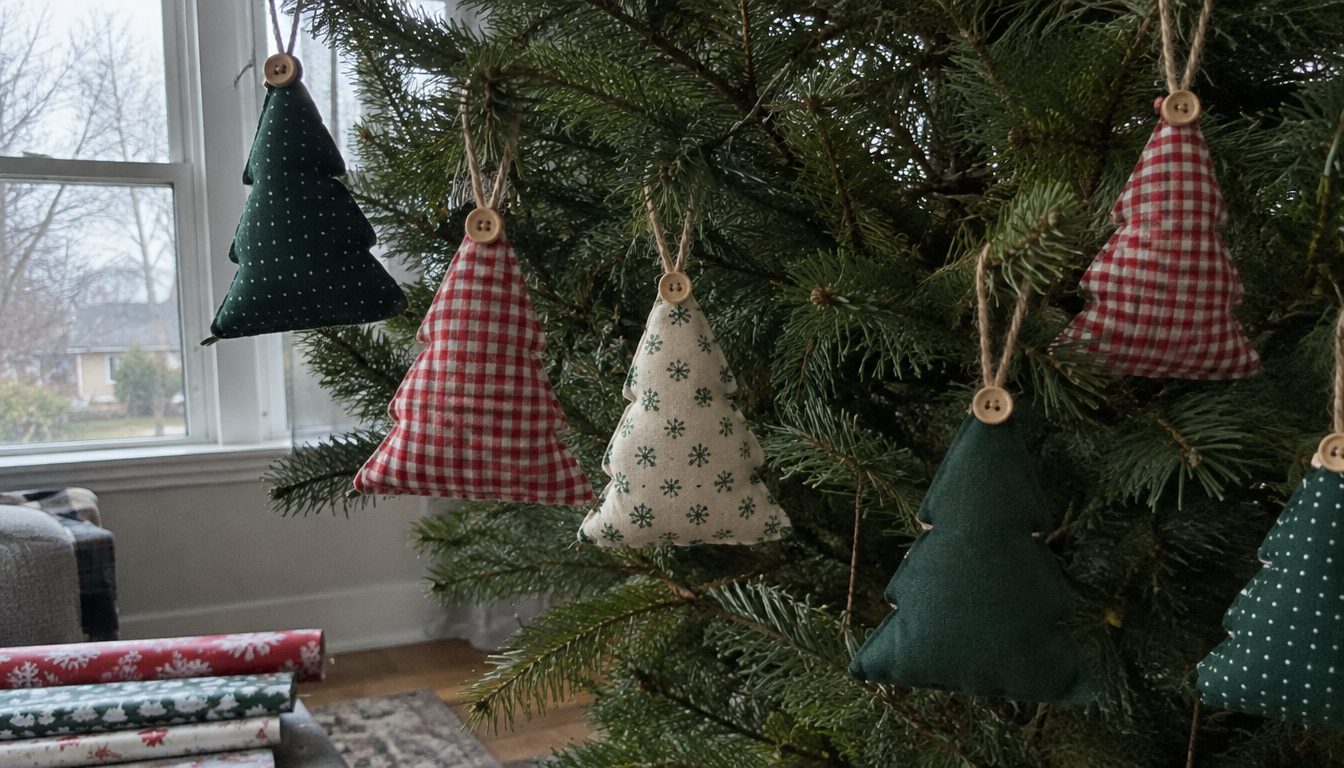
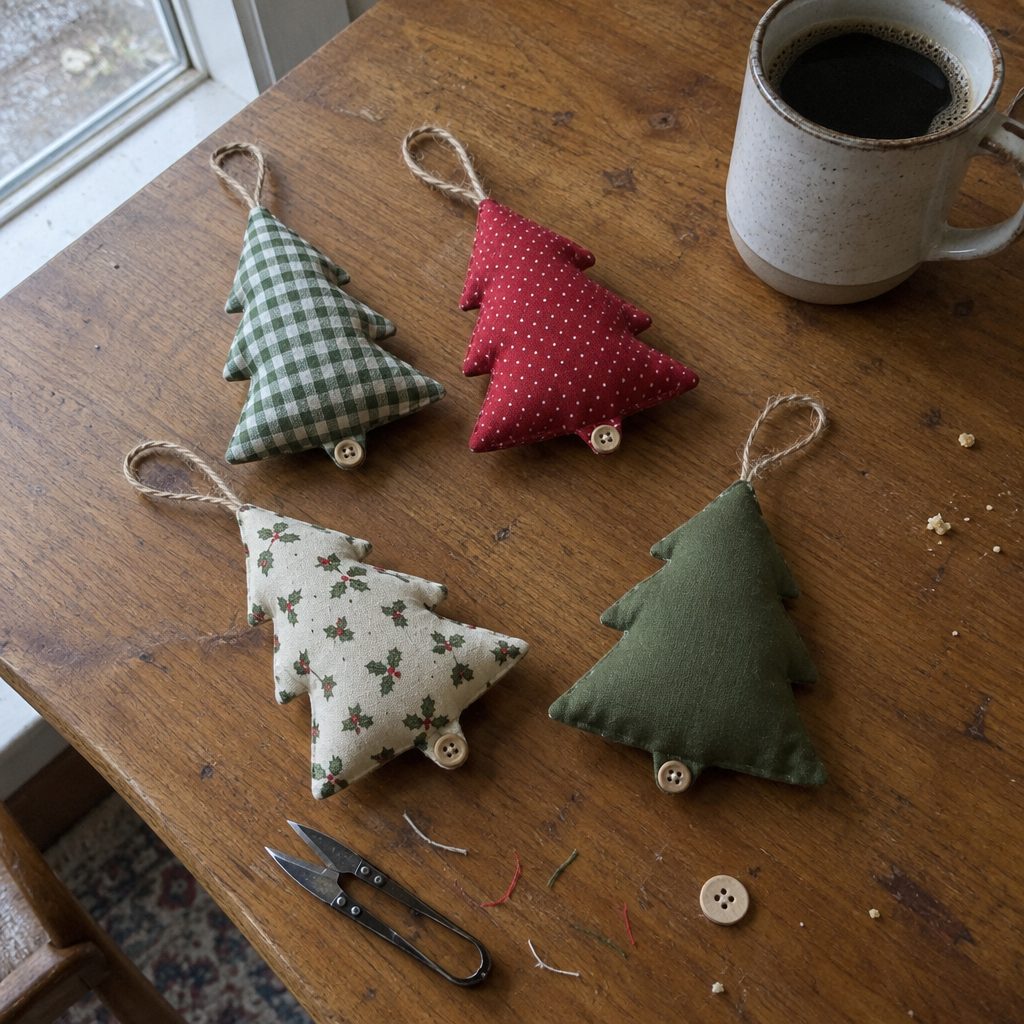
A stuffed fabric tree is two pieces of cotton sewn on a traced line, turned, stuffed, and closed by hand. Once the template is drawn, one takes me about 20 minutes. The first takes closer to 30.
It is a true beginner project. One line on the machine and five minutes of hand stitching.
What makes a tree look sharp instead of puffy is the trimming and clipping after you sew. Trim the points close, clip the inner corners up to the stitching, and the shape pops when you turn it. Skip it and you get a blob. This tree was a favorite from our fabric Christmas ornaments roundup, so here is the full method and a draw-it-yourself template.
What you’ll need
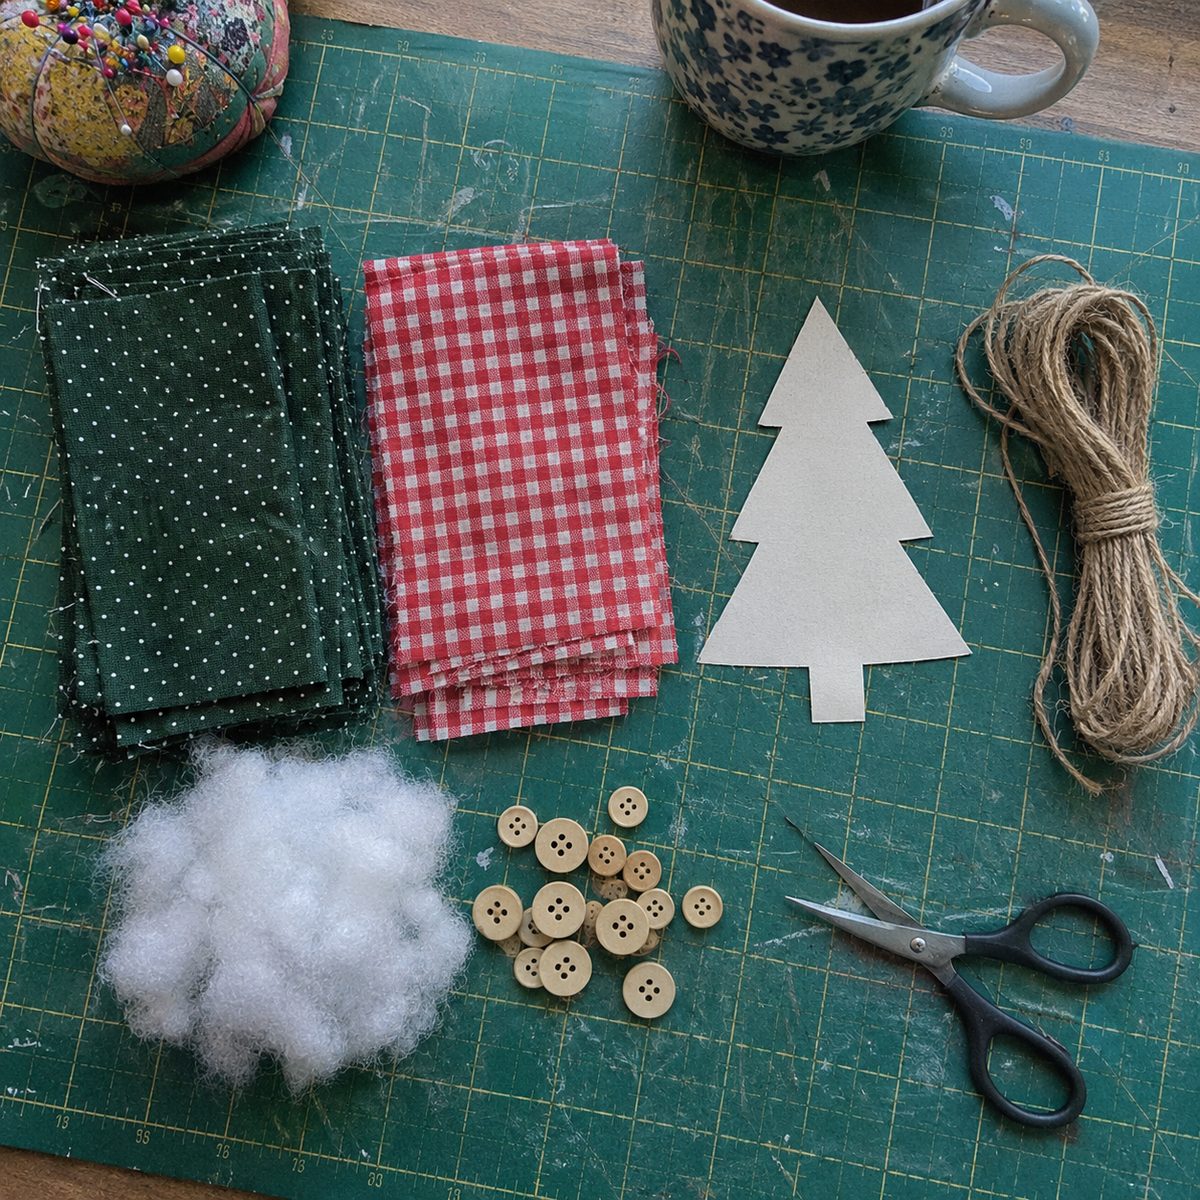
- Two pieces of quilting cotton, at least 4 1/2 x 6 inches each (one fat quarter cuts 6 trees)
- Polyester fiberfill, a loose handful per tree (a 12 ounce bag stuffs 30 or more)
- Jute or baker’s twine, 6 inches per ornament
- One 3/8 inch button or a small wooden star per tree
- All-purpose polyester thread to match, plus a hand sewing needle
- Universal 80/12 machine needle
- Cardstock for the template, and a fine-tip fabric marker or pencil
- Small sharp scissors, a chopstick or point turner, tweezers, a few pins
| Piece | Cut size | Qty |
|---|---|---|
| Tree front and back (rough rectangles, trace and sew first) | 4 1/2 x 6 inches | 2 per tree |
| Template, stepped tree with trunk (cardstock) | 3 1/2 x 5 inches finished outline | 1 |
| Hanging loop, twine | 6 inches | 1 per tree |
| Garland string, twine | 8 feet | 1 per garland of 8 |
| Patchwork front strips (variation) | 1 1/2 x 6 inches | 4 per tree |
| Cone tree body (variation) | Quarter circle, 4 inch radius | 1 |
| Cone tree base (variation) | 2 1/2 inch circle | 1 |
Fabric, the template, and prep
Quilting cotton is the right fabric. It presses crisp, turns without fighting you, and holds a point. Small prints read best at this size. A 2 inch poinsettia becomes one red smear on a 3 1/2 inch tree. Tiny dots, gingham, and small snowflakes still read as a tree. I mix solid greens with one print in every three.
Skip knits, satin, and anything with stretch. Flannel works but is bulky at the points, so trim it closer. I do not prewash for ornaments unless I am pairing a strong red with white, but I do press every piece with a light pass of spray starch so the layers do not shift.
Draw the template on cardstock. Start with a vertical center line 5 inches long. The trunk sits at the bottom, 3/4 inch wide and 5/8 inch tall, centered. Above it, the bottom tier is 1 1/2 inches tall and 3 1/2 inches wide at the base, with sides sloping in to a 2 inch top edge. The middle tier is 2 3/4 inches wide at its base, 1 1/2 inches tall, sloping to a 1 1/4 inch top edge. The top tier has a 2 inch base and rises 1 3/8 inches to a point.
Each tier overhangs the one below by 3/8 inch per side. Those overhangs, plus the two spots where the trunk meets the tree, are the six inner corners you will clip. For a first tree, a plain triangle 3 1/2 inches wide and 4 3/8 inches tall with the same trunk is fine. Two inner corners instead of six.
Trace onto the wrong side of one rectangle. That line is your stitching line, not a cutting line. Mark two ticks 1 1/4 inches apart on one sloped side of the bottom tier for the opening. Not the bottom edge, where the trunk is in the way.
Sew the outline
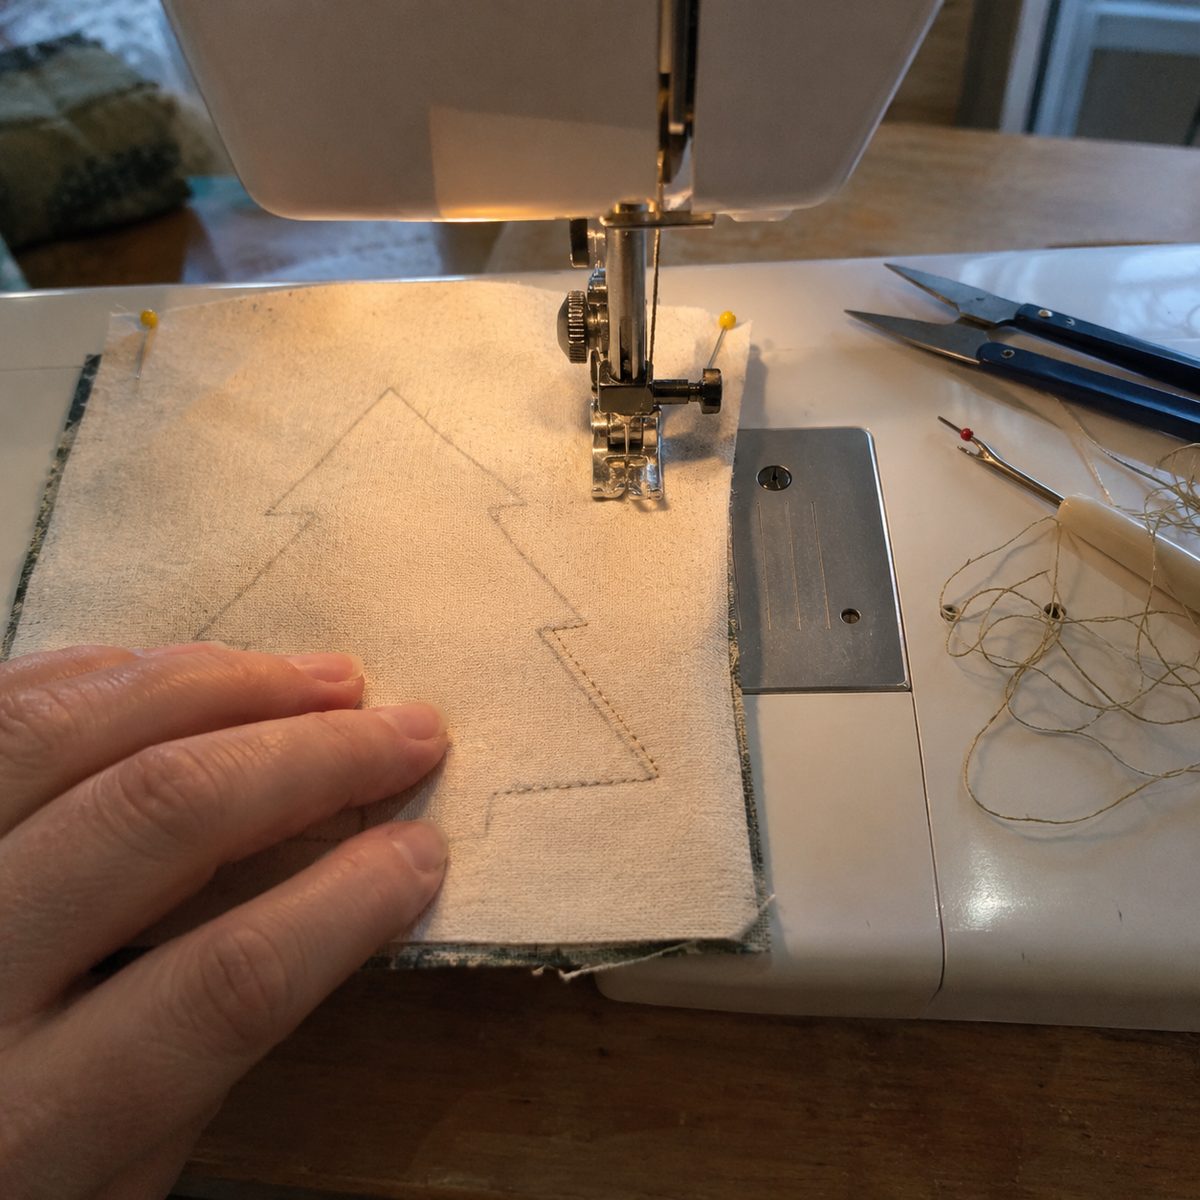
- Press both rectangles. Center the template on the wrong side of one, with at least 1/2 inch of fabric beyond the line all around, and trace it. Mark the gap ticks.
- Lay it on the second rectangle, right sides together, and pin the four corners well away from the line.
- Set the stitch length to 1.8 to 2.0 mm. The short stitch turns corners cleanly and holds when you clip close. A standard 2.5 mm stitch opens up at the inner corners.
- Start at one gap tick, backstitch two stitches, and sew exactly on the line. Pivot at every corner with the needle down. At the top point, take one tiny stitch straight across the tip instead of a sharp pivot. That stitch gives the seam allowance somewhere to go.
- Stop at the other tick and backstitch. You should have a complete outline with one 1 1/4 inch opening and no wobbles at the corners. If a corner went wide, unpick that 1/2 inch and redo it now.
Trim, clip, and turn
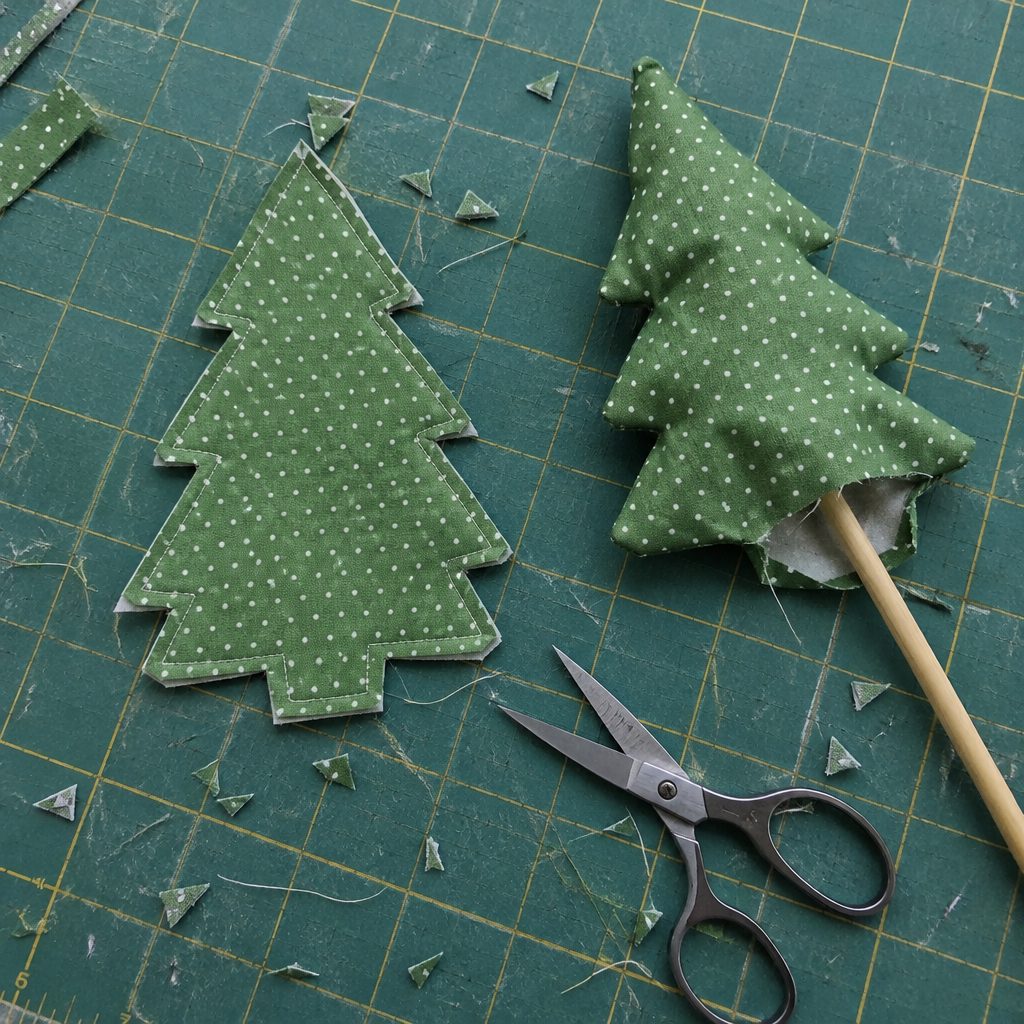
- Cut the tree out 1/4 inch from the stitching all the way around, including across the opening.
- Trim the seven outer points to 1/8 inch. At the top point, snip straight across about 1/16 inch beyond the stitching, then angle the two sides.
- At the six inner corners, clip straight in and stop one or two threads short of the stitching. Not through it.
- Turn through the opening, trunk first. Reach in with tweezers, grab the end of the trunk, and pull it through. Then push the tiers out with the chopstick, wiggling into each corner.
- Slide a pin into each point from the outside and tease out the last bit of fabric. Press flat, folding the gap allowances in on the drawn line. Points crisp, inner corners flat, no dimples.
Stuff it and close the gap
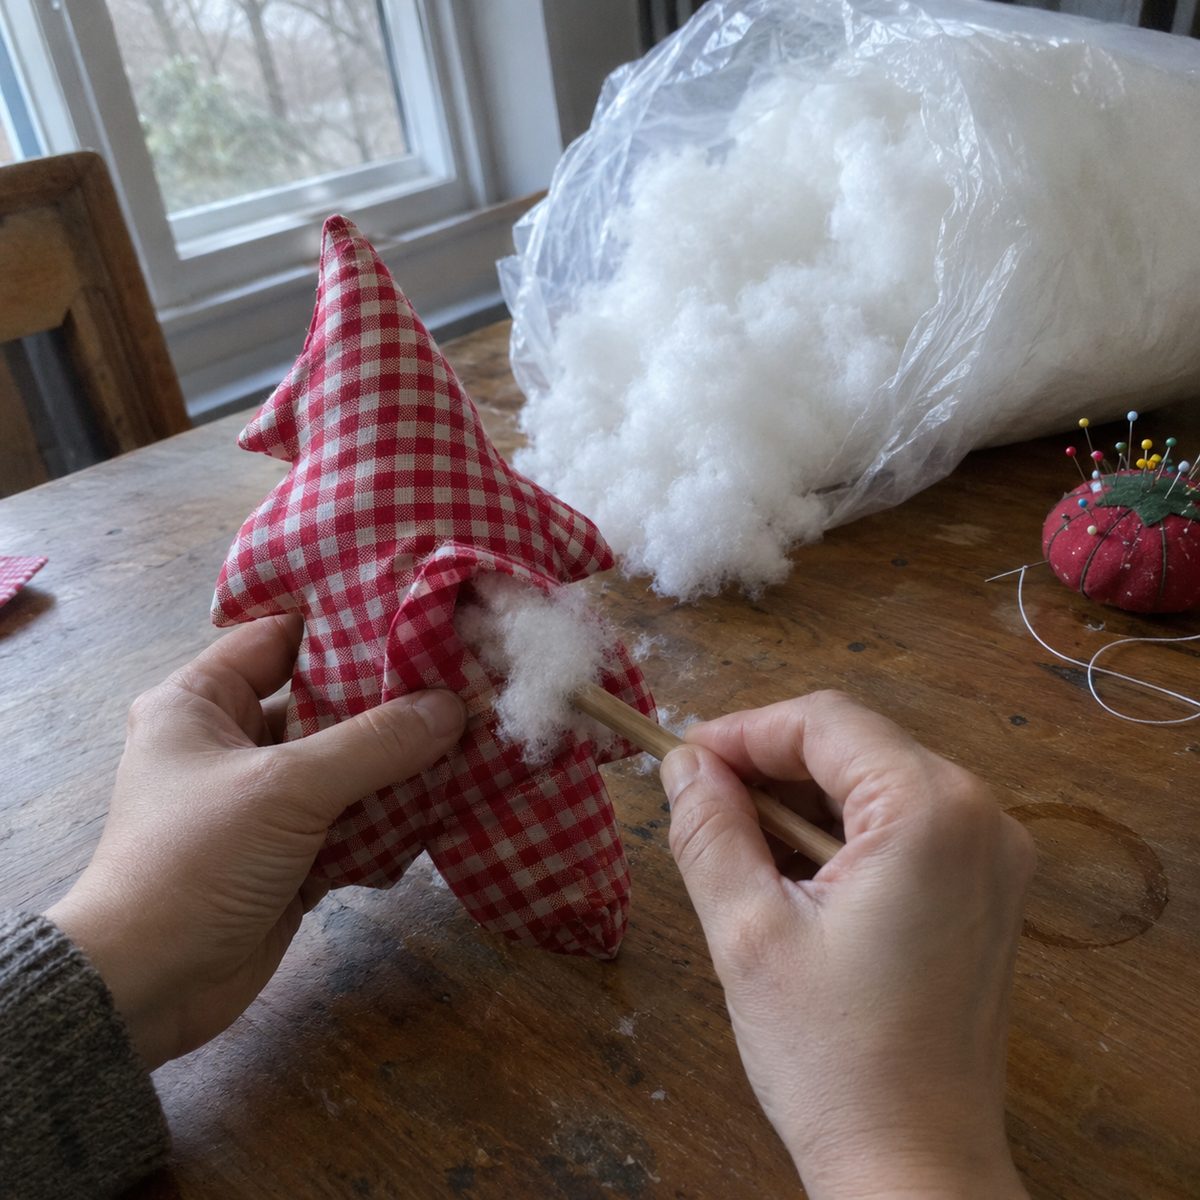
- Pull off a grape-sized tuft of fiberfill and push it into the trunk with the chopstick, then another into the top point. Small tufts only. Wads are where lumps come from.
- Fill the top tier, then the middle, then the bottom, corners before center. Stop when the tree is firm but still gives about 1/4 inch under your thumb. A loose lemon-sized handful packs to that. Overstuffed trees strain the seams and bulge. Understuffed ones go limp on the branch.
- Fold the gap edges in along the drawn line and pin.
- Close with a ladder stitch: come up inside one fold, take a 1/8 inch stitch along it, cross straight over to the other fold, take a 1/8 inch stitch there, and repeat. Every four stitches, pull snug and the seam disappears. Longer stitches leave visible rungs.
- Bury the knot under the seam. Our post on how to end a hand stitch shows the pop-the-knot-inside trick.
Add the loop and the star
You can sandwich the twine in the seam at the tip before sewing, but the ends make the point lumpy and catch the chopstick when you turn. Sewing it on afterward is neater, and the button hides the stitching.
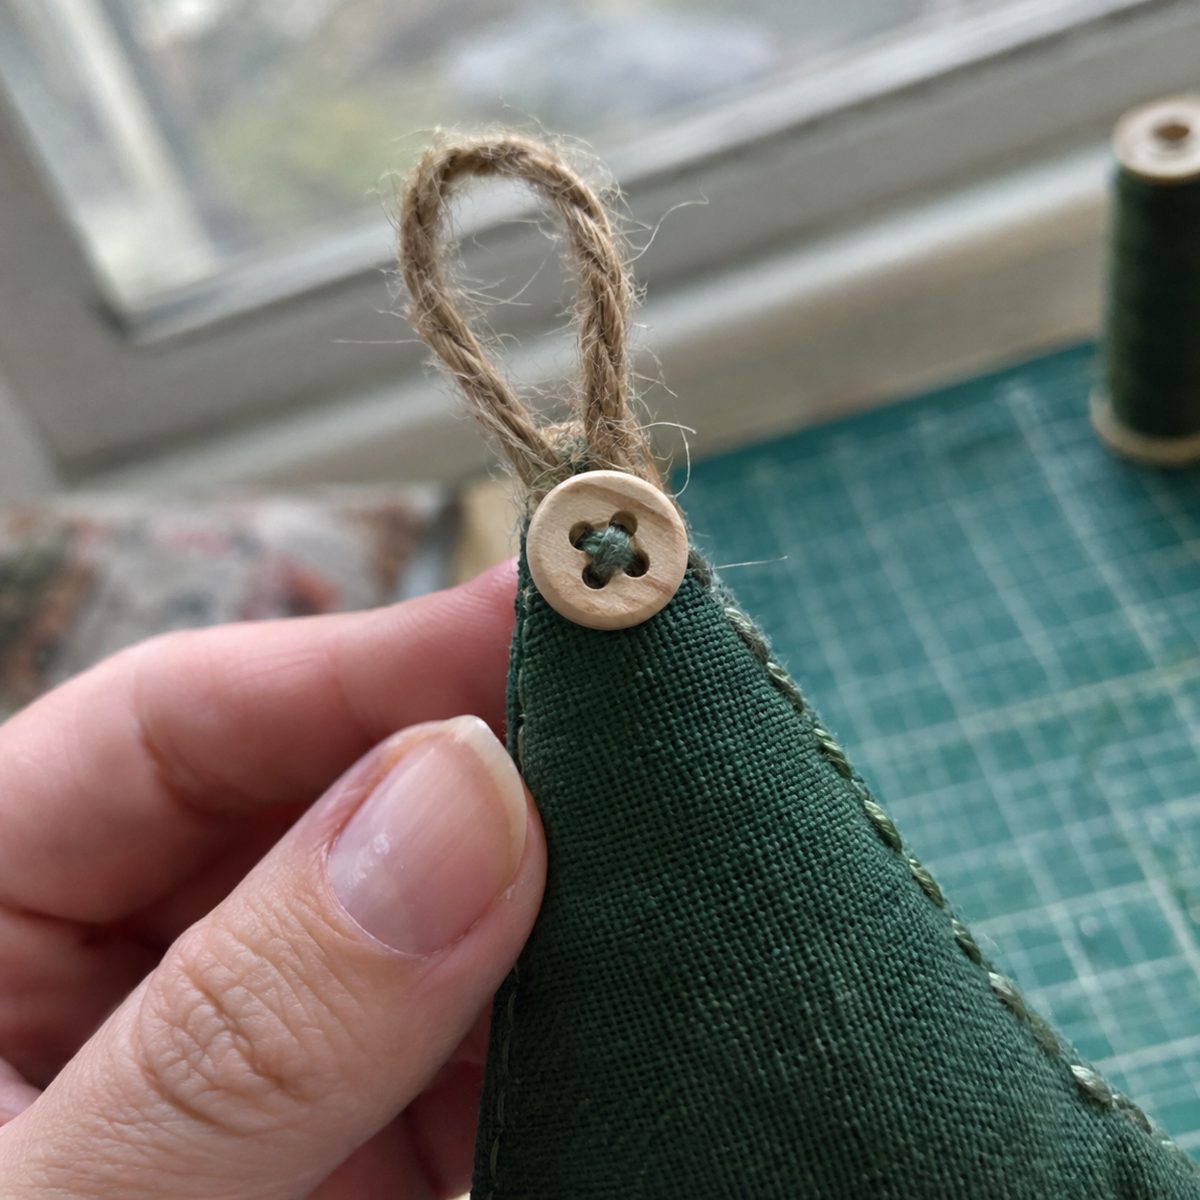
- Cut 6 inches of twine, fold it in half, and tie the ends together in an overhand knot about 1/2 inch from the ends.
- With doubled matching thread, stitch the knot to the top point, passing through the knot and the tip four or five times. The loop should stand straight up from the tip.
- Sew the button or wooden star over the knot on the front, pulling snug so it sinks a little into the stuffing, and knot off under the button.
- Hang it from one finger. If it leans, the loop is off center. Snip it and move it 1/8 inch toward the heavy side.
Making a garland of eight
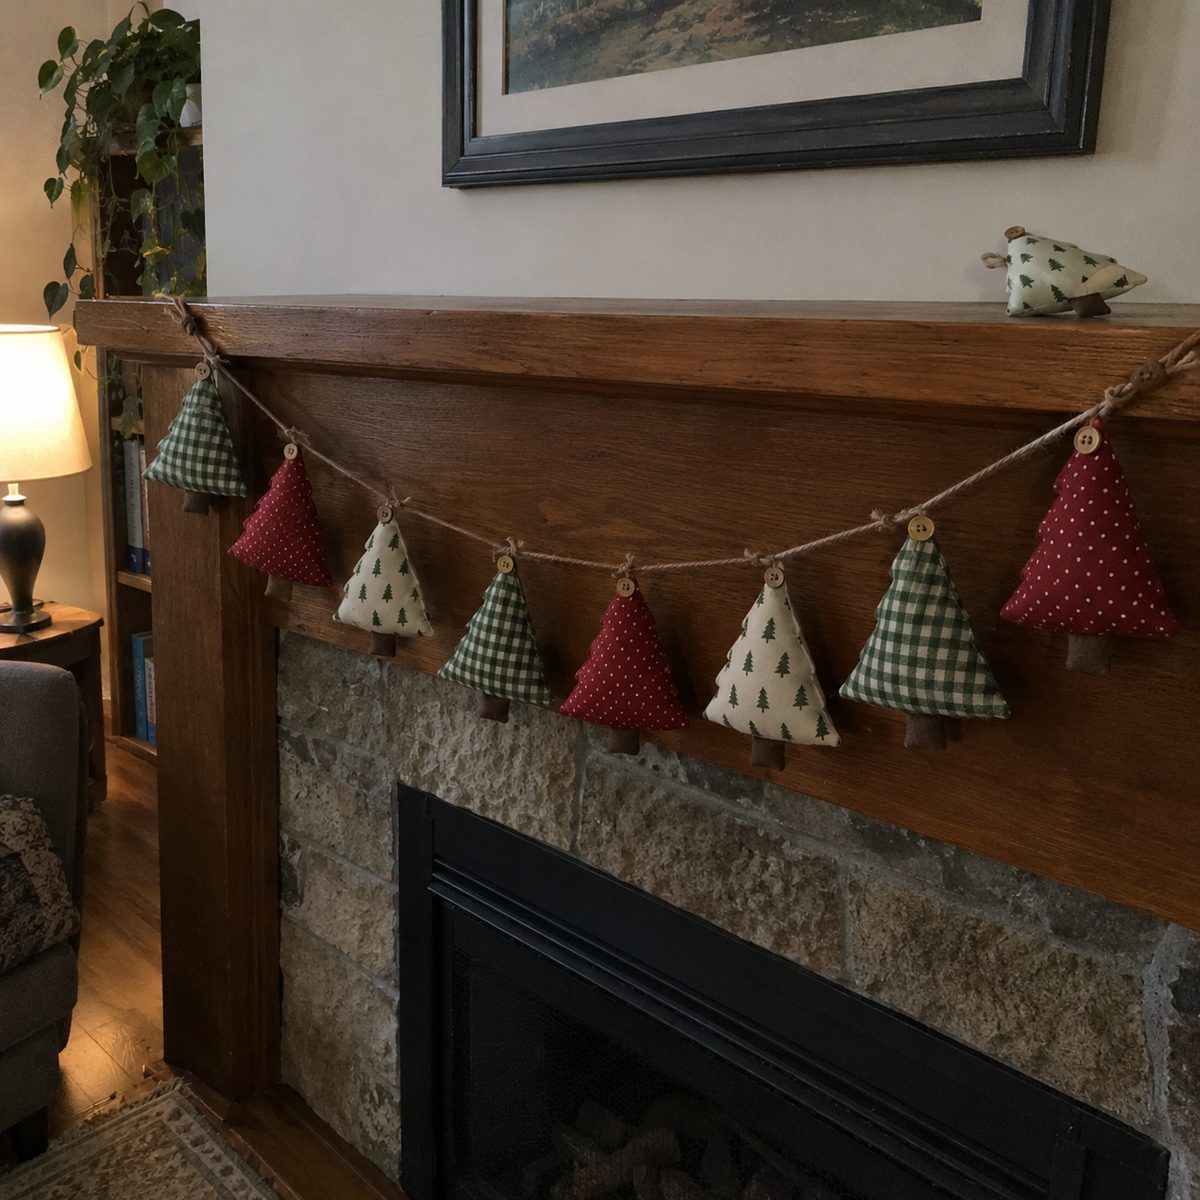
Eight trees on a string is the version people ask me to make for them. Batch the steps and the whole garland takes about two hours.
- Trace eight trees, pair each with a back, and sew them one after another without cutting the thread between pairs. Eight outlines take about 40 minutes.
- Trim all eight, then clip all eight, then turn, then stuff.
- Skip the loops. Thread 8 feet of twine onto a 3 inch doll needle and pass it through each tree, side to side, 1/2 inch below the top point, so each one hangs without flopping forward.
- Space the trees 6 inches apart with 12 inch tails at each end, about 7 1/2 feet in all. Tie a small overhand knot on each side of every tree so they stay put, buttons facing front.
Fixes for the things that go wrong
The top point is rounded or blunt
Too much seam allowance is folded inside the tip. Trim across the point to 1/16 inch and the sides to 1/8 inch, then tease the point out with a pin from the outside, never the chopstick, which pushes through the stitches. If it is still blunt, take one tiny stitch across the very tip next time instead of a hard pivot.
The inner corners pucker or pull into a dimple
You did not clip close enough, so the fabric drags around the corner. Clip from the outside with the tips of small scissors to within one or two threads of the stitching. Six inner corners, six clips, every tree.
A hole opened at a corner when I turned it
Either the clip went through the stitching, or the stitch was long enough that the clip landed between two stitches. Dab seam sealant on the hole, let it dry, and whip the edges together from the outside with tiny stitches. Going forward, 1.8 mm stitches leave nothing to cut between.
The tree is lumpy
Wads. Pull the stuffing out through the gap and start over with grape-sized tufts, corners first. Once closed, roll the tree between your palms for a few seconds and press any high spot with your thumb.
The trunk will not turn
A 3/4 inch trunk is a tight tube. Trim its seam allowance to 1/8 inch, then grab the end from inside with tweezers and pull instead of pushing. If it still fights you, widen the trunk to 1 inch on the template. Nobody will notice.
Variations
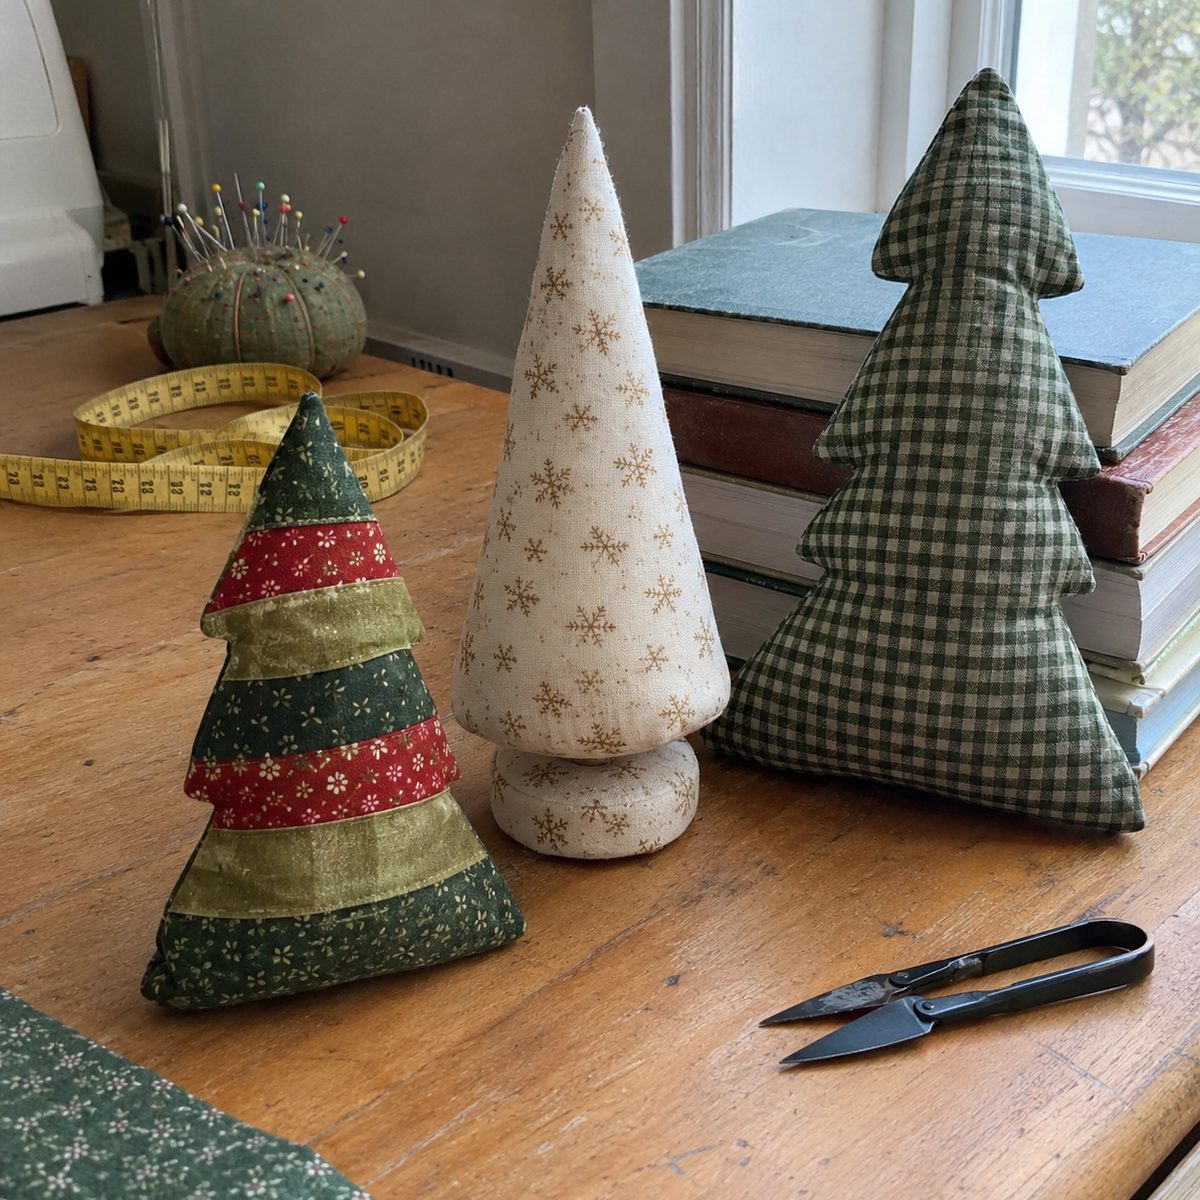
Patchwork front. Sew four 1 1/2 x 6 inch strips together along their long edges with 1/4 inch seams, press to one side, and you have a 4 1/2 x 6 inch panel. Use it as the front and trace on a plain back. Three greens and one red stripe is the classic mix, and since every strip is under 2 inches wide, this is one of the best uses for a tin of fabric scraps.
Cone tree. Cut a quarter circle with a 4 inch radius from cotton backed with medium fusible interfacing. Fold it right sides together and sew the straight edges with a 1/4 inch seam at 2.0 mm. Turn, press, and stuff it firm, point first. Cut a 2 1/2 inch circle for the base, baste 1/4 inch under all around, and ladder stitch it to the bottom edge. The finished cone is just under 4 inches tall and 2 inches across. It stands on a shelf or hangs from a loop in the point.
Tabletop size. Double every number for a 7 x 10 inch tree. Cut rectangles 8 1/2 x 11 1/2 inches, make the trunk 1 1/2 inches wide and 1 1/4 inches tall, leave a 2 1/2 inch gap, and use a 2.2 mm stitch. It takes about an ounce of fiberfill. A half cup of poly pellets in the trunk and bottom tier, added first, lets it sit upright against a stack of books. About 35 minutes each.
Gift toppers. Make the plain triangle version in the recipient’s colors, skip the button, and tie it into the ribbon knot on the package. It replaces the bow and goes on their tree afterward. Red gingham on kraft paper is hard to beat.
Frequently asked questions
Can I make these from felt instead of cotton?
Yes, and felt skips the turning. Cut two tree shapes on the finished line, stack them, and sew around 1/8 inch from the edge by machine or with a hand blanket stitch, leaving a gap to stuff through. Felt trees come out flatter and fuzzier. Use wool-blend felt if you can. Craft felt pills and goes limp within a season.
What needle and thread should I use?
A universal 80/12 needle and all-purpose polyester thread handle two layers of quilting cotton without any fuss. If you get skipped stitches or pulled threads at the corners, change the needle first. A fresh 80/12 solves most of it. Our post on needle sizes for cotton covers when to step up to a 90/14 for flannel or patchwork fronts.
Can I sew the outline by hand?
Yes. Backstitch along the traced line with stitches about 1/8 inch long and pull each one snug. It adds about 15 minutes per tree. Keep the stitches short at the corners and take the same single stitch across the tip. Hand-sewn trees turn and stuff the same way.
How do I store and clean them?
Store them flat in a shoebox with tissue between layers so the points do not get crushed. If one comes out squashed, hold a steam iron an inch above it for a few seconds and reshape it with your fingers. Spot clean only, with a wet wipe. Never put a stuffed ornament through the washer, since the fiberfill shifts and never sits right again.
Make one tree the slow way and the next seven go fast. A stepped tree with a crisp point and a tiny button is one of the most useful shapes in our Christmas sewing projects collection, since it works as an ornament, a garland, and a gift topper. Keep the template in your sewing box and you will reach for it every December.