You’ve decided to take up sewing!!! That’s exciting news. Before we talk about how long does it takes to learn how to sew, let’s first look at its history.
Table of Contents
History of Sewing
Sewing is an activity that has existed for as long as there has been a need to join two pieces of something together to make some sort of covering. Adam and Eve started things off using leaves. Whatever humans are wearing, even today, it is likely that some form of sewing has been involved in its creation.
The word “sew” means to join or fasten something together firmly. As you can appreciate, Neanderthals struggling to keep their warm furs tight around them would appreciate the creativity of the seamstress in their cave who figured out how to use animal sinews to hold the bulky furs firmly in place without letting in the cold winter air.
In most sewn items, a sharp, pointed object, a needle, for instance, is used to make a hole in each of the pieces to be joined together. A joining fiber or thread is then passed through the holes on each of the pieces and pulled tight. Repeat this process a few thousand times, or so and there you have it, a sturdy garment or bag, ready to wear or otherwise use.
Early sewers likely used thorns and sharpened bones to make the holes that they needed in the skins they were joining together. Animal sinew or long, tough plant fibers were used to join skins or large leaves. Examples of such craftsmanship have survived down to this day and are on display in museums around the world. The clothing worn by the Huldremose woman is over 2,000 years old and is on display in a Danish museum. Her clothing was well preserved and is an excellent example of the care that was taken when sewing garments by hand.
Hand Sewing
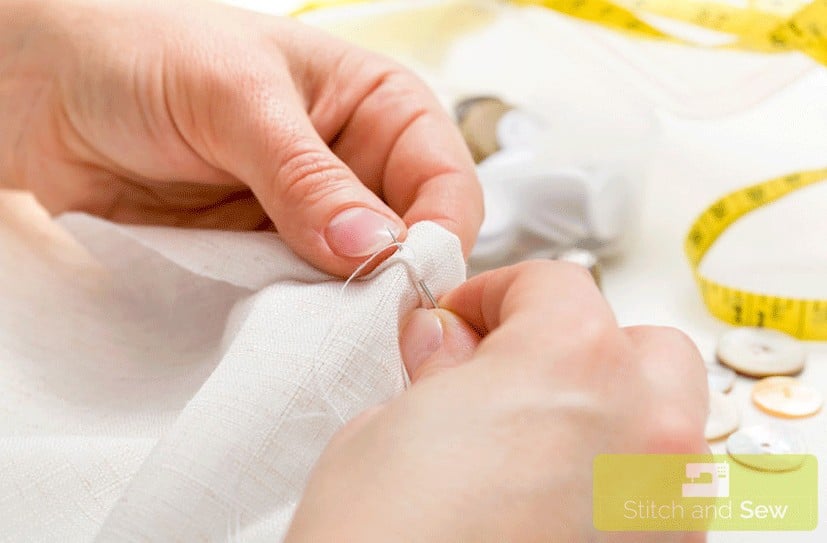
The foundation of all hand sewing hasn’t changed since the first time someone decided to join two pieces of something together. Early sewers used fine, sharp objects to make holes that they then passed a thin cord or piece of plant material through and tied off in some fashion. While twine or another type of thread made from sturdy plant fibers isn’t in common use today, cotton and linen threads are widely used, and thin leather strips used as lacing can be seen on many fashionable sewing projects.
Early sewers were concerned with creating something functional with a minimum of fuss. Sewing by hand remained the primary way to join fabrics together for centuries. A visit to any museum will give you an appreciation for the effort that our ancestors put into sewing. Clothing and household items were generally loose fitting and shapeless, but decorated with ornamentation from nature, like seashells.
Adding holes allowed a seashell to be attached using a variety of threads. Thin strips of leather, animal sinews and tendons and even threads made from plants were used for attaching such decoration. If you’ve ever tried to pull apart a Clematis vine, you can appreciate how well it would work for joining something like a skin bag together. The same goes for the plant Old Man’s Beard, also known as Spanish Moss. The plant may appear delicate, but when turned into twine and used in a sewing project to hold fabric together it has incredible strength and resists breaking.
A step up from using thorns to make a hole in skins came when the first sewers created needles. Sharp thorns had been used to make holes in leather, and tough yet flexible leaves were adapted to use for pulling the fibrous “thread” through the material. Early needles made from animal bones followed these leaf needles and carved wooden needles also were used. It is interesting that needles carved from the wood of a Holly tree are noted for keeping their point and not breaking. These sturdy needles can still be found occasionally in some areas, being used for mending nets. Any modern-day seamstress knows that a needle that doesn’t bend or break and keeps its point is a truly valuable tool.
Things that we take for granted today, like buttons, were made from items that were readily available in nature. One of the earliest examples of a button is a seashell, discovered in the Indus Valley. Such seashell buttons were more for decoration than joining pieces of fabric together. Buttons as a type of fastener didn’t become popular until sewers in Germany began using them to fasten clothing more tightly while making it easier to put on and take off garments.
Fabrics used for sewing have also come a long way since the early days of skins and leaves. This growth in available materials for sewing resulted in sewing projects beginning to have more pieces and shaping. The invention of scissors for cutting was a giant leap forward, providing an easier way to cut fabric with more precision.
Once you have mastered the basics of hand sewing, you’ll be eager to try new projects that take your skills to an advanced level. Whatever the project, whether it is creating a beautiful quilt or delicate embroidery, the foundation principles developed by creative sewers to join pieces of material together will always apply.
Machine Sewing
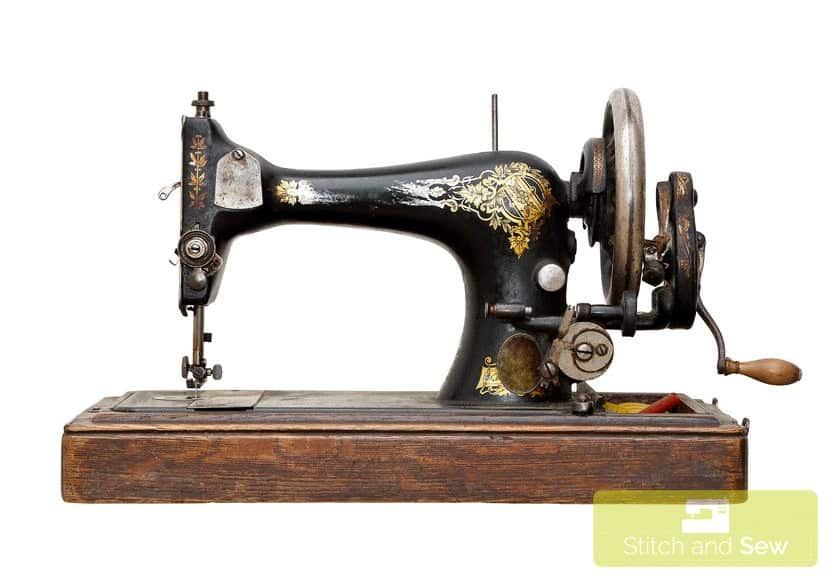
At one time, hand sewing was the only to create clothing but then came the Industrial Revolution, and the face of sewing changed forever. Making clothes moved from small shops employing armies of sewers laboring for days to complete just one dress or uniform, to a factory setting where machines took over the monotonous task of pushing a needle and thread through fabric to create a firm join with uniform stitches.
Clothing was faster and easier to make and the sewing process much less labor intensive, but the size of the average industrial sewing machine kept it firmly in the factory. Who it was that created the first practical sewing machine for home use remains murky. There were lawsuits and counter-claims galore in the mid-1800’s when inventor Elias Howe patented the first practical sewing machine for home use.
Home sewers rejoiced to have a machine that accomplished in a fraction of time what they used to labor over for hours. Sewing clothes and mending became much easier, most people today when they think of sewing, and visualize themselves working on some type of sewing machine to produce their project.
All sewing machines use the same principle as hand sewing. Something — thread — is put through a small hole in a thin, pointed object, otherwise known as a needle, and then the needle is used to push through two pieces of fabric, pulling the thread through behind it. Early sewing machines were powered by a hand crank or a treadle that ran a simple pulley system, pushing the needle up and down while other parts of the machine moved the fabric past the needle. Industrial sewing machines today have kept features like moving sewing heads for completing large projects, but the core design of those early sewing machines for home sewers remains.
In hand sewing, stitches are made one or two at a time, and it may be necessary to back up and go over the same section to make sure that make the stitches hold more firmly. Early sewing machines were designed to make a chain stitch using two separate threads, but initially, there was no way to finish off the stitches resulting in a beautiful looking line of stitching that came apart easily when one of the threads was pulled unless the two thread ends were tied off. While the sewing machine proved to be time-saving, more work was needed on the stitches it produced for it to be practical for home users.
It wasn’t long before designers found new ways to hold stitches together firmly and sewing machines became a standard of modern households along with refrigerators and stoves. A treadle sewing machine was the foundation of many homes and is still coveted by sewers who live in areas where the electrical grid is unpredictable.
The range of sewing machines available today is truly staggering. There are basic sewing machines that handle 20 or more different stitches with ease. Threads and fabric are cut by the machine as you sew using some machines, and today a well-sewn seam is often the strongest part of the project, especially if the thread is stronger than the fabric.
There are even specialty machines that have been developed for specialized types of hand sewing. The addition of a computer chip to modern sewing machines has allowed many home sewers to turn out beautiful embroidery projects, minus the blood-stains and infected fingers that are a component of learning to embroider by hand. The same goes for quilting, another hand sewing project that takes years of practice to perfect. A specialty machine saves time and effort even for those just beginning to sew.
Now that we’ve had a brief look at the start of sewing, you’re probably eager to get busy and start creating something. There are still lots of decisions you’ll need to make about the basics you require but understanding how sewing got started gives you a good foundation for moving on to sewing something of your own.
First Stitches – Starting To Sew
Before you can start sewing anything, you will have to decide what your first project is going to be. As mentioned before, any sewing project involves the same basic idea, you’re going to join two pieces of fabric together to make something. Clothing, home accessories or even a coat for your pet, any project that involves fabric by its very nature will require some degree of sewing.
If you are someone who has decided to start sewing, that first project could well be because you have discovered a large hole in a favorite garment, want to make a special quilt for a first grandchild or are fed up with the high cost of buying clothing for your kids.
By the way, now is a great time to get your kids started…no matter their age. I put together an entire guide to sewing machines for kids and teaching them to sew that you can see here: https://www.stitchandsew.net/best-sewing-machine-kids/.
Sewing has long been the favored method for the budget conscious to repair damaged garments and avoid the expense of having to buy clothing or home accessories.
Your First Project
- Decide exactly what you want to sew. That sounds easy, but some sewing projects can stop a first-time sewer from ever using a sewing machine again because of unexpected difficulties that come up, making it hard for them to get the result they expected. Examples of common first projects that are more challenging than a beginner realizes are patching jeans with premade patches or replacing a zipper. In other words, any project that involves trying to sew somewhere that is not as easy to access using a sewing machine as you might expect.
- Choose the fabric you’re going to use. Whether you’re wanting to sew to do mending, make yourself a sun dress, or create a pillow for the corner of the couch, it is important to understand what fabric works best before you put scissors to fabric and start cutting.
- Prepare the fabric for use. Brand new fabric from the store will need to be prewashed unless you can say with absolute certainty that what you are making will never, ever, need to be washed. The one exception to this will be if you are buying pre-made patches for knees or elbows.
- Put the pattern you are using on the fabric. This step can be as easy as drawing a square on your chosen fabric (in this case the square is your pattern) or as complex as pinning multiple tissue pattern pieces to the fabric. More details about transferring your project to fabric are found in Working With Patterns.
- Cut the project out. Unless you’re working with pre made patches mentioned above or pre cut quilt squares, you will have to put scissors to cloth at some stage in your project. Helpful hints can be found in the section Cutting Out Your Project.
- Sew the seams. In most cases, you’re going to be using your sewing machine for this part, but there are some things (back to patches again) that it may be easier to do by hand. Tips and tricks for sewing seams using your sewing machine are covered in Sewing Seams.
- Finishing touches. For many sewing projects, the finishing touch is simply running an iron over it to press out any wrinkles caused by the sewing process. Buttons and other decorative touches that need to be added by hand would be part of this step as well.
Gather Your Supplies
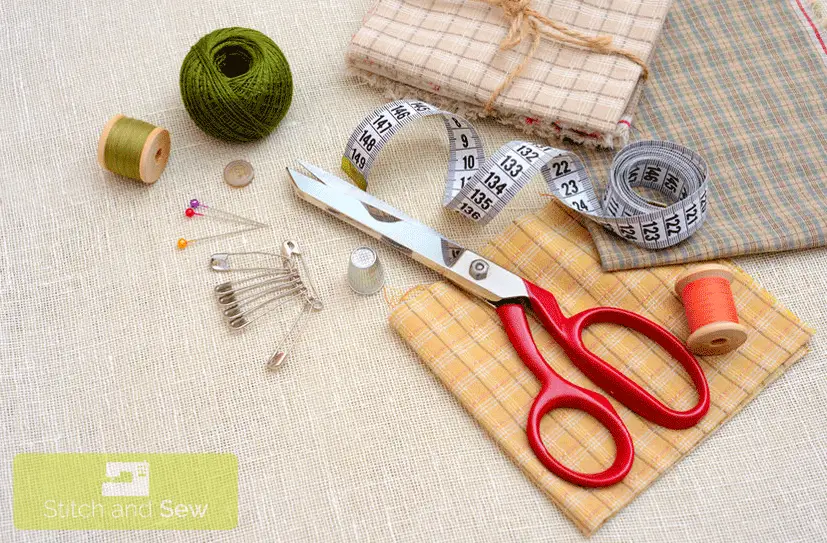
No matter what type of project you’ve decided to start with, any sewing that you do will require at least a few essential items to make your first adventure with sewing into a pleasant experience. One that you’re eager to repeat!
As keeps getting mentioned, sewing involves that you have at least a needle and thread. Pins are next on the list of must-have sewing supplies followed closely by scissors. Unless you’re determined to get the full sewing experience and do your project by hand from start to finish, a sewing machine is also recommended.
Two more essential tools for sewing that often are overlooked in a rush to start putting things together (and trying them on — if you’re making clothing for yourself) are an iron and ironing board.
Fabric and a pattern round out the list of basics that no one who is learning to sew wants to be without.
Now that you’ve got an idea about what you’re going to need to start sewing let’s break these items down and see the reasons that no sewing room is complete without having them on hand. More details about each item can be found in the section on Sewing Supplies
- Needles: These sharp pieces of metal with a small hole in one end are indispensable for sewing projects. You don’t have to be planning to sew by hand to need a needle, without one your sewing machine would be nothing more than a large and awkward doorstop. If you’re going to be doing any hand sewing, you will also need a thimble to protect your finger.
- Pins: These sharp pieces of metal do a great job of holding together the two pieces of fabric that you are planning on running through your sewing machine. Experienced sewers will often tell you that they ‘never’ use pins when sewing but if you keep asking, they will likely admit that their skill at using their sewing machine without pins didn’t happen overnight.
- Thread: Modern day thread bears little resemblance to the heavy (and sometimes quite bulky) fibers initially used to join skins together. Manufacturers have created thread in a wide variety of weights and a stunning array of colors. Details about choosing the right thread for your project are found in the Sewing Supplies section under Thread.
- Scissors: There are enough different types of scissors available that they deserve a section of their own in the Sewing Supplies section. For beginning sewers, two pairs of scissors are sufficient. A large pair for cutting fabric (never let someone use your fabric scissors for cutting paper!) and a smaller pair of snips for cutting thread.
- Notions: Notions are anything small that is associated with a sewing project that is intended to enhance the basic project. Needles, pins, thread, and scissors are all considered notions, but a few minutes spent in the notions section of the fabric store you’re visiting, and you will be dazzled by the wide range of time-saving tools available. Not to mention the fabulous things like appliques or buttons you can add to a project to turn plain into stunning.
- Pattern: A pattern can be as simple as a shape drawn on cloth that you follow to cut things in a straight line. It is recommended that beginners use some form of pattern for at least a little while until they are confident in their cutting skills.
- Fabric: Without fabric, a sewing project is harder to complete. Creative designers have made garments from other items (like Lady Gaga’s dress of meat), but for a beginner, fabric is a good starting point. See the section on Choosing the Fabric for helpful hints and guidelines on which fabrics are likely to work the best for specific projects.
- Iron: An iron has fallen from favor in households where speed is the order of the day, but a good steam iron is indispensable for giving a crisp professional finish to newly sewn seams.
- Ironing Board: Like the iron, an ironing board has gone the way of the dodo in many households. You can substitute any flat surface for early sewing projects if it is well padded to keep the heat of the iron from damaging the surface. Different styles of ironing boards and accessories are available for serious sewers, but for beginners, a regular adjustable board is more than suitable.
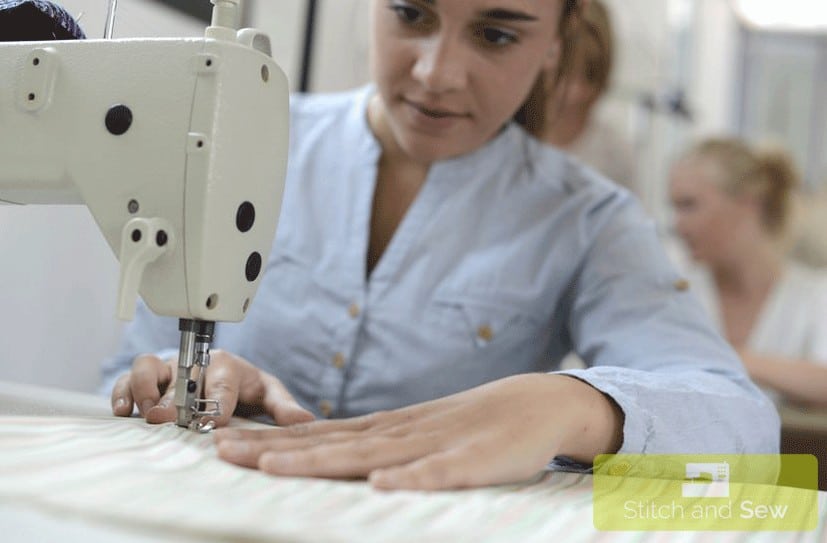
Your Sewing Machine
No discussion of the basics that you need for sewing would be complete without looking at sewing machines. If you don’t have a machine yet, please read these reviews. Hand sewing is unavoidable for certain projects, but for someone who is just taking their first steps in any type of sewing, it is wise to become familiar with modern sewing machines and how sewing projects can be created easily and quickly with a basic sewing machine.
The idea behind a sewing machine is simple. A needle-like one used for hand sewing moves evenly in and out of the fabric, pushing the thread through all the layers to be joined together. Another thread comes from the bobbin located under the main sewing surface and thread from the needle loops around it creating a firm stitch. Repeating this basic straight stitch 6 — 10 times per inch quickly creates a strong join and gives first-time sewers a feeling of satisfaction at what they have accomplished.
Modern sewing machines come with incredible functionality that quickly lifts a beginner’s sewing projects out of the ordinary. Fancy stitches and more are now available on even basic machines at the touch of a button. Here are some of the basic stitches that you will frequently be using when you use a sewing machine:
- Running stitch: This is the primary stitch utilized by all sewing machines for seams, hems, topstitching, and basting. It is the stitch that made a sewing machine the useful tool it is today.
- Zigzag stitch: This stitch is exactly what it sounds like, a back and forth stitch that moves from side to side, one stitch on the zig (right) and the next stitch a little bit forward on the left (the zag). It is used to keep edges from fraying and make a neat finish to a seam, to sew on patches or applique and to attach buttons quickly.
- Buttonhole stitch: This is the basic zigzag stitch done very close together to form the buttonhole. Specialty feet and computerization have made sewing buttonholes quick and easy for beginners and experienced seamstresses.
- Blind hemming stitch: This interesting stitch takes a bit of practice to perfect for beginners, but with a little bit of practice you will be able to sew hems on clothing using your sewing machine with virtually no sign of the stitches showing on the front. This is truly a time-saver when it comes to hemming large items like curtains or fancy ball gowns.
- Overlock stitch: Similar to a zigzag stitch, this stitch is also useful for covering raw edges on applique or seams, providing a clean edge with a minimum of effort.
If you don’t have a sewing machine, I did an extensive review of what I consider to be the best sewing machines for beginners.
Supplies – Tools to Make Sewing Easier
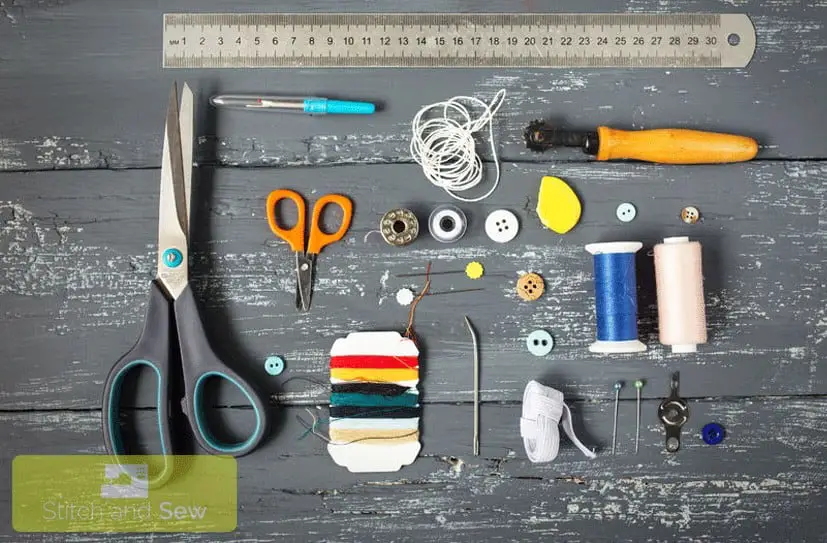
You’ve got your sewing machine, decided on a project and are itching to start sewing. Before you cut anything out though, there are still some basics that a beginning sewer needs to make their project go smoothly from start to finish. I’ve been sewing for close to 20 years now and one of the things that frustrates me the most whenever I start a project is having to leave what I’m doing because I have forgotten my pin cushion and seam ripper in the last place that I was working with them. It would be even more frustrating to realize that you could use one of these sewing essentials and you don’t have them at all, meaning a quick trip to the store will be in order.
Needles
There are three basic parts to a sewing needle. The shaft is the body of the needle, long and sturdy and thin enough to pass through fabric easily. The eye is a small (sometimes very small) hole that the sewing thread goes through. Last is the point of the needle itself, where the shaft of the needle tapers down to a wickedly sharp point, just ask anybody who has been poked or perhaps stuck themselves with one, whether by accident or on purpose.
Hand Sewing Needles
Hand sewing needles come in a variety of thicknesses and weights. They are all the same in that there is a hole in the thickest end where the thread goes. The needle tapers to a fine point at the opposite end from the eye. This point is generally extremely sharp, but it can become dull in time after being pushed through some of today’s fabrics. In addition to a basic sewing needle that can be used for most sewing done by hand, there are several specialty needles that a beginning sewer should be aware of.
- Sharps: These little needles are extremely sharp and extremely short. Favored by quilters they are extremely fine with tiny eyes to minimize the holes that may be left in delicate quilt fabrics.
- Embroidery: Embroidery or crewel needles have an extremely sharp point and a longer eye for using with thicker threads.
- Darning: This is a relatively thick needle with a blunt point and a large eye for using with wool or heavy thread for darning.
- Leather: A heavy needle with a very sharp point.
- Tapestry: Heavier needle with a slightly bent tip or a curve in the whole needle. This needle also typically has a larger eye to make it easier to use with heavy tapestry thread or wool.
- Upholstery: A heavy curved needle with a small eye.
Sewing Machine Needles
Sewing machine needles have all the same features of a standard needle, but they are all a standardized length and have a slightly thicker section at the opposite end of the eye of the needle. This section is rounded with one flat side. The needle is inserted into the sewing machine (flat side facing away from you) and held in place by a small screw that must be tightened before sewing starts so that the needle doesn’t fall out of the machine. The eye of the needle is close to the point.
Needles used in sewing machines are available in one length and standard weights. Weights are given in American and European form. The most common sizes that the beginning sewer will use are 12/80, 14/90, or 16/100. Most packages of sewing needles will show the needle size on them in this format, which is American/European weight.
- Universal: The most common type of sewing machine needle. Usually, comes in a needle pack that contains the three most popular sizes.
- Ballpoint: Identical to the universal needle, for the most part, ballpoint needles have more rounded edges and are intended to be used with knit fabrics and push the fibers out of the way of the needle instead of possibly breaking or weakening them with the sharper universal needle.
- Jeans: Heaver weight needle designed for use with denim and other heavy fabrics. These needles have a slender eye with a strong, sharp point.
- Leather: Heavy needles like jeans needles but with a triangular shaped point to make a clean hole in non-woven fabrics, like leather or vinyl.
- Topstitching: These needles feature a very sharp point and a long eye to handle heavier topstitching thread.
Thread
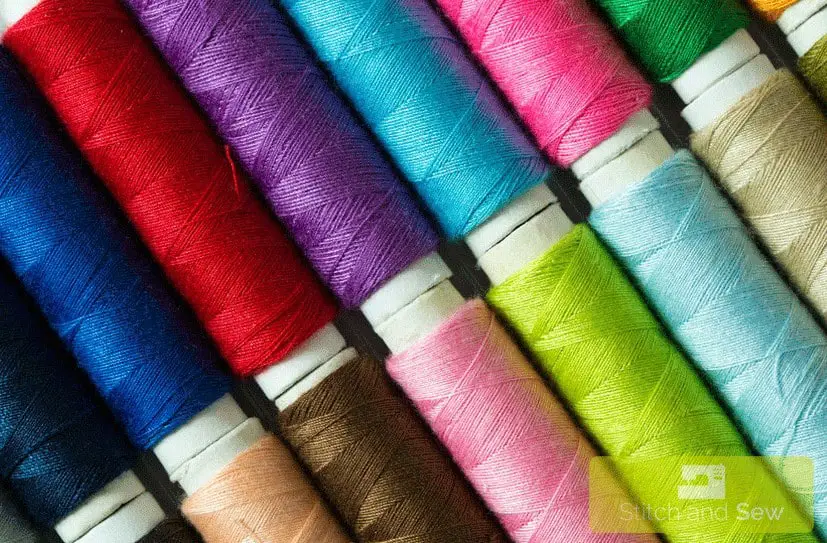
With so many types of needles to choose from for your sewing machine, a beginning sewer will be relieved to know that there are three basic types of thread that will get the most use once they start sewing. What the thread is made from is important as well as the weight of the thread.
When you are first starting to sew, you will be most likely to use thread made from polyester, cotton, or a blend of the two. Specialty threads are out there, but until you are comfortable sewing fabric that is a little more challenging, stick to the basic threads, and your projects will turn out well.
As you stand in front of the thread selection at your fabric store, you will see that polyester thread is the clear favorite of manufacturers. It is strong enough to handle virtually any sewing project you might want it for, and the color array is mind blowing. Pay attention to the color number so that you can get additional thread if you accidentally don’t buy enough. Knowing the type of thread you’re using is important because cotton thread — like cotton fabric — can shrink after sewing which could cause problems if your garment is made exclusively from polyester material. An excellent choice for beginning sewers is a cotton wrapped polyester thread which is durable and works well for most sewing projects.
A general rule of thumb as you start your adventure in sewing is that you can never have too much white (and black) thread. The staples in my sewing room are a 1,000-meter spool of white polyester thread next to a 500-meter spool of black polyester thread. These two spools handle just about all my sewing needs on a daily basis, and I’m always sure to have an extra bobbin or two filled with them ‘just in case.’
Thread Weight
Most spools of thread have the weight indicated on them somewhere, but it can be time-consuming to search around the outer edges of a spool looking for it. Manufacturers have standardized the descriptions of the thread to give you a quick way to decide on the weight of thread you want to use. The thinner, or lighter weight the thread — meaning it will also break easily — the higher the number. Often the weight is shown followed by a slash with 2 or 3 behind it — for example 40/3. This is telling you the number of plies in that tiny strand of thread.
- Light: Lightweight thread is a fine, very light thread that shows a weight of 60 on the spool.
- Thin: Another very light thread, this is a bit heavier than light thread with a weight of 50.
- Regular: 40 weight is the most common type of sewing machine thread available today. It is used in projects ranging from quilts to clothing.
- Upholstery: This thread has a weight marking of 30 and is primarily used for sewing heavy weight fabric that would be used for curtains or to cover furniture.
- Heavy: At a weight of 20, this is the heaviest thread on the market today. It is used for decorative stitches that might see a lot of wear or stress on them.
Scissors
If you have difficulty imagining your house without scissors, it is even harder to imagine a sewing room with only one pair of scissors. From all-purpose, crafting scissors to tailor’s shears and electric scissors, a well-equipped sewing room will always have at least one pair of scissors within easy reach.
When you are first starting your sewing project, as soon as the pattern is pinned in place it will be very tempting just to grab your kitchen scissors and start cutting. Don’t give in to the temptation. Kitchen scissors work well in the kitchen but to make the best cuts in that beautiful fabric you have chosen you will need a pair of scissors that are only to be used for sewing. My household of men quickly learned that taking Mom’s sewing scissors to cut out something they wanted to save from the paper was NOT a good idea. Scrapbookers everywhere will tell you that nothing dulls scissors faster than cutting paper with them.
The scissors that live in my kitchen have also been used to cut interesting things like thin wires and other items, so they have more than one unexpected dull spot that can make a mess when I pick them up by accident and try to cut even a small piece of fabric. Thread can dull scissors as well so it is wise to have a special pair of scissors handy to your sewing machine just for snipping threads unless your sewing machine has a conveniently placed thread cutter.
- All purpose or craft scissors: These basic scissors have long blades with pointed ends, designed to make long cuts as well as small, precise cuts in small areas with the pointy ends.
- Dressmaker’s shears: Typically shears have longer blades that all-purpose scissors. Their blades can be from 7 – 10 inches long making cutting fabric out with them easier. The blades in these shears are tapered and have one blunt and one pointed end. The blades also have what is known as a knife edge where the top blade is at an angle to the bottom blade which lets them cut through fabric more accurately.
- Snips: These are often small bladed scissors with a spring holding the blades apart. There are no finger holes for use when cutting, they are typically pressed shut to snip threads or stitches using the thumb and index finger. Once the thread is snipped, releasing pressure on the snips lets them open fully again.
- Pinking shears: Pinking shears are designed with a serrated edge on both blades that gives a more finished edge to fabric and helps to reduce fraying on some loosely woven fabrics.
Rotary Cutters
A rotary cutter features a single cutting edge that sewers can use to cut out fabric. Although the first rotary cutter was designed for cutting out clothing, it quickly turned into the favorite tool of quilters.
An extremely sharp circular blade is attached to a handle with a blade guard that slides into place to protect the blade and unsuspecting fingers that might pick up the cutter by accident using the wrong end. Blades can be sharpened and come in a wide range of sizes. It is even possible to buy specialty blades to cut zigzag lines giving a finished edge to the cut fabric similar to what you get using pinking shears.
Sewing Notions
Sewing Notions are defined in Wikipedia as small objects that are usually attached by sewing to a larger project. The article also says that this is a very broad definition that also covers any small tool or item used in the act of sewing. That’s why in the notions department of your favorite store that also sells fabric you’ll find enough small things to entertain a toddler for hours and a serious sewer for a lifetime.
The following are some items that you could make do without when you start your first project but having tools that are designed to help make sewing easier will make your sewing go more quickly and keep your frustration to a minimum right from the start. Needles and thread aren’t included in this list because they are basics for any kind of sewing and they deserve a section all their own.
- Pins: In today’s fast-paced, let’s get things done world, pinning projects together before sewing them is often overlooked or minimized as too time-consuming to be useful. While I often hold two pieces of fabric together between my fingers to sew a short seam, experience has taught me that pinning things works better. In the case of curved seams or a seam with a small seam allowance — on quilt blocks for example or very slippery/stretchy material, using pins (sometimes lots of pins) is crucial to the success of your sewing. Pins need to be sharp, but the type of pin you use depends on personal preference. There are specialty pins for quilts and embroidery and basic straight pins come with a wide enough variety of heads (the end of the pin that is not sharp has a topper or head) to suit everybody’s preferences. It’s recommended to have a pincushion or magnetic pin catcher to keep pins tidy and close at hand.
- Marking tools: When I was first learning to sew in high school, the options for marking your project out were very basic. For someone taking their first tentative sewing steps, the teacher insisted that all marks from patterns be transferred using dressmakers’ tracing paper, a tracing wheel, and even the dreaded tailor tacks. As we progressed in experience, we were finally allowed to push pins through the pattern dots and mark the position using a pencil. Today sewers have an amazing array of options for making marks, ranging from gel pens that draw a nice bright line that disappears with heat from an iron to highlighting tape that marks where you want a line to go but lifts off cleaning when you’re finished with it.
- Measuring tools: Rulers in more than one length are valuable to a beginner. The more sewing you do, the more you’ll find that there are custom straight edges available for almost any project. Quilting has the widest range of straight edges designed to measure as well, but you will also want to have some type of tape measure on hand as well as a long yardstick.
- Seam ripper: Incredible as it may sound, there will come a time when you want to get your carefully sewn seams undone. Mistakes happen even to the most careful sewer and having a proper tool on hand makes the annoying task of undoing stitching much easier.
- Thimble: If you’re going to do any type of hand sewing a thimble will be one of the most useful tools you can have. Worn on the middle finger of the hand you generally use for sewing, modern thimbles are available in several different materials. A metal thimble is still the most common type manufactured, but plastic, ceramic and silicon thimbles are also available.
More Sewing Notions
The seam rippers and marking tools mentioned earlier are all classified as notions, but you won’t find these included in the section on the back of most patterns that lists the notions you’ll need to complete the project you’re considering. While you can use different types of the notions listed below, most of them are necessary for the finished product to turn out the way you expected.
- Interfacing: Interfacing is a basic woven fabric that is used to stiffen certain parts of a sewing project. Collars, cuffs, and waistbands all generally require interfacing unless the material is extremely heavy, while tote bags and purses all use some weight of interfacing to help the bag keep its shape.
- Buttons: Ever since buttons were invented as a mechanism for holding things together, home sewers have embraced this handy item, and they are the gold standard for not only keeping clothing fitting snugly but making sure all other openings in fabric close securely.
- Zippers: Zippers were developed when clothing manufacturers saw that this useful item could help children to learn to dress themselves. Before being developed for apparel, zippers were primarily used in rubber boots and tobacco pouches. They were considered better than buttons because they made a firm join between two edges that might gap open if buttons were used to close them.
- Snaps and Buckles: Move over buttons, more time and labor-saving devices were created with the development of snaps and buckles that could be used to join clothing and other projects together. Both of these handy notions come in a wide variety of materials and along the way have become easier and quicker to add to projects than buttons.
- Velcro: Velcro is the trade name for a product line of heavy duty hook and loop closures that appear in too many types of products to even try to list them here. As far as notions go, hook and loop closure tape is available in sizes and colors suitable for just about any project a beginner wants to try out.
- Bias Tape: This is a narrow piece of fabric that has been cut out on a 45-degree angle from the straight grain of the fabric it is taken from. Quilters often make their own bias tape from a square of the fabric they have used in the front (or back) of their quilt, but every store that offers notions will have a display devoted to bias tape and similar products that are designed to cover and neaten the cut edge of fabric.
Fabric
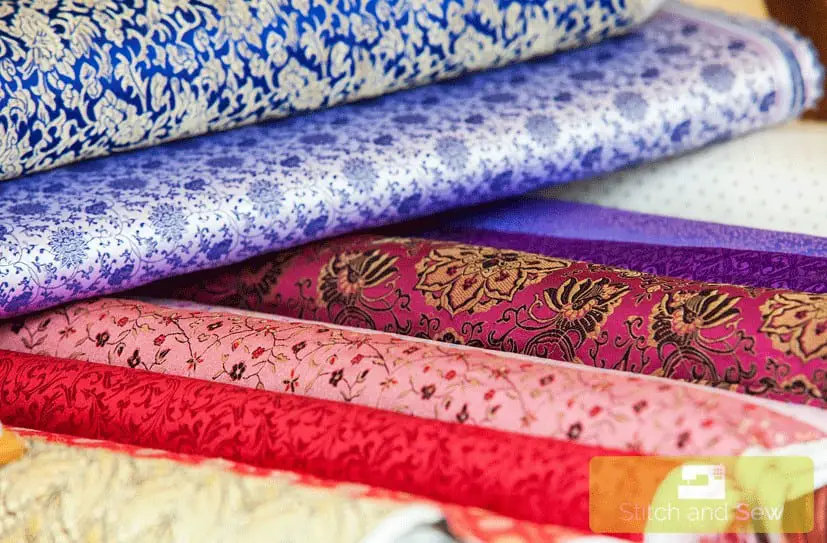
You’re standing in the middle of your local fabric store and if it is your first visit you may be feeling a bit like Alice in Wonderland. Beautiful fabric everywhere you look, hanging on long rolls and displayed on small circular tables. For someone who is planning their first project, there can be too much choice available, and it is very possible that you’ll end up walking out with fabric that you absolutely adore, but that is also one that just won’t work for the project you have in mind.
Your first line of defense against getting fabric that will seem like it is fighting you every step of the way is talking to the salespeople at the store. Since they deal with fabric all day every day, they will likely have some good suggestions as to the best fabric for what you’re trying to make.
If you are using a pattern, the back of its envelope (or the instructions on-line) will give you suggestions for the type of fabric to use. Experienced sewers may be able to get away with using a different fabric than the one recommended by the pattern designer, but for someone just starting out, it is best to stick with what is recommended. The designer has already taken into consideration the weight and texture of the fabric and visualized how it will look when sewing is complete.
The first rule of fabric is to decide on your pattern first. If there are no fabrics specifically recommended on the pattern, don’t fall into the trap of assuming that any fabric will do. Take some time to talk with an experienced sewer.
People who work in fabric departments or stores are a great resource for finding out about what fabric you should use. Many fabric stores have displays up of projects that have been sewn by the staff members so their insights on how a fabric will work — or not as the case may be — are very valuable to someone who is just starting out.
Best Fabric Choices for a Beginner
- 100% Cotton: With its firm weave, 100% cotton is the perfect material to start sewing with. It is usually easy to unpick stitches from, stretches slightly when being steam pressed to help seams that aren’t perfectly straight lie flat, and generally is the best all-around choice for taking your first stitches on.
- Cotton blends: Cotton also comes blended with several other fibers, such as linen and polyester. These blends, particularly the cotton/polyester ones, are also very easy for beginners to practice their sewing on, plus they have the added advantage of not wrinkling quite so much as cotton does.
- Linen: Linen is close behind cotton as a good fabric to start sewing with. It is light-weight and easy to sew making it an excellent choice for your first project.
Prepare Your Fabric for Sewing
It is always a good idea to prewash fabric before sewing. Most fabrics come with some sort of finish put on them as a preservative to keep them from fading or otherwise arriving at the store in less than perfect condition. Cotton will always shrink when it is washed at first, so it is wise to prepare your fabric by washing, drying and ironing it before starting to work with it.
Fabrics to Avoid When Learning to Sew
The fabric store is full of them. Delicate, clingy fabrics that feel so wonderful to touch. Beautiful, body hugging knits are plentiful too, but they can stretch in unsuspected ways and all your careful cutting and piecing together ends up stretched completely out of its intended shape when it comes out of your sewing machine.
Cutting these delicate fabrics is also challenging. Even though you’re sure you are cutting right along the line of the pattern that you have carefully pinned in place, they are easily pushed out of alignment by your scissors, giving you a jagged line instead of a smooth edge that you can use as a guide to keep your seams straight.
Knits can be especially difficult for beginners to work with since cut edges tend to roll up and they get stretched and pushed by the scissors when you cut them, making the cut edges uneven.
Not Recommended for Beginners
- Satin: Shiny, slippery and feels so good on, satin is a fabric that lures many sewers into giving it a try but it’s hard to cut out and sew so should be avoided until you’ve gained more experience.
- Chiffon: This sheer fabric can be a nightmare for experienced sewers so your first sewing project should not be a prom or bridesmaid dress. The experience could put you off sewing forever.
- Velvet: Velvet brings its own set of challenges to sewing. It has a nap, meaning that if the pieces of your project aren’t all cut facing in the same direction, they will all look different. Velveteen is made from cotton, and it is somewhat easier for a beginner to sew, but it still isn’t recommended for your first projects.
- Jersey: Any type of a jersey knit (even one made from cotton) is capable of stretching beyond recognition once it runs through your sewing machine. It is also difficult to cut because the fabric fibers push away from the scissors instead of being cut cleanly.
Terminology (Sewing Vocabulary)
Like anything else, sewing has a vocabulary all its own. While you’re not very likely to hear anybody other than a weaver talking about the ‘warp’ or ‘weft’ of fabric — these terms both refer to the threads that are woven lengthwise and crosswise in fabric — there are some basics that anyone starting to sew should be familiar with.
Fabric terms or descriptions that you want to take note of are ones you see on patterns under the heading of ‘not recommended for”. Many a beginning sewer has come to grief when they overlook these suggestions, it takes a lot of experience and talent to make an unsuitable fabric look good in unexpected styles, that’s why clothing designers get the big bucks.
The terms that follow are important because you’ll see them a lot on patterns. Knowing what a pattern means by its instructions, along with why certain fabric descriptions are important will help your sewing get off to a good start. No one likes to start something and end up throwing it into the garbage halfway through because the fabric just isn’t working the way you saw it in your mind.
Common Fabric Terms Beginners Should Learn
- Right side/wrong side: Most fabrics have a right and a wrong side. The right side is the one that you want to be facing out once the project is completed. On fabric, it is usually brighter or darker in color than the reverse or wrong side. Cotton fabrics are tough to determine the right or wrong side of, usually both sides are equal in color and texture, making them excellent for beginning users.
- Selvedge: The selvedge is just what it sounds like. It is the edge that runs along both long edges of a bolt of fabric. It is a finished edge that keeps the fabric from fraying.
- Straight of grain: This is a straight thread running parallel to the selvedges. Patterns all have long arrows printed on them that say, ‘Place on the straight of grain’ which means you’ll need to measure the distance accurately between the selvedge and the arrow and pin the fabric firmly to keep it from shifting. Not getting a pattern piece straight on the material when it needs to be can complicate your sewing because the fabric may stretch unexpectedly while it is being sewn. Cotton fabrics usually have a straight grainline crosswise and lengthwise, making pattern layout much simpler.
- Diagonal: An imaginary line running at 45 degrees across fabric is the diagonal — picture a line cutting through the middle of the right angle formed by the cut end of your fabric and the selvedge. Some pattern pieces must be cut on the diagonal to work properly, and fabric with distinct diagonal patterns are difficult to sew properly as well.
- Nap: The nap of fabric is the raised surface of certain types of material. Velvet is a good example of a fabric that has a nap. Pattern pieces cut on fabric with a distinct nap must all be laid out facing the same way because when something brushes across the nap the appearance of the fabric changes, often quite dramatically.
Working With Patterns
Read Your Pattern
It may seem a strange idea to read through a pattern before doing anything else, but even the most experienced sewers take the time to look through a pattern they haven’t made before because it offers helpful suggestions all the way through that will keep you on track. While the placement of the pattern pieces on fabric often is not crucial in beginning projects, it is still a good idea to know how individual pieces look before they are sewn together. The instruction sheet offers suggestions about how to lay the pattern pieces out on your chosen fabric as well. Different sizes will often require different pattern layout, so it is wise to have a look at how it is recommended to lay out your chosen pattern in the right size before starting to pin it to the fabric.
Most patterns today come with multiple sizes marked on the same pattern. Cutting lines for these sizes are shown by different line styles, usually with a small arrow pointing to the line at a few places on each pattern piece, showing which line is for which size. When cutting curves like armholes or necklines, you’ll notice that these lines converge until they are virtually on top of one another. Do your best to cut on the proper line, even in these circumstances because otherwise your sewing may bulge or sag in ways that you don’t want it to.
If you think you may want to lengthen or shorten your garment, there are marks on the pattern pieces that show where is the best place to make this type of adjustment. Looking for these marking in advance will save you trying to figure out how best to shorten something without ruining the line of it. Other instructions that are shown on the pattern piece is how many pieces of it you’ll need to cut. Generally, most pattern pieces are cut from two layers of fabric, but some parts may require four pieces while pockets and facings may only need one piece each.
Patterns are mostly printed on flimsy tissue paper. The tissue paper used is sturdy enough to be used multiple times but will often tear unexpectedly. You will need to cut apart the pieces of the pattern that you are planning on using — remember that even though tissue paper is flimsy, it is still paper and you shouldn’t use your sewing scissors for cutting out the pattern. Ironing all the pieces you will be using with a low heat setting on your iron will flatten them out nicely, and you can be sure that you cut the piece out correctly.
Pin Your Pattern Carefully
Once you have ironed all the pattern pieces flat and prepared your fabric, it is time to get down to the serious business of pinning all those pieces to the fabric. By this point in the process, you have already looked at how the pattern designer recommends the pieces are positioned, and for beginners, it is very wise to follow these instructions.
Marks on the pattern show how the piece should be positioned so that the straight of grain runs correctly in the finished item. Use a meter stick or other long ruler to measure the distance from the grainline on the pattern to the selvedge. Once you’re sure that the first grainline is even with the selvedge, you can use it as the measuring point for other pattern pieces. Some pieces — like waistbands — may be designed to be cut on the bias to maximize the stretch available even on non-stretch fabrics so note carefully where the straight of grain marking is on each pattern piece you are cutting out.
Don’t skimp on the number of pins you use to hold the pattern to the fabric. Put the pins in parallel to the cutting line and close to it, so that the pattern will stay tight to the fabric when you start cutting. Avoid pinning at right angles to the cutting line because it can be very easy not to notice a pin when you’re cutting a long edge. Pins will dull your cutting scissors almost as quickly as paper.
Your prepared fabric should be ready to go. It has been washed and pressed and most importantly, put with the right side of the fabric facing in. There will be some marks that need to be put on the fabric as sewing guidelines, and they should always be placed on the wrong side of the fabric unless otherwise indicated.
Cutting Out Your Project
Cut with long, even strokes if possible and do your best to stay right on the marked cutting line. This is especially important if you are using a pattern with multiple sizes printed on it and you lose track of which size you meant to be cutting out.
Use scissors with long, sharp blades and do your best to stand with your body at right angles to the scissors. You may have to move the fabric with the pattern pinned in place to find the best cutting angle, but it is important that you are comfortable when you cut out multiple pieces. When I have overlooked this simple bit of advice, I’ve even ended up with blisters on my thumb as my comfort grip scissors were held too awkwardly in my hand to work properly. Leaning across cutting surfaces can also cause back problems or aggravate existing issues. As well, any motion that you make multiple times unnaturally can lead to repetitive stress injury.
As you cut each pattern piece from the fabric leave the tissue paper in place and put the piece to one side. Move the fabric on the cutting table if you need better access to the next piece you want to cut, or else move around so that you’re not leaning across the cutting surface or cutting at an awkward angle. Reaching across and cutting parallel to yourself instead of at right angles can make your cuts end up further away from the cutting line than you would like.
Transfer Marks From Pattern To Fabric
Once you’ve finished cutting out and cleared off the cutting surface, it is time to transfer the pattern markings from the pattern to the fabric. When I was first learning to sew, my teachers insisted that all marks on the pattern must be transferred using dressmakers carbon paper and a tracing wheel. This is a tedious task that has mostly disappeared from use by beginning sewers. While dressmakers’ carbon paper and a tracing wheel do still have a place in a sewing room, most easy projects really don’t require them.
The marks that are necessary to be transferred from the pattern to the fabric are ones that are essential to the look and fit of the result. These may be dots for positioning pockets, or dots and lines showing dart placement and the stitching line. There will also be notches on a pattern, designed to help with aligning pattern pieces that need to fit in a specific way or to make sure that a long seam will match at the top and the bottom. Dots on patterns also show button and buttonhole positioning as well as zipper placement.
There is a wide variety of marking instruments on the market today. The most common way of transferring dots and lines is by pushing a pin through the tissue pattern piece in the center of the marked dot, making sure that the pin stands at right angles to the fabric and goes through both layers. Use the marking instrument of your choice, whether tailor’s chalk or the newest option, gel pens that disappear when heat from your iron is applied, to mark a small dot where the pin meets the fabric. Connect sewing lines shown between the dots by using a ruler and the marking method of your choice. Don’t forget to mark both sides of the pattern piece you’re working with if you have cut it out from two pieces of fabric. Always place marks on the wrong side of the fabric, you can put temporary dots on the right side later on.
Notches can be marked two ways. One school of thought says notches should always be cut out in their entirety, leaving a little triangle outside the cutting line to be aligned with its mate on another pattern piece. On the other hand, you have sewers who are too impatient to take the extra second required to cut carefully up and down the tiny triangle that indicates a matching spot. Such sewers prefer to cut straight along the cutting line and make a small — and it should be very small — clip at the spot where the notch is indicated. You’ll notice that in some cases, sleeves, for instance, there will be a single notch on one side of the pattern and a double notch on the other. These notches are crucial to take note of — I was very annoyed with myself the first time I didn’t accurately notch sleeves that I was sewing and ended up very carefully sewing in a sleeve that hung backward on the top I was making. Not a happy moment in my sewing room!
Getting To Know Your Sewing Machine
Your Sewing Machine By The Book
There it sits, your sewing machine, waiting to help you create beautiful clothing or craft items. For someone who is just starting out, their sewing machine can be a tool that they have a love/hate relationship with. You’ll be happy to know that all sewing machines come with the same basic features and because the design of a sewing machine itself hasn’t changed in over a century, those features are located in similar places on most machines. Once you’ve learned how to use a sewing machine, this knowledge transfers easily from one machine to another, just like driving a car, the principles are all the same.
The user manual for your machine is an invaluable resource, so it’s smart to spend some time looking through it. You will probably find yourself going back to it frequently as you take on more complex projects like buttonholes, but learning the names of the essential parts will give you a good start on the road to successfully using your sewing machine.
Common Sewing Machine Parts
- Take up lever: Every sewing machine has one, this is the lever in the front of your machine (it may be slightly recessed and a bit hard to see at first) that moves up and down while keeping tension on the thread. It pulls the thread from the spool and back up from the fabric by means of this up and down motion. Located directly over the needle, it usually has a small slot ending in a round hole that thread drops easily into when you are threading your machine.
- Spool pins: Pins at the top of the machine where your spool of thread sits. Your machine may have one or two of these.
- Bobbin winder: Small peg that is usually on the top right-hand side of your sewing machine where the bobbin is held securely in place while turning and winding thread on it.
- Balance wheel: This is a wheel or knob on the right side of the sewing machine that manually moves the needle and feed dogs one stitch at a time.
- Feed dogs: Metal teeth that move up, back and down to move the fabric through the sewing machine under the presser foot.
- Presser Foot: Different types of feet can be attached to a shaft that is raised or lowered by a lever. Sewing can only be done properly with the presser foot lowered, holding the fabric firmly to the feed dogs.
- Reverse Lever: On the front of your sewing machine, this lever is pushed to reverse the direction of stitching. Some sewing machines allow for stitching backward by moving this lever to a fixed position.
- Thread cutter: Most sewing machines have a built-in thread cutter that cuts the thread when a seam is finished, and the fabric is pulled to the left of the sewing machine and back towards the sewer.
- Needle threader: One of the handiest inventions for modern sewing machines this small manual device will quickly grab the thread that has been threaded through the take-up lever and tension areas.
- Free arm/flatbed: These are basic sewing area variations. A free arm allows you to sew small curved seams, cuffs for example while the flatbed is exactly what it sounds like, a flat sewing surface that supports large seams and other parts of a project as the sewer guides the fabric through the presser foot and feed dogs.
- Foot controller: Used to control the sewing machine speed, the controller usually plugs into the lower right side of your sewing machine.
Dials, Buttons and Knobs
Your sewing machine manual is also an excellent resource to help you figure out what all the dials and buttons on your sewing machine do. Most of today’s machines have at least one large knob that can be used to select stitch length and width, moving you from the basic straight stitch to zigzag stitch quickly and easily. Many models also allow for the sewing needle to be positioned to the left or right of the center of the presser foot.
Adding small computer chips to sewing machines has increased the number of specialty or decorative stitches that beginning sewers will delight to try out. These stitches are often accessed by push-buttons that show numbers or pictures that represent the type of stitch being selected.
Other dials on your machine are used to adjust the thread tension as it goes through the machine, helping to keep the stitches in the fabric neat and even on both sides of the fabric. A small screw is used on some models to adjust bobbin tension directly on the bobbin or on the bobbin case itself.
Standard Sewing Machine Stitches
These two stitches are the most commonly used by beginners:
- Straight Stitch: Virtually every project you work on will use some size of straight stitch. A longer stitch is used for quick basting of pieces together, while general stitching is usually done with a short, straight stitch that makes 10-12 stitches per inch.
- Zigzag: Your sewing machine makes quick work of sewing a zigzag pattern. Selector dials or sliding control knobs make choosing the stitch width and length easy.
Things That Can Go Wrong
The manual that comes with your sewing machine is also a valuable resource when something goes wrong with your sewing. Thread tension is one of the most common glitches that happen when we first start sewing. Your sewing machine may even seem to suck the starting edge of your sewing down inside instead of moving it smoothly over the feed dogs. Sewing machine manuals have clear, easy to follow diagrams that help you to easily see where the thread should go through the machine and how to remove fabric from under the sewing surface if necessary gently.
I once managed to get the bobbin holder in my sewing machine so jammed with thread that it was nearly impossible to turn the Balance Wheel manually. How did I this? I had fallen into the bad habit of not making sure that both the upper and lower threads were firmly held out of the line of stitching when I made the first stitches at the start of a seam. This resulted in one or both of the threads being pulled down into the bobbin area of my machine and tiny lengths of them gradually built up in an extremely narrow gap between the bobbin case and the shuttle that moves the top thread around the bobbin. The buildup was removed, eventually, but it meant a trip to the repair shop and a week or so without the use of my machine. Some days when I’m in a rush to start sewing, I still forget to keep the threads firmly under the presser foot. Fortunately, it hasn’t caused any more problems with my sewing machine.
Avoid Time-Consuming Problems
- Instead of starting a straight line of stitching at the very edge of your fabric, position the fabric about 1/4 of an inch in from the edge and do a few short stitches in reverse before sewing the seam itself. Continue sewing forward, and you have a firm start to the seam. Make sure your starting threads are firmly held above the sewing surface by the presser foot.
- Do practice stitches on a plain piece of fabric to get a feel for how your machine sews and what the stitch looks like both top and bottom. You could even use a different colored bobbin thread for these practice sessions so that you get a better idea of exactly what the stitches should look like.
- Change your needles frequently. Needles can get dull and make messy holes in fabric that affect the appearance of the finished project.
- Avoid sewing over pins.
- Sew slowly until you’re confident managing the speed of your stitches with the foot controller.
Sewing Seams and More
Sewing Straight Lines
Sewing in a straight line can be challenging if you’re doing it by hand. Using your sewing machine, it is possible to turn out beautifully straight seam lines with a minimum of effort. A plain, straight stitch is the foundation that all sewing builds on.
The face plate of your sewing machine (this is the metal plate where the feed dogs and the presser foot meet and hold the fabric in place when you are sewing) has lines on it that indicate the most commonly used seam allowances. These lines will be labeled in either fractions of an inch (3/8) or millimeters (10) and show the distance from the raw edge that the seam will be. Keeping the raw edge of the fabric running along the desired line as you sew will give you a perfectly straight line of stitching with a minimum of fuss. Many sewing machines feature these marks on either side of the presser foot for ease of sewing a variety of projects. If you are having difficulty seeing the marking line easily, you can put a piece of colored tape on the line you’ll use most often (5/8” or 10 mm is the most common) and then line up the fabric edge along it as you feed the fabric slowly through the presser foot and needle.
Straight Line Stitching
- Basting: This is a simple long stitch that you will either do as a temporary seam that you plan to remove (when putting in a zipper) or on one piece of fabric that you want to gather up so that it fits evenly to a short piece of fabric.
- Seams: Most of the sewing projects you do will involve sewing a seam, whether straight or on a curved edge like an armhole. Craft projects typically use 1/4” (6 mm) or 3/8” (9 mm) seams, while clothing patterns call for a standard 5/8” (16 mm) seam allowance.
- Bias tape: Bias tape can be attached with a wider basting stitch and then sewn in place with your regular short straight stitch. The first fold of the open bias tape provides a reference point for keeping your sewing straight. Make sure that the center of the presser foot is on the line as you sew and you’ll have a straight seam line.
- Rolled Hem: This is the simplest possible hem finishing for garments. The raw edge of a project is folded over 1/4” – 1/2”, pressed, and then folded up the same amount and pressed again. Sew a straight stitch close to the fold, using the notch in the presser foot as your guide to keep the seam straight.
- Topstitching: Topstitching is done in the same manner as the straight stitching on a rolled hem, but the outside edge of your presser foot is used as the guideline because topstitching is always 1/4” (6 mm) away from the edge of what is being sewn.
More Challenging Seams
Sewing a straight seam can seem overwhelming at first, but once you’ve mastered using the markings to guide your fabric placement, things will go smoothly. Working with curved pieces of fabric can be easily done when you have marked the faceplate guidelines for ease of reference. There will be times, however, when you must rely on the markings that you have transferred from the pattern to get the sewing line right.
- Darts: Darts are one of the places where you will not use the guides on the sewing machine to keep your line straight. Beginning sewers may prefer to connect the straight lines between the dots marked on the fabric when the pattern markings were transferred until they are confident that they will be able to sew between the dots in a straight line without the visual cue of a line drawn on the fabric. Darts are usually sewn from the wide end to the pointed end, depending on the type of dart.
- Curved seams: Curved seams are found in sleeves, waistbands, and cuffs on sleeves or pants. These seams can be more challenging to sew because while you can see the markings on the sewing machine faceplate to judge the size of the seam you’re sewing; the smaller length of the seam may make it harder to feed the fabric through the needle while keeping the edge aligned with the seam gauge you are using (usually 5/8” on clothing). Waistbands and sleeves may have the added difficulty of one piece of fabric being bigger than the other, so it needs to be gathered evenly across the face of the other piece before being sewn in place. The extra material involved can be harder for the sewing machine to move under the presser foot and this can push the pieces of fabric out of alignment as well.
- Crafts: Many craft projects can require joining two parts of a project together around what is essentially a circle (think of a teddy bear head as an example). Generally, craft projects are sewn with a narrower seam, and if heavier fabric is being used, it can pull the fabric away from the sewing line, and even out from under the needle before you realize it.
- Zippers: To correctly insert a zipper, most sewing machines come with a special presser foot called a zipper foot. A zipper foot is narrower than your regular sewing machine foot, allowing you to sew a straight stitch close to the side of the zipper without your stitching being pushed out of alignment by the bulk of the zipper against the presser foot.
Other Stitches for Beginners
After your sewing machine’s straight stitch, a zigzag stitch is the one most likely to be used in most sewing projects. Applique, buttonholes, and buttons are all parts of a sewing project that are made easier by a sewing machine, and all of them use a simple zigzag stitch.
Many modern machines today come with 10 or more basic sewing stitches built in, making it easy for the beginning sewer to complete more challenging projects with the push of a button or turn of a dial.
6 Common Stitches On Most Sewing Machines
- Straight stitch: As mentioned earlier this is the basic stitch for all sewers, used in seams and basting. Straight stitches can be lengthened or shortened for use in basting or sewing tight seams.
- Plain zigzag stitch: A zigzag stitch is the second most common stitch that a beginning sewer will use for their projects. Zigzag stitches can be adjusted both by width or height and by density (distance between the left/right points of the stitches).
- Three Stitch Zigzag: An enhanced zigzag stitch for use in projects where a plain zigzag would cause the fabric to roll under the stitch. This stitch does three straight stitches to the left followed by three straight stitches to the right (the zig and the zag).
- Stretch stitch: This stitch is used to sew seams on fabrics that have a lot of stretch to them. When the fabric stretches more than thread, the thread will break. Using a stretch stitch is recommended for these fabrics otherwise your seam may end up with tiny holes caused by stitches that have snapped as the fabric is stretched.
- Overlock Stitch: An overlock stitch creates a seam and a finished edge to the fabric in one stitch. The stitch looks like the type of stitch produced by a serger and commercial sewing machines.
- Blind Hem: A specialized stitch used for hems on dresses and pants, this stitch catches a small amount of the garment in a single stitch that is hard to see on the outside of the garment.
Last Words
Finishing Touches
Hurray! You’ve finished your first sewing project. All the machine sewing is done, and you’re ready to turn it right side out and admire it … right? You’re nearly done, but there may still be a few final things to do in order to get the finished look you’re expecting. Many times, I’ve heaved a sigh of relief that I’ve finally finished sewing, and rushed to admire the result, only to discover threads sticking through seams at surprising spots and wrinkles spoiling the overall look of my hard work. Taking that extra minute to clip threads at the end of seams and trim bulky seams are two essential steps for finishing your project successfully.
The end of a sewing project, even one for beginners is often the time when hand sewing is necessary. Sewing machines have advanced to the point where it is possible to do virtually everything using your machine, but there may be certain things that you want to try doing by hand, just for the satisfaction of knowing that you’ve added to your sewing skills.
You May Need Hand Sewing For:
- Buttons: You can sew a button on using your sewing machine, but this can make a first project more complicated for someone who is learning to sew. Sewing buttons on by hand is a valuable experience for a beginner. For an experienced sewer, it is often quicker to sew buttons by hand than to have to set up the sewing machine. Sewing a button on by machine requires you to know how to lower the feed dogs of your machine (so that they don’t move the button away from the needle. You will have to use a zigzag stitch to attach the button carefully, I have broken many buttons when the stitch width I’m using is wider than the holes of the button.
- Hook and Eye closures: These tiny closures are often found at the top of skirts, and while it would seem easy to attach them by machine, they are so small that it’s hard to position correctly without the presser foot pushing them out of alignment when it is lowered. The presser foot is strong enough to shoot the tiny notions across your sewing room making it difficult to sew them in place easily using your sewing machine.
- Hems: Sewing purists will tell you that you should follow the instructions exactly for hems, turning them up the required 1 1/2 or 2 inches and then carefully sewing them by hand. This can be good practice for hand sewing, but in today’s busy lives, it is easier to do a smaller rolled hem, particularly on easy to sew beginner projects.
Ironing
I know, everybody hates to iron, but once you’ve mastered sewing, you will quickly see that the final touch to the project you’ve worked so hard on is pressing out the wrinkles that have mysteriously appeared on it. Cotton and linen are hands down the easiest fabrics for a beginner to learn to sew on. Unfortunately, they are also the worst for wrinkling. To a beginner it may seem like these wrinkles are set in stone, so ironing is an important finishing touch to make your hard work look perfect.
Basics of Ironing
- Iron: The basic shape and purpose of a sewing iron hasn’t changed since it was invented. Initially, heated metal was used to flatten fabric, the first iron to use electricity to heat it up was patented in the early 1800’s.
- Ironing Board: This is a flat surface on legs. There are small portable ironing boards for use on table tops and circular stuffed ‘tailor’s hams’ that can be inserted inside sleeves and pant legs to allow for even pressing while keeping their circular shape. Modern inventions that have made ironing easier for beginning sewers are specially coated sewing mats that can be used on any flat surface and compact mini-ironing boards for use on top of a table.
- Apply Heat and Weight: Before electric irons were invented, sewers used hot pieces of metal in a similar shape and design to today’s irons. They kept these irons warm on top of stoves so that they could quickly touch up seams or correct wrinkles on what they were sewing.
- Using Steam: A water reservoir was added to electric irons, along with holes in the metal plate allowing steam to come out of the iron when it was put face down on the fabric. The steam relaxes the bent fibers in the fabric that forms the wrinkles while the weight of the iron smooths the surface of the fabric.
7 Common Mistakes All Sewers Make
Even after 20 years of sewing — give or take — I still make mistakes when I sew. The biggest thing I’ve finally learned is not to rush when I sit down at the machine and start sewing. Reading the pattern carefully is part of this, as is taking the time to put in enough pins to really hold things together securely. If you are taking the time to pin something together, it is always best to pin it together properly, so nothing moves out of alignment. This is especially important whether you are cutting delicate fabrics or sewing small curved seams when it comes to pins, more is usually better.
With those thoughts in mind, here is my list of common mistakes that can easily be avoided by someone beginning to sew:
- Using the wrong fabric: Until you’re an experienced sewer with lots of successful projects completed, stick with the fabrics that are recommended by the pattern designer or the experts at your favorite fabric store. There are large fabric stores on-line that have excellent fabric selection and blogs that can help you to learn from about which fabrics will work the best for individual projects.
- Sewing the wrong things together: Whether you sew the wrong side of a fabric to the right side or join a piece in the wrong place, relax and get your seam ripper out. All sewers have done similar things at one time or another. The moment I realized that the sleeve I had so carefully just finished sewing was in the neck opening instead of the armhole, is high on the list of times when I had to walk away from the sewing machine for a moment or two. A classic example of me getting ahead of myself and doing something I hadn’t intended.
- Mismatching notches or dots: I’ve had more than one occasion where I happily reach the end of a long seam and discover to my horror that I have an extra two or more inches of fabric left on one of the pieces of fabric. Before assuming that a cutting error has accidentally been made and grabbing the scissors to cut off the excess, make sure that all the notches and dots are aligned correctly and that the top of each piece is aligned at the start of the seam. If you are using very stretchy fabric, it is also possible that one side of the seam has stretched because of the pressure from the presser foot on the feed dogs. You will need to unpick the entire seam because otherwise, the seam will not hang correctly.
- Too hot iron: If you’ve been sewing a lot of projects using cotton or linen it is easy to forget that your iron has been set on high. You may notice as soon as you put the iron down on a synthetic fabric that it doesn’t glide as freely as it usually does, it may even start to feel like it is sticking to the fabric. A sizzling hot iron can melt synthetic fabric into a little shriveled up piece. Modern iron-on interfacings and other clever inventions for joining material together will result in a sticky mess on your iron if you accidentally run it across them without having fabric between them and its hot surface.
- Threading your sewing machine incorrectly: As soon as something appears to be wrong with how your sewing machine is stitching, check that it is threaded correctly. Also, check the tension dials for both the top thread and the bobbin.
- Use sharp objects carefully: When it comes to trimming seams or opening buttonholes, always be cautious when using something sharp around your fabric. Seam rippers are very sharp and too much pressure on them can easily result in ruined buttonholes as they will cut through the bar tack at the end of a buttonhole with ease. Trimming seams is another place where one stroke of your scissors can put a large slash in the fabric at a spot where repairs can be difficult.
- Slow down! Sewing too quickly has caused me a lot of headaches over the years. Going fast has caused the top sewing thread to end up wound around itself – no idea how that happens beyond that it always happens when I’m racing down a long seam. Hitting a pin while you’re sewing quickly can break the needle, the pin and possibly your sewing machine if any extra metal bits end up down inside the workings of the bobbin case.
There it sits, your very first sewing project! You can rightly feel proud of what you have accomplished. Sewing takes skill, and as you work your way through the frustrations that we all experience, your appreciation of the effort that early seamstresses put into creating perfect quilts and other accessories, as well as clothing will grow.
Having patience is an asset in all aspects of life and sewing is no exception. Slow down and enjoy what you are creating, then when you’re ready to move on, you’ll be able to sew more complicated projects without hesitation confidently. I frequently stumble across almost finished projects that I have hidden at the bottom of my cedar lined fabric trunk and realize that what frustrated me at the time was so minor that I should have fixed it right away. However, we all reach a point when stepping away from a project (even briefly) is a good plan. Things are always easier to do a day (or year) or two later!
For beginning sewers, there are many fabulous inventions and practical accessories that will let you sew as well as (or better than) someone with years of experience. Now that you’ve mastered the basics of sewing – straight seams and using the right tools for the job – you’re ready to move on to more complicated patterns and projects. Beautifully fitted jackets and reupholstering furniture is well within reach, now that…you can sew!