Sewing alone can be a challenging task, but sewing without a guide can be even more difficult and for some of us with less experience, impossible.
Patterns in sewing are the predetermined and pre-measured guides to lead our needle along the path to sewing success.
Often these patterns are premade otherwise known as pre-graded patters and can be purchased at a store or online because creating your own sewing pattern can be challenging. Many seamstresses, especially beginners, avoid creating their own sewing patterns because it is likely the most challenging and most technical aspect of the sewing process.
However, if you are in fact at the point in your sewing that you feel you are ready to start branching out and creating your own patterns, this article can teach you how.
What is a Sewing Pattern?
To begin, let’s discuss what exactly a sewing pattern is and what its purpose is in your craft.
A sewing pattern, in the simplest context, is a template that outlines/traces a particular garment design so it can be used as a guide to replicate a specific design. The purpose of having a pattern is to make your life easier.
This is also useful if you are trying to sew your own clothing or sizing a garment to fit particular measurements.
Just think of pre-graded sewing patterns as guidelines to help craft a particular garment/design.
These patterns come in many material forms: cardboard, paper, or paperboard. Sewing patterns are typically made of paper because it is more flexible and adjusts with fabric though these are less durable, while stiffer materials can also be used for repeated uses though they are less bendable.
These patterns can be altered to change the size of the end garment. This size change in pattern is called grading. There are two types of custom-fitted patterns: sloper pattern and block pattern.
Unless you are working with mass production, the best type of pattern for home use is the sloper pattern. This is more suited for home sewing because it can easily be graded or altered to a different size.
A block pattern is used more in industrial garment production and is generally specific for a given size.
Of course, you can go to the store or shop online and get yourself a pre-graded pattern, but that’s not what we are here to learn.
Math Time

If you are trying to work this process out for yourself and you aren’t attending school or taking classes that will help you learn how to create your own patterns, I am going to try to describe this so you can understand and visualize the process.
The following is something I feel obligated to include in the article: MATH.
But, before we begin, you’ll have to get yourself in the right mindset…a math mindset.
Yes, I said math, but bear with me.
If you think about it, a sewing pattern is really just a bunch of geometric shapes put together to create edges and lines that can be sewn together to form one larger geometric shape. Granted these shapes all need to be measured accurately, so the end piece fits, but in simple terms, sewing patterns are shapes.
If you are going by the proverbial book, the math aspect of sewing patterns gets way more intense than shapes and will give just about anybody a headache.
There are tons of calculations and formulas you are supposed to follow to create a sewing pattern…if you’re going by the book that is. But fret naught, that isn’t what we are going to be doing.
So, toss the book!…but maybe not in the garbage, I’m sure there are useful things in there worth saving for later.
Steps to Creating Your Own Sewing Pattern
There are many ways you can begin creating your own sewing pattern, but the simplest way is to copy a garment you already know you love. If you have an item with a design you like, and it fits comfortably, make a simple copy of it.
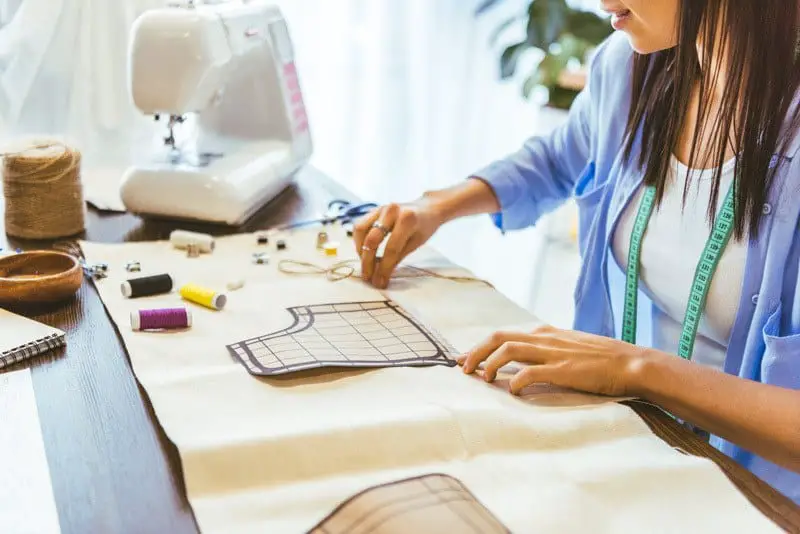
Before you begin, you are going to want to collect your tools.
– Chalk- Pattern or tracing paper- Scissors- Chosen garments (well-fitted and not stretchy)- Permanent marker- Tape measure or ruler- Flat surface- Corkboard- Pins or heavy objects (to hold the clothing in place during tracing)
To begin creating your pattern, start with something simple that you know you love. I’d suggest starting with a regular t-shirt as a baseline for your first try.
So, here’s a step by step breakdown of how you can make your own sewing pattern.
- Take the pattern paper you’ve selected (20”x40” works well) and fold it in half
- Lay the shirt over the paper and smooth as evenly as you can. Try not to stretch the fabric; otherwise, you may be unintentionally altering the size of the shirt.
- Whichever side (front or back) you choose to do first, make sure to label the paper accordingly – I’d start with the back. So have the back of the shirt on the paper. Keep the part of the shirt that you’re tracing face down.
- Start with the neckline and trace up to the top of the shoulder.
- For the next step, fold the sleeves along the paper-side seam into the center of the garment.
- When you trace the sleeve seam, do not trace the sleeve itself. Once the sleeve is folded into the garment, the back-sleeve seam will be exposed. Trace along this seam.
- Trace along the sides of the garment and along the bottom
- TIP: make your trace lines about ½ inch away from the garment to leave room for shrinkage and mistakes. Or trace along the garment and add another line ½ inch from the original line.
- Flip the garment over and trace the other side.
- For the deeper neckline of the front of the shirt, you’ll have to site-trace. Put your finger along the seam of the front neckline and trace by flipping the fabric and marking on the paper where the seam should be.
- Once you have the main pieces, front and back, traced, move onto the sleeves.
- To trace the sleeves, trace along the bottom seam. There is typically only 1 seam on a sleeve, so when you measure your fabric off of the pattern, you’ll want to double the amount of material, so you have a full sleeve in circumference.
- The seam where the sleeve attaches to the body of the shirt should fit together.
Once you finish these three pieces: front, back, and sleeves, you’ve made a sewing pattern.
Congratulations!
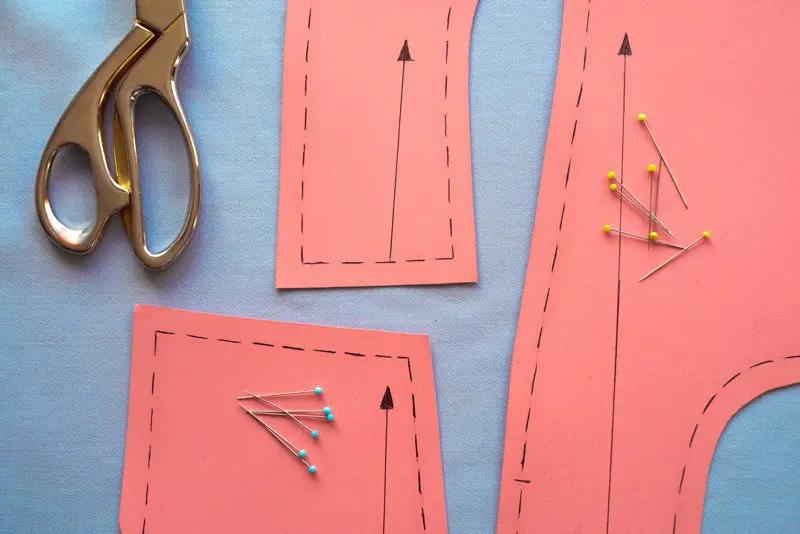
You can now cut out the patterns along the outer lines, and you’ve got yourself a homemade sewing pattern.
This next portion has less to do with making a pattern and more in how to use it.
Now it’s time to start lining up your chosen fabric with the pattern.
These next steps are where you will be using the other tools you collected at the onset of this project. You’ll want your flat surface again, corkboard, and scissors.
To start you want to lay out your fabric and secure it on the corkboard. Next place each of the patterns you’ve cut out and place and secure them on the fabric with a pin. You can pin the fabric and paper to the corkboard with pins. Then begin tracing on the material with the chalk along the pattern lines you traced.
This video from Wendy may be helpful as well!
If you’ve been sewing with patterns before, you can take it from here!
Enjoy sewing with your own patterns and enjoy experimenting and getting creative!
I look forward to seeing your creations!