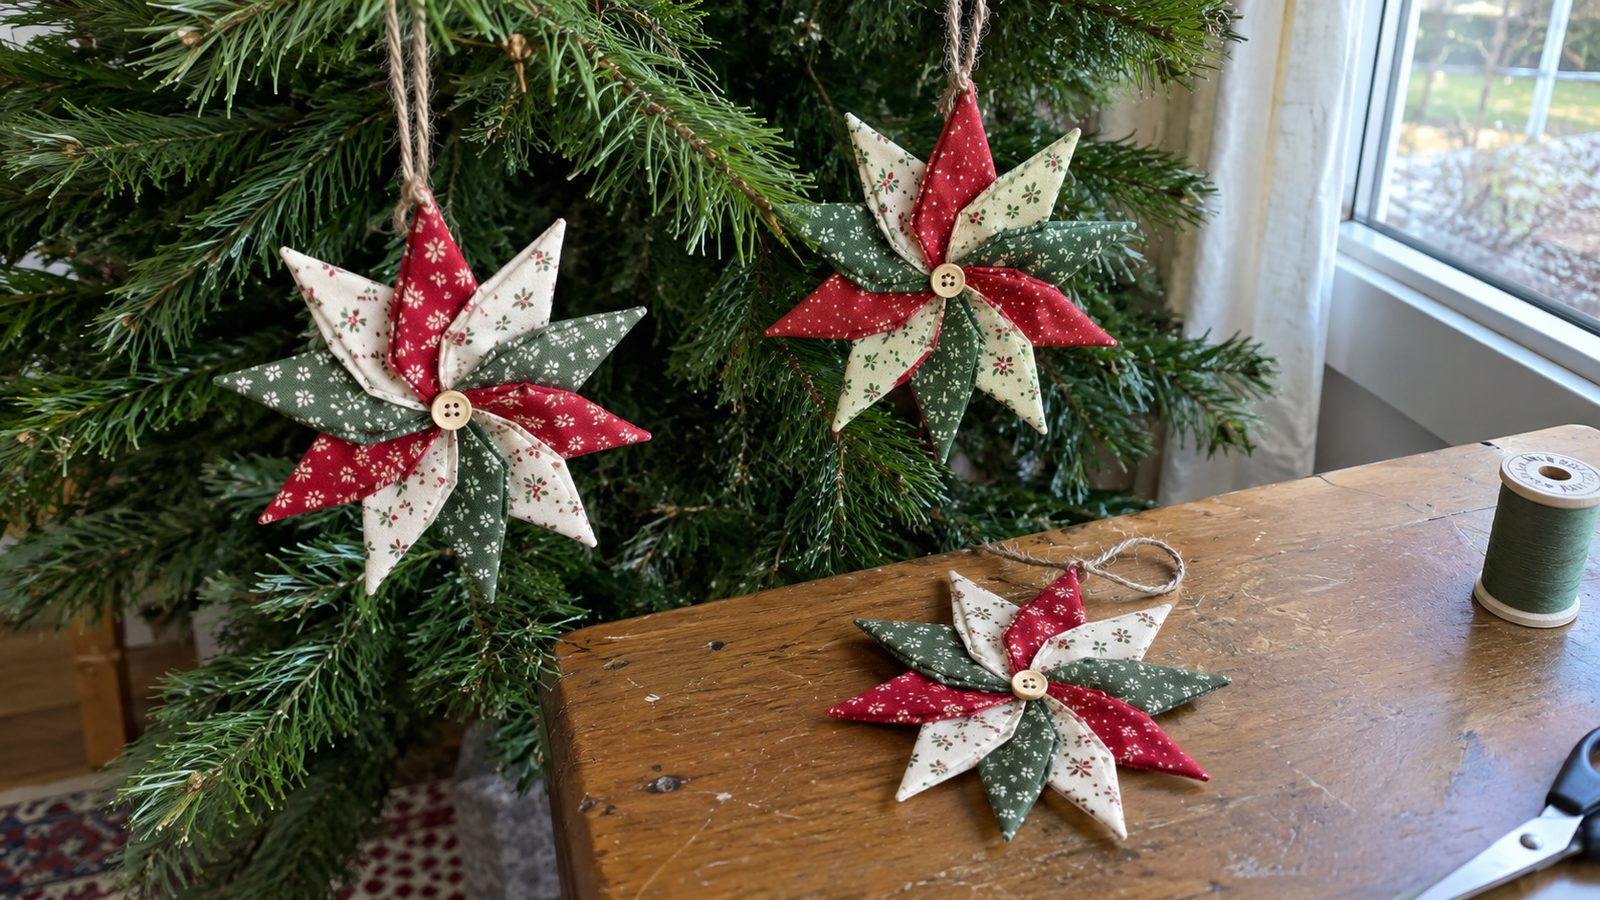
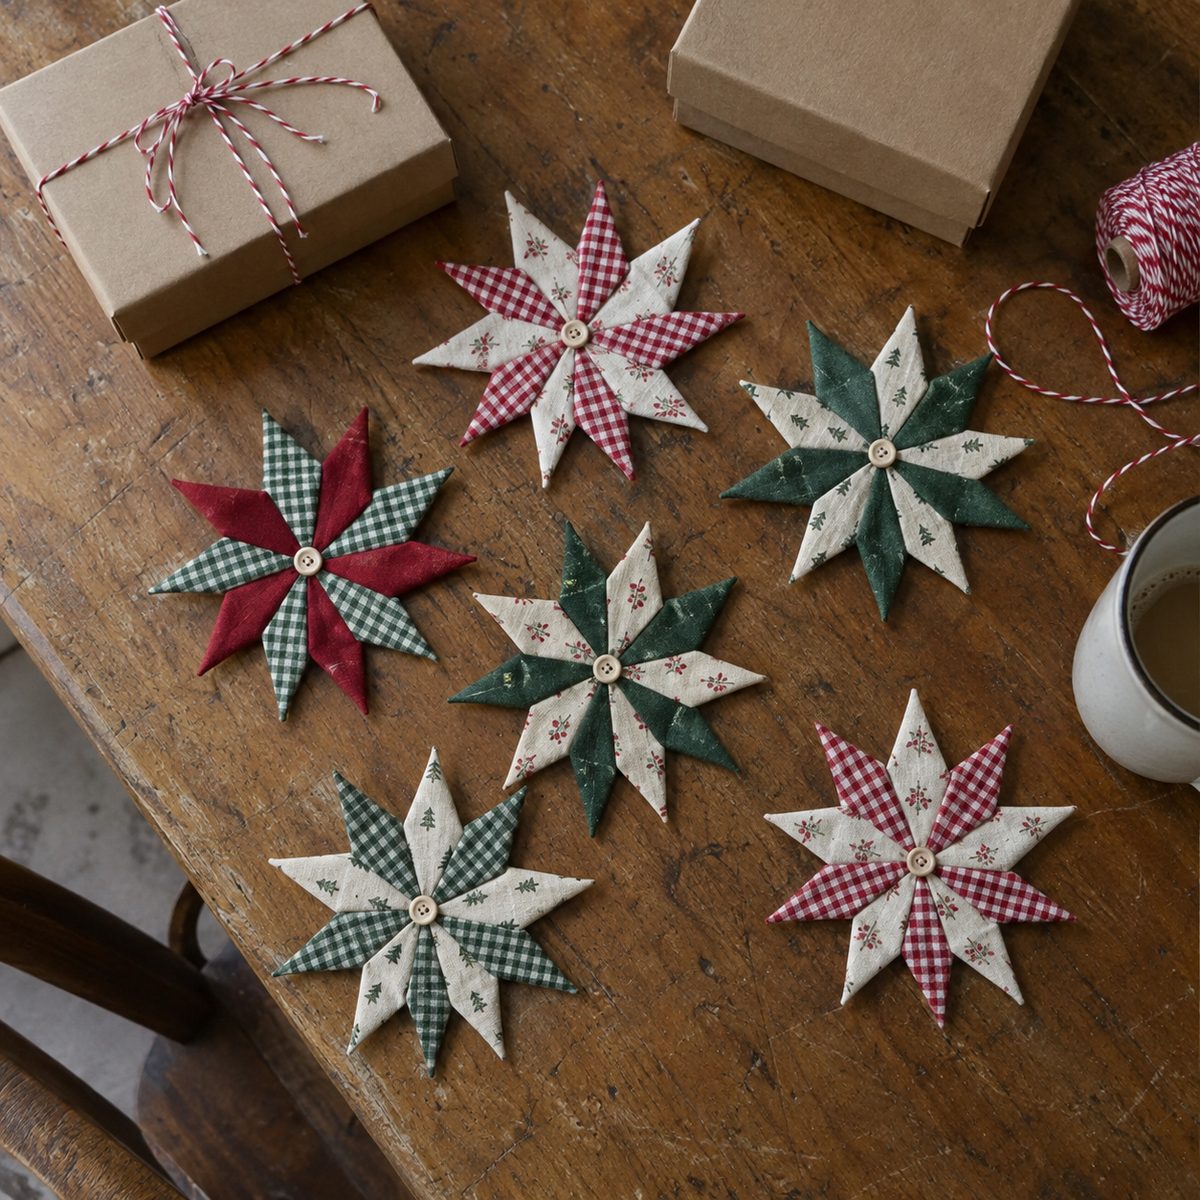
A folded fabric star is four cotton squares folded into sharp points, pressed stiff with starch, and stitched to a small felt circle. A second layer of smaller points goes on top, turned so the eight tips alternate. It looks like a carved Scandinavian wood star and hangs flat against the tree.
Each one takes about 30 minutes once you have made your first. It is almost all hand sewing, so it is a true beginner project, and a good one for the couch.
What makes or breaks it is pressing. Starch every fold and press it flat before you make the next one. Soft folds give you a droopy star, and no amount of stitching fixes that.
What you’ll need
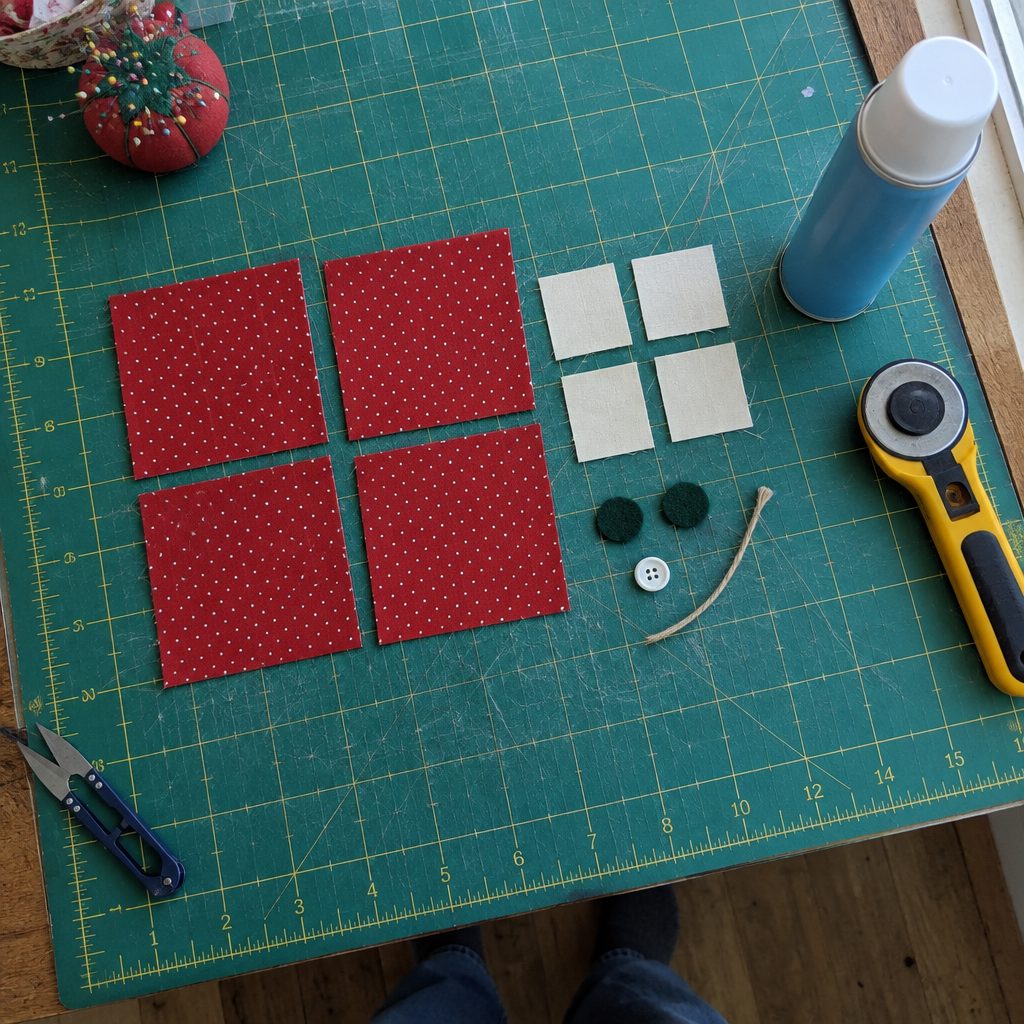
- Quilting cotton: four 5-inch squares and four 3 1/2-inch squares per star. A 5-inch charm pack gives you the bottom layer for ten stars.
- Wool-blend felt, a 3 by 6 inch scrap per star (two 2-inch circles), in a color close to your darker fabric
- Spray starch. One can does about 20 stars.
- Hand-sewing needle, a size 9 sharp, and all-purpose thread to match the fabric
- One 7/8-inch button per star, or a 1-inch cover button and a fabric scrap
- 8 inches of 1/4-inch ribbon or baker’s twine per star for the loop
- Rotary cutter, mat, and ruler, plus a 2-inch jar lid to trace the felt circle
- Pins, a fabric glue stick for the back circle, a thimble, and a dry iron
Cut chart for one medium star
This makes a star about 4 inches tip to tip. The squares look too big for that; most of the fabric ends up inside the folds.
| Piece | Cut size | Qty |
|---|---|---|
| Bottom layer points | 5 x 5 inches | 4 |
| Top layer points | 3 1/2 x 3 1/2 inches | 4 |
| Felt base circle | 2 inches across | 1 |
| Felt cover circle (for the back) | 2 inches across | 1 |
| Hanging loop | 1/4 inch ribbon or twine, 8 inches long | 1 |
Fabric, starch, and cutting
Use quilting cotton and nothing heavier. Flannel folds round and the center turns into a pillow. Batiks fold the crispest of anything I have used because the weave is so tight.
Keep prints small. A 5-inch square becomes a point 2 1/2 inches long, so a big floral turns into a blob. Pin dots, tiny gingham, narrow stripes, and solids all work. I like a print on the bottom layer and a solid on top.
Do not prewash. The factory sizing is on your side here, and ornaments never see a washing machine.
Starch before you cut. Lay the fabric face down, mist with spray starch until it looks damp but not wet, wait 20 seconds for it to soak in, then press dry with a dry iron on the cotton setting. Press too soon and the starch flakes into white specks. And this is pressing, not ironing. Set the iron down, count to three, lift it. Pushing it around stretches the fabric, and a stretched square gives a leaning point.
Cut after starching. Starched fabric cuts cleaner, and a square that is 1/8 inch off shows up as a crooked tip. Leftover charm squares are ideal, and there are more uses for that pile in scrap fabric projects.
Fold and press the points
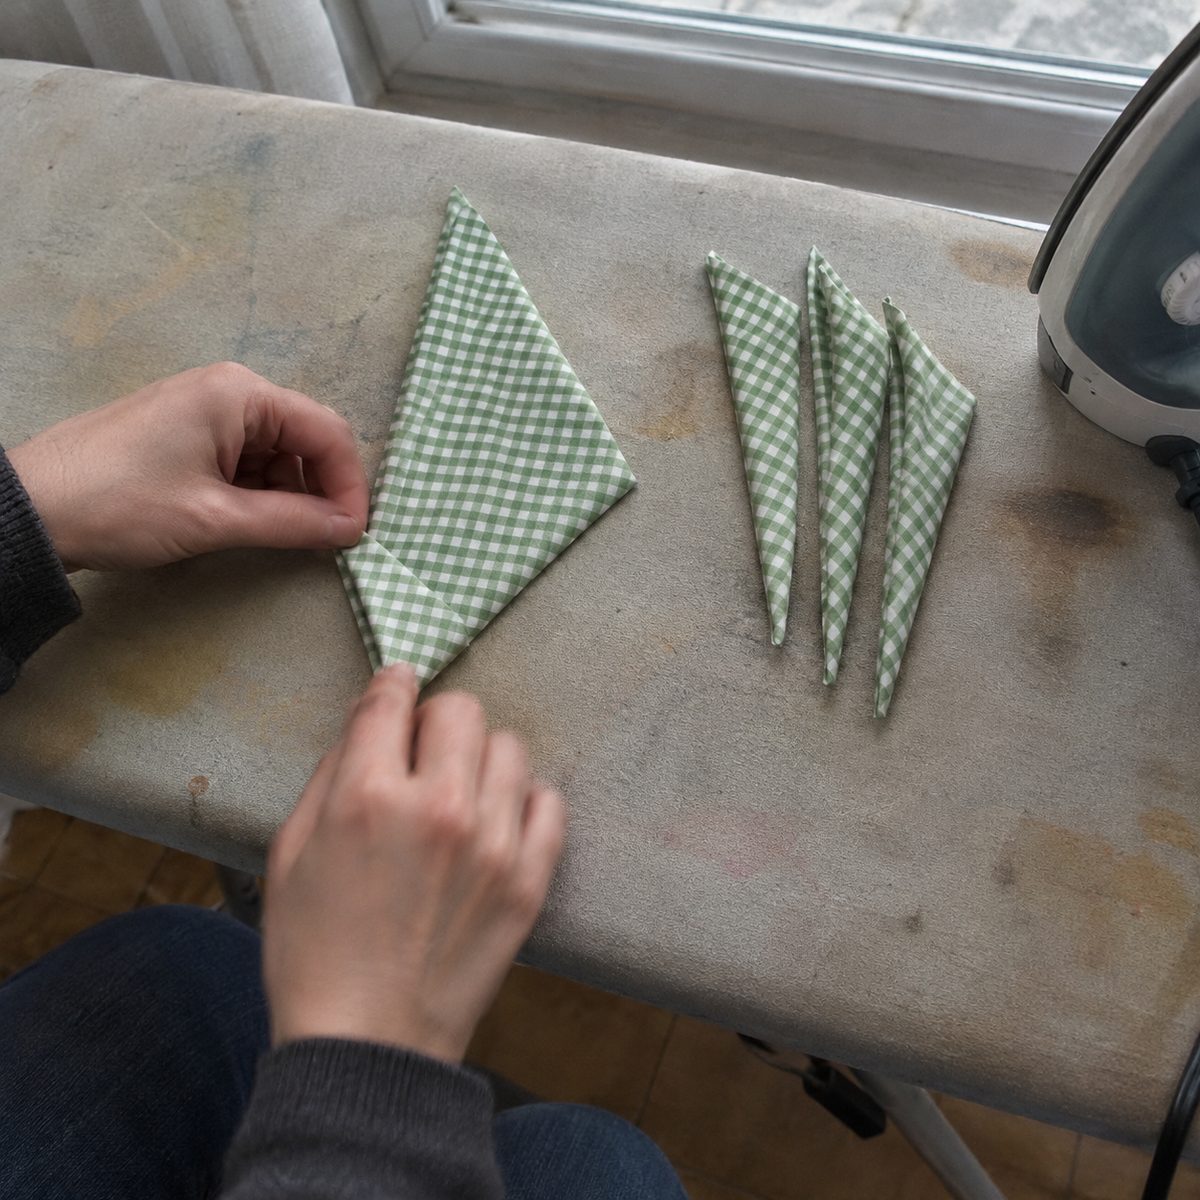
Fold all eight points before you stitch anything. Every fold gets starch and a press. Work assembly-line style: the same fold on all eight, press, next fold.
- Take a 5-inch square, wrong side up. Fold it in half, bottom edge up to the top edge, into a 5 by 2 1/2 inch rectangle with the fold along the top. Press. On a directional print, the motifs run toward the fold, which becomes the tip.
- Pinch the center of the folded edge. Fold the top left corner down so its edge lies along the vertical center line, then fold the top right corner down to meet it. You now have a triangle with one raw edge along the bottom. The two folded edges should touch without overlapping or gapping. Press.
- Fold the left slanted edge in to the center line once more, pivoting from the tip, then the right one to meet it. The point is now about 2 inches across the base and 2 1/2 inches tall. Press hard.
- Look at the bottom. Two little tails from the original corners stick out below the base, crossed over each other. Trim them level with the base edge. Leave them on and the center gets fat.
- Repeat with the other three big squares and the four 3 1/2-inch squares, which finish 1 3/4 inches tall. Stack them in two piles and give each pile one more hard press.
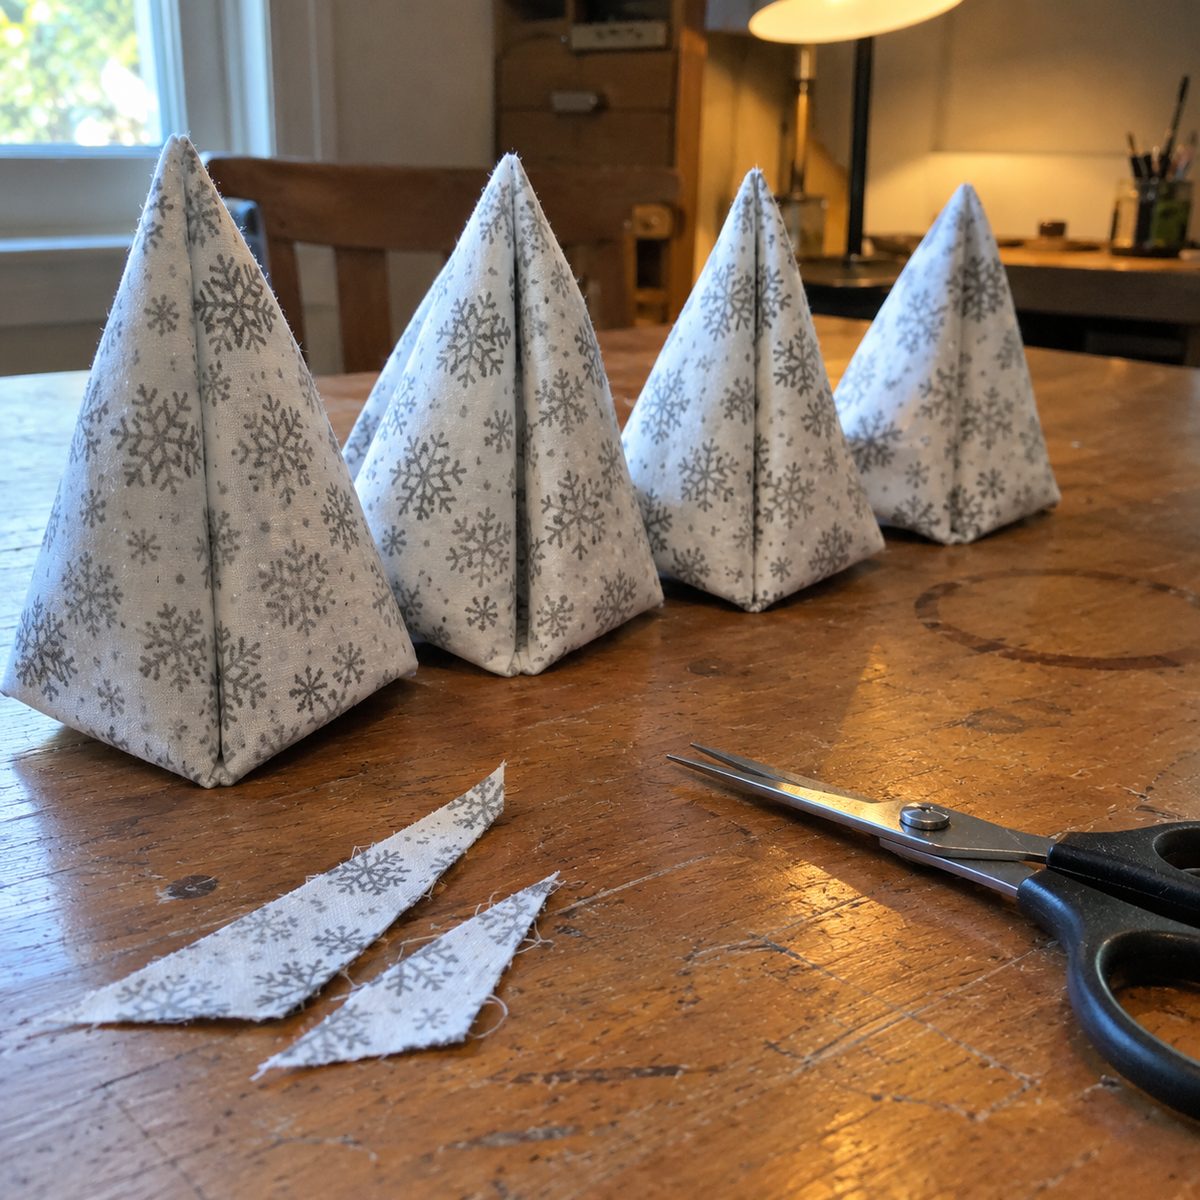
Stand the four big points in a row, tips up. They should match in height, with the center line dead straight. A short one came from a square cut small or folded off center. Make another; you cannot stretch it to match later.
Build the bottom layer on the felt
Trace and cut two 2-inch felt circles and mark the center of one with a chalk dot.
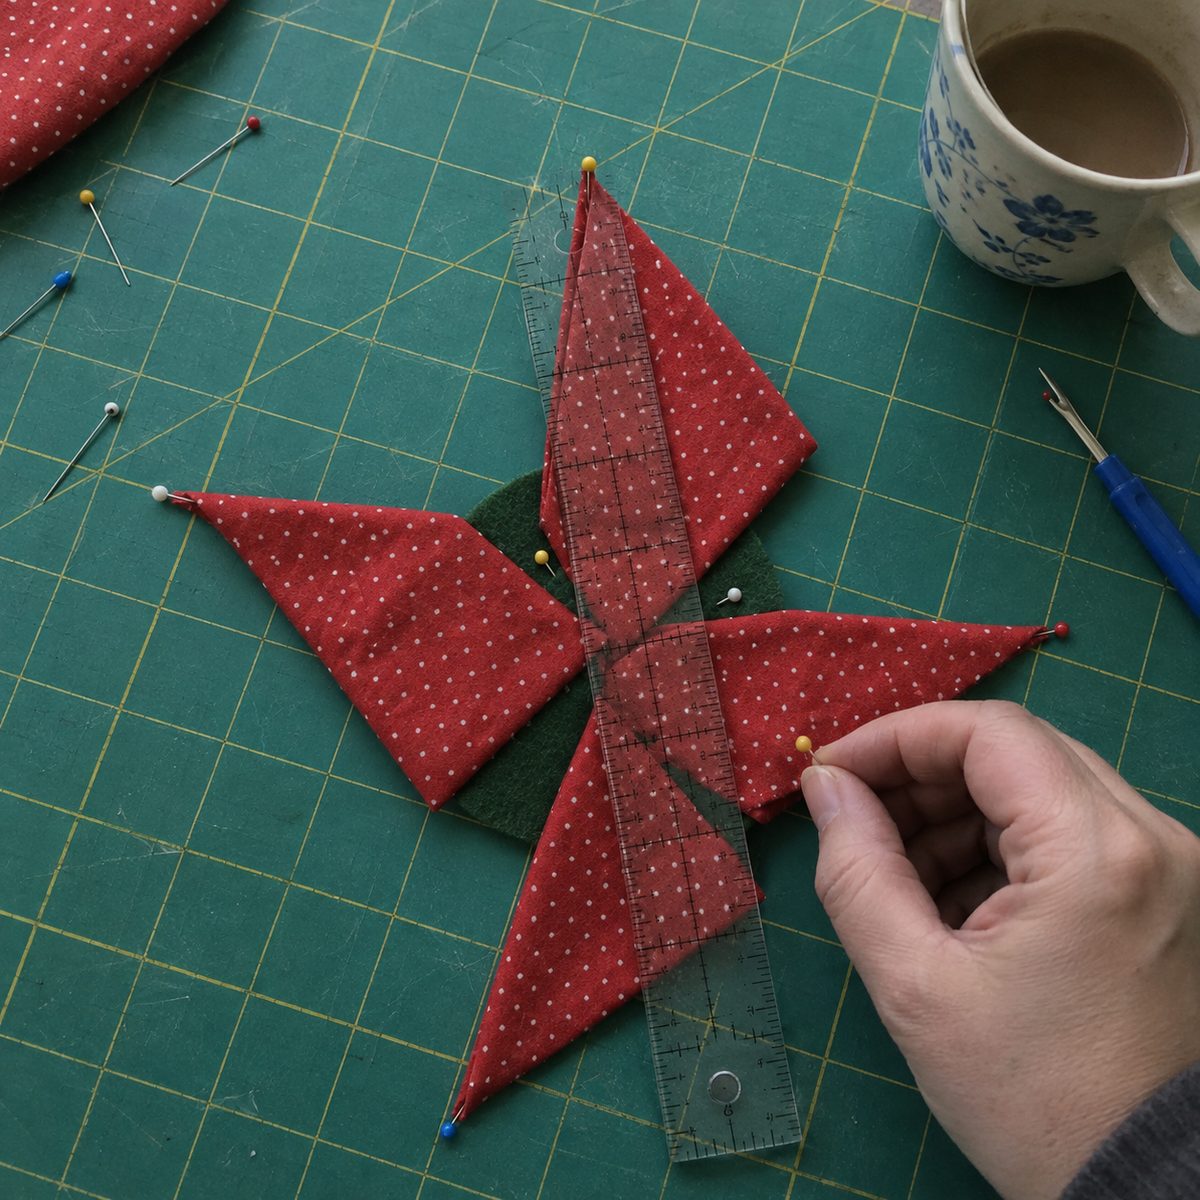
- Lay the first big point on the felt with its tip at 12 o’clock and its base edge running about 1/2 inch past the center dot.
- Lay the second point with its tip at 3 o’clock and its base 1/2 inch past the center, on top of the first point’s base. Then the third at 6 o’clock on top of the second, and the fourth at 9 o’clock on top of the third.
- Lift the base of the first point and slide the fourth point’s base underneath it. Now every point is over one neighbor and under the other, like a pinwheel. Stacked in one pile, the center is a lump and the top layer sits crooked.
- Lay a ruler from the 12 o’clock tip to the 6 o’clock tip; it should cross the center dot. Repeat for 3 and 9, nudge until both lines cross on the dot, then pin each point through its center line near the base.
- Thread a single strand, knot it, and come up from the back of the felt. Stitch each base edge down with stitches about 1/8 inch long, running along the raw edge and catching the felt. Keep every stitch inside a 1-inch circle around the center.
- Tack each tip. Slide the needle under the folded flap about 1/4 inch from the tip, take one tiny stitch through all the layers, and bring the thread back out under the flap so it stays hidden. Two stitches per tip.
Add the top layer and the button
The small points sit over the big ones’ bases, each small tip pointing into the gap between two big tips.
- Lay the first small point with its tip at 1:30 on a clock face and its base about 3/8 inch past the center. Lay the others at 4:30, 7:30, and 10:30, pinwheeled the same way as the bottom layer.
- Check the gaps. Each small tip should sit halfway between two big tips, with the same amount of big point showing on both sides. Pin all four through their center lines.
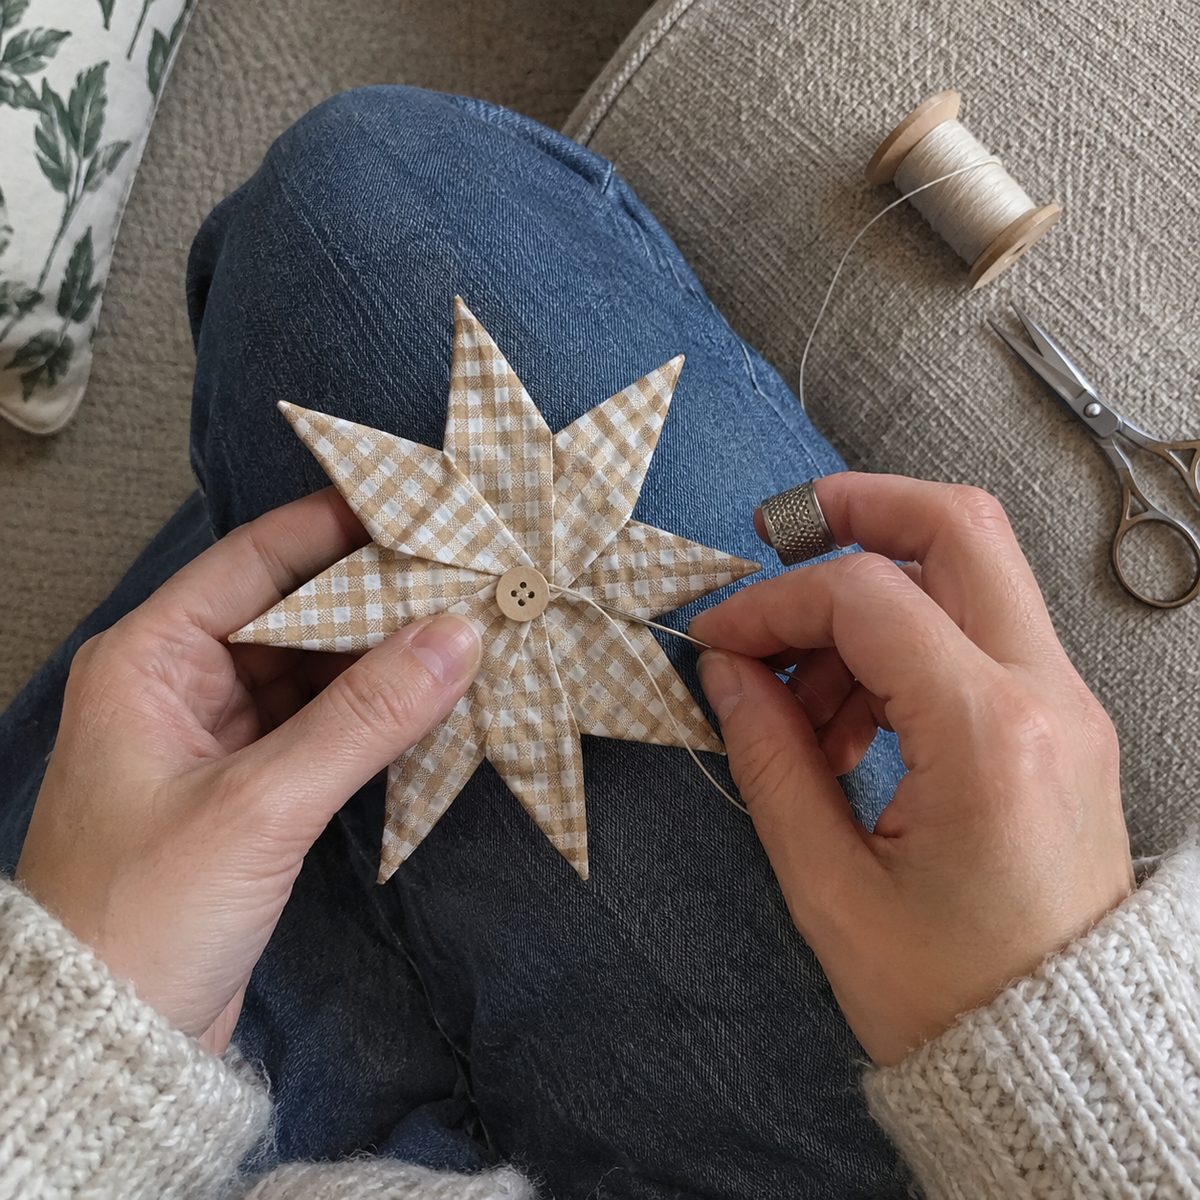
- Stitch the small bases down the same way, through everything, catching the felt. The needle is going through ten or more layers of starched cotton at the center. Push with a thimble.
- Tack each small tip with two hidden stitches under the flap.
- Center the button over the stack. Sew it on with doubled thread, four passes through each hole, all the way through to the felt, and pull firm. The button is the one thing squashing the center flat. Finish with three small backstitches on the felt, the way I show in how to end a hand stitch.
Finish the back and add the loop
A finished back makes these look bought instead of made in a hurry.
- Press the star once more from the front with a dry iron and a pressing cloth over the button. Press hard and hold. The center flattens more than you expect.
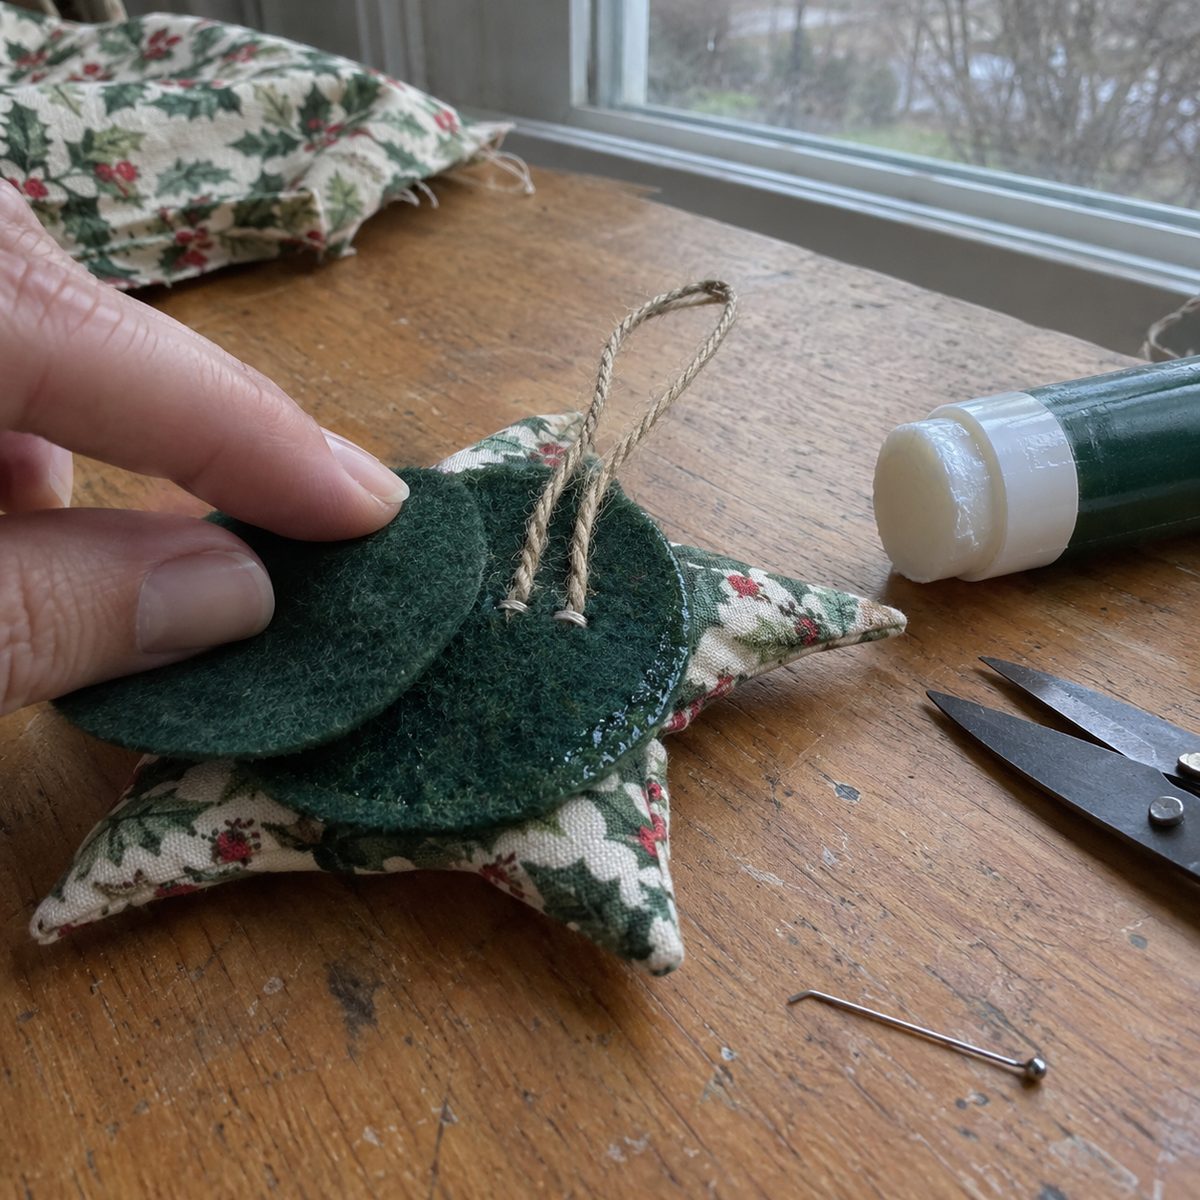
- Fold the 8 inches of ribbon in half. Lay the two ends on the back of the felt about 1/2 inch apart, pointing toward the center, with the loop extending up past the 12 o’clock tip. Stitch across both ends with six small stitches through the felt only.
- Run a fabric glue stick over the back of the felt and press the second circle on with the edges matched. Weight it with a book for ten minutes. Or whipstitch around the edge, about 10 stitches to the inch.
- Tug the loop. If it slips, your stitches only caught the top felt layer; take four more right through both circles at the ribbon ends.
The finished star is about 4 inches tip to tip. The center should feel like a thick coaster, firm and flat, not like a pincushion.
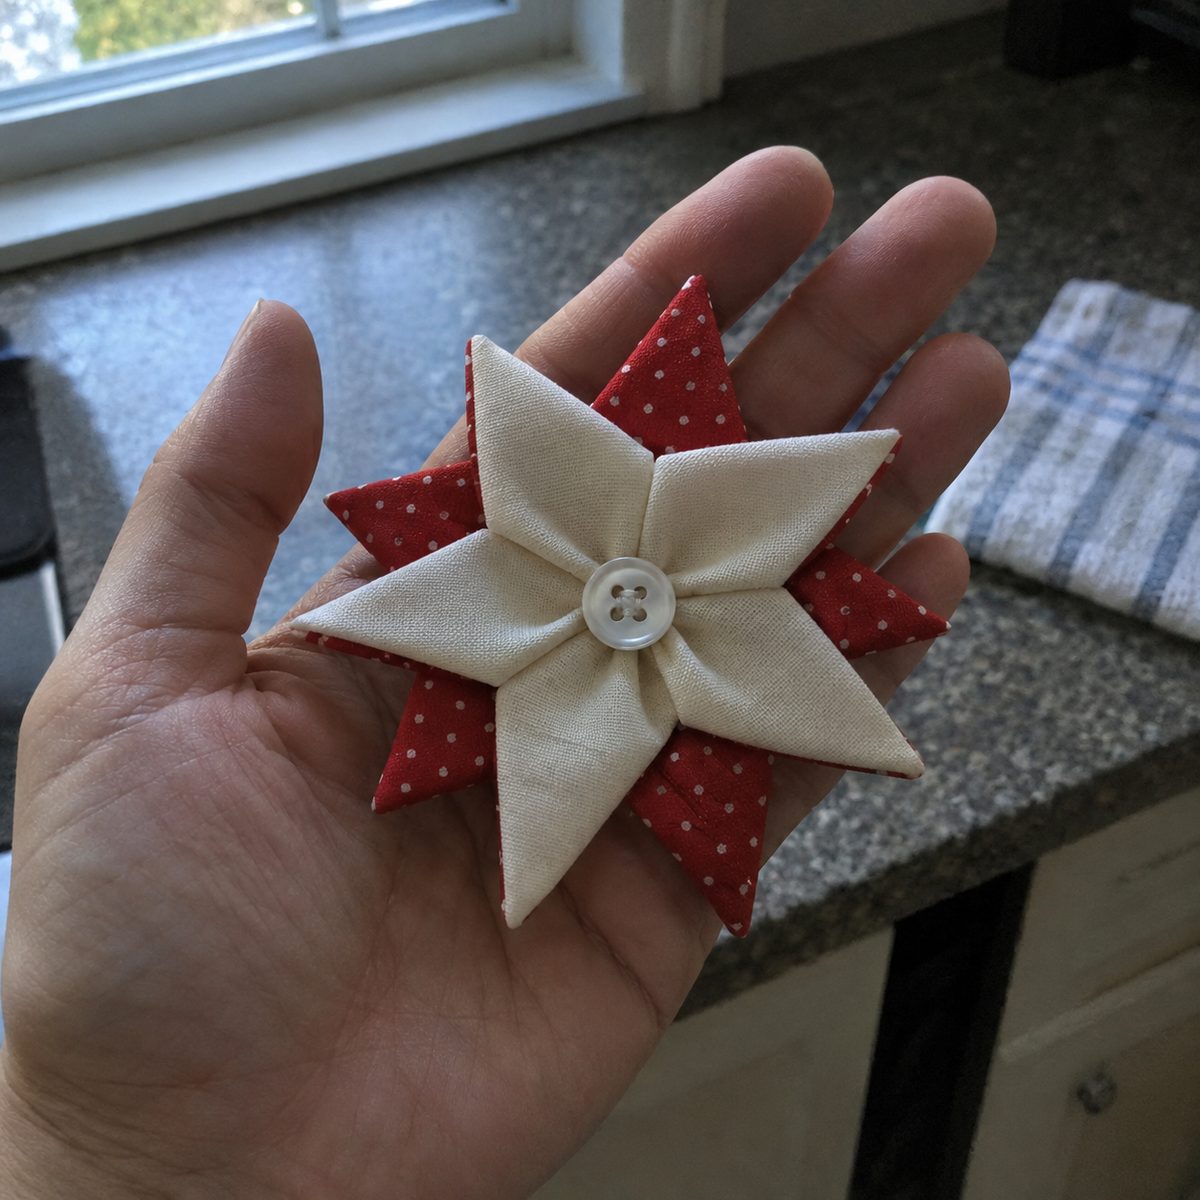
Once you have one on the tree you will want a dozen. This one came out of the Christmas sewing projects roundup, and the rest of the fabric Christmas ornaments list uses the same scraps and the same felt.
Fixes for the things that go wrong
The points look soft or rounded
Not enough starch, or you ironed instead of pressed. Open the point back up, mist it again, wait the 20 seconds, and press each fold with the iron held still. Flannel and loose homespun never fold sharp.
The flaps pop open at the tip
The second fold did not come all the way to the center line, so the flap has nothing to lean against. Unfold, re-starch, and refold with the edge touching the center crease exactly. Then put in the two hidden tip tacks.
The center is a hard lump
Three causes: untrimmed tails, bases stacked in a pile instead of a pinwheel, or thick craft felt. Trim the tails, re-lay the points, and press the bottom layer hard before the top goes on. Wool-blend felt is about half the thickness of the stiff acrylic sheets.
The tips are not in a straight line
Check with the ruler before you stitch anything. If one point is shorter than the others, its square was cut small or the first fold was off center. Make a new point rather than trying to coax it.
Felt shows between the points
The felt circle is too big, or the wrong color. For the medium star it is 2 inches across, no bigger. Slide small sharp scissors under the point and trim 1/8 inch at a time. Next time, match the felt to your darkest fabric.
Sizes, fabric swaps, and batch-making
Three sizes cover everything: small for garlands and gift tags, medium for the tree, large for a wreath or mantel.
| Star | Bottom squares | Top squares | Felt circles | Finished size |
|---|---|---|---|---|
| Small | 4 x 4 inches | 3 x 3 inches | 1 1/2 inches | about 3 inches |
| Medium | 5 x 5 inches | 3 1/2 x 3 1/2 inches | 2 inches | about 4 inches |
| Large | 6 x 6 inches | 4 1/2 x 4 1/2 inches | 2 1/2 inches | about 5 inches |
For the classic Nordic look, use a red print on the bottom and cream on top with a white button. For a woodland tree, go dark green under a tiny tan check with a wood button. Gold metallic-print cotton folds fine and catches the lights. In fall I make the same star in rust and mustard for the Thanksgiving table.
For gift toppers, skip the loop and the second felt circle. Stitch the star straight onto the ribbon bow with four stitches through the back felt.
For a garland, make twelve small stars and run baker’s twine across the back of each one before you glue the cover circle on, 5 inches apart on 6 feet of twine.
For a batch, cut and starch everything in one session, then do fold one on every square, press, fold two on every square, press, and so on. Twenty points take about 25 minutes that way, not 5 minutes each.
Frequently asked questions
Can I make these on a sewing machine?
Mostly no. The base stitching sits under ten layers of starched cotton, and the tip tacks have to hide under a flap. A machine cannot reach either spot without showing stitches. You can machine stitch the back felt circle on with a 2.5 mm straight stitch 1/8 inch from the edge if you prefer that to glue.
Do I have to use starch?
You have to use something. Spray starch is cheapest and holds well. In a pinch, a 50/50 mix of white school glue and water brushed on and pressed dry gives an even stiffer fold, but it darkens light fabrics slightly. Skip the stiffener and the star collapses within a day.
How much fabric do I need for a dozen stars?
Twelve medium stars need 48 squares at 5 inches and 48 at 3 1/2 inches. One charm pack of 42 plus six more squares from a fat quarter covers the bottom layer. A fat quarter cut into 3 1/2-inch squares gives you 20, so plan on three for the top layer.
How do I store them so they stay sharp?
Flat, in a single layer, in a shoebox or a lidded tin with tissue between layers. Do not pile them in the ornament bin; the tips crush. If one comes out of storage soft, a mist of starch and a hard press from the front brings it right back.
Make one tonight with whatever two fabrics are closest to hand, and do not worry if the first center is a little thick. The second star takes half the time, and by the fourth you will be folding points without looking.