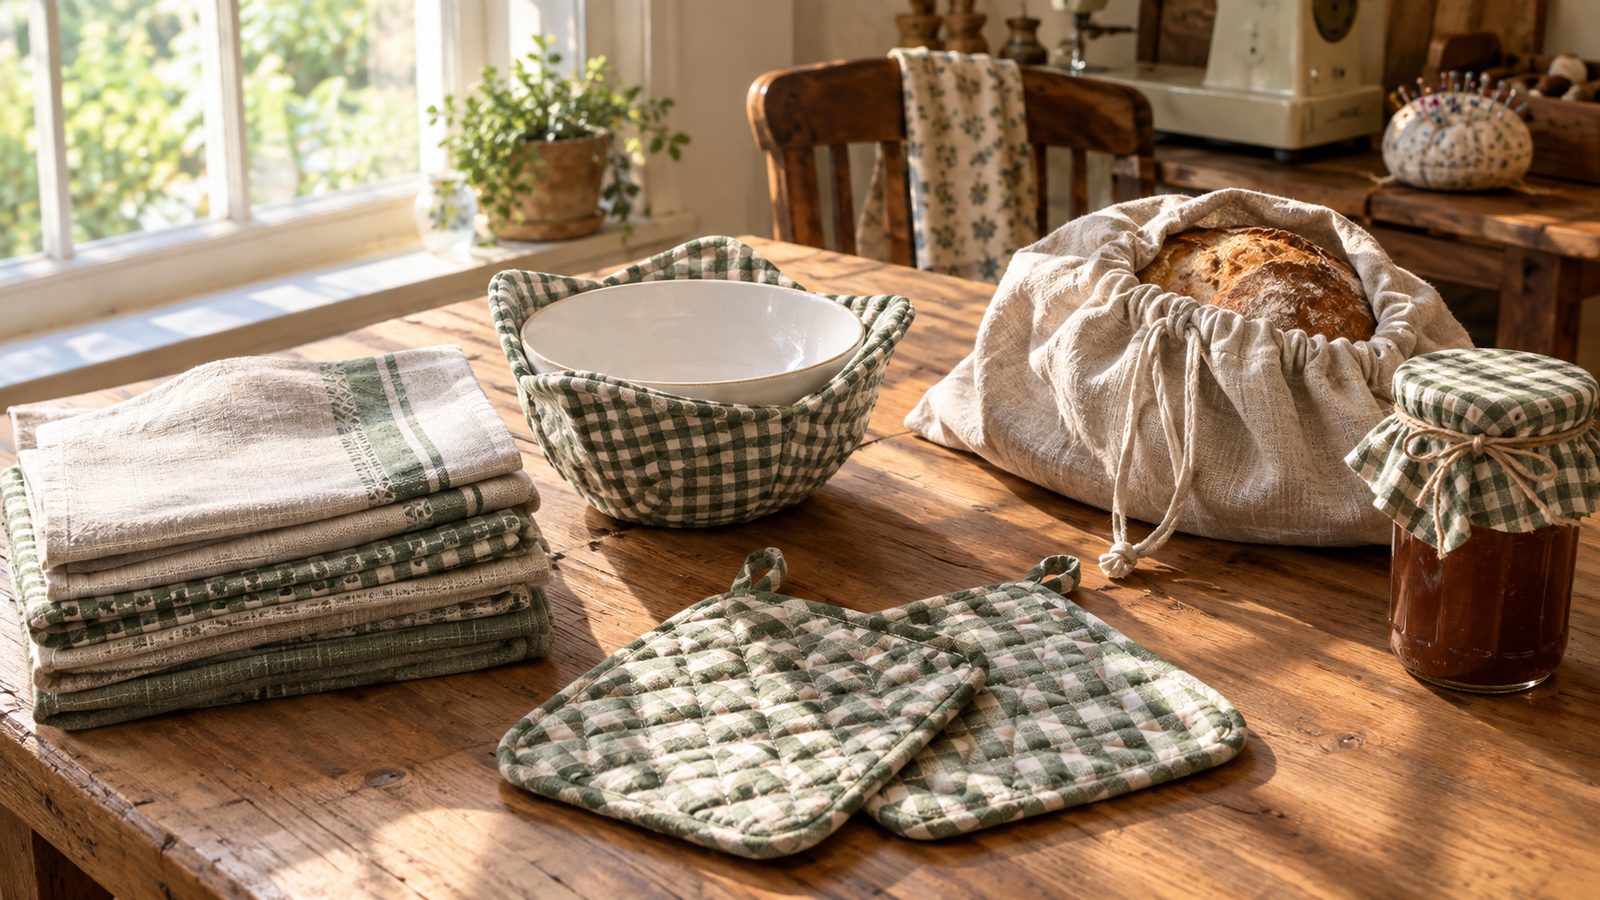
The kitchen is where handmade things get used hardest, and that is exactly why it is such a satisfying room to sew for. A potholder you made gets grabbed every night. A stack of cloth napkins replaces a whole aisle of paper goods.
Most of these projects are straight seams on cotton or linen, so they suit newer sewists and make great use of fat quarters and leftover yardage. A few call for heat-safe materials, and I have flagged exactly what to buy where it matters.
Pick one or two, prewash your fabric, and your kitchen will feel a little more like yours by the weekend.
1. Quilted Potholders
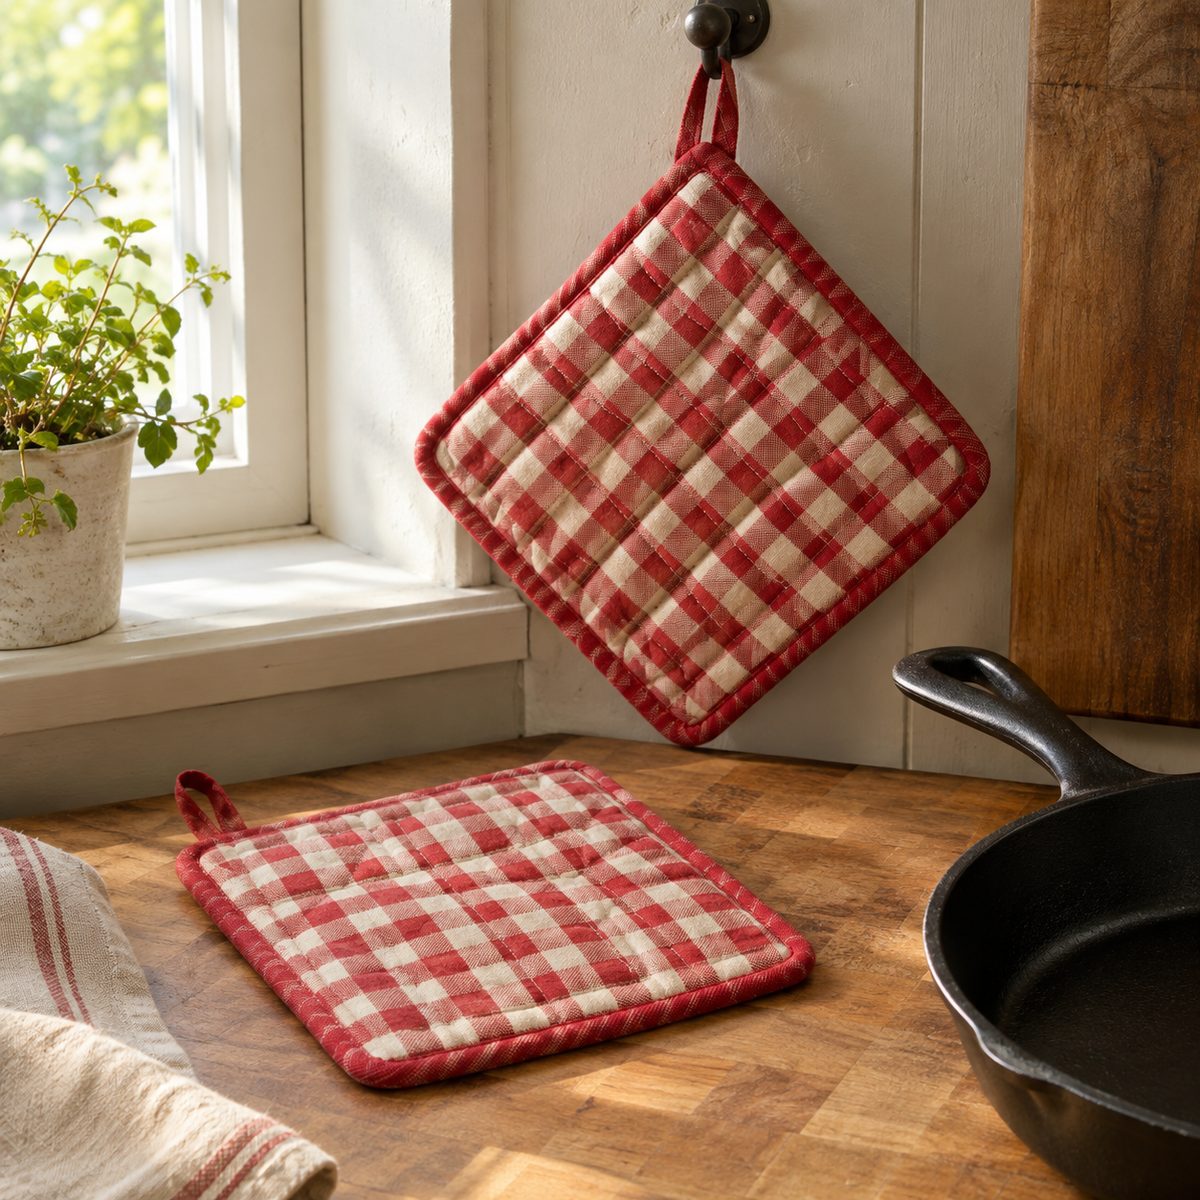
Potholders are the classic first kitchen project, and a good one takes about 30 minutes. The secret is the filling: use one layer of insulated, heat-resistant batting plus one layer of 100% cotton batting. Regular polyester batting alone lets heat straight through, and polyester can melt against a hot pan. If you are new to the different types, this guide to what batting is in sewing breaks them down.
- Cut two 9-inch squares of cotton fabric and one square of each batting.
- Stack, pin, and quilt a simple grid about 1 inch apart.
- Trim to 8 inches and bind the edges, adding a 4-inch loop at one corner.
Make them in pairs. One always goes missing.
2. Oven Mitt
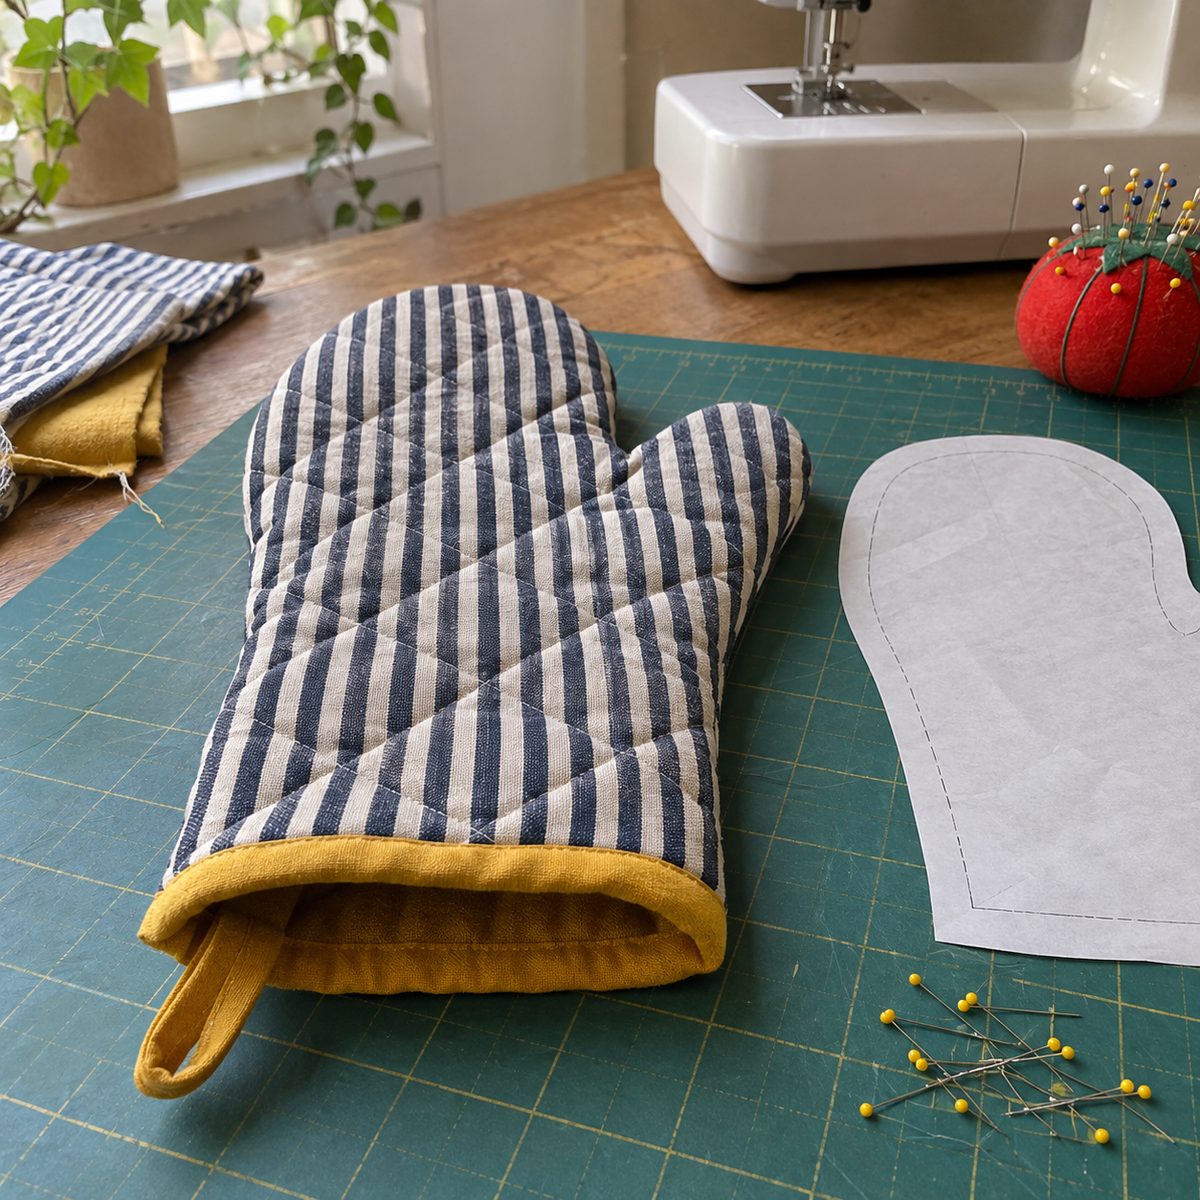
An oven mitt protects your wrist in a way a flat potholder never will, and it is easier to sew than it looks. Trace around your hand with fingers together and thumb out, then add 1 inch all around and extend the cuff to about 12 inches long.
Each side is a quilted sandwich: outer cotton, insulated batting, cotton batting, and cotton lining. Quilt each sandwich flat first, then cut out two mirror-image mitt shapes. Sew them together with a 1/2-inch seam, clip the curve at the thumb crotch carefully, and bind the raw seam allowance or finish it with a zigzag so it will not fray in the wash. Bind the cuff and add a hanging loop.
Use a size 90/14 needle to push through all those layers, and go slowly around the thumb. Budget about 90 minutes for your first one.
3. Microwave Bowl Cozies
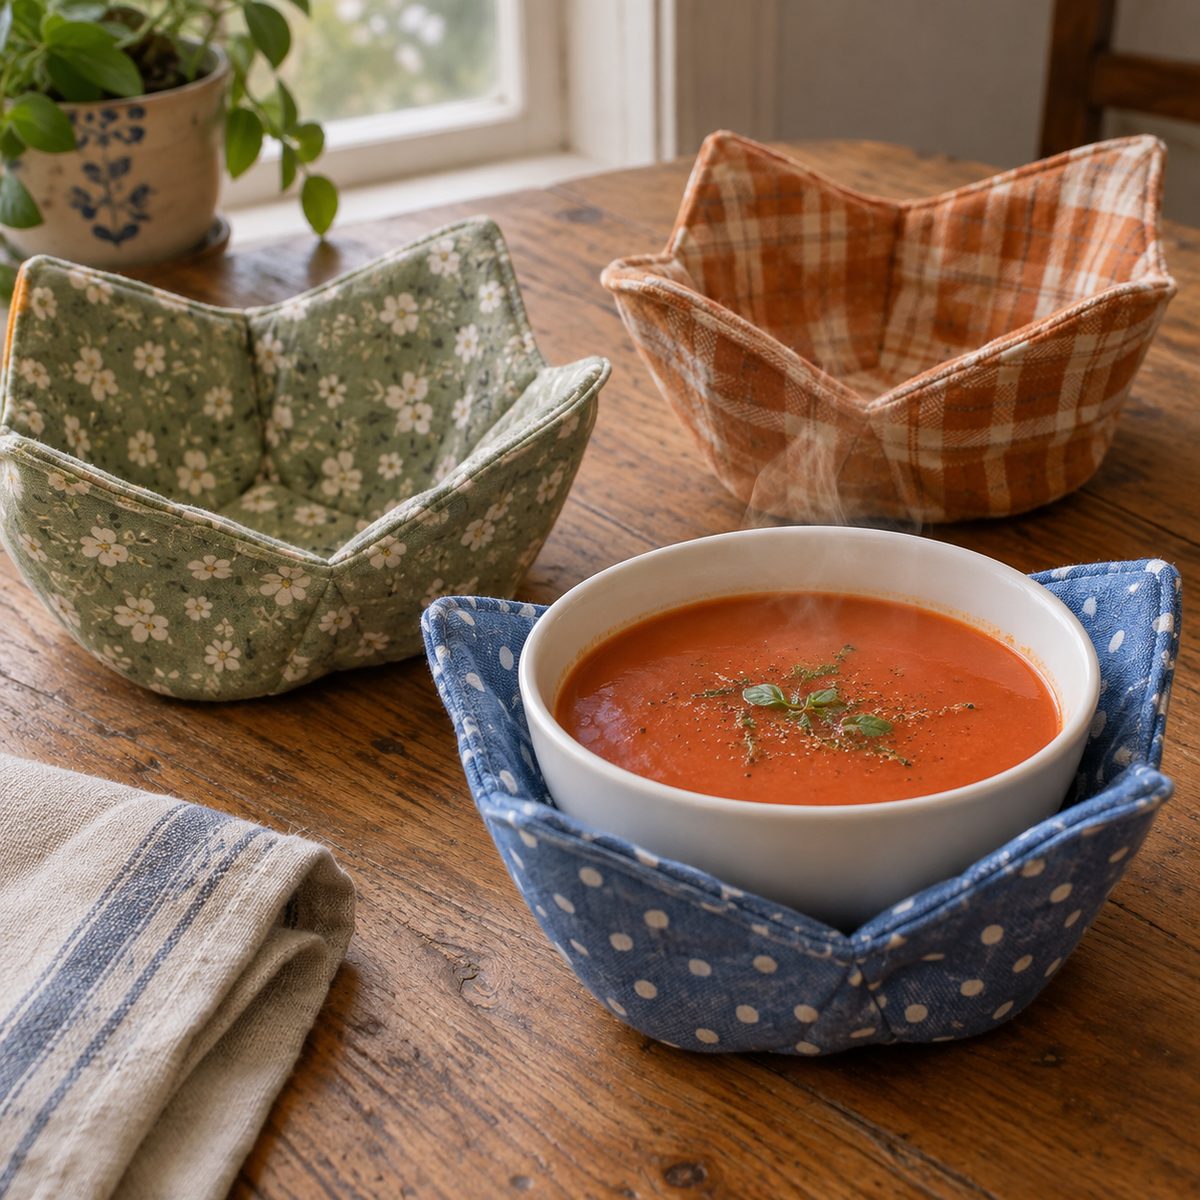
Bowl cozies are the kitchen project that sells out at every craft fair. They cradle a bowl of soup or oatmeal so you can carry it straight out of the microwave without burning your fingers.
Because they go in the microwave, materials matter more here than anywhere else in this list. Use 100% cotton fabric, 100% cotton thread, and 100% cotton batting with no scrim. Avoid polyester, metallic prints, and insulated batting, which contains a reflective film that can spark or scorch.
- Cut two 10-inch squares of fabric and two of batting.
- Fold each square in half, mark a 1-inch-wide, 3-inch-long dart at the center of each side, and sew all four darts.
- Stack outer and lining right sides together, sew around leaving a gap, turn, and topstitch.
A 10-inch cozy fits a standard cereal bowl. Scale to 12 inches for large soup bowls.
4. Cloth Napkins
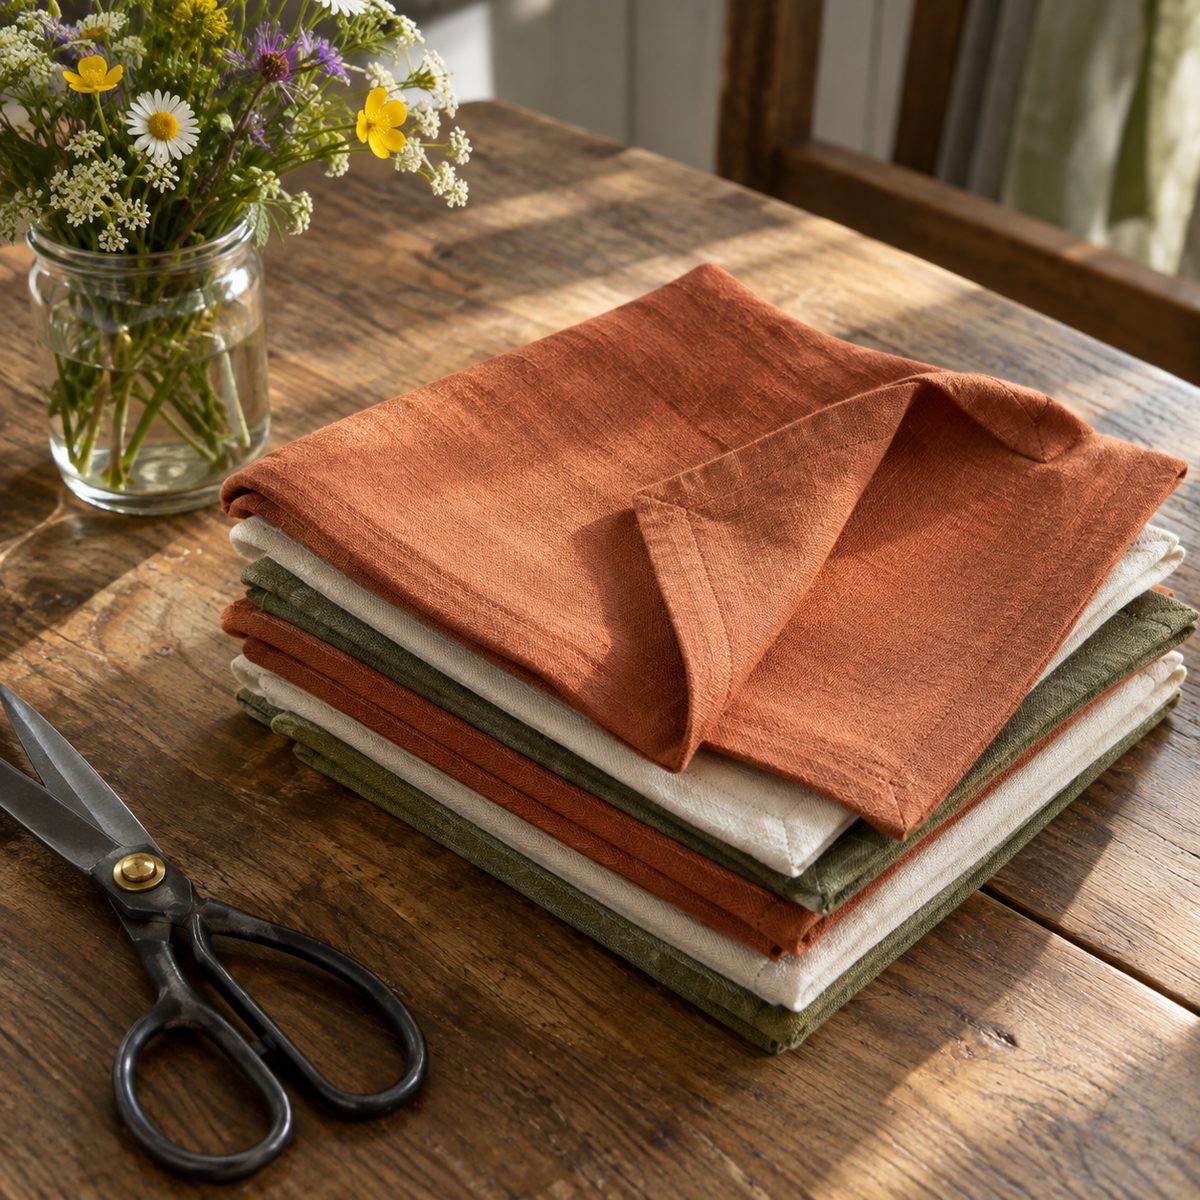
Cloth napkins are the easiest way to cut paper waste and make every meal feel a bit nicer. A set of eight is an afternoon of sewing.
Choose quilting cotton, cotton-linen blend, or lightweight linen. For a standard dinner napkin, cut 18-inch squares (you will get two per width of 44-inch fabric). For lunch or kids, 14 inches is plenty.
The cleanest finish is a mitered double-fold hem. Press 1/2 inch to the wrong side on all edges, then another 1/2 inch, and open out the corners to fold neat diagonal miters before stitching close to the inner fold. If you want to skip mitering, a narrow rolled hem on a serger or a double-fold hem with square corners looks nearly as tidy.
Wash and dry your fabric before cutting. Napkins get laundered constantly, and prewashing keeps them square.
5. Unpaper Towels
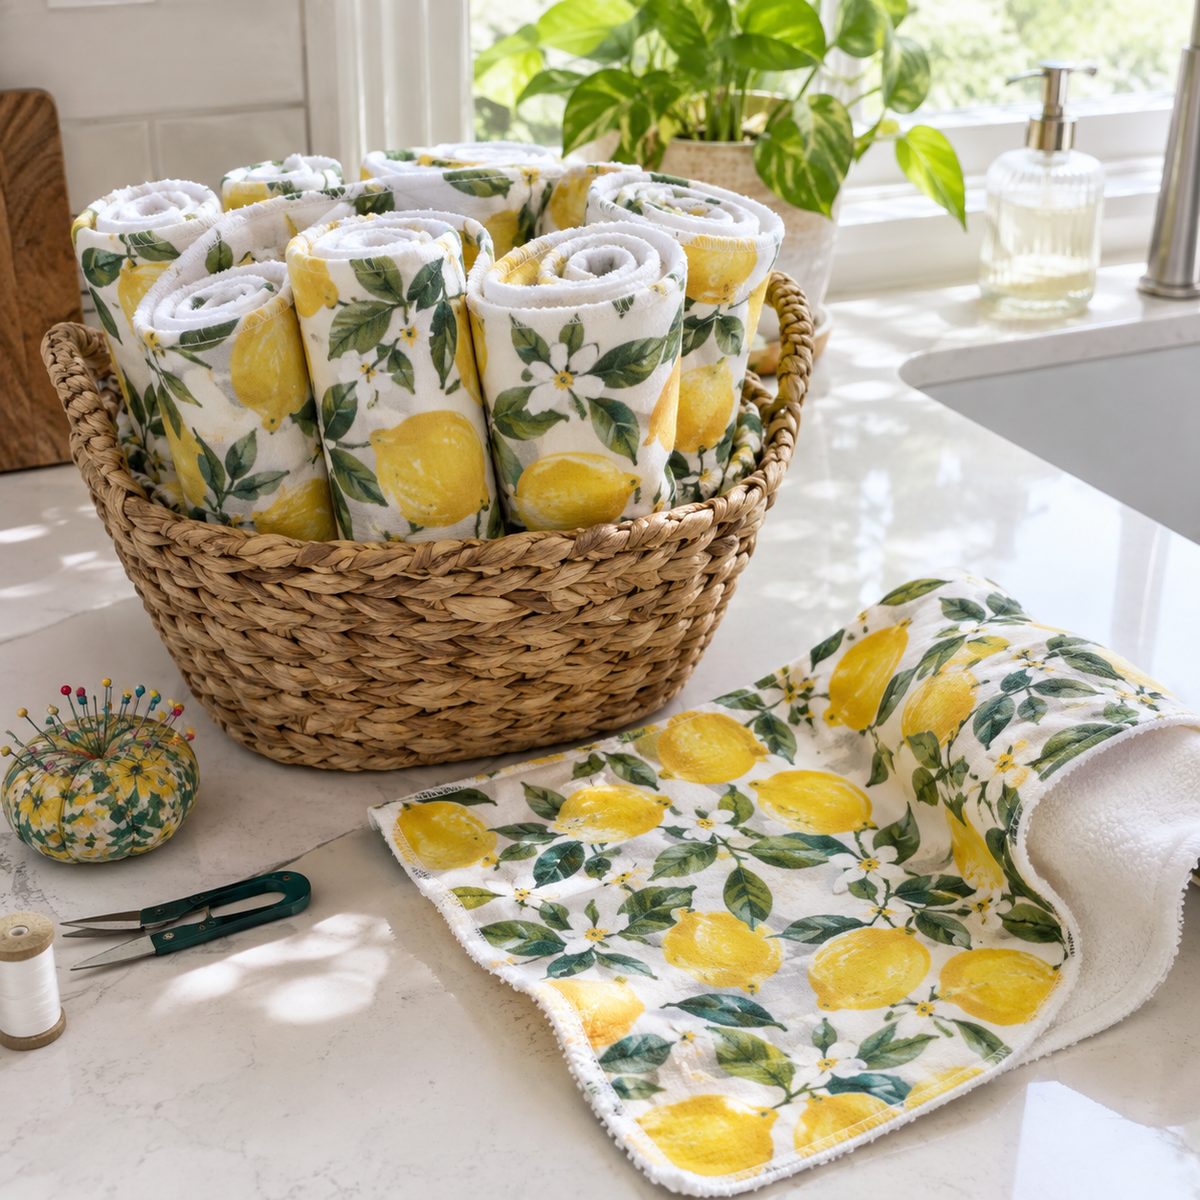
Unpaper towels are reusable cloth squares that replace paper towels for spills, drying hands, and wiping counters. They are one of the most practical things you can sew for a kitchen, and they are forgiving of wobbly seams.
Pair a printed quilting cotton on one side with an absorbent layer on the other: cotton flannel, birdseye cotton, or terry cloth all work well. Cut both layers 11 by 12 inches.
- Place right sides together and sew around with a 1/4-inch seam, leaving a 3-inch gap.
- Clip corners, turn, and press.
- Topstitch 1/8 inch from the edge to close the gap and keep the layers flat.
If you have a serger, you can skip turning entirely: layer wrong sides together and serge around the edge. Make a dozen, roll them up, and keep them in a basket where the paper towel holder used to be.
6. Reusable Produce Bags
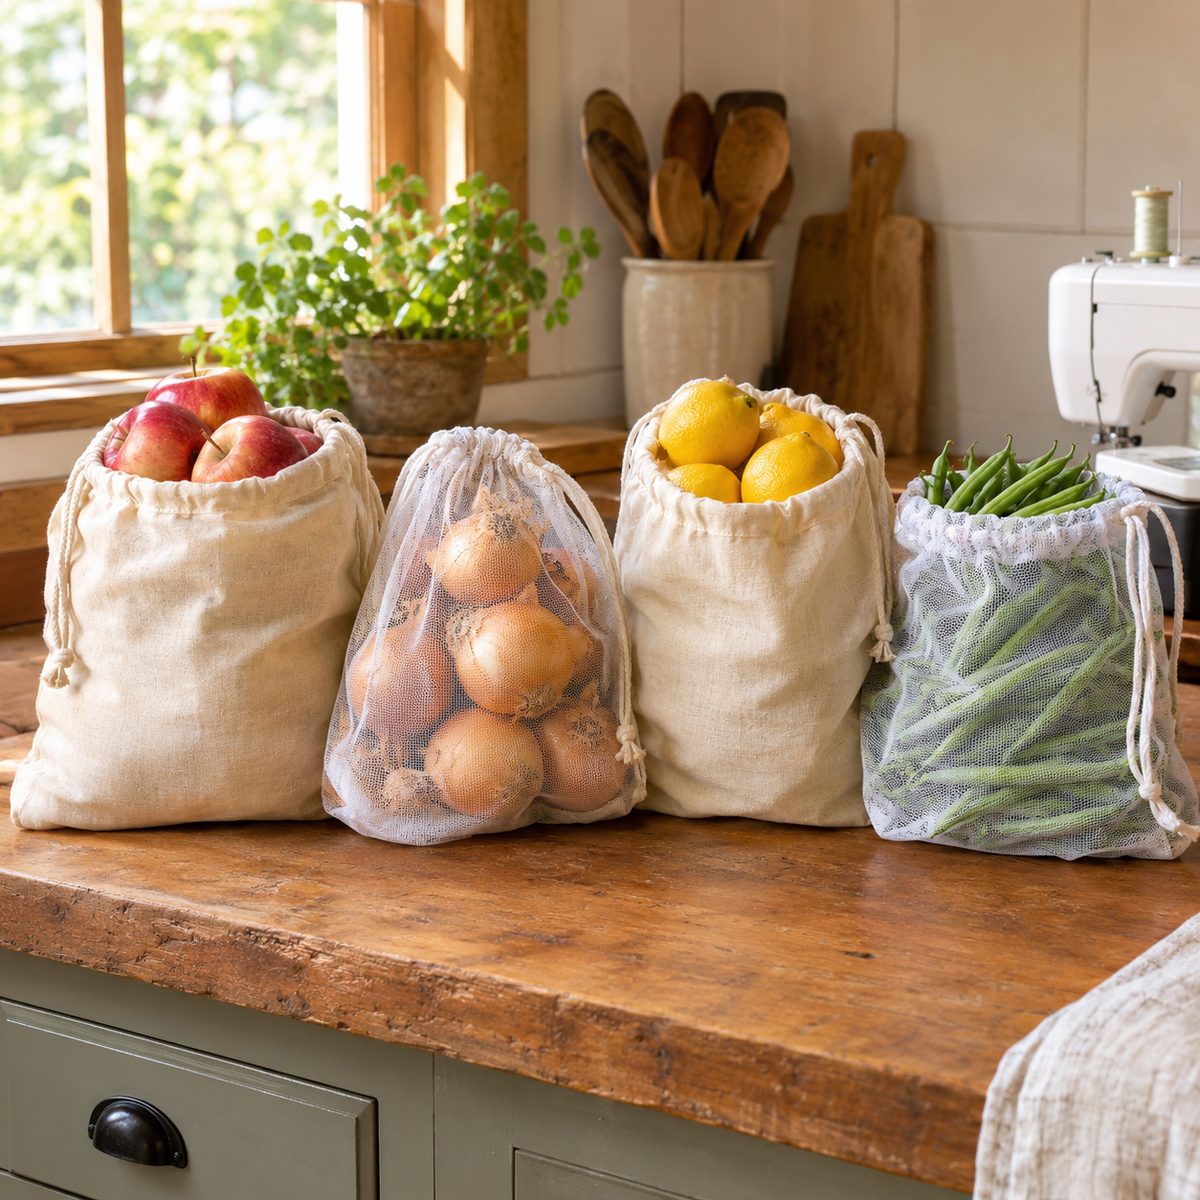
Reusable produce bags keep apples, onions, and loose greens together at the store and in the fridge drawer. They are also light enough to fold into your purse.
Use cotton muslin, lightweight linen, or a sheer polyester mesh if you want the cashier to see what is inside. A useful size is 12 by 15 inches finished, so cut a rectangle 13 by 32 inches, which gives you a fold at the bottom and room for a drawstring casing.
French seams are the key trick. Sew the sides wrong sides together at 1/4 inch, trim, turn, and sew again right sides together at 3/8 inch. That encloses every raw edge, so the bag will not shred after dozens of washes. Fold the top down 1 inch to form a casing, leave a small opening, and thread a cotton cord through with a safety pin.
Make them in three sizes and you will use every one.
7. Linen Bread Bag
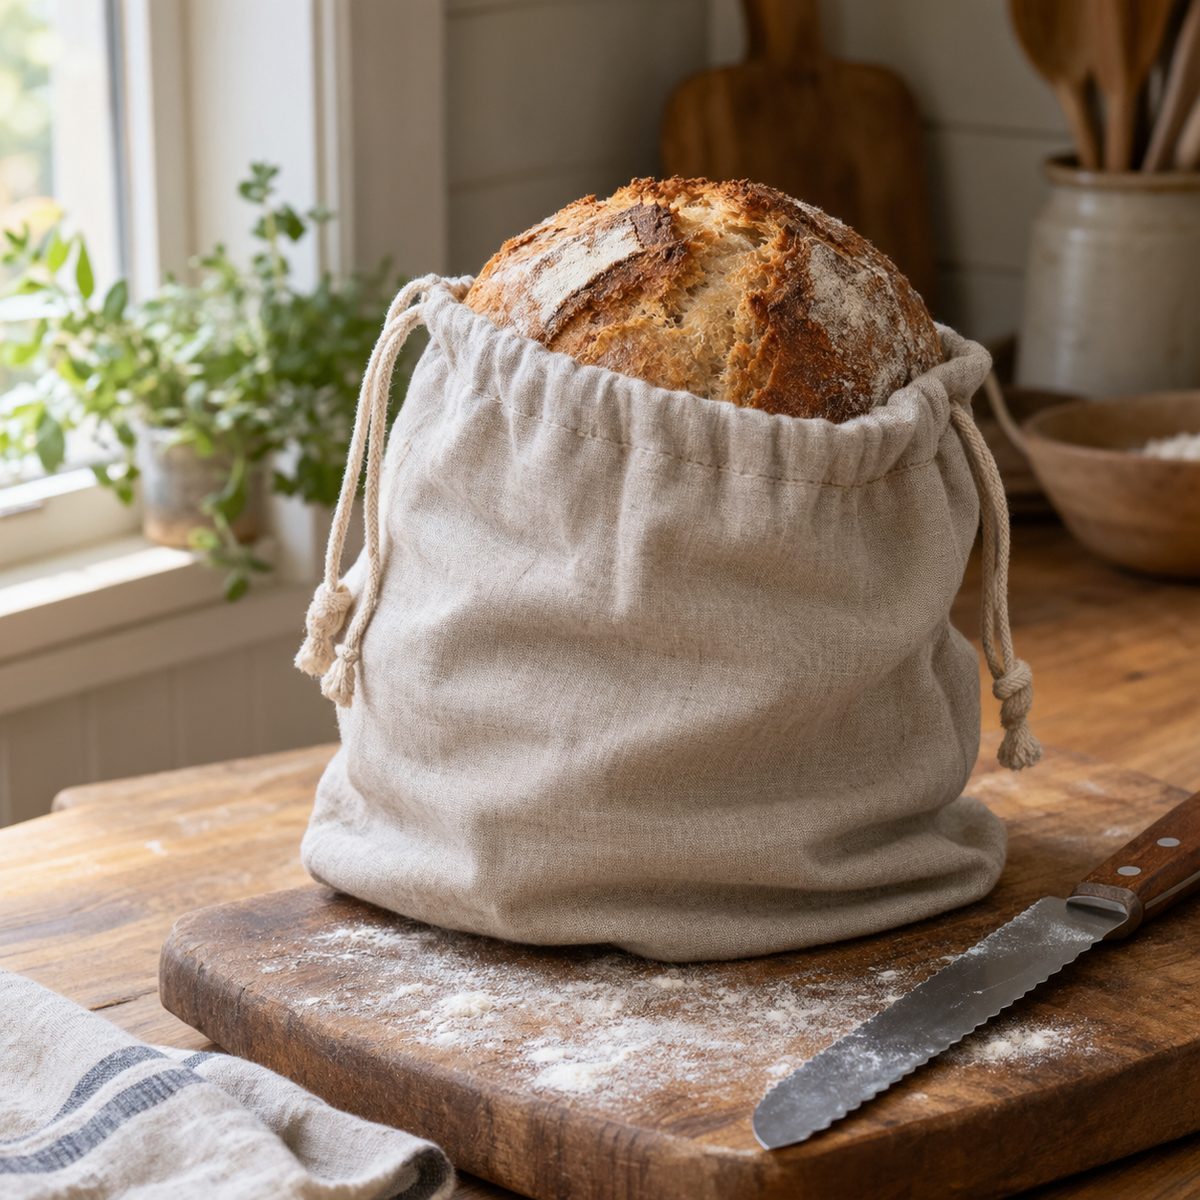
A linen bread bag keeps a crusty loaf fresh longer than plastic, which traps moisture and softens the crust. Linen breathes, so the loaf stays crisp outside and tender inside for two or three days.
Use a medium-weight linen or a linen-cotton blend. For a standard boule or baguette pair, cut a rectangle 15 by 34 inches. Fold in half so the bag is 15 by 17 inches, finish the side seams with French seams, and box the bottom corners by 3 inches so a round loaf sits flat.
At the top, fold down a 1 1/2-inch casing and run a linen tie or cotton cord through it. Some people prefer a flat bag with a simple fold-over flap and a button, which is quicker if you are not in the mood for drawstrings.
Wash it without fabric softener, which leaves a residue on linen and makes it less breathable.
8. Tea Towels
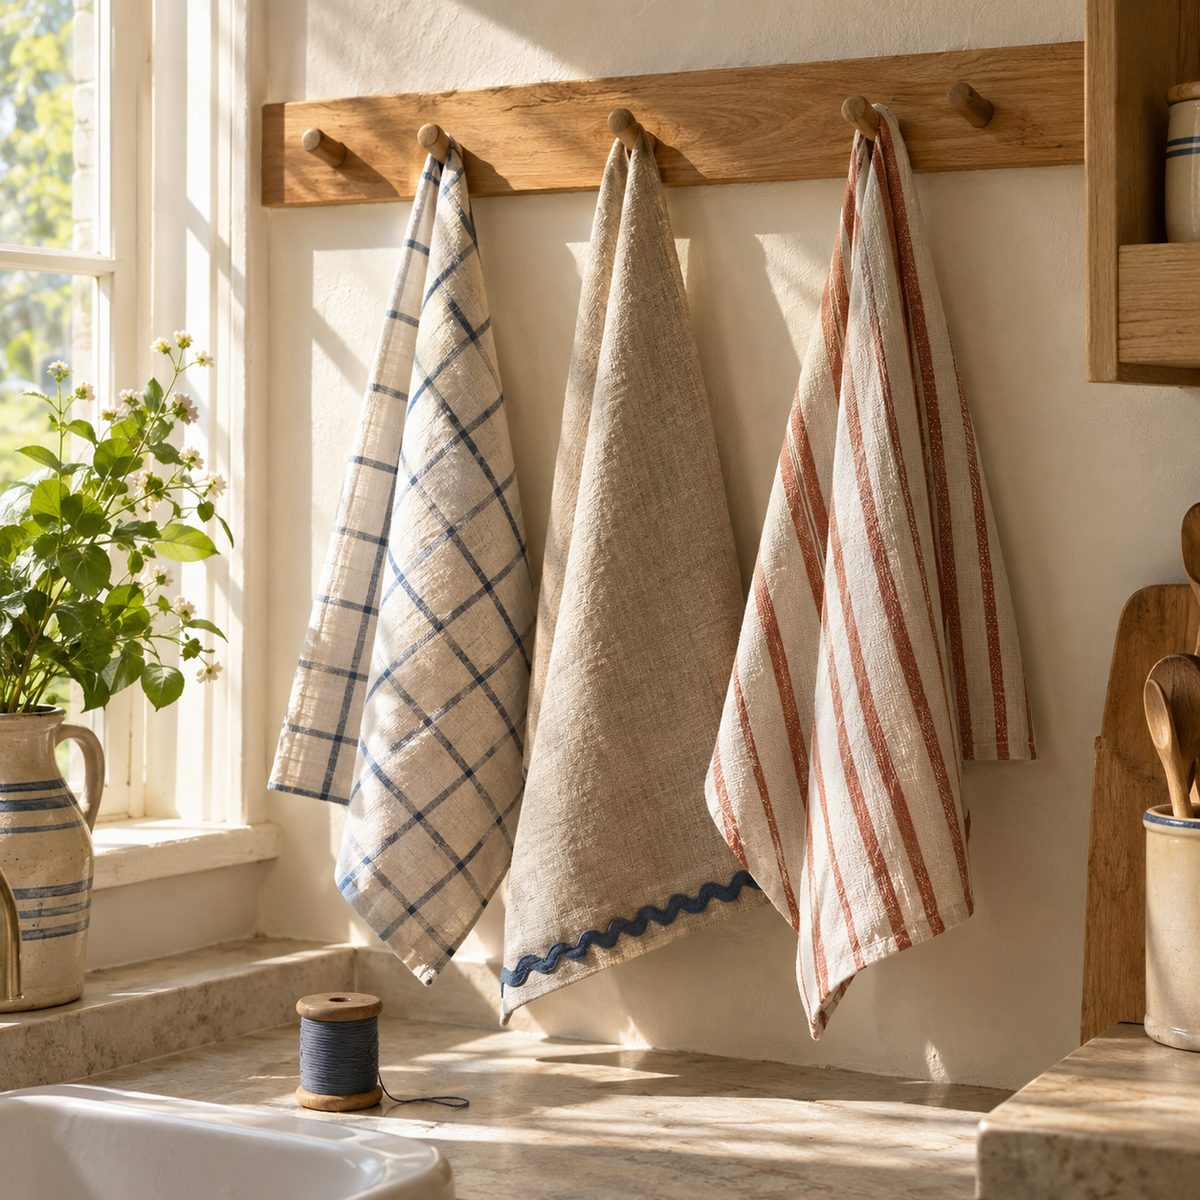
Handmade tea towels are quick to sew, wonderful for drying glassware, and one of the best small gifts you can make. The fabric does most of the work here.
Choose 100% linen, cotton-linen blend, or cotton huck toweling. Linen is lint-free and gets softer and more absorbent every wash. Cut rectangles 20 by 30 inches, or buy toweling by the yard and just hem the cut ends, since the selvage edges are already finished.
- Press a 1/2-inch double-fold hem on all raw edges.
- Tuck a 5-inch loop of twill tape into one corner before stitching.
- Stitch close to the inner fold and press firmly.
For a decorative touch, add a strip of contrasting fabric or rickrack across one end. It takes five extra minutes and makes the towel look boutique-bought.
9. Reversible Placemats
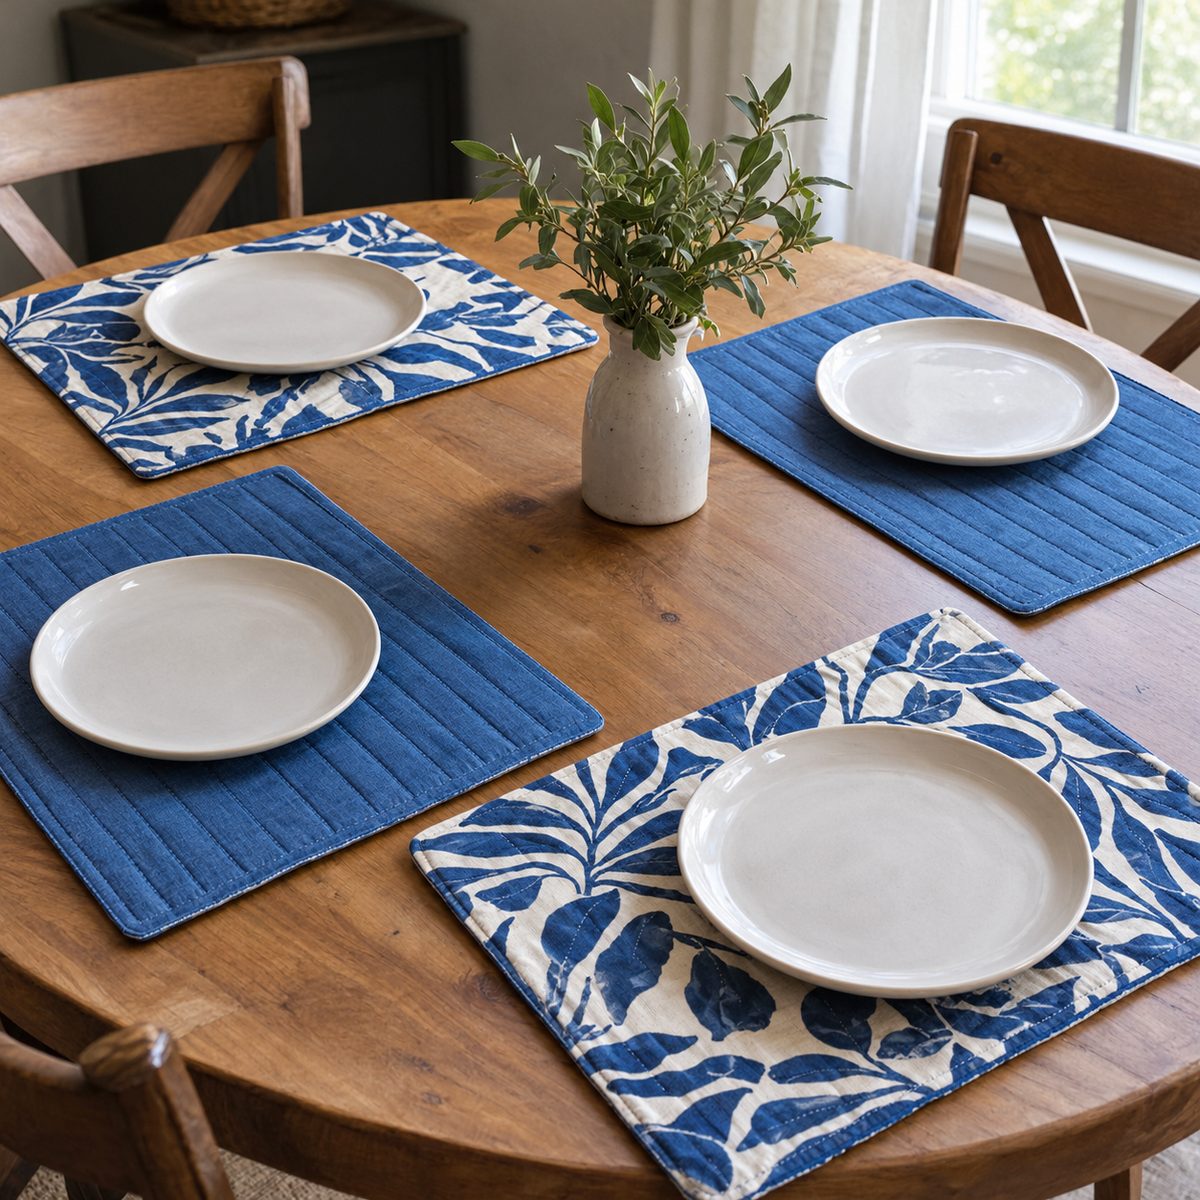
Reversible placemats give you two looks for the work of one, such as a festive print on one side and a solid neutral on the other. They protect your table and pull a room together.
Cut two pieces of cotton or canvas at 13 by 19 inches for each placemat. For body, add a layer of thin cotton batting or fusible fleece between them so the mat lies flat and cushions dishes.
Sew around the edge with right sides together, leaving a 4-inch gap on one long side. Clip corners, turn, press carefully, and topstitch 1/4 inch from the edge to close the opening. A few lines of straight-line quilting across the mat keep the layers from shifting in the wash.
Plan on about 45 minutes per placemat, faster once you batch-cut a set of four or six.
10. Table Runner
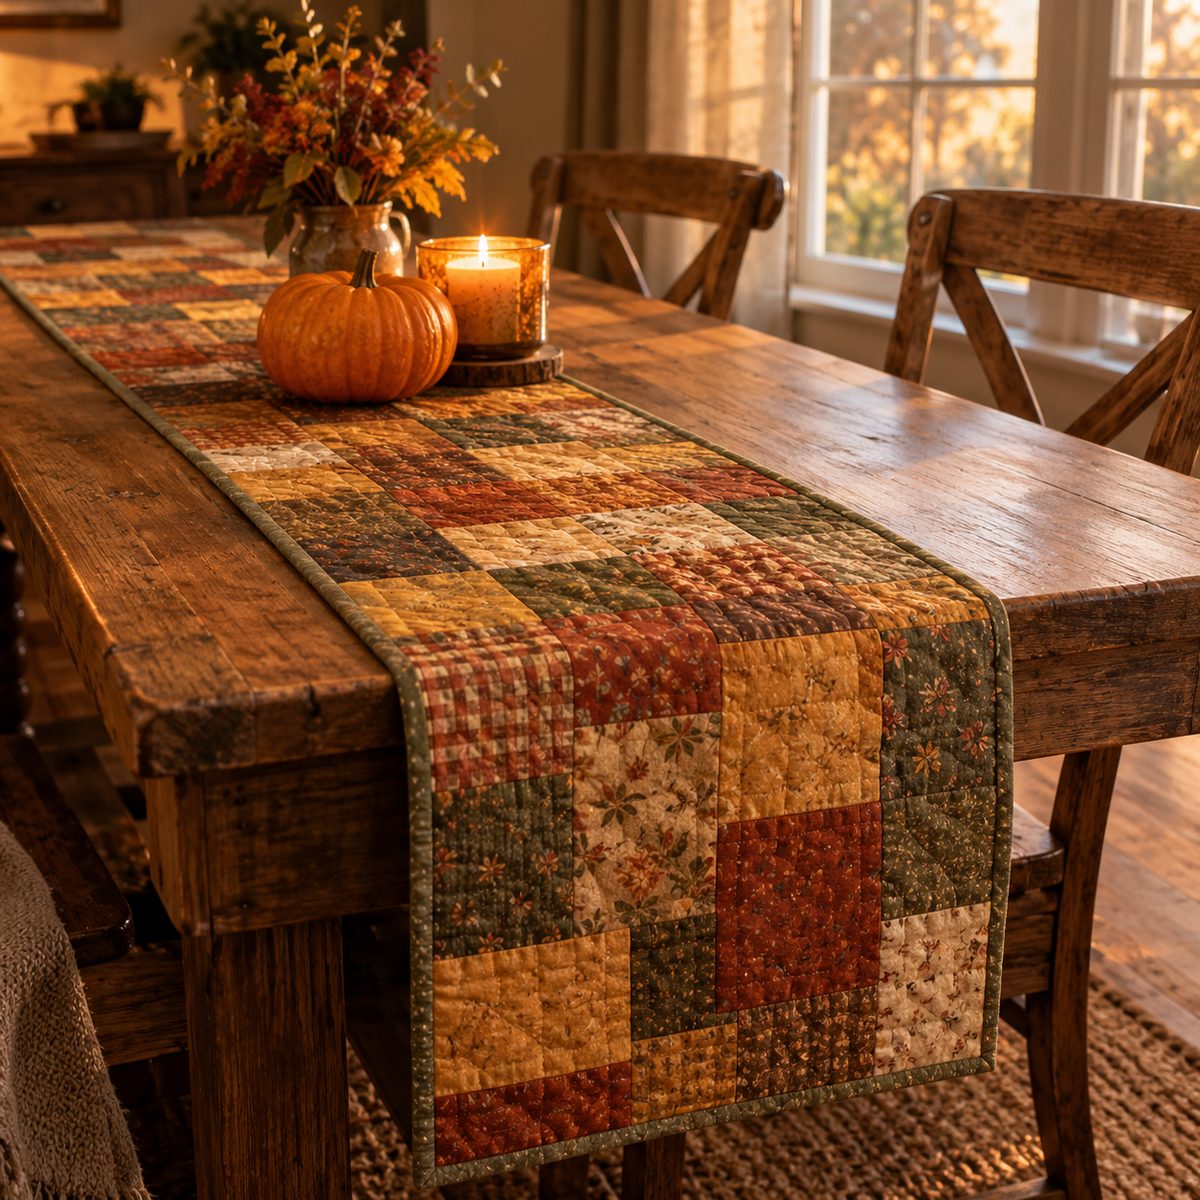
A table runner is the fastest way to change the look of a kitchen table with the seasons. It is basically a long, skinny quilt, and it is a great place to practice quilting without committing to a full bed-sized project.
A typical runner is 14 inches wide and about 12 to 18 inches shorter than your table length. Piece the top from strips or squares, or use one large print panel. Layer with thin cotton batting and backing, then quilt with straight lines or gentle curves.
Finish with double-fold binding cut 2 1/2 inches wide. You will need to join several strips for a runner this long, and this tutorial on how to sew binding strips together shows the neat diagonal-seam method.
Expect two to three hours, most of it in the quilting.
11. Jar Covers
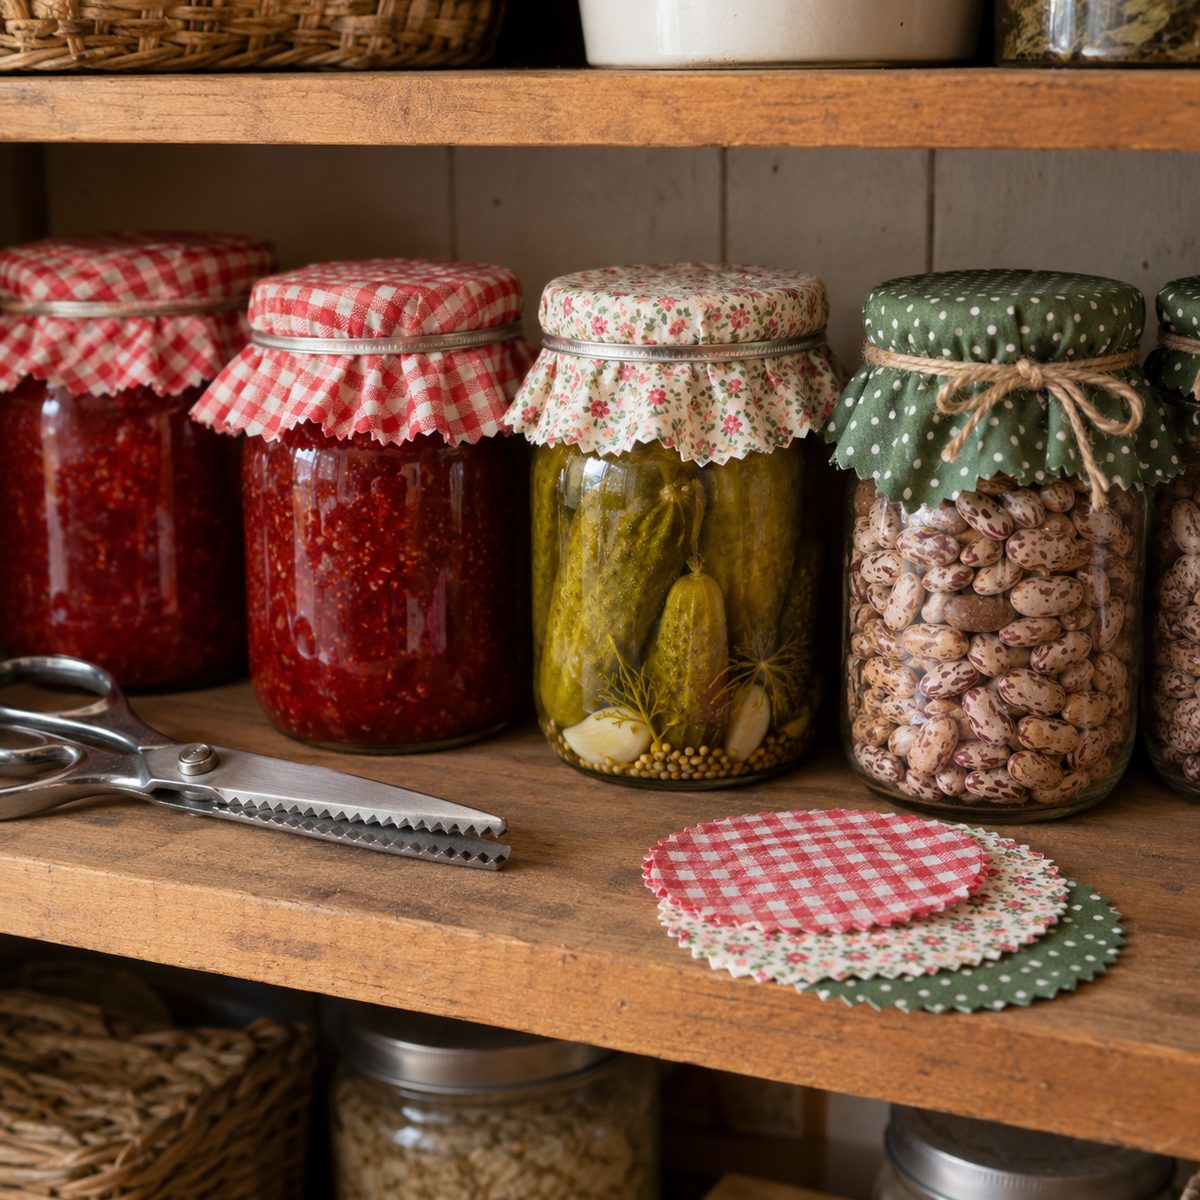
Fabric jar covers dress up homemade jam, pickles, or pantry storage and turn a simple jar into a pretty gift. They are the perfect use for tiny scraps.
For a regular-mouth mason jar, cut a 6 1/2-inch circle of cotton fabric. For a wide-mouth jar, cut 7 1/2 inches. Pinking shears give a cute zigzag edge that will not fray much, so you can skip hemming entirely.
For a more finished version, sew two circles right sides together, turn, press, and then stitch a casing 1 inch in from the edge. Thread a thin elastic or ribbon through the casing so the cover snugs around the lid.
Place the fabric over the flat lid, screw the band on over it, and trim any excess. Ten covers take less than an hour, and they add real charm to a holiday gift basket.
12. Stand Mixer Appliance Cover
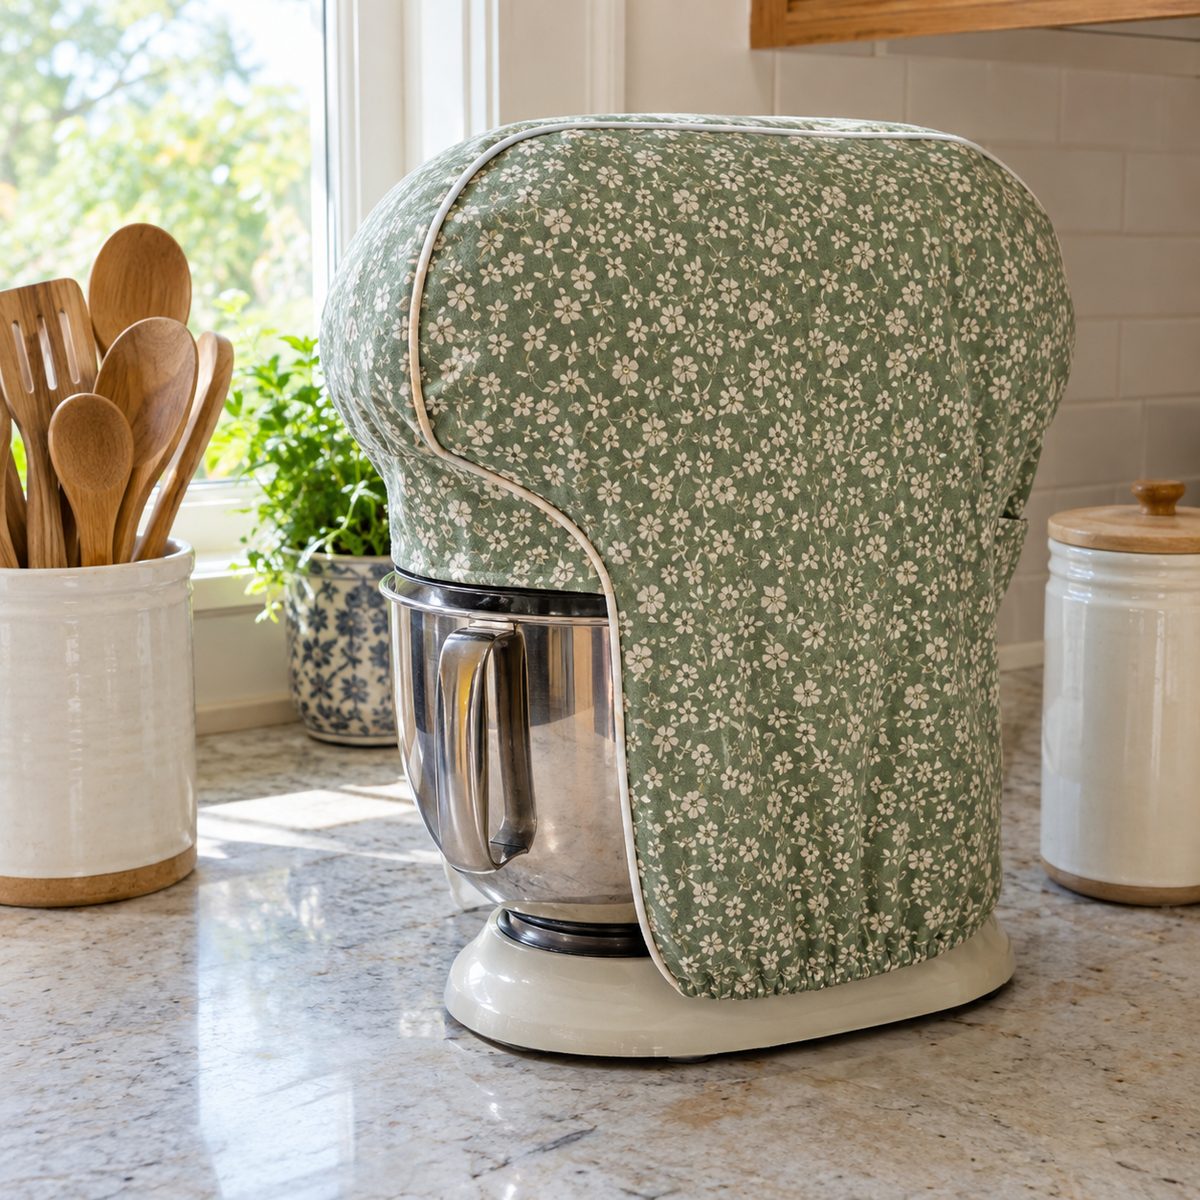
A fitted cover keeps flour dust and kitchen grease off your stand mixer and makes a counter look calmer. The same method works for a toaster, bread maker, or blender.
Measure the appliance height, depth, and width, then add 1 inch of ease to each plus seam allowances. The cover is three pieces: two side panels shaped like the mixer silhouette with rounded top corners, and one long gusset strip that runs up one side, over the top, and down the other.
Use canvas, duck cloth, or quilted cotton so the cover holds its shape. If you want quilting cotton, fuse a mid-weight interfacing to each piece first. Woven interfacing or fusible fleece works best for structure.
Ease the gusset around the curves with plenty of pins, and hem the bottom edge with a 1-inch double fold.
13. Hanging Kitchen Towel with Button Tab
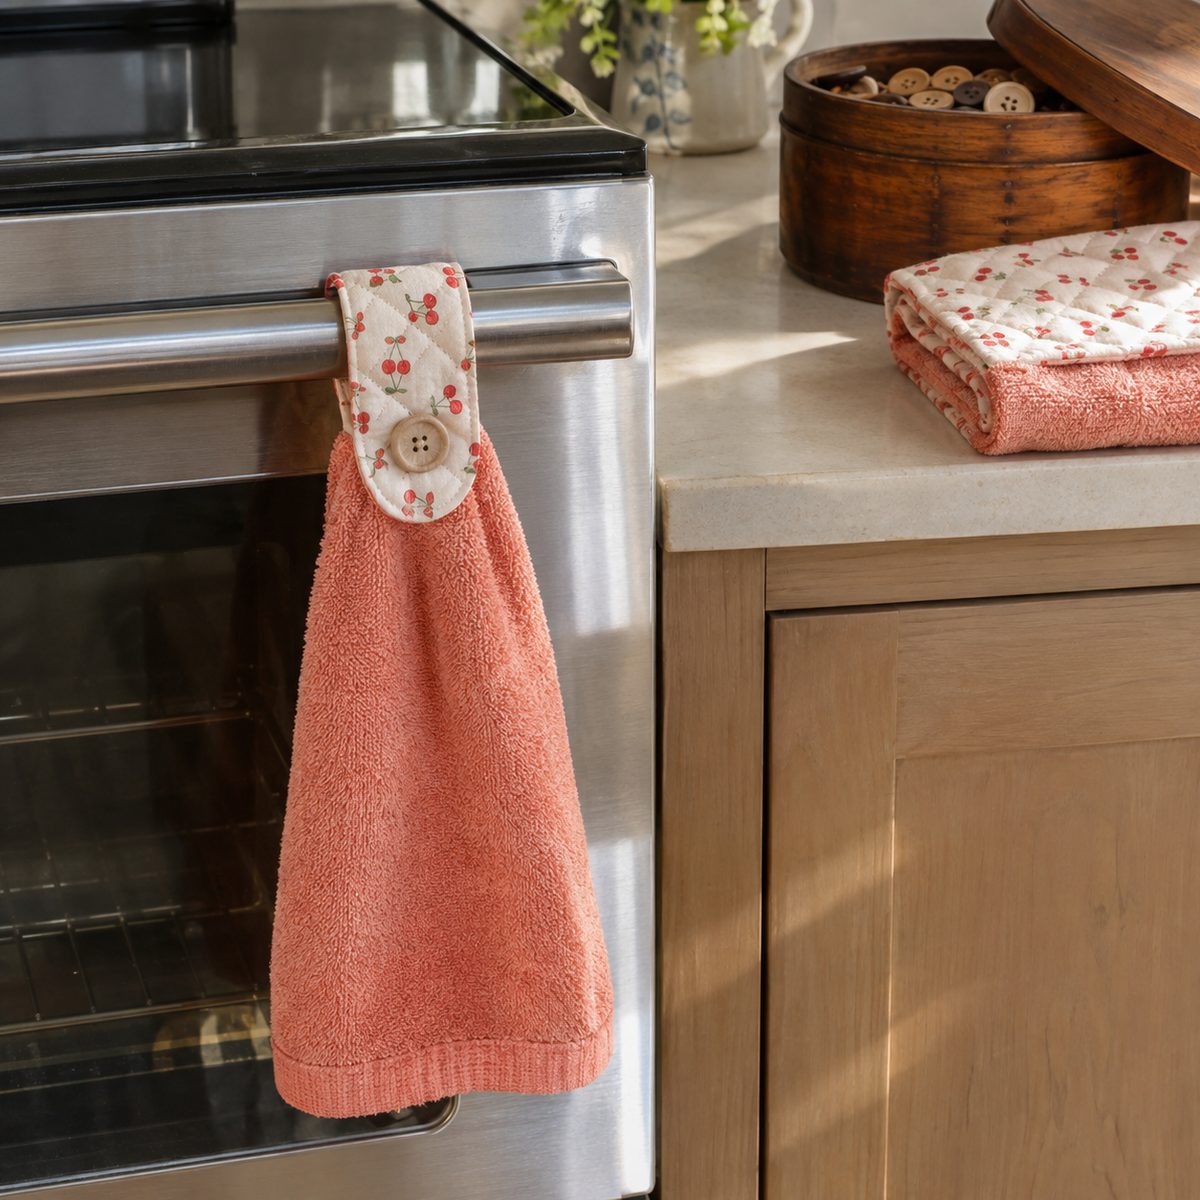
A hanging towel buttons around your oven handle or cabinet door so it stays put instead of sliding onto the floor. They make a great beginner project and a classic bazaar item.
Start with a purchased terry hand towel or a hemmed 16 by 24-inch piece of cotton terry. Cut it in half widthwise, and run a gathering stitch along the cut edge until it measures about 5 inches.
For the top tab, cut two pieces of quilting cotton about 6 by 8 inches with a rounded end. Sew them right sides together around the curve, turn, and press. Slip the gathered towel into the open end, topstitch closed, and add a buttonhole in the rounded end with a button on the other side.
The whole thing takes about 40 minutes, and you get two towels from one hand towel.
14. Half Apron
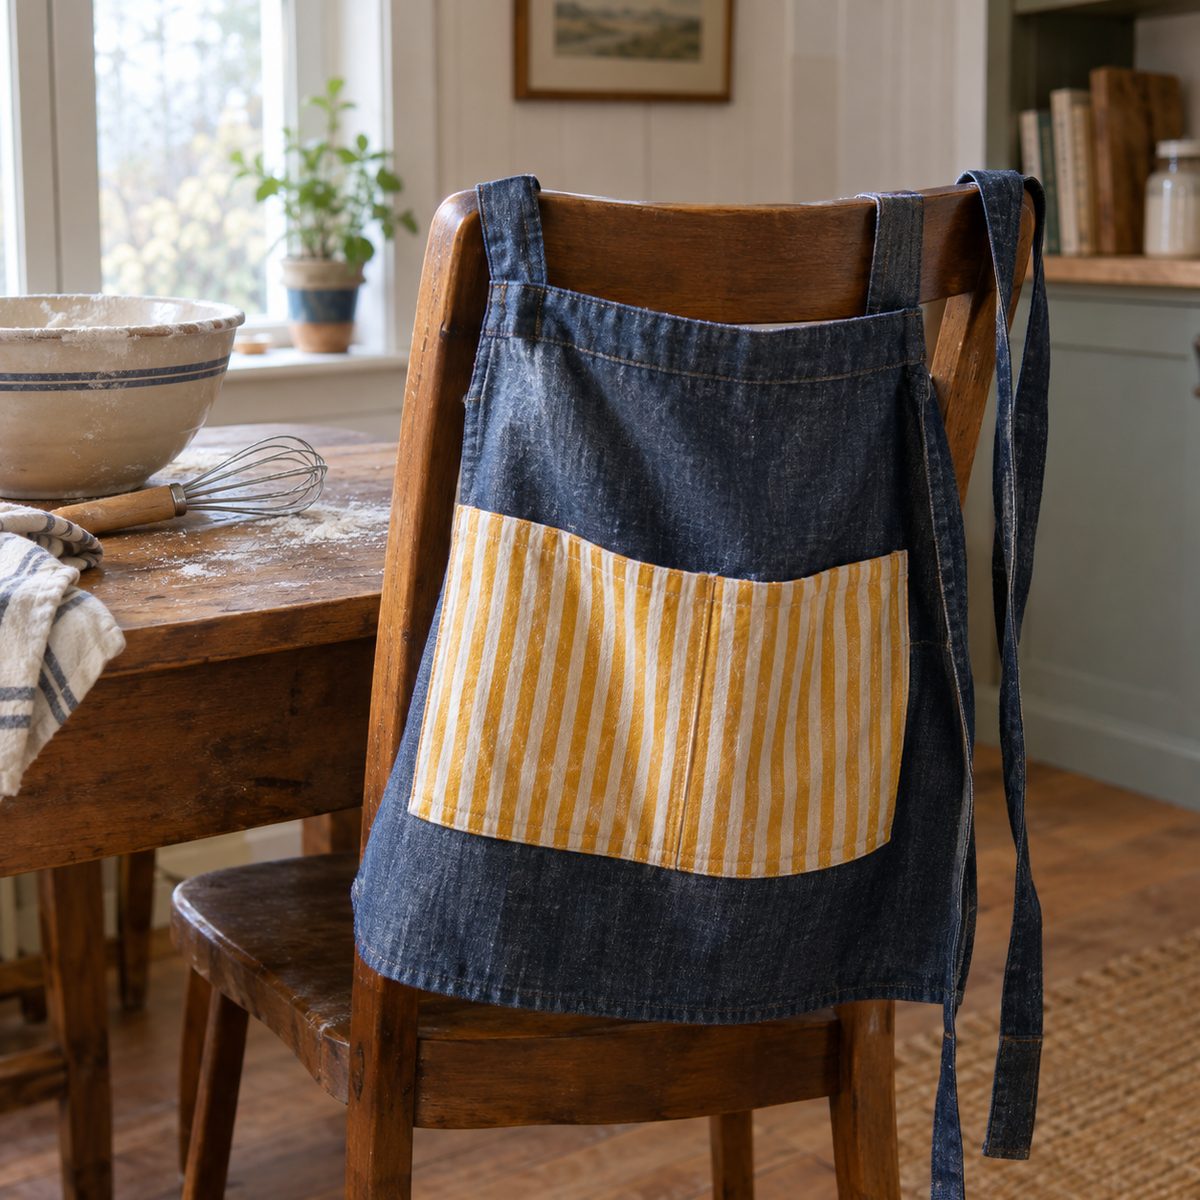
A half apron covers your lap while you cook or bake and is quicker to make than a full bib apron. Add a deep pocket and it becomes the place your phone, dish towel, and meat thermometer all live.
Cut a rectangle 24 inches wide by 20 inches long in canvas, denim, or sturdy cotton. Hem the sides and bottom with a 1/2-inch double fold. For the pocket, cut a piece 24 by 8 inches, hem the top, press the other edges under, and stitch it across the lower apron, then sew vertical lines to divide it into three or four compartments.
Gather or pleat the top edge to about 18 inches. Cut a waistband strip 4 by 80 inches, fold it in half lengthwise, and sandwich the apron top into the center. Stitch along the full length to close both ties and attach the apron at once.
15. Insulated Casserole Carrier
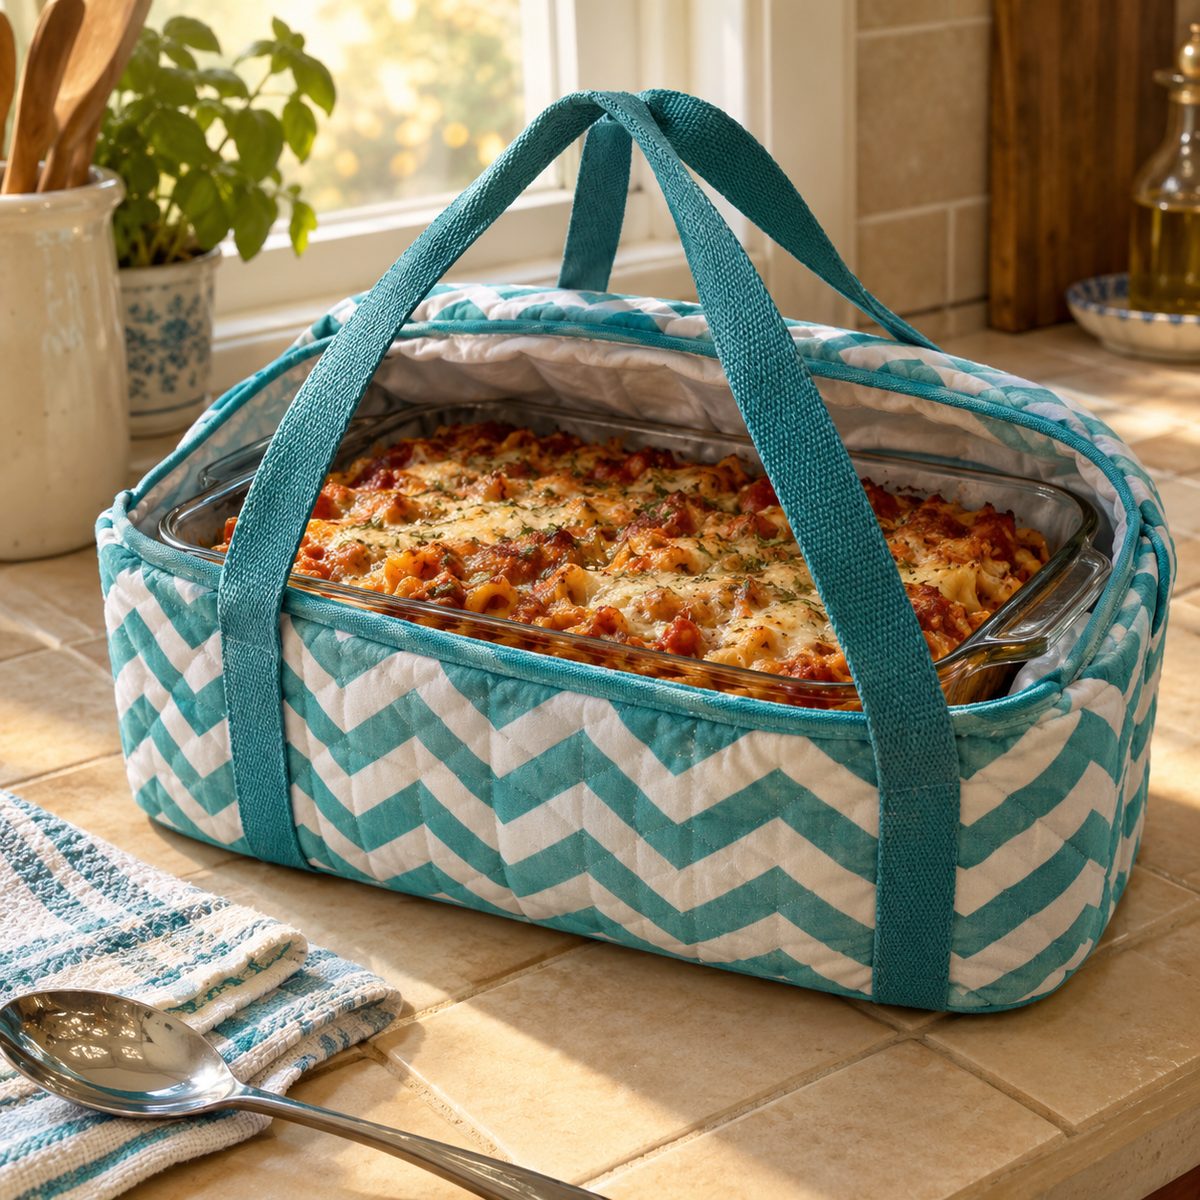
If you bring dishes to potlucks, a casserole carrier is a must. It keeps a hot 9 by 13-inch pan warm and lets you carry it by handles instead of balancing it on oven mitts.
Cut an outer fabric, an insulated heat-resistant batting, and a lining, each 24 by 28 inches. Quilt the three layers together with straight lines, then cut a 4-inch square from each corner.
- Bind all outer edges, including the notched corners.
- Fold up each side so the carrier forms a tray, and join each corner with a pair of ties or hook-and-loop tabs.
- Add two sturdy handles made from 2-inch cotton webbing across the long sides.
Measure your own baking dish before cutting, since brands vary by an inch or more. A heavy-duty 100/16 needle helps when stitching through the webbing and binding layers.
16. Reusable Elastic Bowl Covers
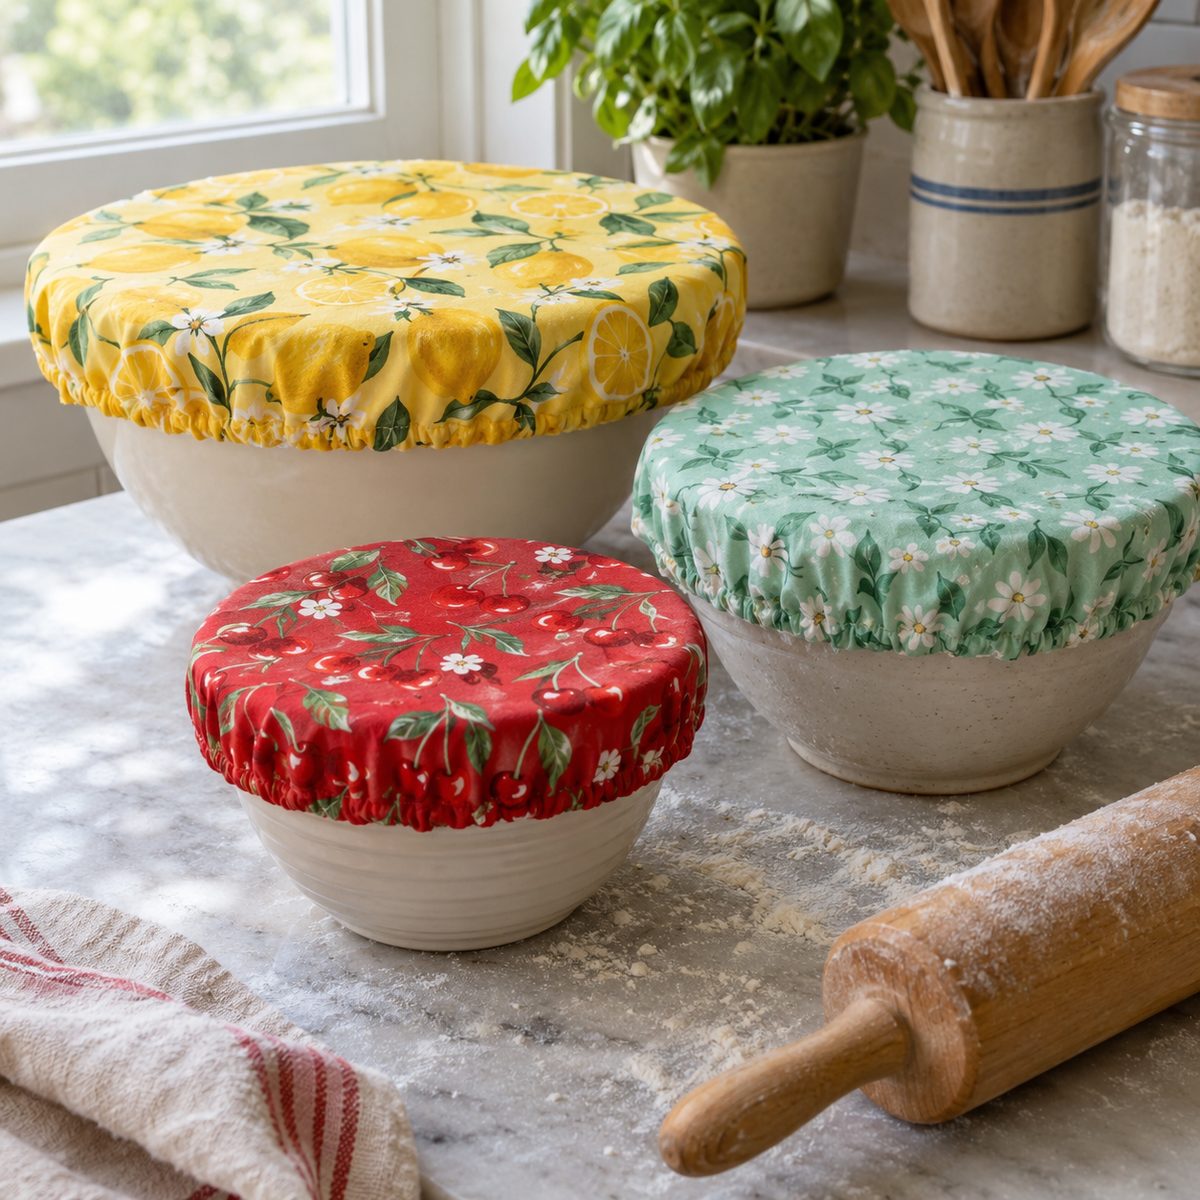
Fabric bowl covers are a washable swap for plastic wrap. They snap over a bowl of rising dough, leftovers, or a salad heading to a picnic.
Measure across the top of your bowl and add 4 inches to get the circle diameter. A 10-inch mixing bowl needs a 14-inch circle. Cut one layer of cotton, or two if you want a reversible cover. For covers that sit over damp food, a layer of PUL or ripstop nylon makes a water-resistant lining. Just keep those versions out of the microwave.
Fold the edge under 1/2 inch to form a casing, stitch around, and leave a 1-inch gap. Thread 1/4-inch elastic through, pull it until the cover fits snugly, and sew the ends together. If you have trouble keeping elastic even, this guide on how to sew elastic into fabric helps.
Make a small, medium, and large so every bowl in the cupboard has a match.
17. Grocery Bag Holder
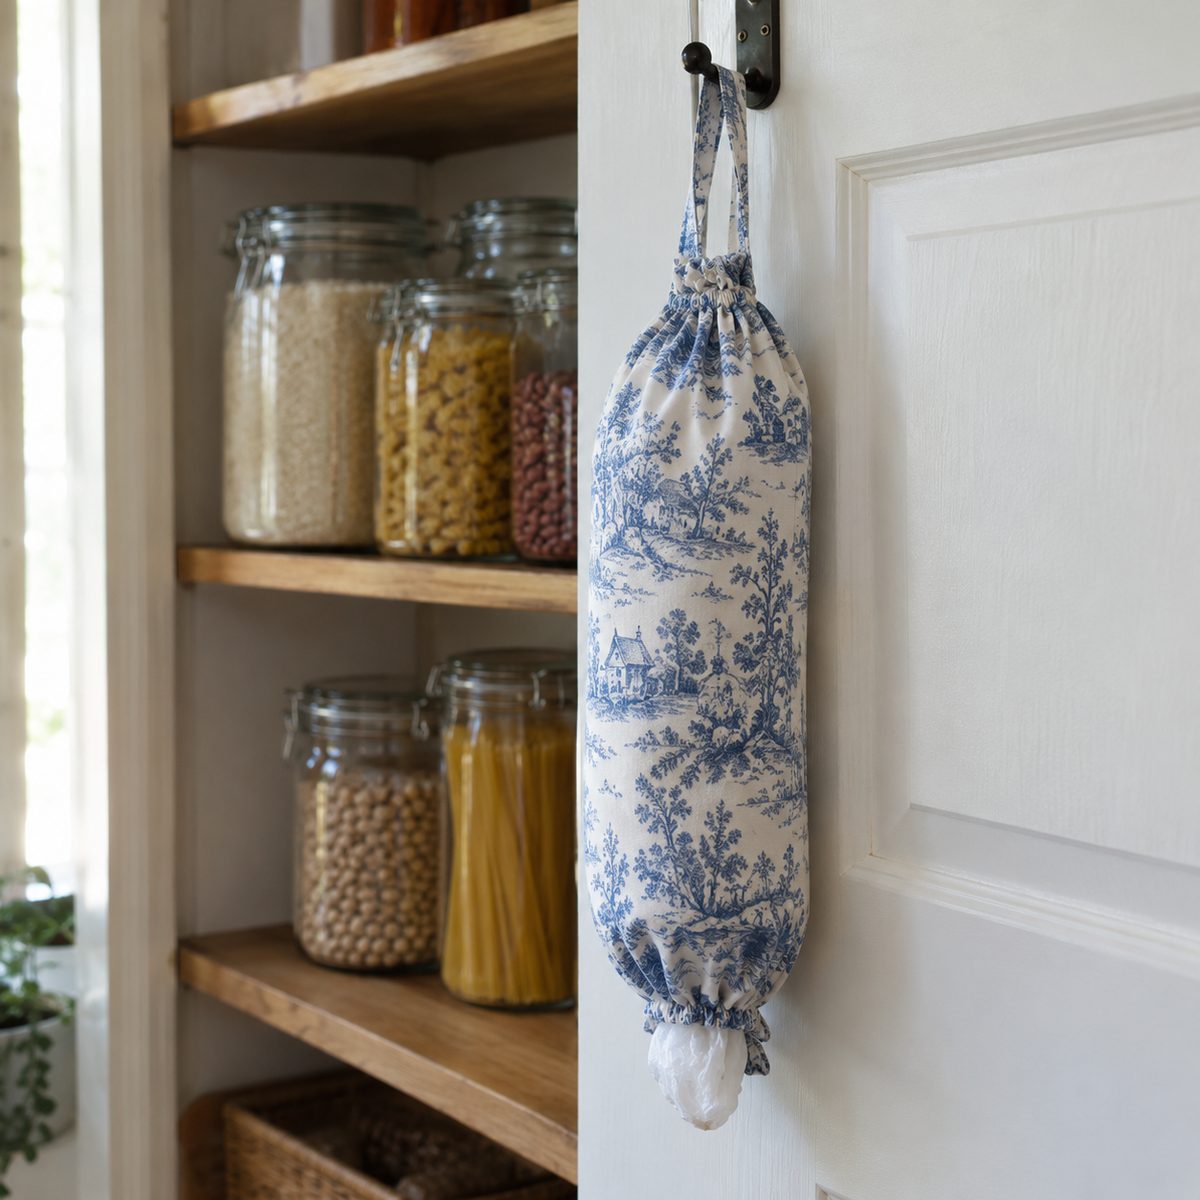
A fabric grocery bag holder, sometimes called a bag keeper, tames the pile of plastic bags under the sink. You stuff bags in the top and pull them out one at a time from the bottom.
Cut a rectangle 18 by 23 inches in a sturdy cotton or home decor fabric. Hem both short ends with a 1-inch casing and thread 1/4-inch elastic through each, pulling it snug so each end gathers to about 3 inches. Sew the elastic ends together.
Fold the tube right sides together along the long edge and sew with a 1/2-inch seam, then finish the seam allowance with a zigzag or serger. Turn right side out and attach a 6-inch fabric loop at the top for hanging on a hook or cabinet door.
It is a 30-minute project and a smart way to use up a half yard of fabric you love.
18. Fabric Trivets and Coasters
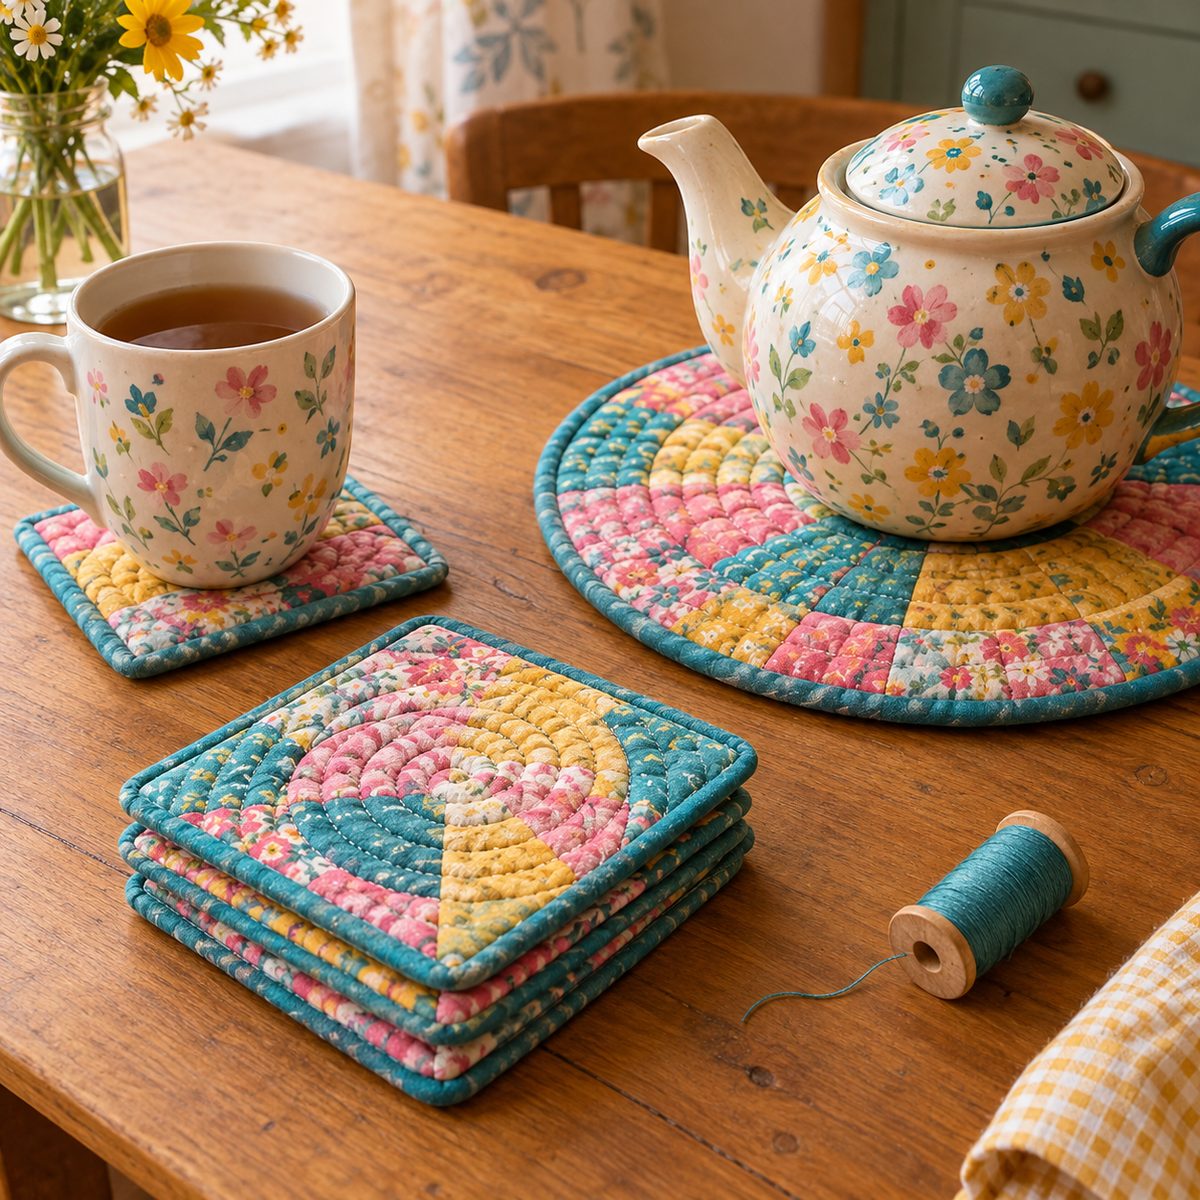
Fabric trivets protect your table from warm serving dishes, and matching coasters catch drips from iced tea. Both are ideal for using up small fabric scraps.
For a trivet, cut two 9-inch squares of cotton plus one layer of insulated batting and one of cotton batting, just like a potholder. For coasters, cut 5-inch squares with a single layer of cotton batting.
- Place fabric right sides together on top of the batting and sew around, leaving a gap.
- Trim corners, turn, and press flat.
- Topstitch around the edge and add a spiral or grid of quilting to hold everything in place.
A set of four coasters and one trivet tied with twine makes a lovely hostess gift, and the whole set takes about an hour.
Where to Start
If you are new to kitchen sewing, begin with napkins or tea towels to practice straight hems, then move on to potholders once you are comfortable with layers and binding. Keep a small stash of 100% cotton batting, cotton thread, and heat-resistant batting on hand so you can whip up bowl cozies and trivets whenever a gift occasion pops up. Prewash everything, since kitchen linens live in the laundry. Before long, your drawers will be full of things you actually love using every day.