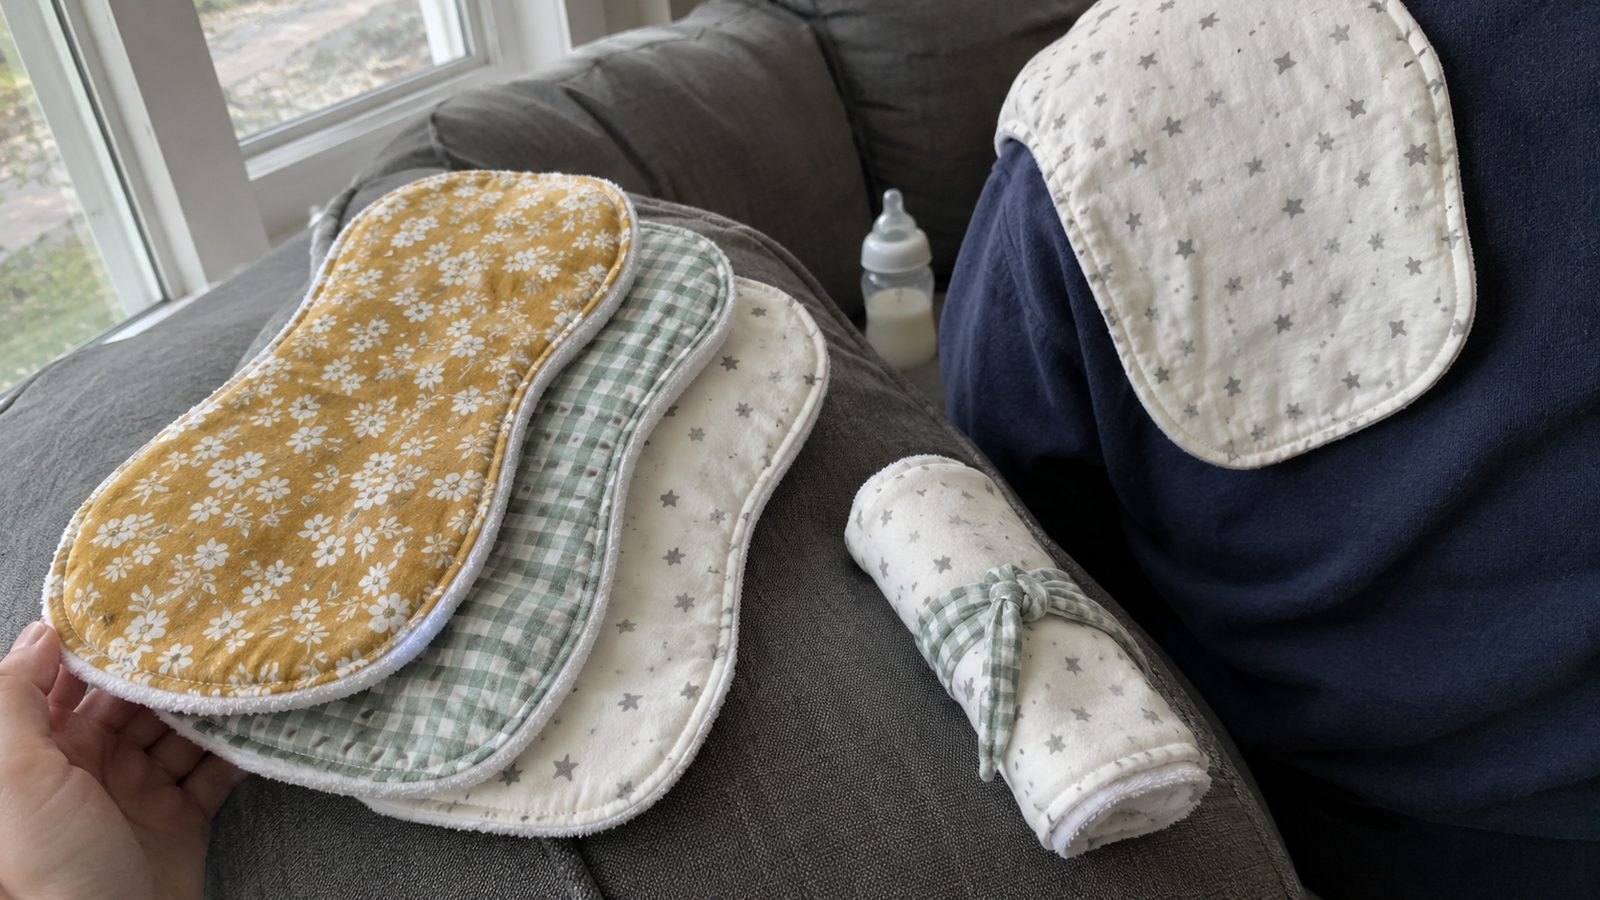
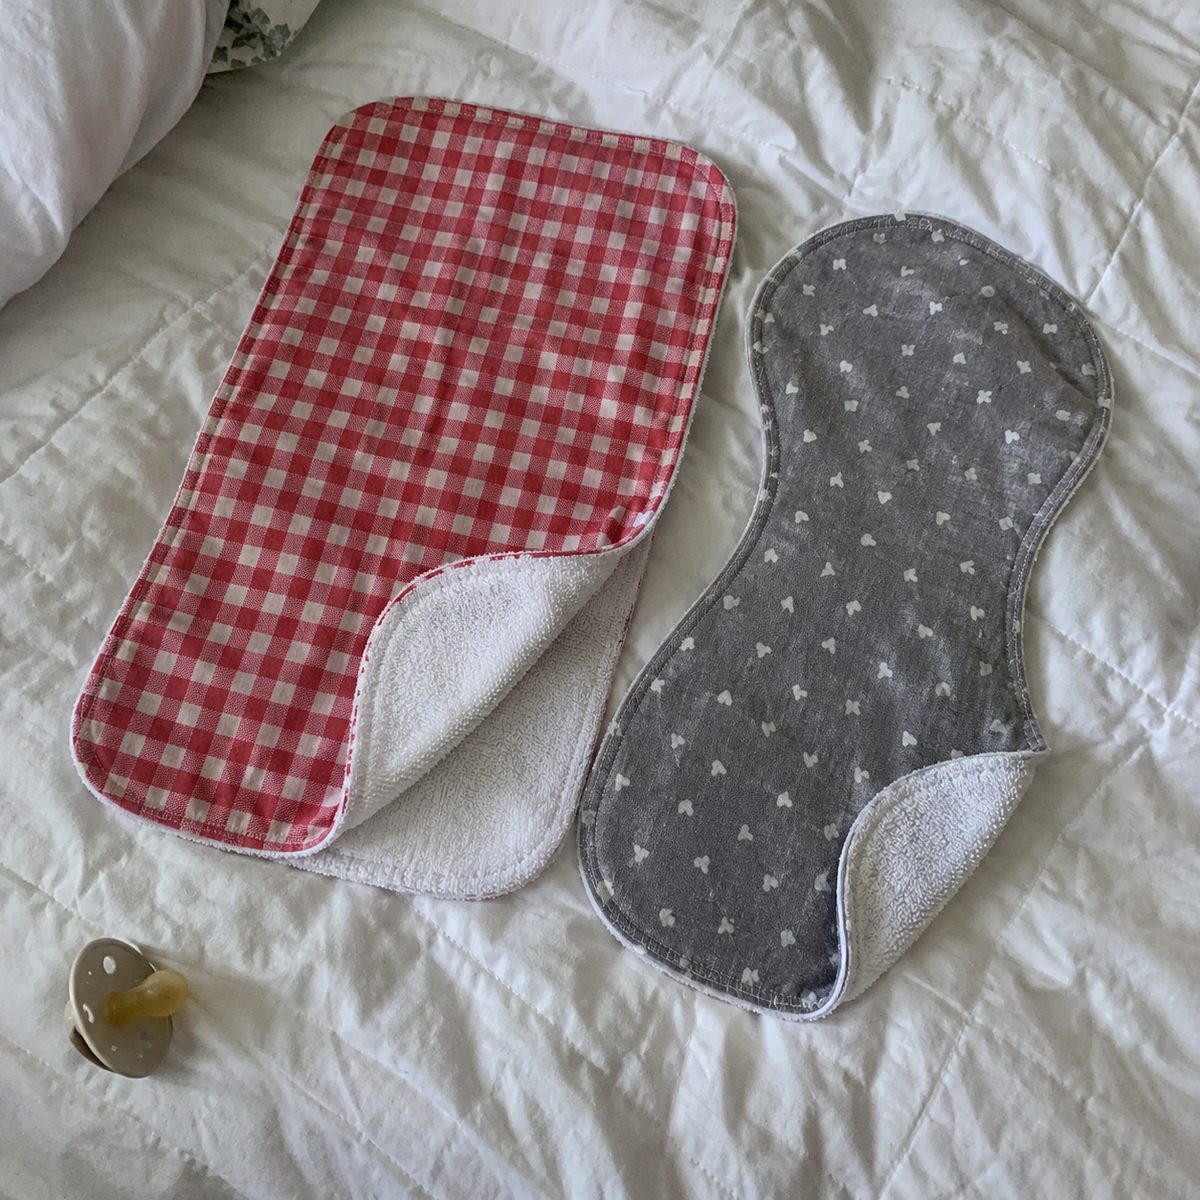
A burp cloth is a two-layer pad, a soft print on one side and something absorbent on the other, shaped to sit on a shoulder without sliding off. This contoured version finishes about 9 1/2 by 17 1/2 inches. A set of three takes about an hour, and it is a true beginner project: one gentle curve, a quarter-inch seam, no closures.
The one thing that makes them come out well is prewashing. Flannel shrinks hard, terry shrinks and sheds, and an unwashed cloth puckers and twists on its first hot cycle.
Burp cloths were one of the most-clicked items in my handmade gifts roundup, and they are what I make when a shower invitation shows up.
What you’ll need
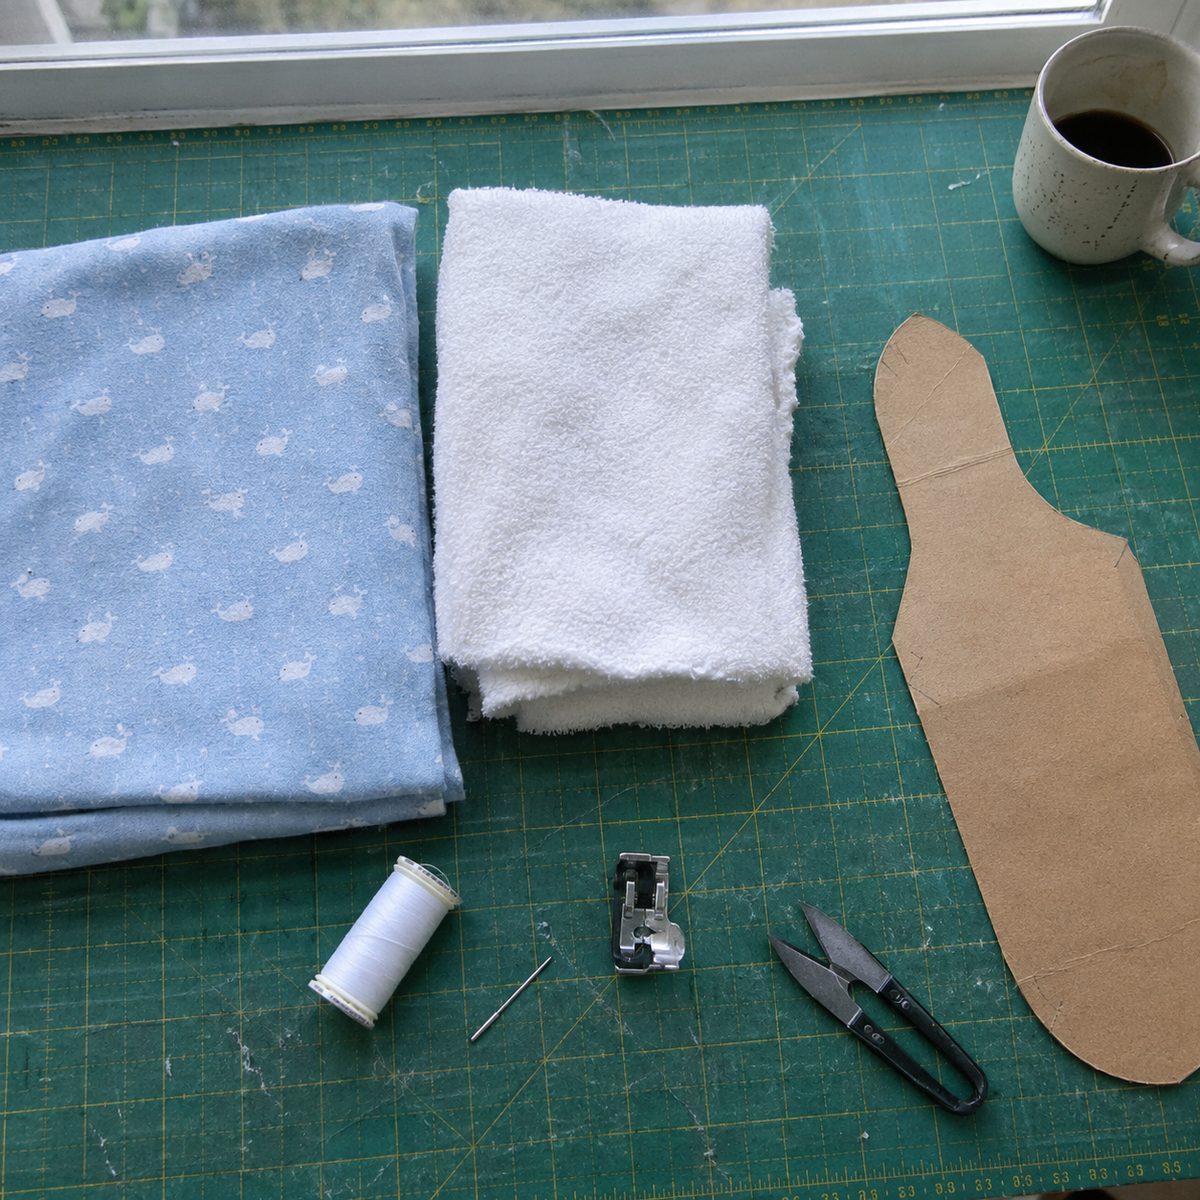
- 1/2 yard cotton flannel or quilting cotton print for the tops (5/8 yard for the full 18-inch length after shrinking)
- 1/2 yard cotton terry cloth, chenille, or a second flannel for the backs
- All-purpose polyester thread to blend with the backing
- Size 90/14 universal needle (100/16 for thick chenille)
- Walking foot, if you have one
- Freezer paper or a flattened cereal box, a pencil, a coffee mug and a dinner plate for the curves
- Rotary cutter, mat, 24-inch ruler, fabric scissors, pins or clips
- Point turner or a chopstick, and spray starch if your flannel is floppy
| Piece | Cut size | Qty |
|---|---|---|
| Contoured top (print) | Template: 18 in. long, 10 in. wide at the ends, 7 1/2 in. at the waist | 1 per cloth |
| Contoured back (terry, chenille or flannel) | Same template | 1 per cloth |
| Rectangle top (print) | 10 x 18 in. | 1 per cloth |
| Rectangle back | 10 x 18 in. | 1 per cloth |
| Newborn rectangle, optional | 8 x 16 in. | 1 top + 1 back |
| Tie strip for a gift bundle, optional | 1 1/2 x 22 in. | 1 per set |
All sizes include a 1/4-inch seam allowance, so the contoured cloth and the rectangle both finish about 9 1/2 x 17 1/2 inches.
Fabric choices and prep
For the top, cotton flannel is the classic and what I use most. It is soft against a baby’s neck, it grips a shoulder better than smooth quilting cotton, and it absorbs on its own. Quilting cotton works if you fall in love with a print, but back it with terry, not another thin cotton, or the cloth soaks through.
For the back, cotton terry (towel fabric) absorbs the most. Chenille is softer and looks like a boutique product but it is thick and sheds while you sew. A second layer of flannel is the thinnest and easiest, fine for a newborn, a little light for a six-month-old who spits up with purpose. Skip minky for your first set. It stretches, it slides, and it hates the iron.
Now the part people skip. Wash everything hot and dry it hot, the way the parents will. Flannel loses 5 to 8 percent, almost all of it in the length, so a half yard that measured 18 inches off the bolt comes out closer to 17. Either buy 5/8 yard or shorten the template to 17 inches. Terry shrinks less but sheds a startling amount of lint on the first wash, so never wash it with dark clothes. The long version is in my post on washing fabric before sewing.
Press the flannel flat with steam, and starch it lightly if it feels limp. Do not starch the terry. Mark the terry on its back with a ballpoint pen, since nothing else shows on the loops, and the flannel on the wrong side with a regular pencil.
Draw the template and cut
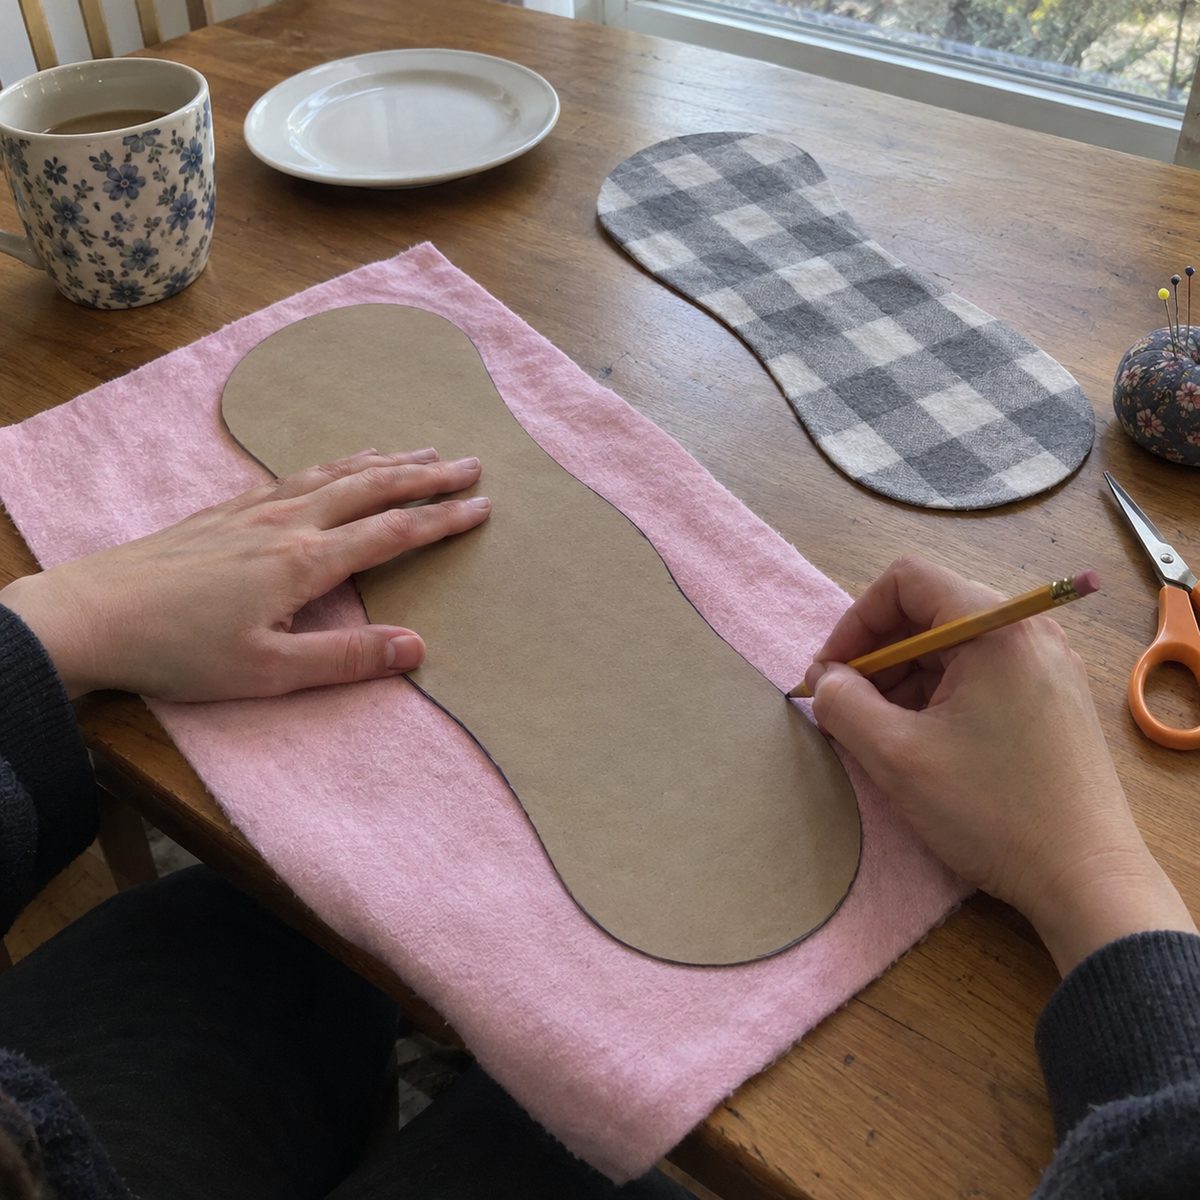
You only draw this once. Iron the finished freezer paper to a cereal box and it lasts for years.
- Fold a sheet of freezer paper in half lengthwise, then in half crosswise, so you are drawing one quarter of the cloth. From the center folds, mark 9 inches along the length and 5 inches across at the end. That opens to 18 by 10 inches.
- Mark 3 3/4 inches across at the center fold. That is the half-waist, so the cloth narrows to 7 1/2 inches in the middle. This curve is what keeps it on a shoulder.
- Draw the end. Square across at the 9-inch mark, then round the outer corner by tracing the rim of a coffee mug, a radius of about 1 3/4 inches.
- Draw the side. From the end, run straight for about 3 inches at the full 5-inch width, then ease into a gentle curve in to the 3 3/4-inch mark at the center fold. A dinner plate rim gives about the right arc. It should look like a shallow smile, not a corset.
- Cut through all four layers and unfold. Check that it measures 18 by 10 at the ends and 7 1/2 at the waist. Write on it that the 1/4-inch seam allowance is included.
- Trace the template onto the wrong side of the prewashed flannel and cut three tops. Flip the terry over, trace three backs, and cut. Three cloths fit across a half yard, since 3 times 10 inches is 30 and the fabric is 42 to 44 wide.
For the rectangle version there is no template. Rotary cut 10 x 18 inch pieces, one top and one back per cloth, and round the corners with the mug if you like.
Pin and sew the layers
- Lay a flannel top right side up, then a terry back on it right side down, loops facing the print. Line up the edges and smooth from the center out. Terry grows half an inch if you drag it, so pat, do not pull.
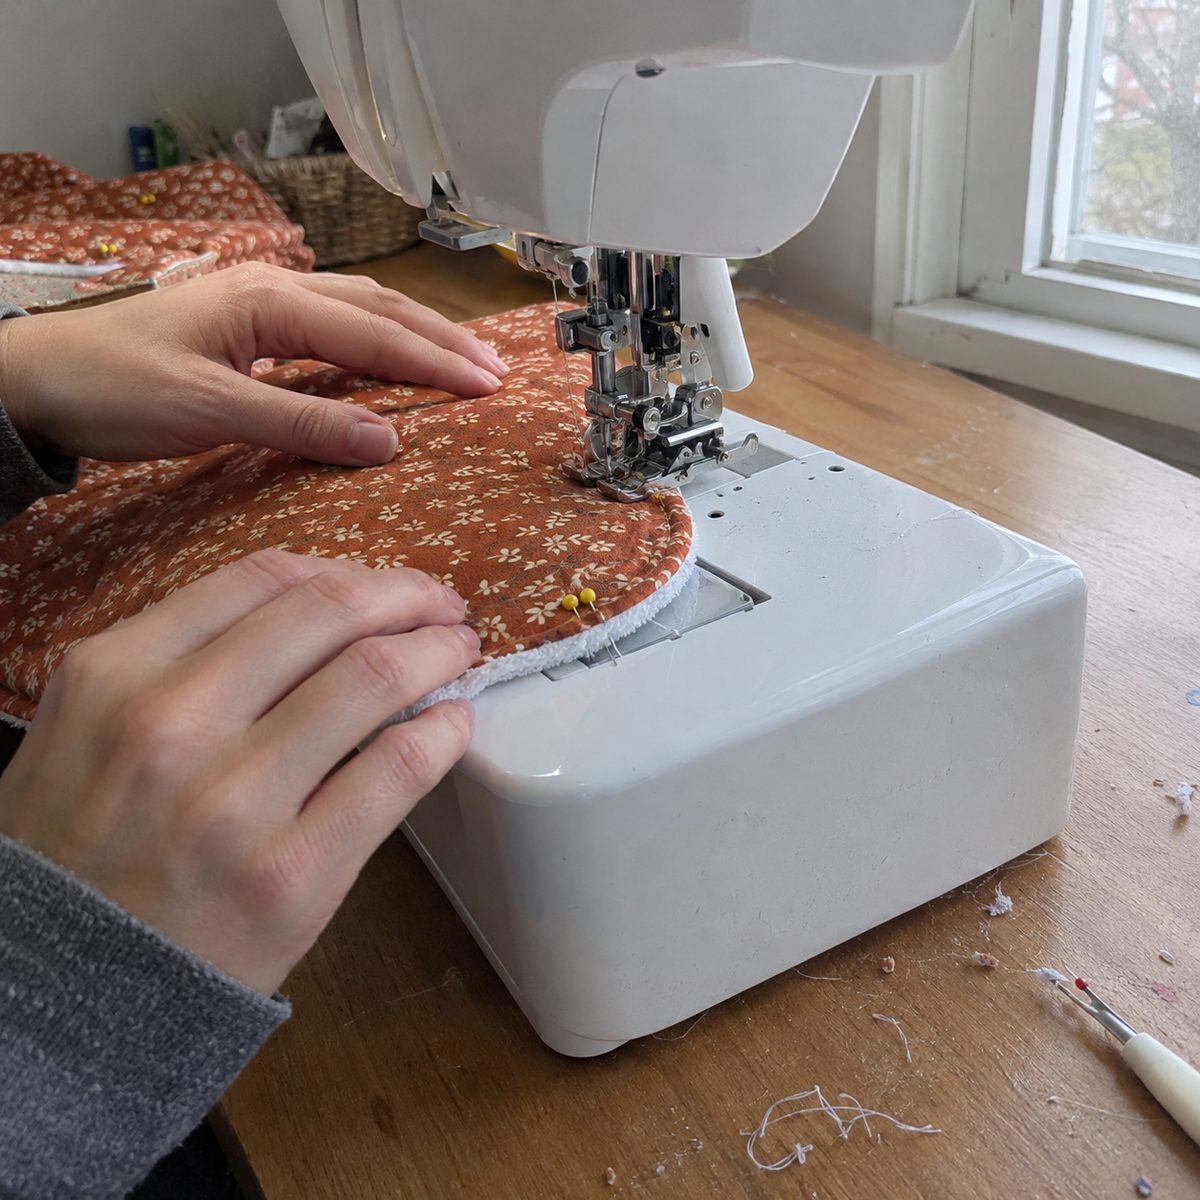
- Pin every 2 inches, closer on the curves. Clips do not snag terry loops the way pins can. On one long side, about 4 inches from an end where the edge is still straight, mark a 3-inch gap with two double pins.
- Set up the machine: 90/14 universal needle, polyester thread, stitch length 3.0 mm, walking foot if you have one. Terry and flannel together are thick and fuzzy, and a size 80 needle skips stitches in the loops. My post on needle sizes for cotton explains the numbers.
- Sew with the terry against the feed dogs and the flannel on top. Start at one gap pin, backstitch three stitches, and sew a 1/4-inch seam all the way around. Slow down on the curves and steer, no pivoting needed. Stop at the second gap pin and backstitch.
- Check the terry side. The seam should be a steady 1/4 inch with no tucks folded into it. If there is one, unpick those 2 inches and resew. A 30-second fix now, a permanent lump later.
With three cloths, chain them. Pin all three, sew all three, then clip and turn all three.
Clip, turn and press
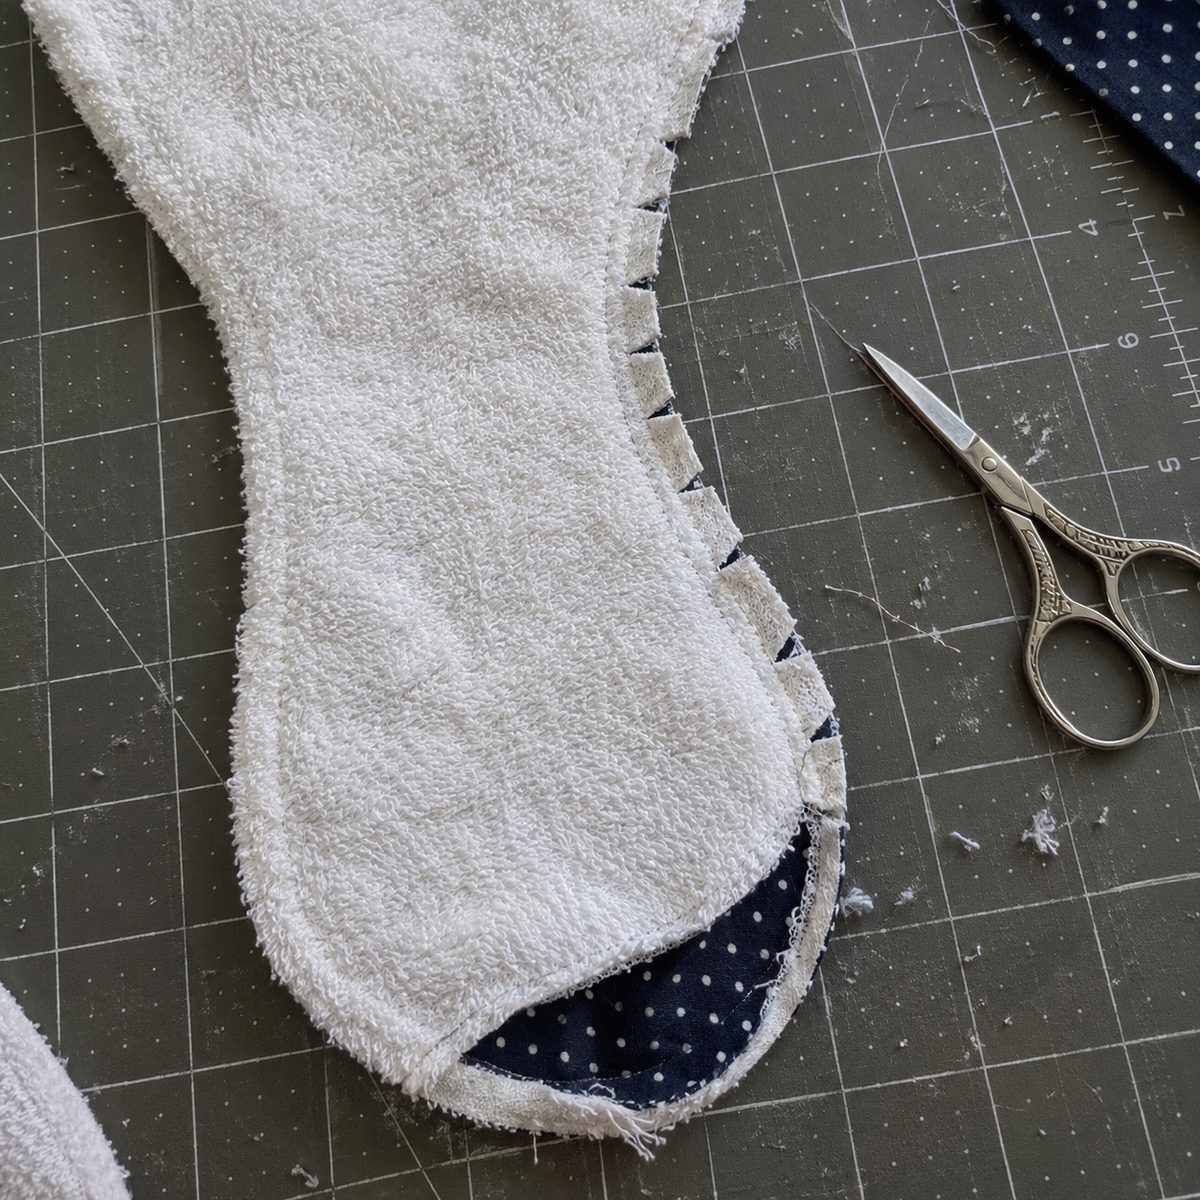
- Trim the seam allowance to about 1/8 inch around both rounded ends. Bulk on an outer curve is what makes a rounded end turn pointy. Leave the full 1/4 inch at the gap.
- Along the waist, an inward curve, clip into the seam allowance every 1/2 inch, stopping 1/8 inch short of the stitching. Clip too far and a hole shows after the first wash. Clip too rarely and the waist puckers like a drawstring.
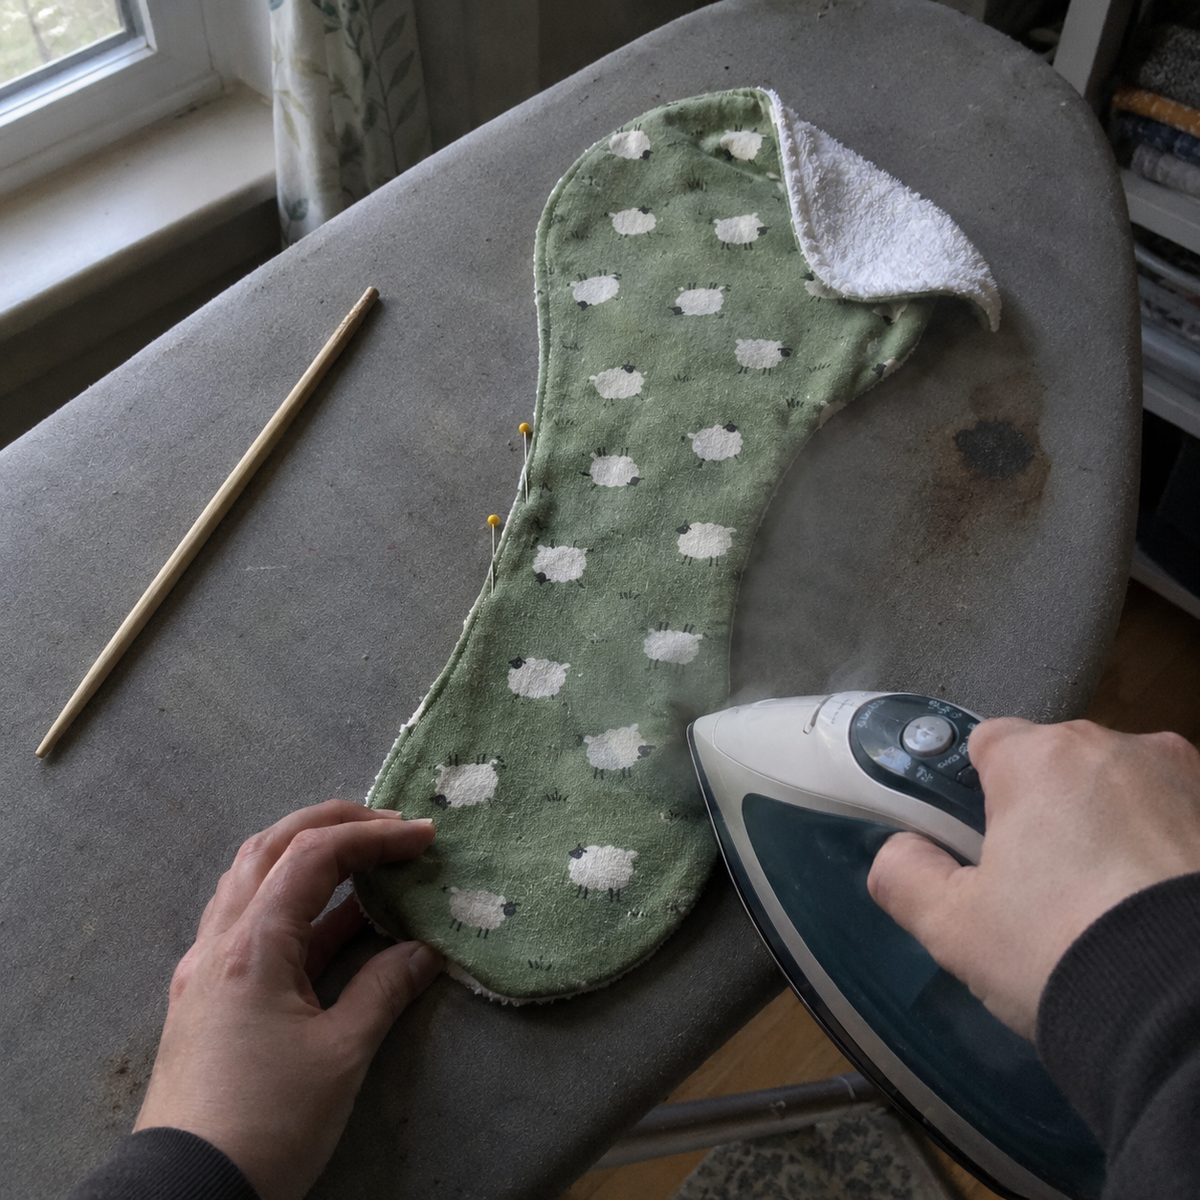
- Pull the cloth right side out through the gap. Run a point turner or the blunt end of a chopstick along the seam from the inside to push the edge all the way out. Roll the seam between your thumbs so the stitching sits exactly on the edge.
- Press from the flannel side with steam. Terry does not take a press and chenille flattens if you lean on it, so keep the iron on the print. At the gap, fold both raw edges in 1/4 inch, press, and hold them with two pins or a dot of washable glue stick.
When it is right, the cloth lies flat with no ripples at the waist and the ends are smooth half circles.
Topstitch to finish
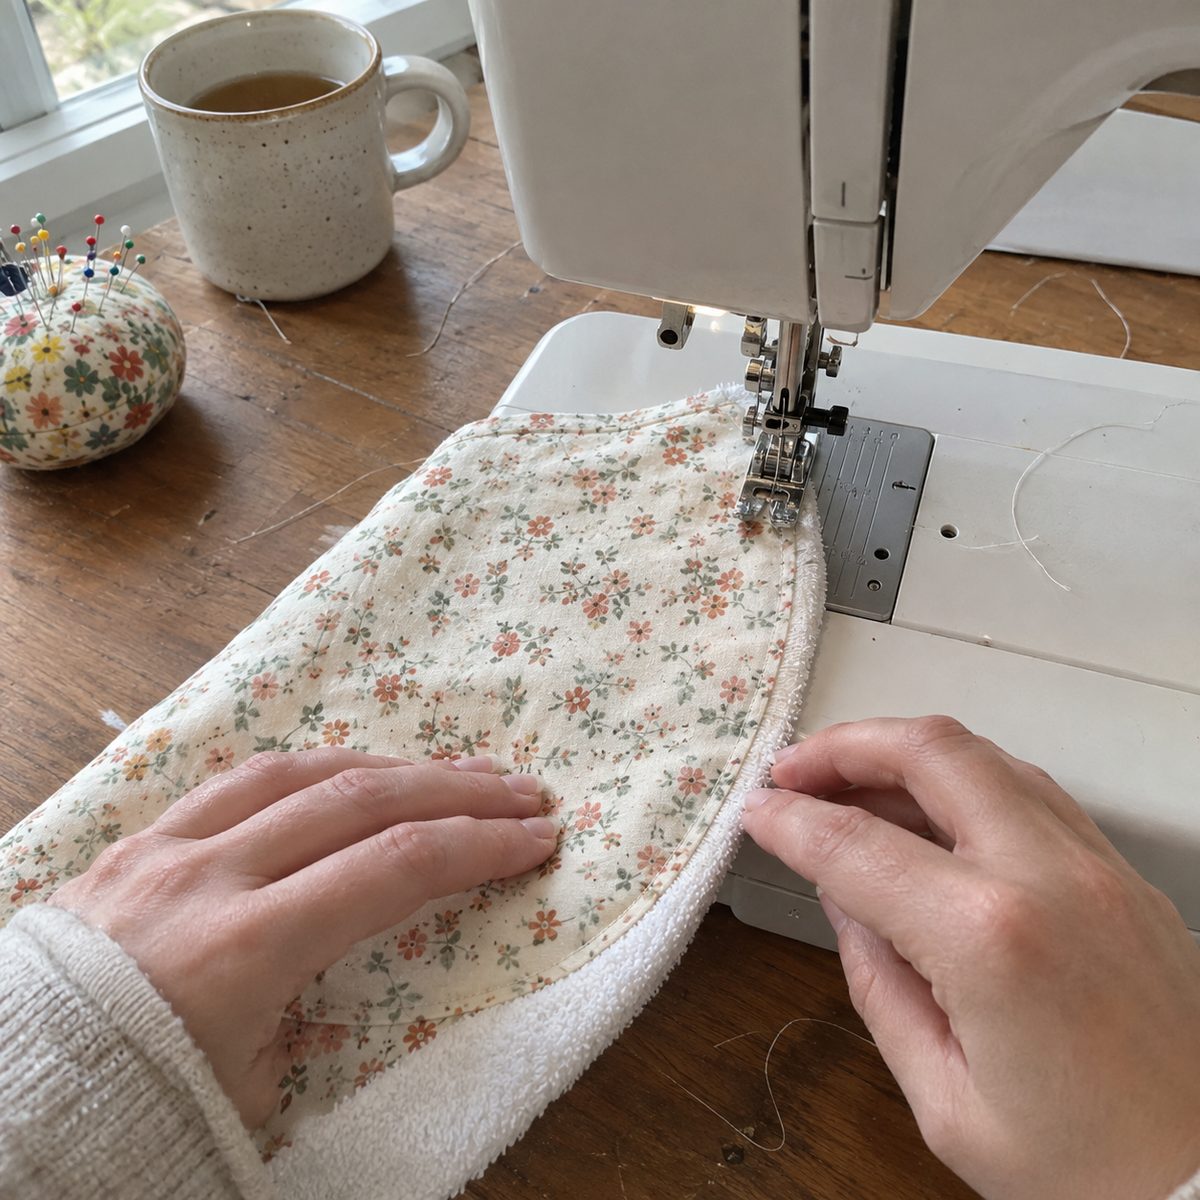
- Lengthen the stitch to 3.5 mm. Topstitching looks neater long, and the extra length rides over the terry loops instead of sinking into them.
- Starting at the gap, topstitch 1/4 inch from the edge all the way around, using the edge of the foot as a guide. This row closes the gap, so make sure both folded edges are caught.
- Keep the terry side down again so the print does not creep ahead and leave a twist at the end.
- Overlap your starting stitches by three or four and stop. Pull the threads to the back, trim, and give it one more press from the print side.
For a store-bought look, add a second row 3/8 inch inside the first. Done right, the topstitching is an even frame and the gap is invisible.
Fixes for the things that go wrong
The edges came out wavy and the layers do not match
The terry stretched while you pinned or sewed. Pat the layers together instead of sweeping a hand across them, use more pins, and always sew with the terry on the bottom so the feed dogs pull it along evenly. A walking foot fixes this almost completely. A hot steam press from the flannel side shrinks most of an existing wave back.
The rounded ends have points or a ridge
The seam allowance was too wide on the outer curve. Trim it to 1/8 inch around the ends before turning, and use the point turner to push the full curve out. If an end is already turned and ridged, turn it back inside out through the gap, trim, and try again. That is why the gap stays open until the end.
The waist puckers
Not enough clips, or clips that stopped too far from the stitching. Inward curves need a clip every 1/2 inch, each ending about 1/8 inch from the seam. Turn it back out, clip more, and repress. If you clipped through the stitching, zigzag over the spot from the inside before turning it again.
Skipped stitches on the terry side
Thick, fuzzy layers and a small or dull needle. Switch to a fresh 90/14, slow down, and lengthen the stitch to 3.0. If it still skips, rethread the top and check the tension, which both get knocked around when you swap feet.
Sizes, fabrics and gift sets
For a newborn gift, cut rectangles 8 x 16. For a bigger baby, stretch the contoured template to 11 wide and 20 long and keep the same 7 1/2-inch waist. Wider than 11 and it feels like a hand towel.
Seasonal swaps are easy because the top is one piece. Fall plaids for autumn babies, snowflakes and red gingham for December showers, seersucker stripes for summer. Double gauze makes a lovely top but it frays and shifts, so starch it well and use a terry back. Linen is too scratchy for a baby’s neck.
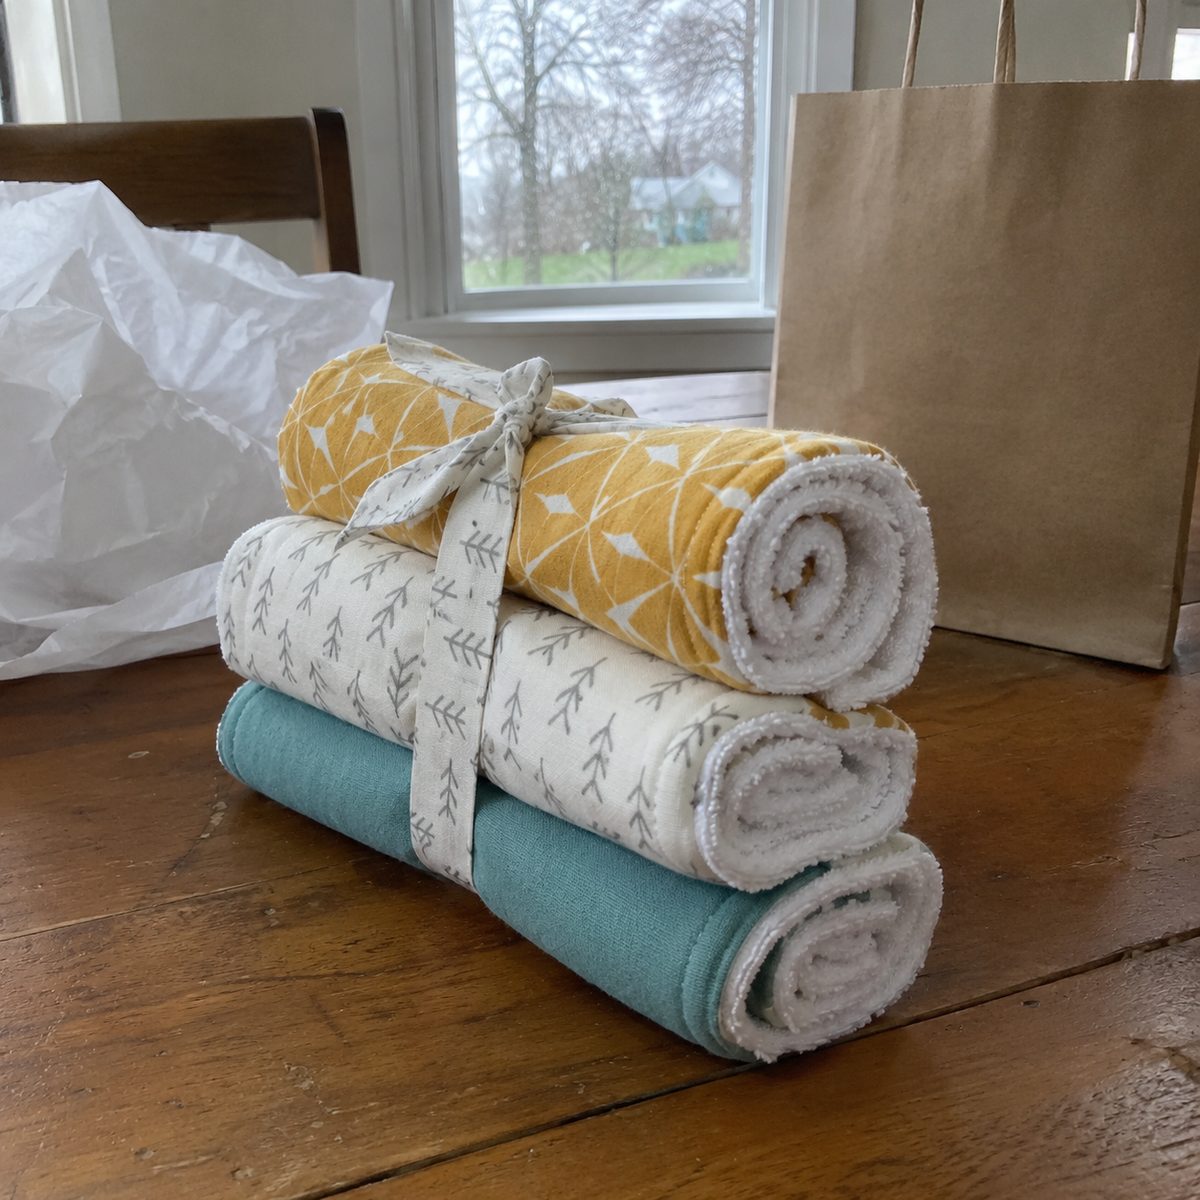
For a gift, make three in coordinating prints from one collection, press them hard, roll each from the end, and stack the rolls. Tie the stack with the 1 1/2 x 22 inch strip from the cut chart or cotton twill tape. A matching bib from my baby sewing projects list rounds it out.
If you are making these to sell, they sit near the top of my sewing projects to sell list. Sets of three move in the 18 to 25 dollar range at local fairs and the materials run about 6 dollars a set. Stack four layers of prewashed flannel and rotary cut around the cardboard template, then do the same with the terry, and 12 cloths are cut in one sitting. Make some sets in neutral prints, since shoppers who do not know the baby’s sex buy those first.
Frequently asked questions
Do I really have to prewash flannel for burp cloths?
Yes, and hot. Flannel shrinks more than almost any other quilting-store cotton, and it shrinks unevenly, mostly in length. Sew it unwashed and the first hot wash leaves the cloth puckered along the seams and twisted at the waist, because the two layers shrink by different amounts. Wash and dry both fabrics on the hottest setting the parents will use, then press and cut.
What is the most absorbent backing for a burp cloth?
Cotton terry, the same fabric as a bath towel. It holds the most liquid and dries fast. Chenille is nearly as absorbent and softer, but thicker to sew. Two layers of flannel are the thinnest and easiest to handle, fine for a newborn, but they soak through faster. For a gift set I use terry backs and save chenille for the one cloth on top of the stack.
Can I make burp cloths without the template?
Yes. Cut two 10 x 18 inch rectangles, round the corners with a mug, and sew exactly the same way. The rectangle slides off a shoulder a little more easily and looks less finished, but it absorbs the same and is faster to cut in bulk. Many parents prefer it because it folds flat into a diaper bag.
How should the parents wash them?
Hot wash, hot dry, with the regular laundry. Because you prewashed, nothing will shrink or twist. Tell them to skip fabric softener, which coats the terry loops and cuts the absorbency, and to expect a little lint from the edges for the first two or three washes. A set should last through two babies.
Make the first one slowly and the next eleven go fast. Once the template is cut from cardboard, a set of three is an hour of pleasant sewing, and nobody who has ever held a spitting baby has too many of these.