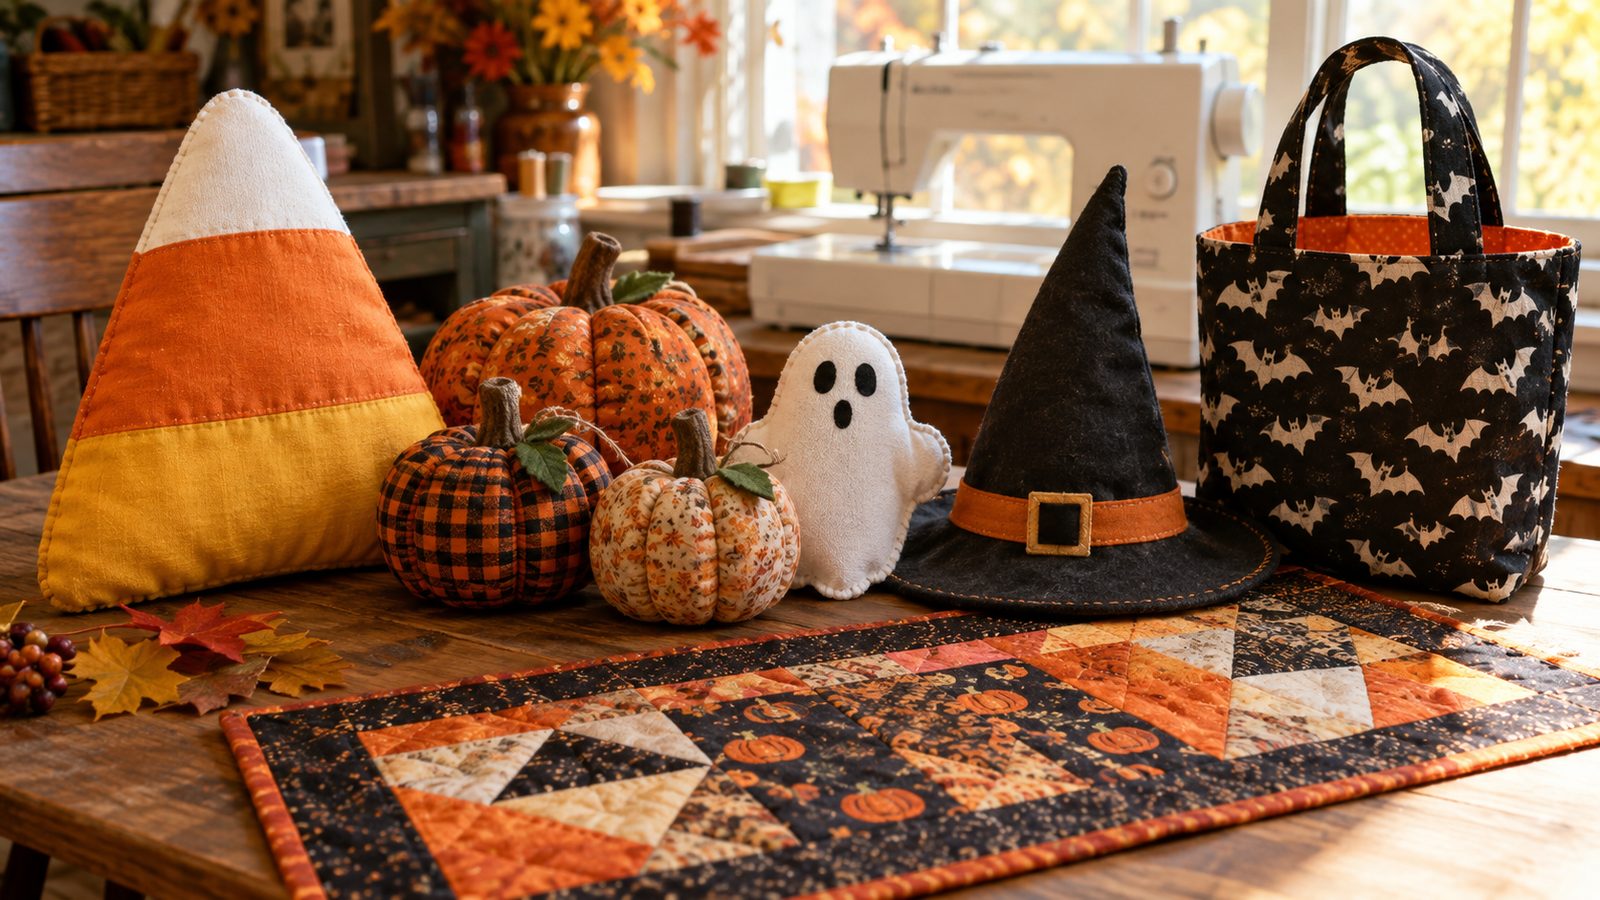
Halloween is the most forgiving sewing holiday of the year. Crooked seams look spooky, felt doesn’t fray, and a costume only has to survive one night of candy runs. That makes it the perfect time to pull out the orange and black scraps and make something fun.
Below are 20 family-friendly projects, from 20-minute beginner wins to a few intermediate pieces worth a weekend. Each one lists sizes, fabrics, and the key trick so you can pick a project and start cutting tonight.
1. Candy Corn Pillow
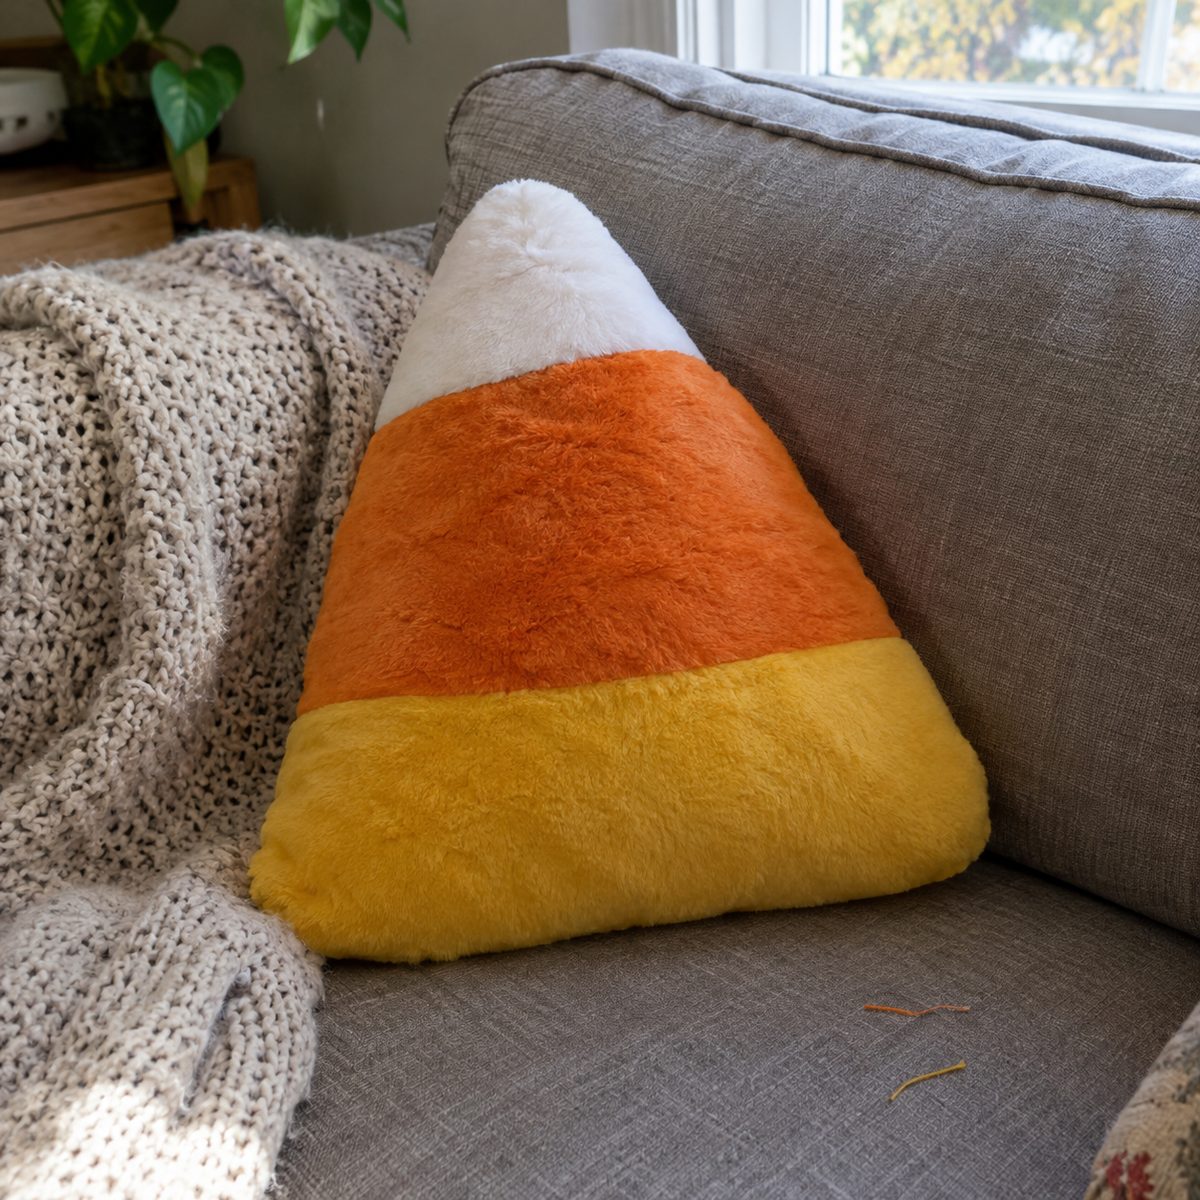
A candy corn pillow is the Halloween project people ask about the most, and it’s really just three strips of fabric sewn together and cut into a triangle. It looks great on a couch from late September through Thanksgiving.
- Cut three strips of cotton or minky: white 4 inches, orange 5 inches, yellow 6 inches, all 20 inches long.
- Sew them together in that order with 1/2-inch seams and press the seams open.
- Draw a rounded-top triangle about 16 inches tall on the pieced panel, then cut two (one for the back).
Sew the front and back right sides together, leave a 4-inch opening on the bottom edge, turn, and stuff firmly with polyfill. Close the gap with a ladder stitch. Plan on about 90 minutes from cutting to couch.
2. Lined Trick-or-Treat Tote
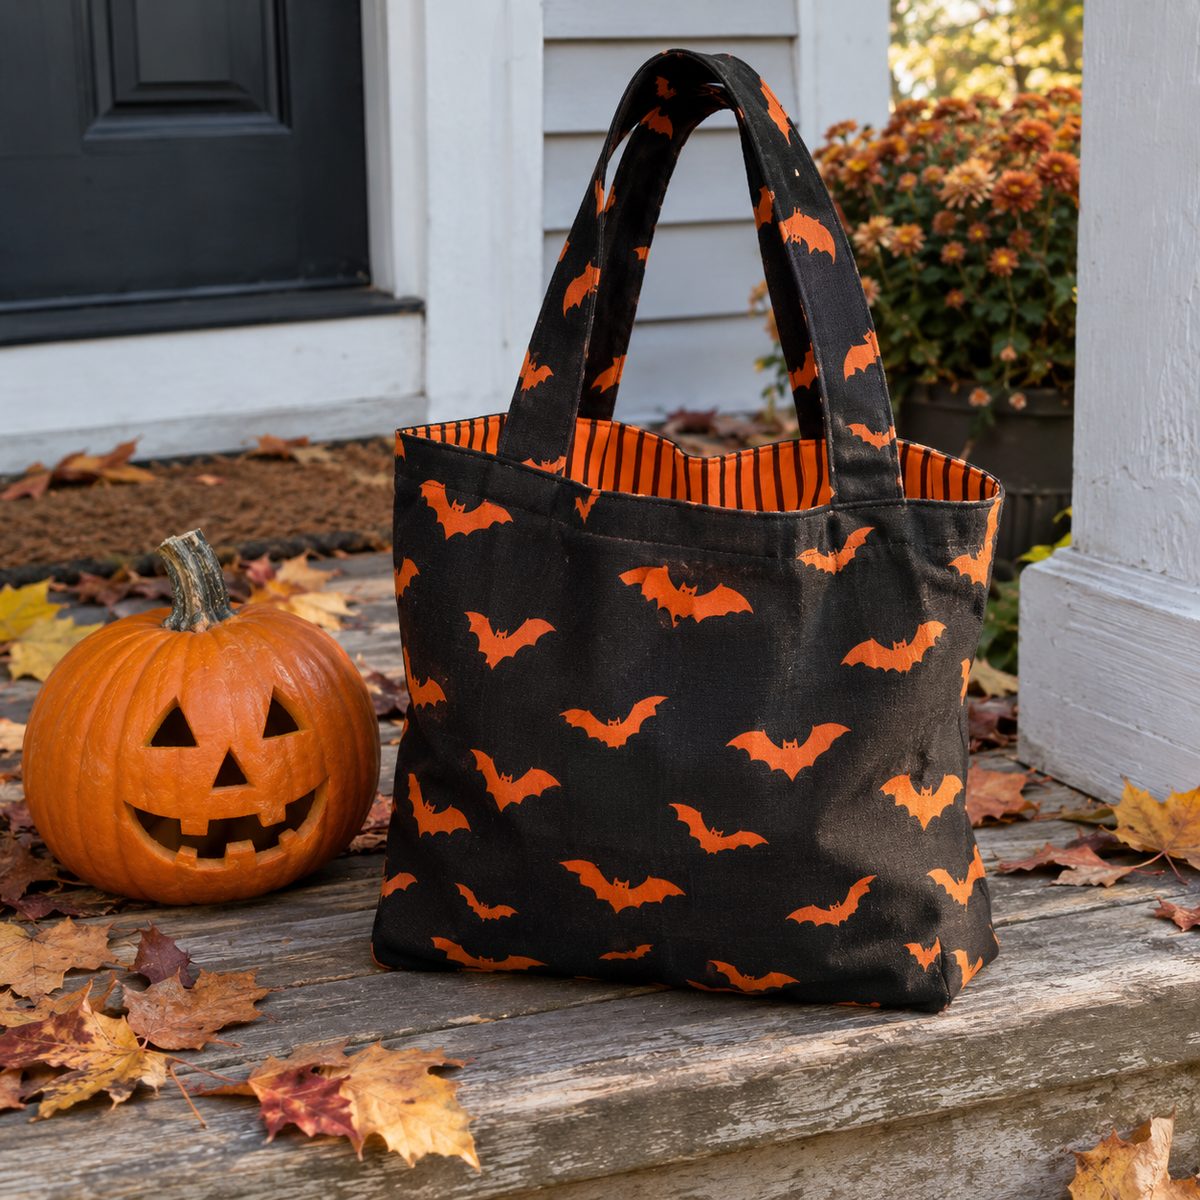
A sturdy fabric tote beats a plastic pumpkin every time: it holds more candy, doesn’t crack, and gets reused every year. I like a boxed-corner bottom so the bag stands up while kids dig through their haul.
Cut two outer panels of Halloween-print quilting cotton at 14 x 16 inches, two lining panels the same size, and two straps at 4 x 22 inches. Fuse medium-weight interfacing to the outer panels so the bag holds its shape when it’s loaded. Box the corners at 2 inches, sew the lining the same way, then drop the lining inside and topstitch the top edge with the straps sandwiched in.
For the full step-by-step, follow this lined tote bag with boxed corners tutorial and just swap in spooky fabric. Add a strip of reflective tape along the top for safer walking after dark.
3. Fabric Pumpkins
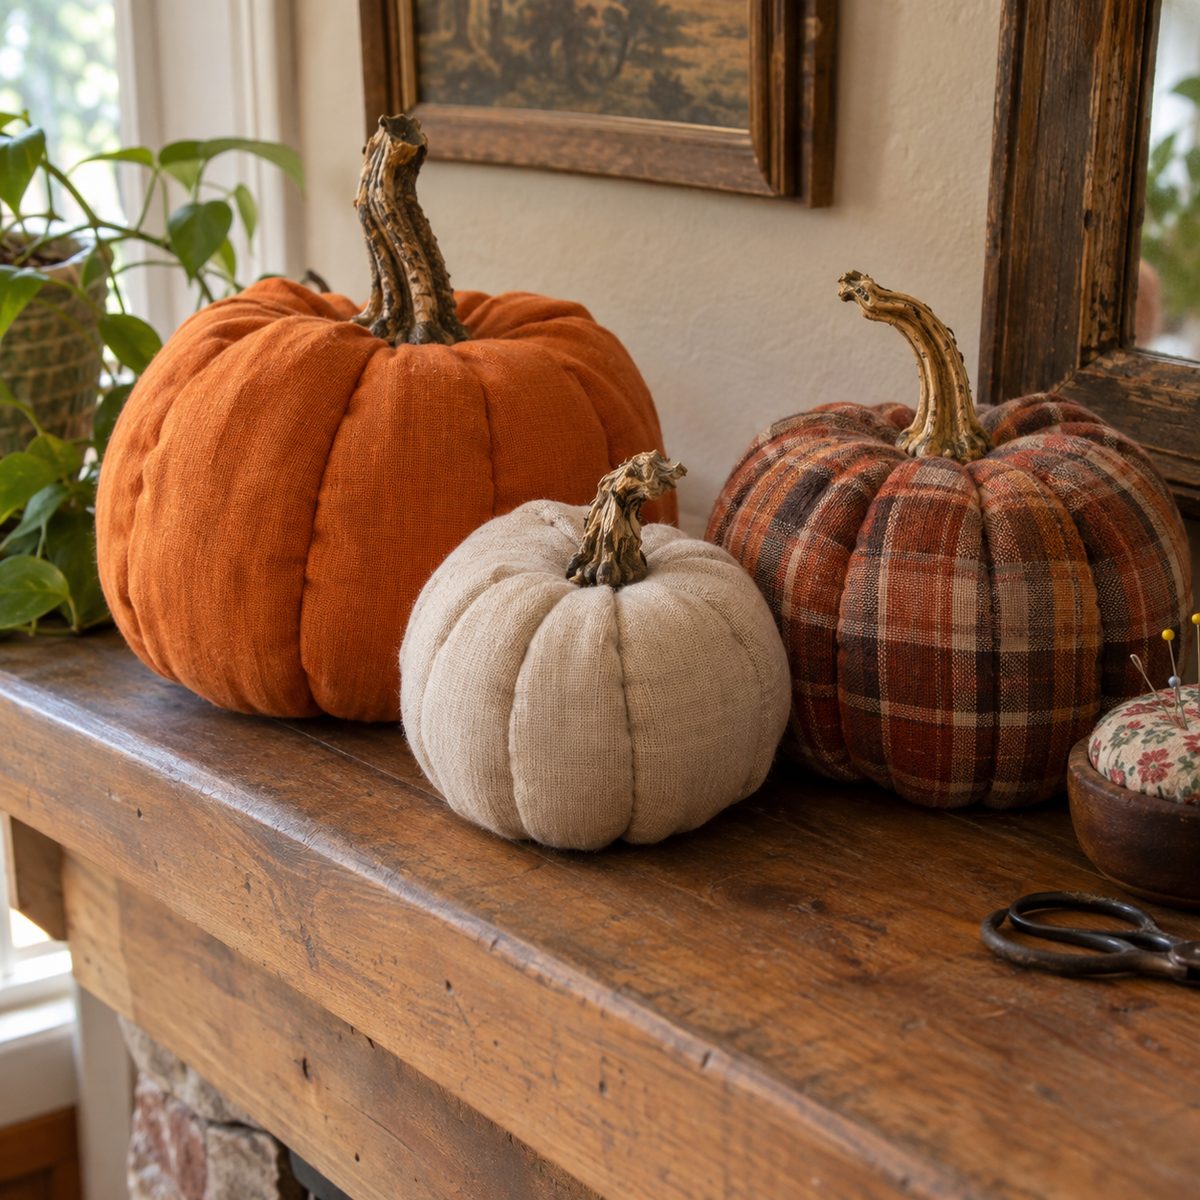
Fabric pumpkins are fast, forgiving, and the best way to burn through orange, cream, and plaid scraps. A cluster of three sizes on a mantel looks like it came from a boutique.
Cut a rectangle twice as long as it is tall: 10 x 20 inches for a large pumpkin, 7 x 14 for medium, 5 x 10 for small. Fold it in half and sew the short ends into a tube. Hand-sew a running stitch around the bottom edge with doubled thread, pull it tight, and knot. Stuff with polyfill, then run another gathering stitch around the top and cinch it closed.
For realistic sections, thread a long doll needle with embroidery floss and wrap it from the top center down around the outside five or six times, pulling snug. Finish with a real dried stem or a twisted brown felt stem glued in the top.
4. Pennant Bunting
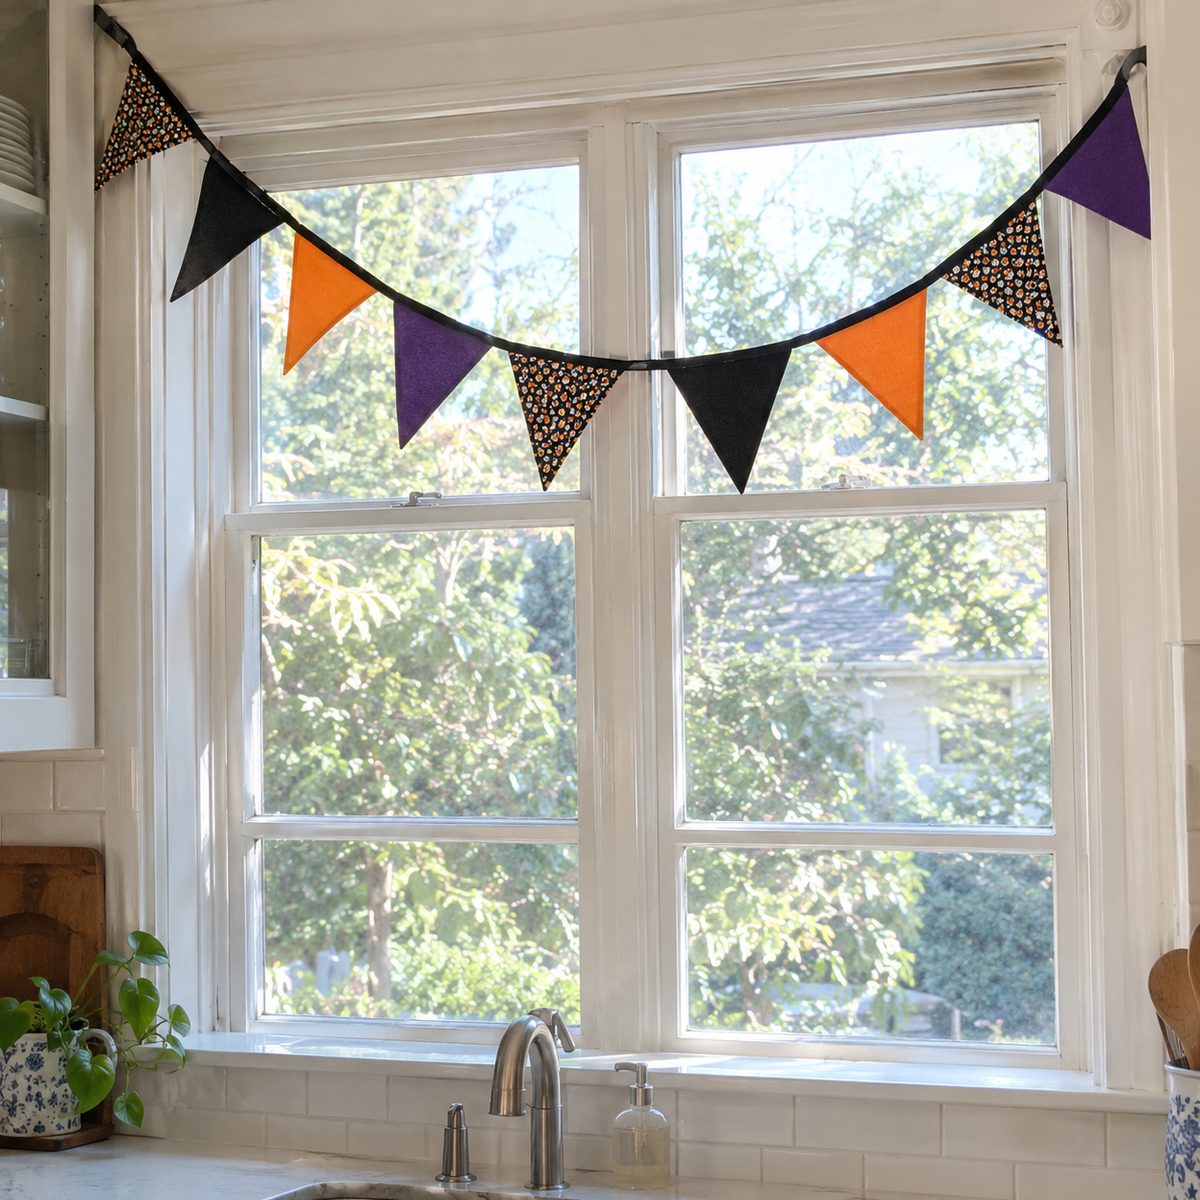
Bunting is the easiest way to make a whole room feel like Halloween, and it’s a perfect first project for a new sewist. You’re sewing straight lines and turning triangles, nothing more.
Cut triangles 7 inches wide by 8 inches tall, two per flag, in a mix of black, orange, purple, and a small-scale print. Sew each pair right sides together along the two long sides, clip the point, turn, and press flat. You’ll need about 15 flags for a 10-foot strand.
Fold a length of 1/2-inch double-fold bias tape over the top edges of the flags, spacing them about 1 inch apart, and stitch the whole thing closed in one pass. Leave 12 inches of tape at each end for tying.
5. Patchwork Table Runner
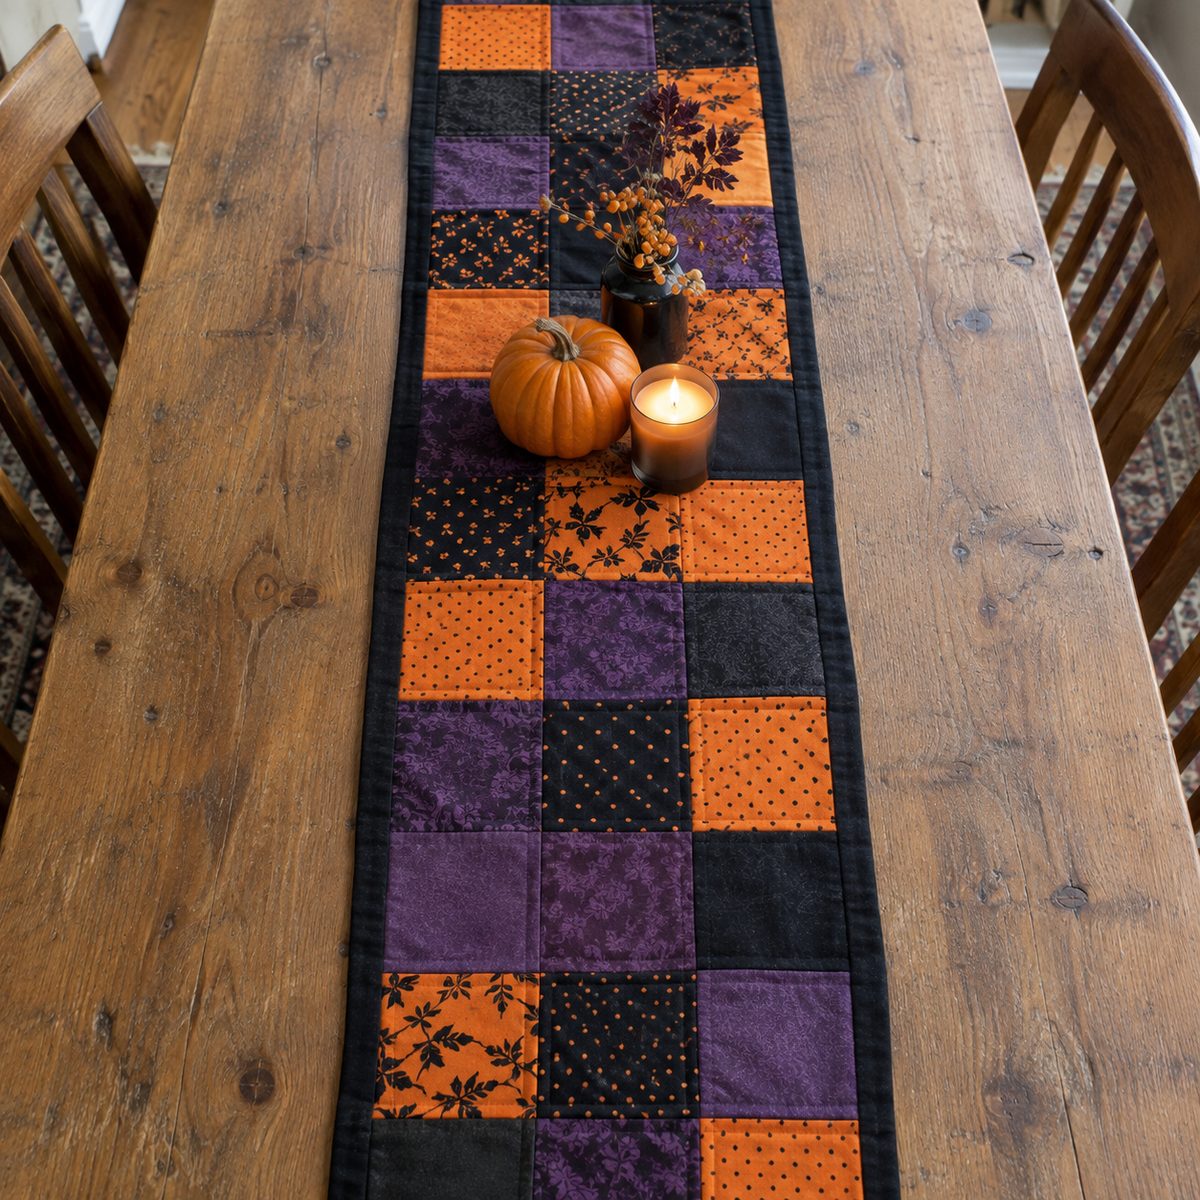
A Halloween table runner dresses up the dining table for the whole month, and it’s an easy introduction to patchwork. Straight seams and squares are all you need.
- Cut 24 squares at 5 inches from four or five coordinating fall and Halloween prints.
- Sew them into a 3 x 8 grid with 1/4-inch seams for a finished runner around 13 x 36 inches.
- Layer with a thin cotton batting and a solid backing, then quilt straight lines along the seams.
Finish the edges with a 2 1/2-inch binding in black or a candy corn stripe. If you’re new to quilting, a walking foot helps keep the three layers from shifting, and pressing every seam before the next step keeps your corners lined up. Expect three to four hours for a beginner.
6. Felt Witch Hat
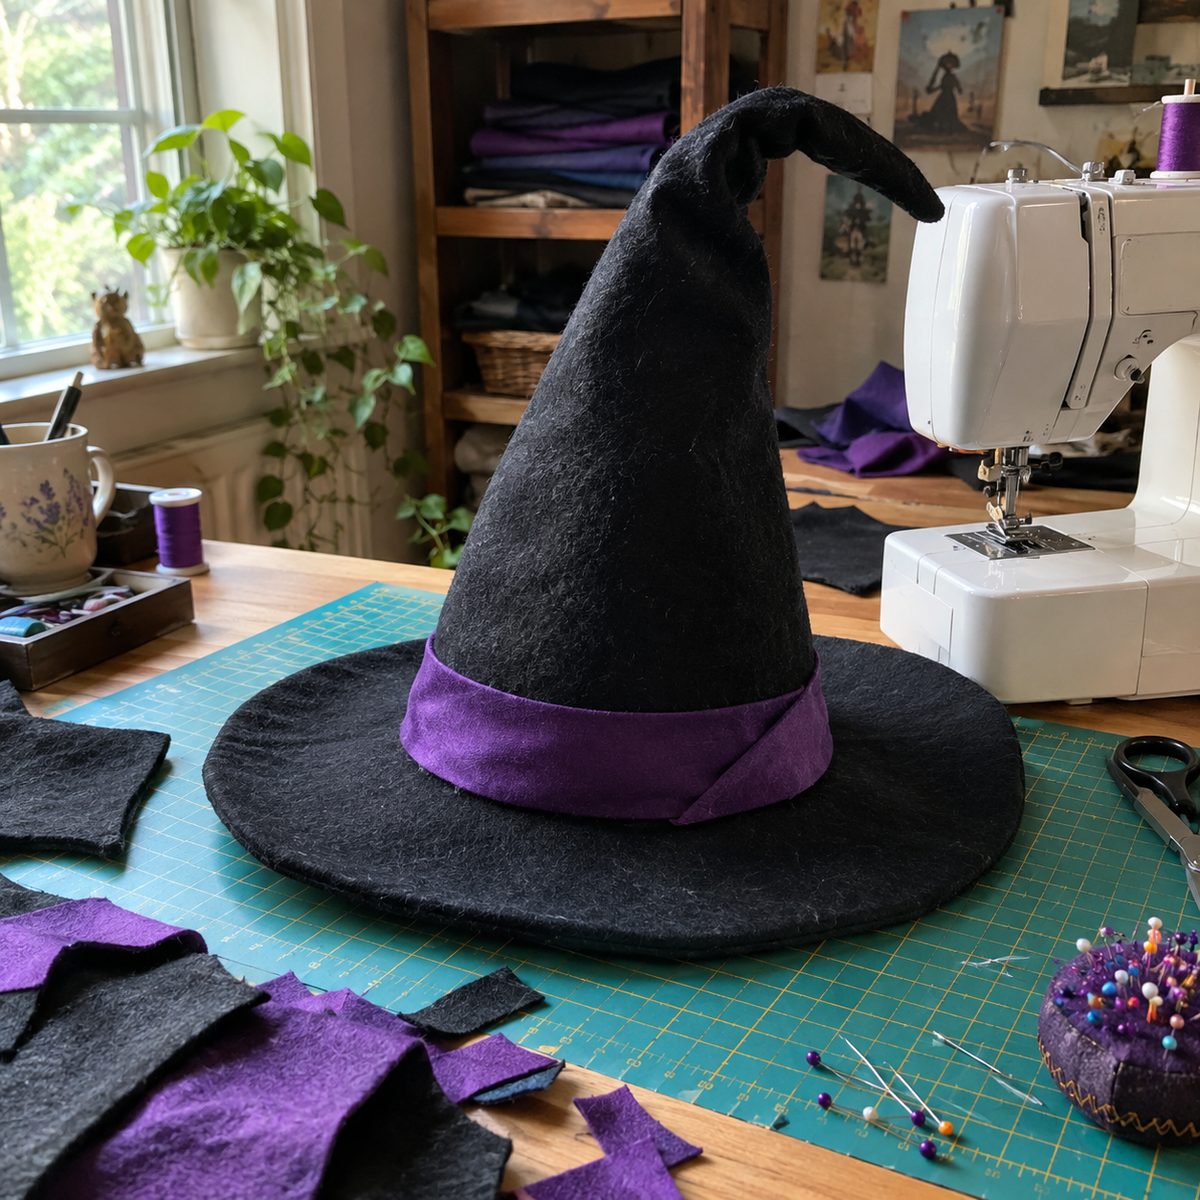
A soft felt witch hat is a costume piece that works for kids and adults. Stiffened craft felt gives you a perky point without any wire.
For the cone, draw a quarter circle with a 15-inch radius on stiff black felt, then cut a small arc at the tip so the base matches the wearer’s head measurement plus 1 inch. For the brim, cut a 16-inch circle and a center hole that matches the cone’s base.
Stitch the cone’s straight edges together with a 1/4-inch seam, then turn it right side out. Clip small tabs around the cone’s bottom edge, fold them under the brim, and stitch in place. Felt sews beautifully by machine; a longer 3.0 stitch keeps it from stretching. Here’s more on sewing felt with a sewing machine. Add a purple ribbon band to finish.
7. Kids’ Superhero Cape
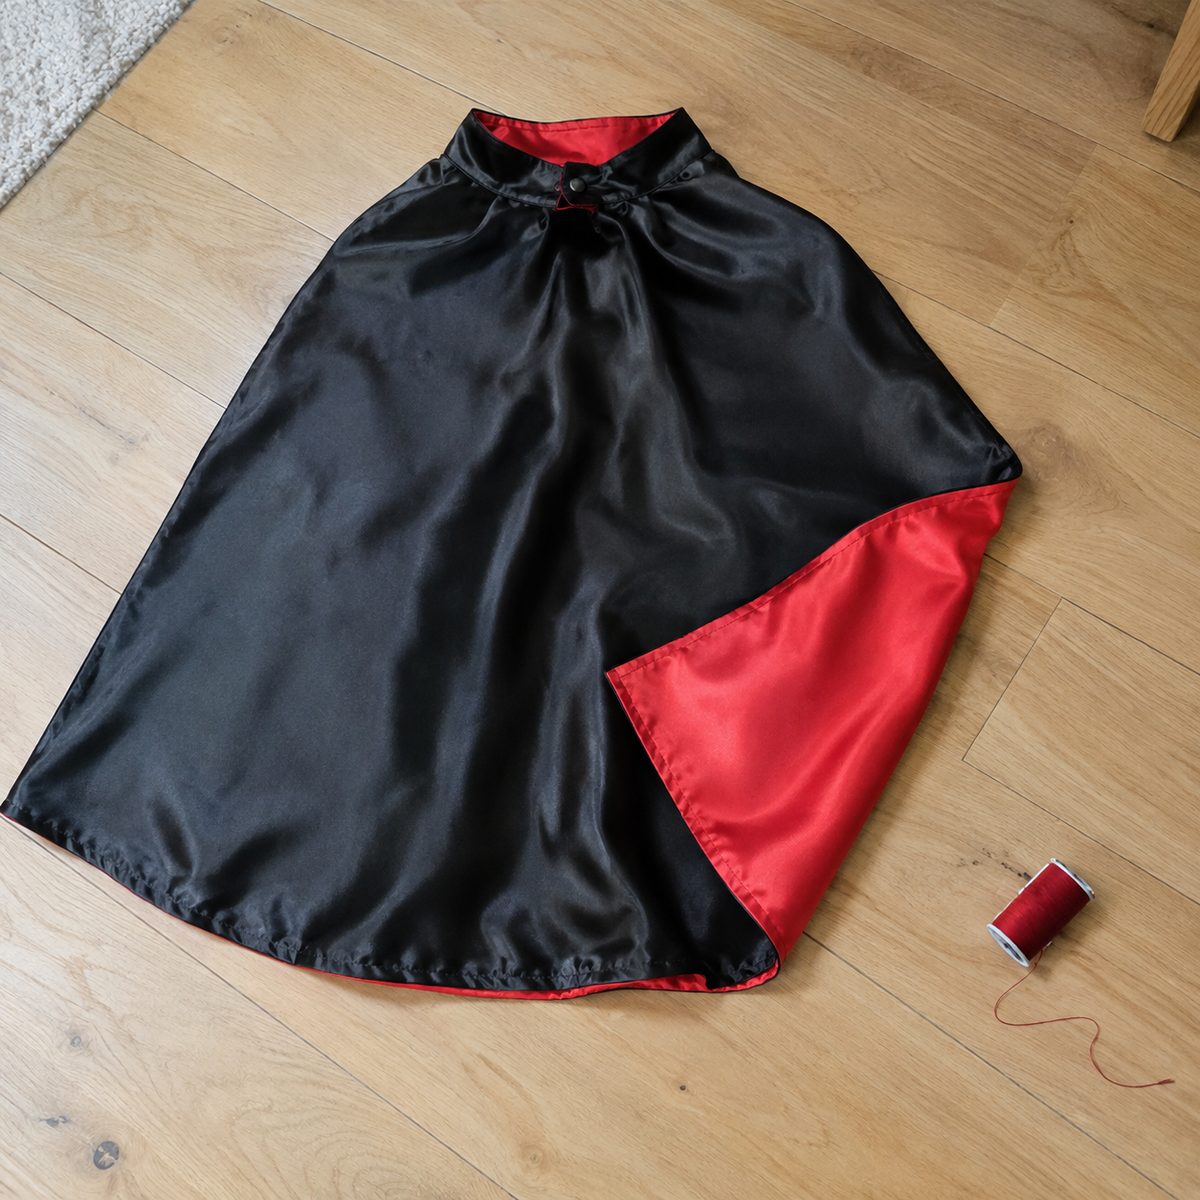
A reversible cape turns into a vampire, a superhero, or a wizard depending on the rest of the outfit, which is why it gets worn long after October. It’s one of the quickest costume pieces to sew.
Cut two trapezoids from satin or broadcloth: 10 inches wide at the neck, 26 inches wide at the hem, and 24 inches long for a child around age 5 to 8. Use black on one side and red or purple on the other.
Sew them right sides together around the sides and hem, leaving the neck edge open. Turn, press, and topstitch 1/4 inch from the edge. Fold the neck edge in and stitch 1 inch of hook-and-loop tape at the corners. Skip ties at the neck for little ones; hook-and-loop tape pulls apart safely if the cape catches on something.
8. Little Ghost Softies
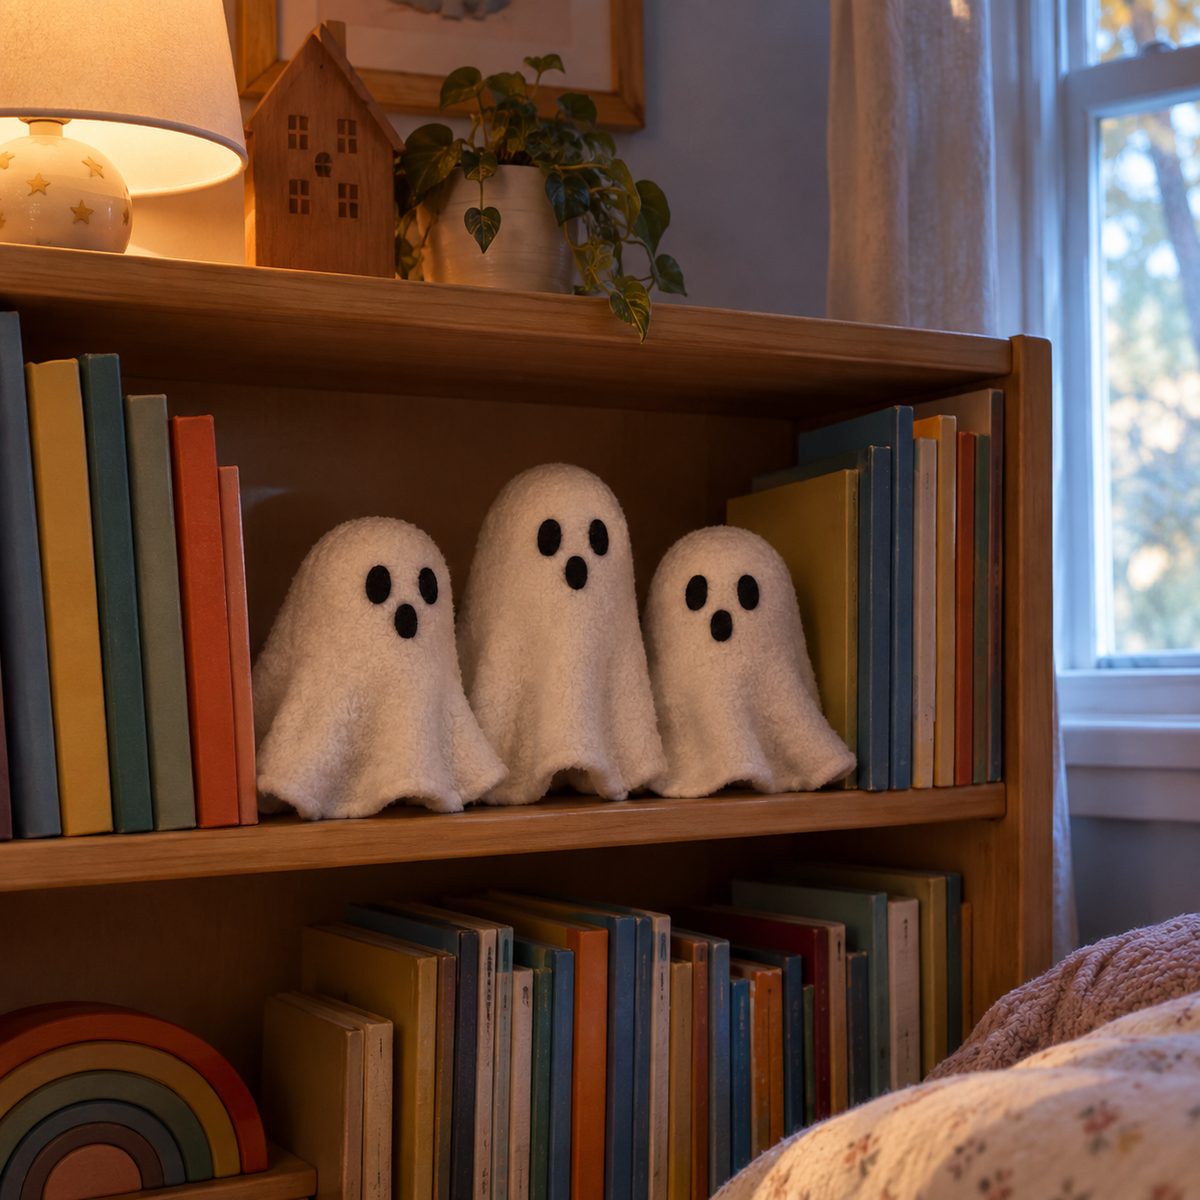
These palm-sized ghosts are cute rather than scary, which makes them a hit with toddlers and a sweet addition to a Halloween bookshelf. They’re also a great first hand-sewing project for kids.
Draw a simple ghost shape about 6 inches tall with a rounded head and a wavy bottom edge. Cut two from white fleece or minky, which doesn’t fray and feels soft. Before sewing, add the face: two black felt ovals for eyes and a small oval mouth, stitched on by hand or with a tight zigzag.
Place the pieces right sides together and sew around with a 1/4-inch seam, leaving a 2-inch gap on one side. Clip the curves, turn, stuff lightly, and close by hand. For babies, embroider the face instead of using felt pieces so nothing can come loose. Each ghost takes about 30 minutes.
9. Pet Halloween Bandana
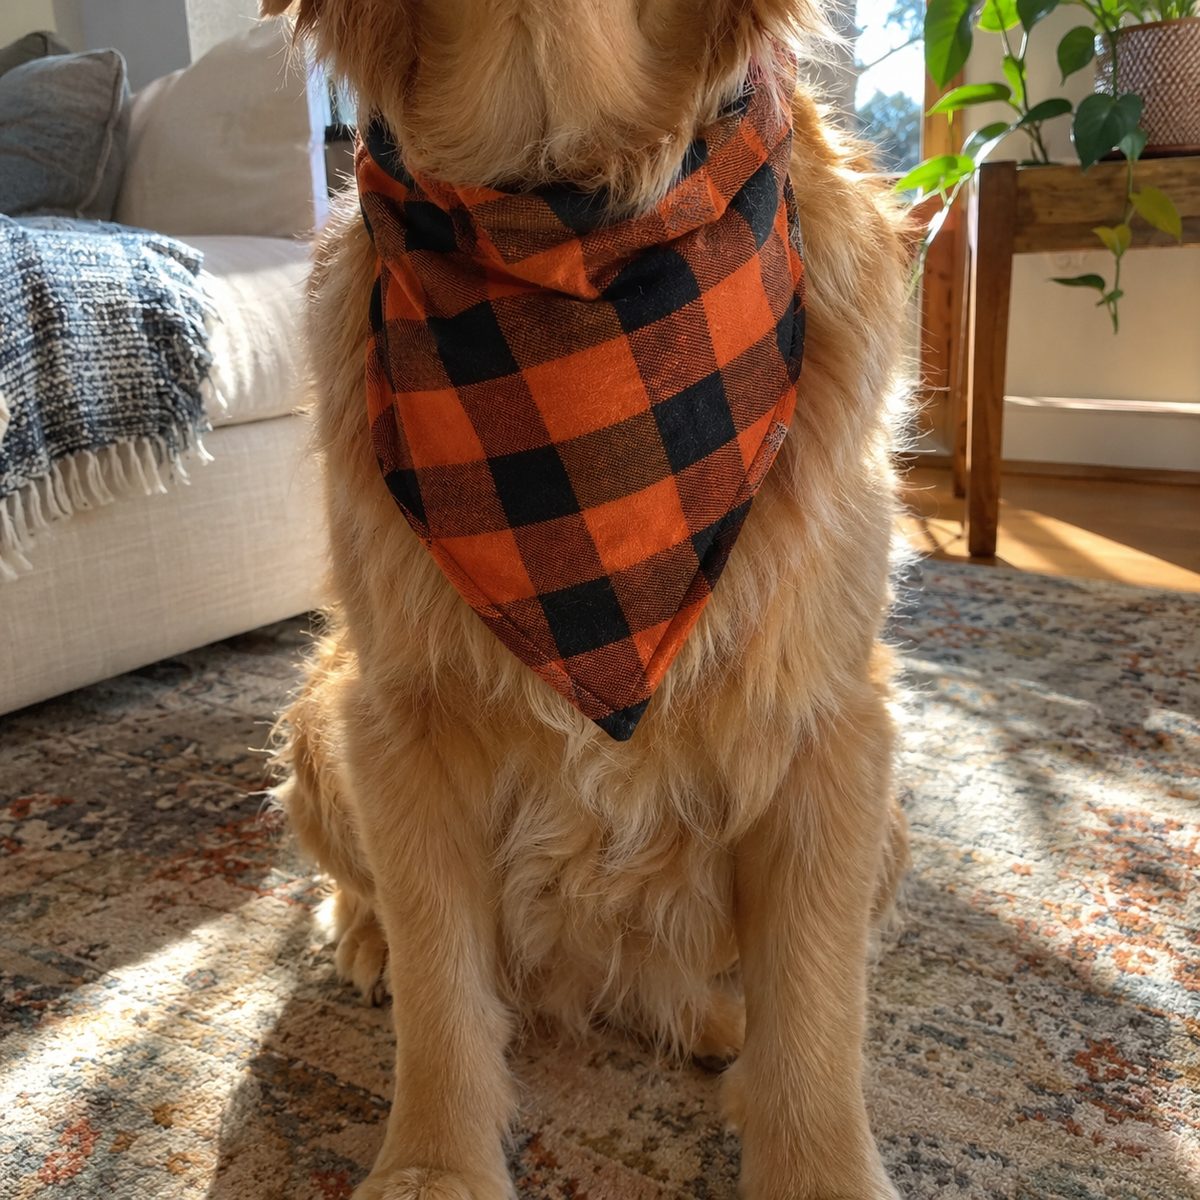
A reversible bandana is the easiest way to get a dog or cat into the Halloween spirit without a full costume they’ll hate. It slips over their regular collar, so there’s nothing to tie or fasten.
- Small (cats, small dogs): 12 x 7 inch triangle
- Medium: 16 x 9 inch triangle
- Large: 22 x 12 inch triangle
Add a 2-inch-deep rectangle to the long top edge of your triangle pattern. Cut one from a Halloween print and one from a solid, sew right sides together all the way around leaving 2 inches open, then turn and press. Fold the top rectangle down 1 1/2 inches and stitch across to make the collar channel. Measure your pet’s collar first and make sure the channel is wide enough to slide on easily.
10. Bat Wings for Kids
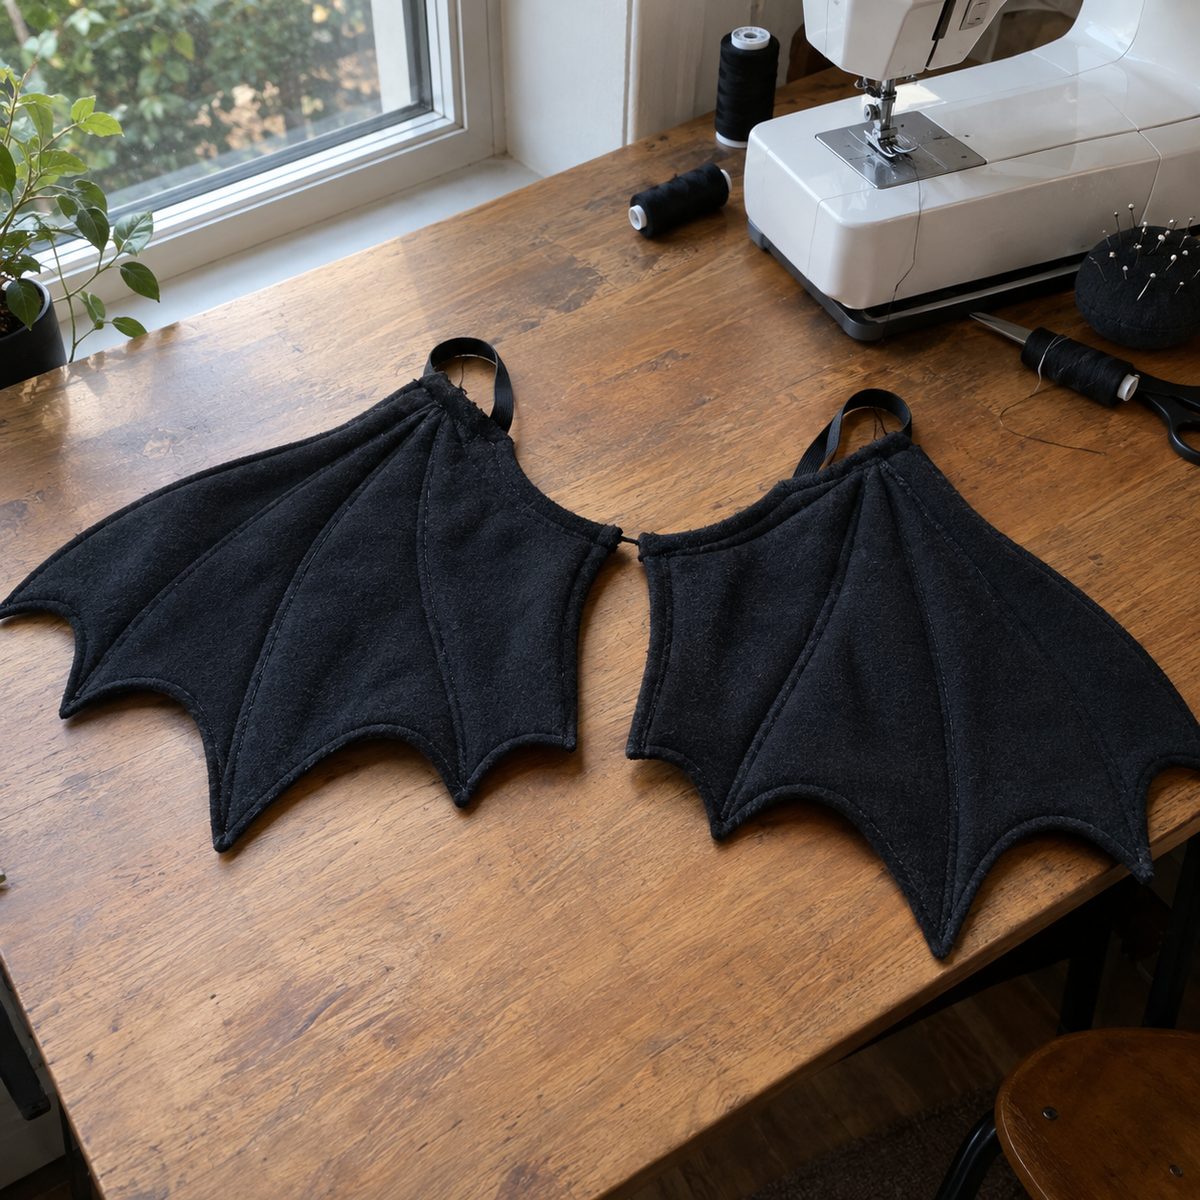
Bat wings are a fast costume that looks impressive, and kids love flapping them around the yard. Pair them with black leggings and a black shirt and the costume is done.
Cut two wing pieces from black fleece or felt, each shaped like a scalloped half-umbrella about 24 inches from the spine to the tip for a school-age child. Fleece is ideal because it won’t fray and holds its shape. Topstitch a few lines from the top center out toward each scallop point to suggest wing “ribs.”
Sew the two wing halves together along the center back. Add two 8-inch loops of 1/2-inch elastic at the upper back for shoulder straps, and stitch a small elastic loop at each wing tip so kids can slip their hands in.
11. Cat Ear Headband
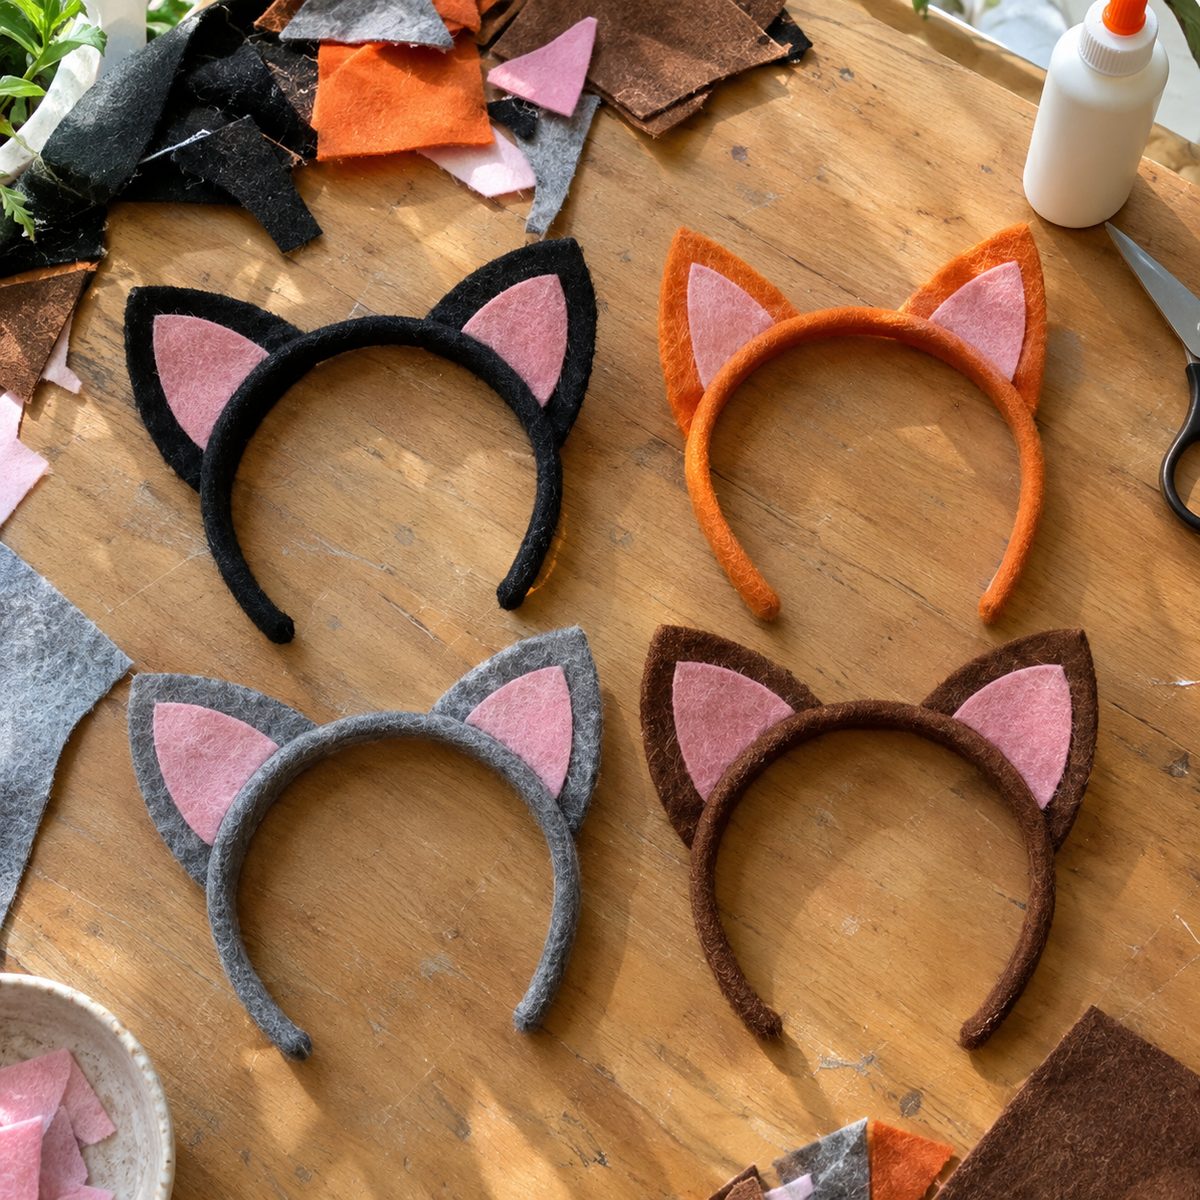
Cat ears are the most versatile Halloween accessory in the closet: they work for a black cat, a fox, a tiger, or a mouse with just a fabric change.
Cut four triangles about 3 inches tall from black felt and two slightly smaller triangles from pink felt for the inner ears. Stitch each pink piece to one black piece. Place each ear front and back together and sew the two long sides, leaving the base open.
Turn the ears, stuff a tiny bit of polyfill in the tip if you’d like them to stand up, and wrap the open base around a plain plastic headband. Hand-stitch the base closed around the band with a few tight whipstitches, then add a dab of fabric glue underneath to keep the ears from sliding. Budget about 30 minutes per headband.
12. Elastic-Waist Tulle Skirt
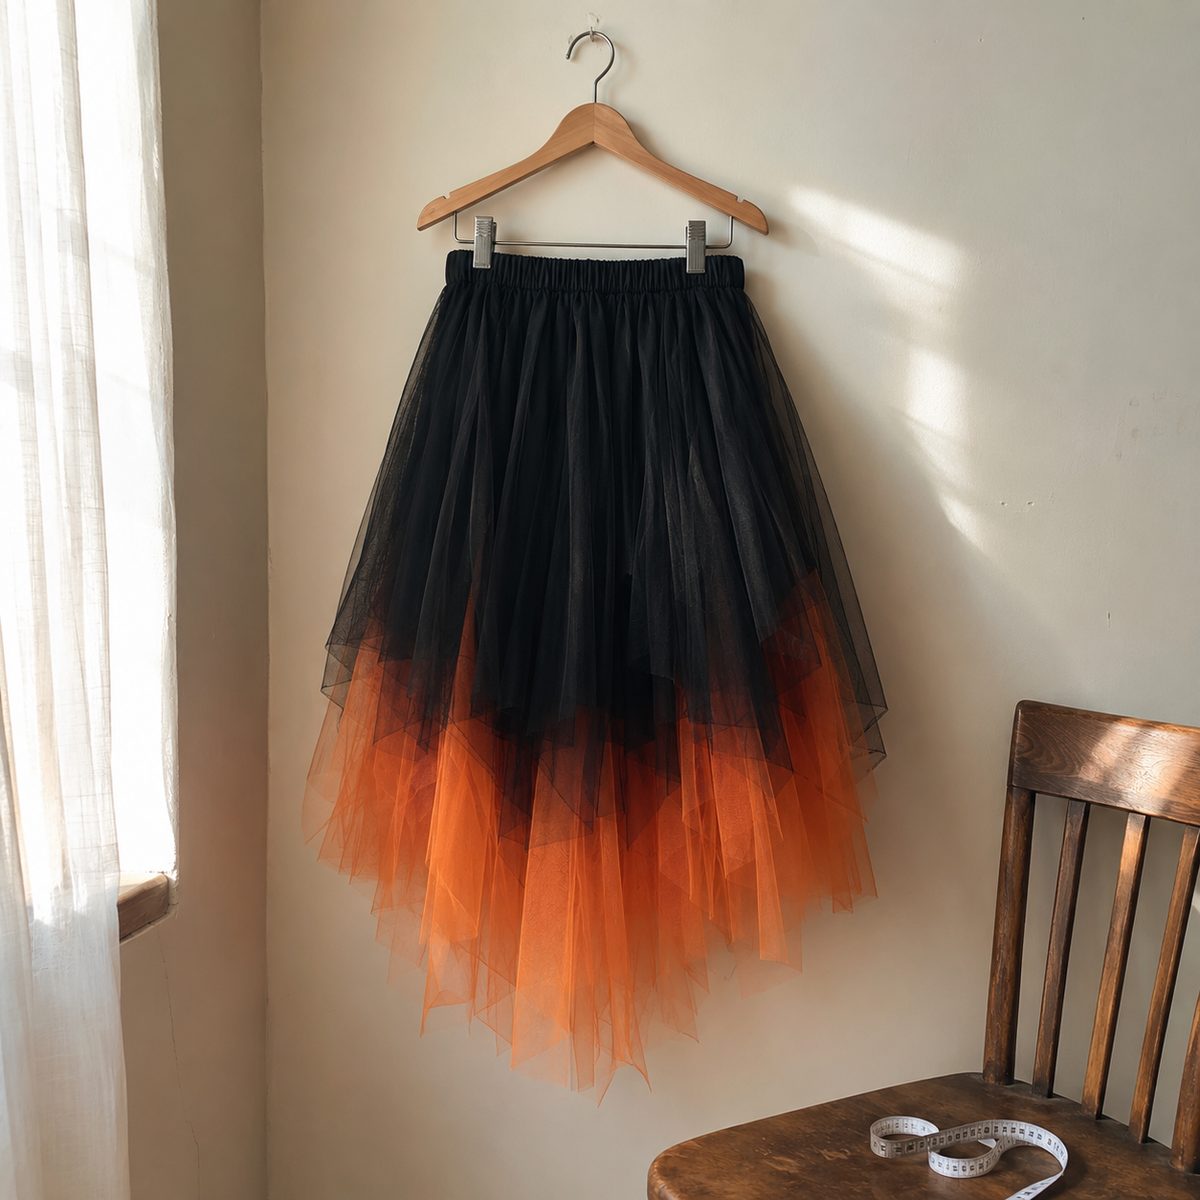
A layered tulle skirt is the base for dozens of costumes: witch, fairy, candy corn, or spider queen. Black over orange is my favorite combo, and the whole thing sews up in about an hour.
Cut three layers of tulle, each twice the waist measurement wide and the desired length plus 1 inch. Cut a lining of lightweight cotton the same length so the tulle doesn’t scratch legs. Sew each layer into a tube with a single seam.
Stack the tulle over the lining, baste the top edges together, and gather them to fit a 1 1/2-inch waistband casing. Thread 1-inch elastic cut to the waist measurement minus 2 inches through the casing, overlap the ends, and zigzag them together. If you’ve never done a casing, this guide to sewing elastic into fabric walks through it.
13. Pumpkin Mug Rugs
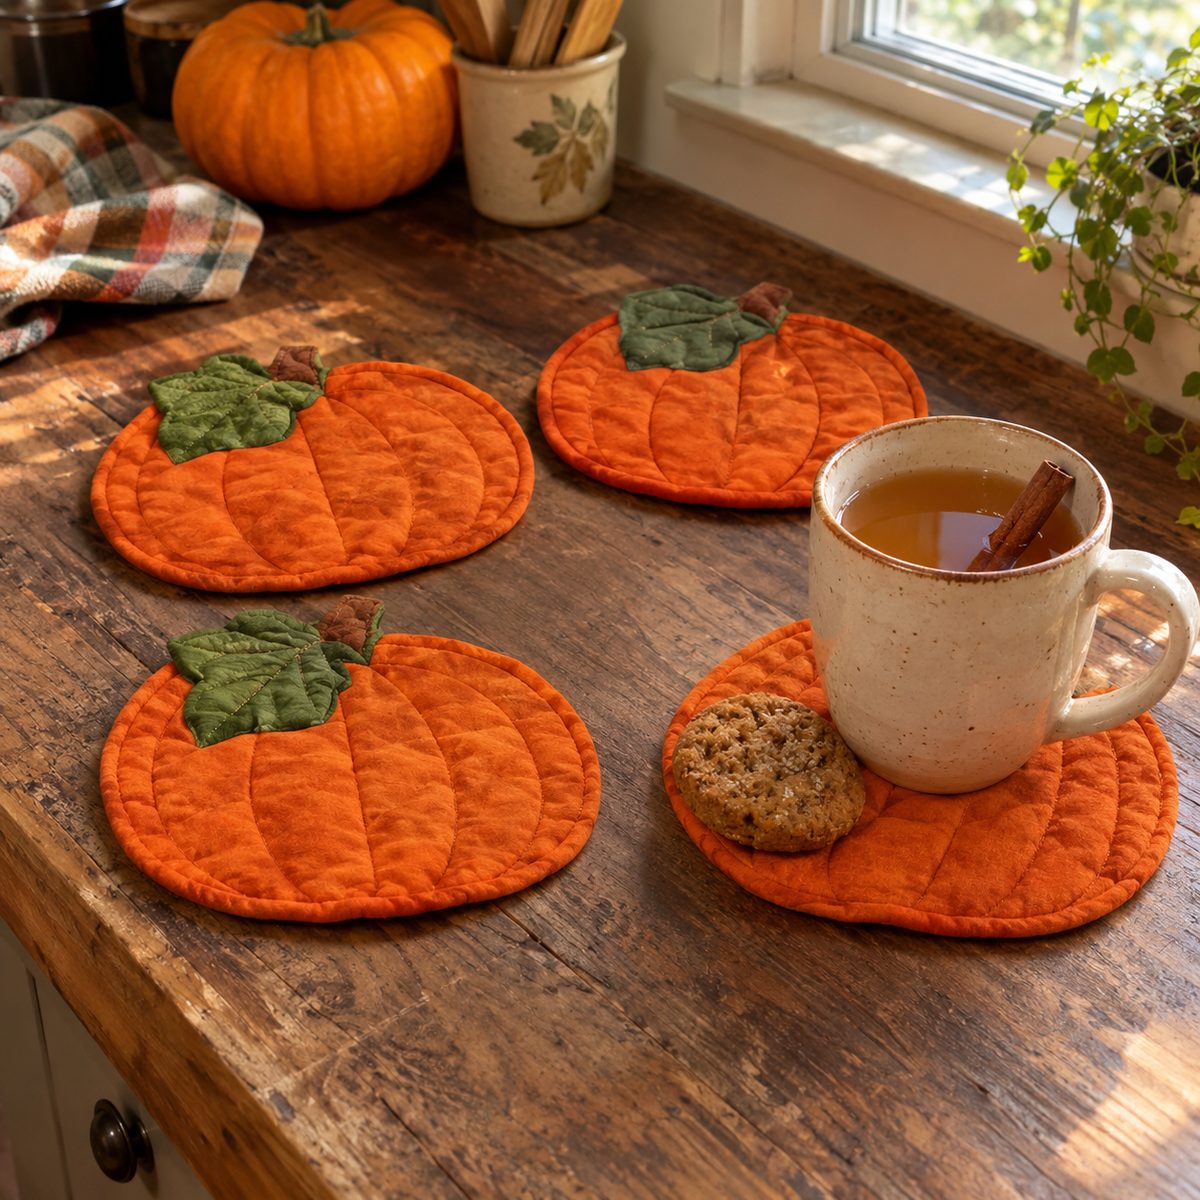
Mug rugs are oversized coasters with room for a cookie, and a pumpkin-shaped set makes a lovely hostess gift for a Halloween party. They’re also a low-risk way to practice quilting.
Draw a pumpkin about 7 inches wide by 6 inches tall with a small stem on top. Cut one front from orange cotton, one back from a coordinating print, and one layer of cotton batting. Cut a small green leaf and stitch it near the stem.
Layer the front and back right sides together with the batting on the bottom, and sew around with a 1/4-inch seam, leaving a 2-inch gap. Clip the curves and the inside corners at the stem, turn, and press. Topstitch around the edge to close the gap, then stitch three curved lines down the pumpkin to create sections.
14. Pillowcase Candy Bag
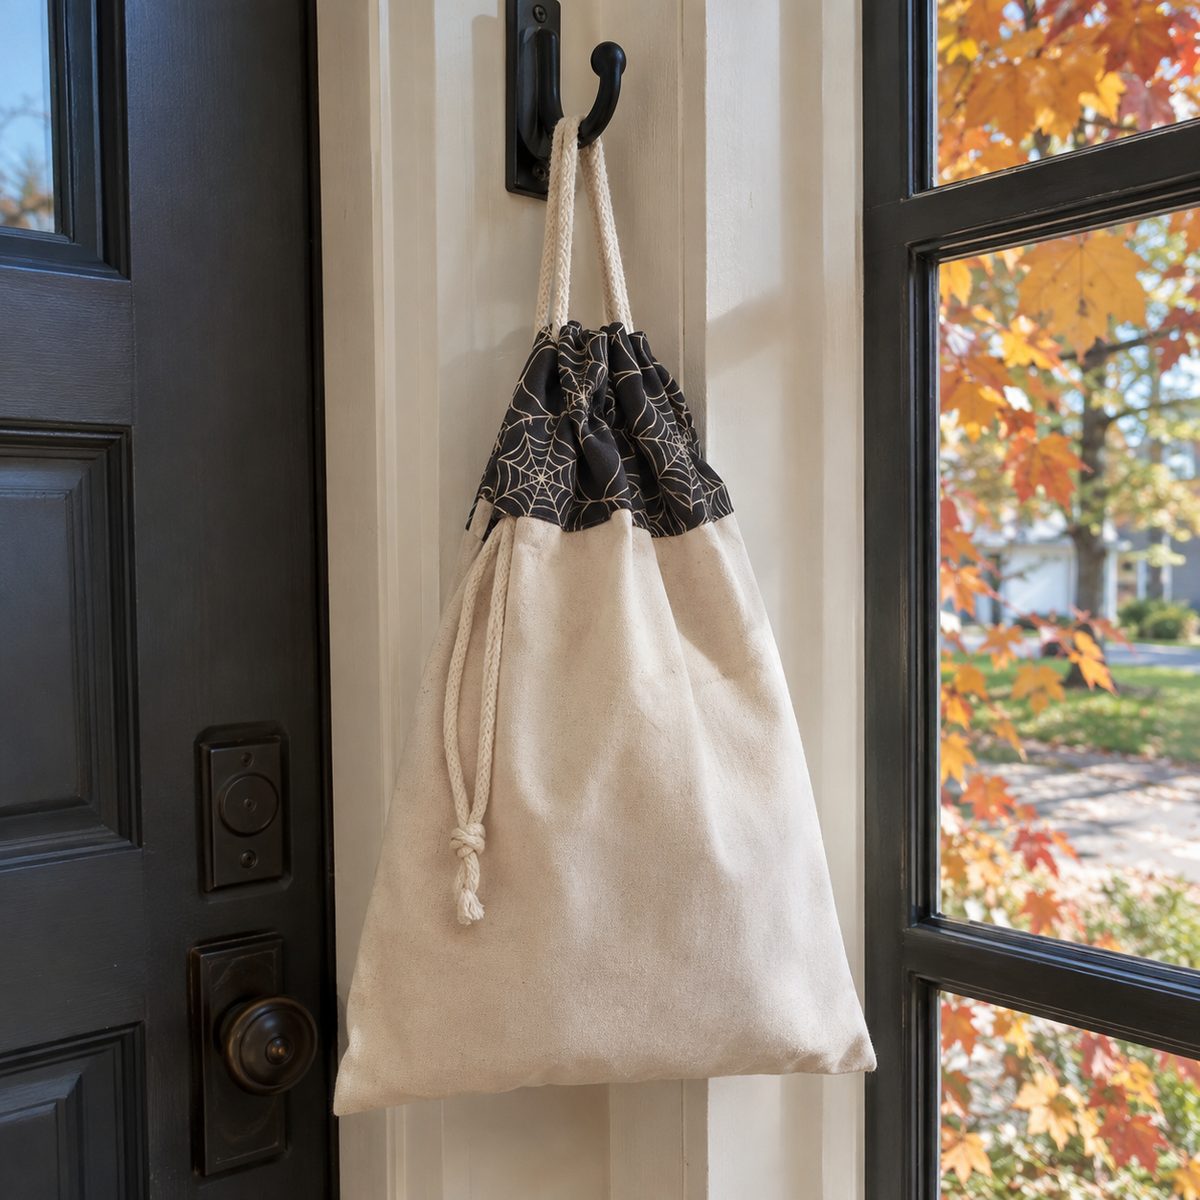
Serious trick-or-treaters swear by a pillowcase, and you can sew a sturdier, cuter version sized for kids. It’s big enough for a long night and folds flat for storage.
Cut two panels of canvas or duck cloth at 16 x 20 inches, and a 4-inch-wide cuff from a Halloween print. Canvas is heavy enough that the bag won’t tear when it’s full. Sew the panels together on three sides with a 1/2-inch seam and zigzag or serge the raw edges.
Fold the cuff in half lengthwise, sew it to the top edge, and press it up. Add a 1-inch-wide drawstring channel just under the cuff and thread cotton cord through so kids can cinch the bag shut between houses. For small kids, a pair of short handles is easier than a drawstring. Embroider or appliqué their initial on the front so bags don’t get mixed up.
15. Drawstring Party Favor Bags
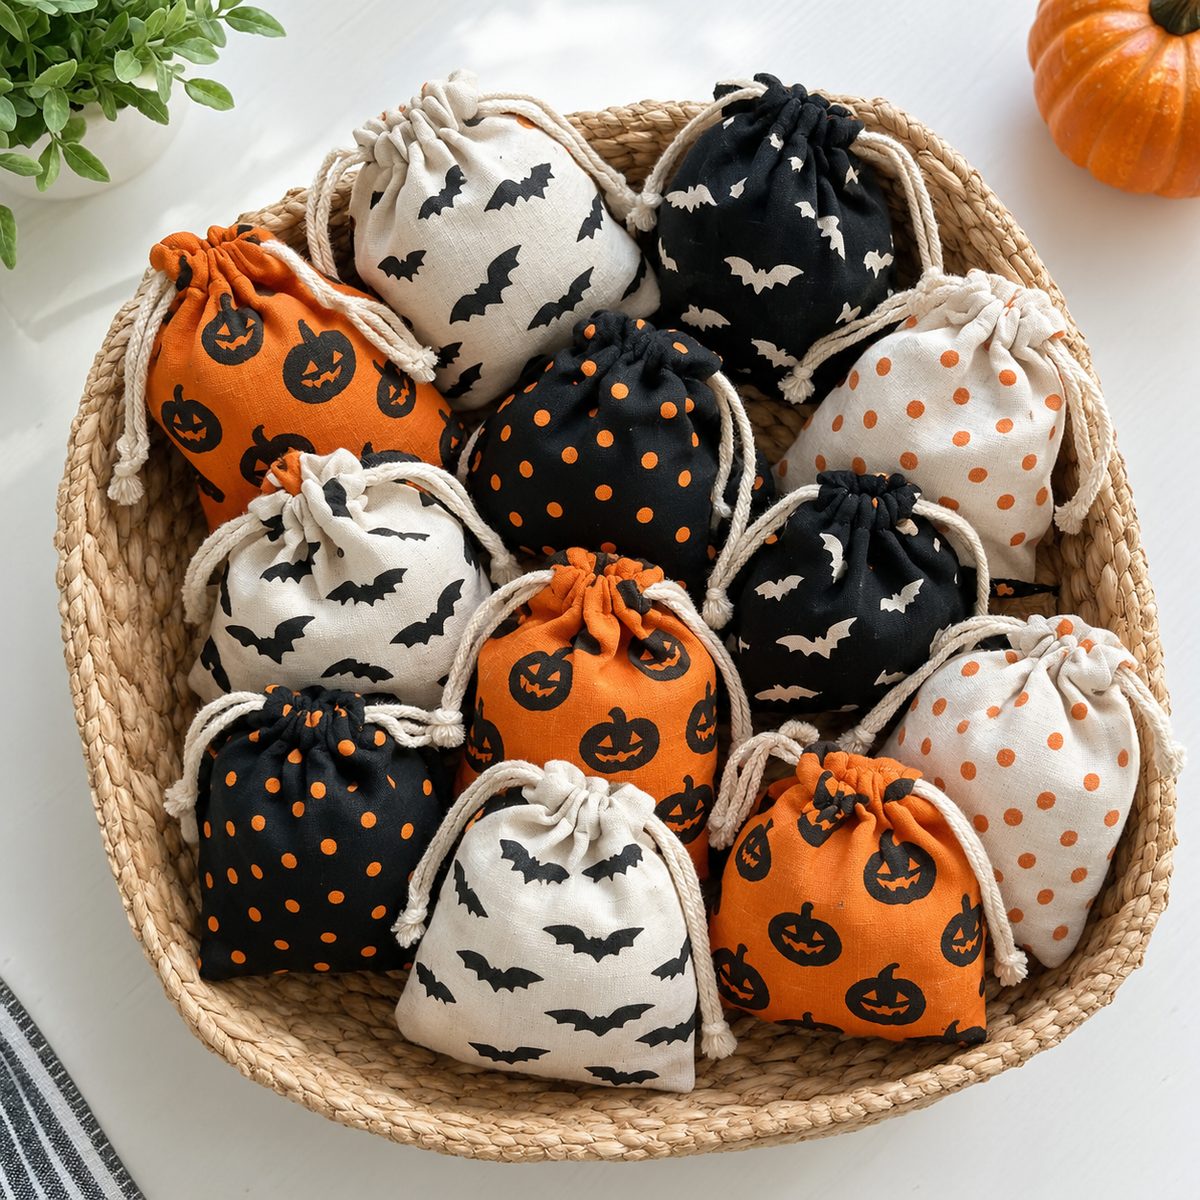
Tiny drawstring bags are perfect for classroom treats, party favors, or holding a handful of candy at each place setting.
- Cut a 6 x 16 inch rectangle of cotton print for each bag.
- Fold it in half, right sides together, into a 6 x 8 inch shape.
- Sew the sides, stopping 1 1/2 inches from the top on each side.
Press the unsewn side edges back and topstitch them down. Fold the top edge down 1/4 inch, then 3/4 inch, and stitch to form the drawstring casing. Thread 16 inches of narrow ribbon or cord through with a safety pin and knot the ends. Chain-piece the bags assembly-line style, sewing all the side seams at once, to speed things up.
16. Monster Zipper Pouch
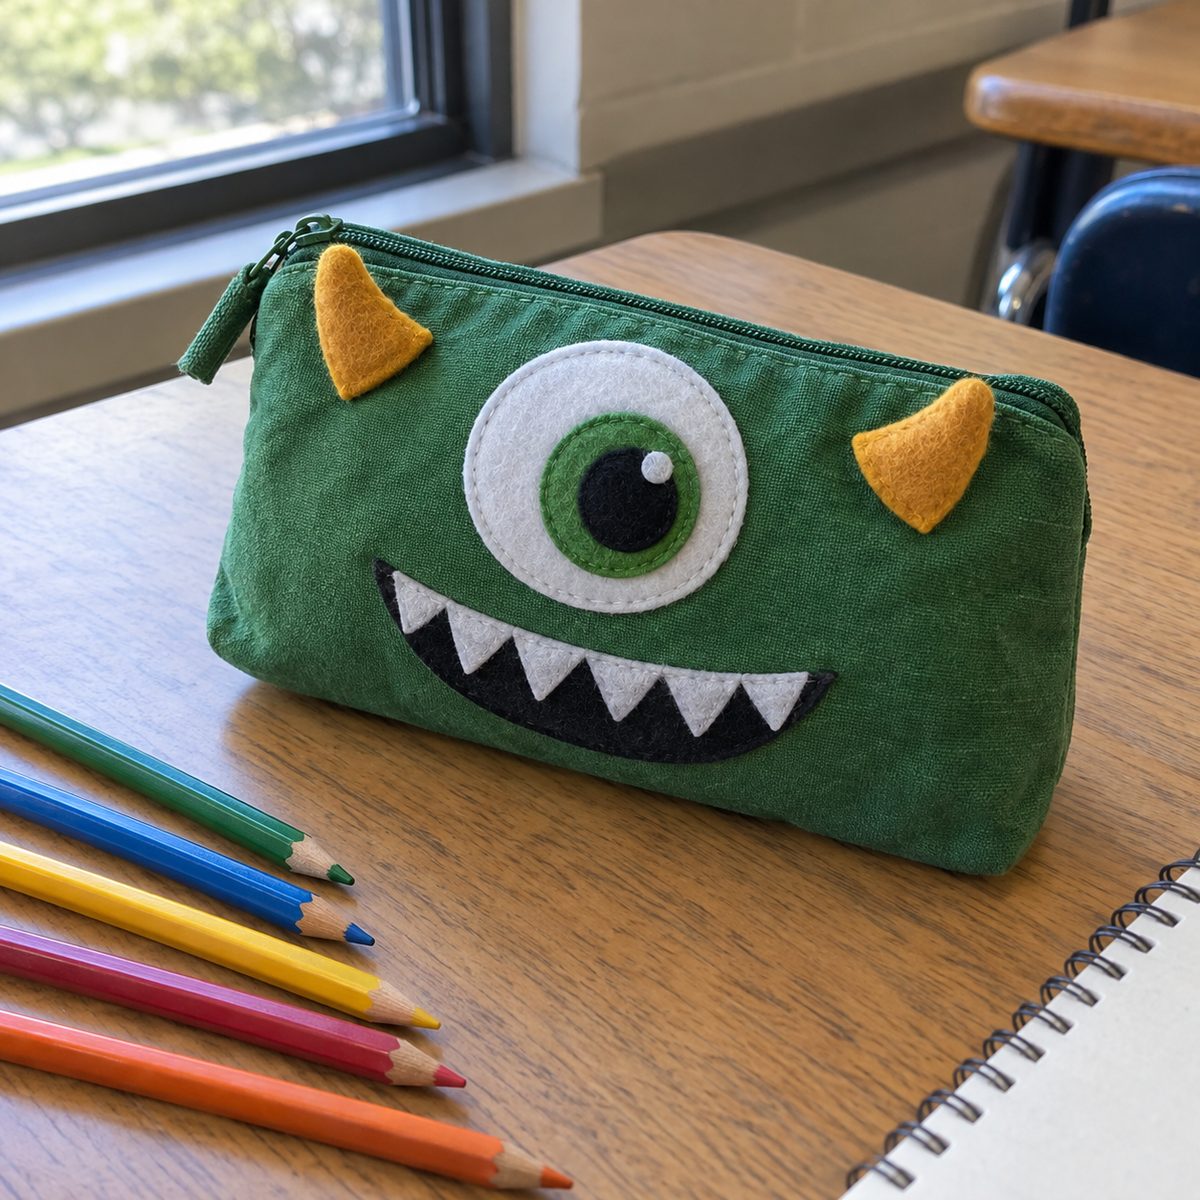
A googly-eyed monster pouch is a fun, practical Halloween gift for kids who need a new pencil case for school. It’s also a friendly way to learn zipper installation without pressure, because monsters don’t have to be perfect.
Cut two outer pieces of green, purple, or orange cotton at 9 x 6 inches, two lining pieces the same size, and a 9-inch zipper. Before assembly, appliqué the monster face on one outer piece: a large white felt circle eye with a black felt pupil, and a zigzag mouth of white felt teeth.
Sew the zipper between the outer and lining layers on each side, open it partway, then sew all four layers around the edges with the lining pieces together and the outer pieces together. Leave a gap in the lining, turn, and close. Stitch small felt horns into the top seam for extra personality.
17. Halloween Cloth Napkins
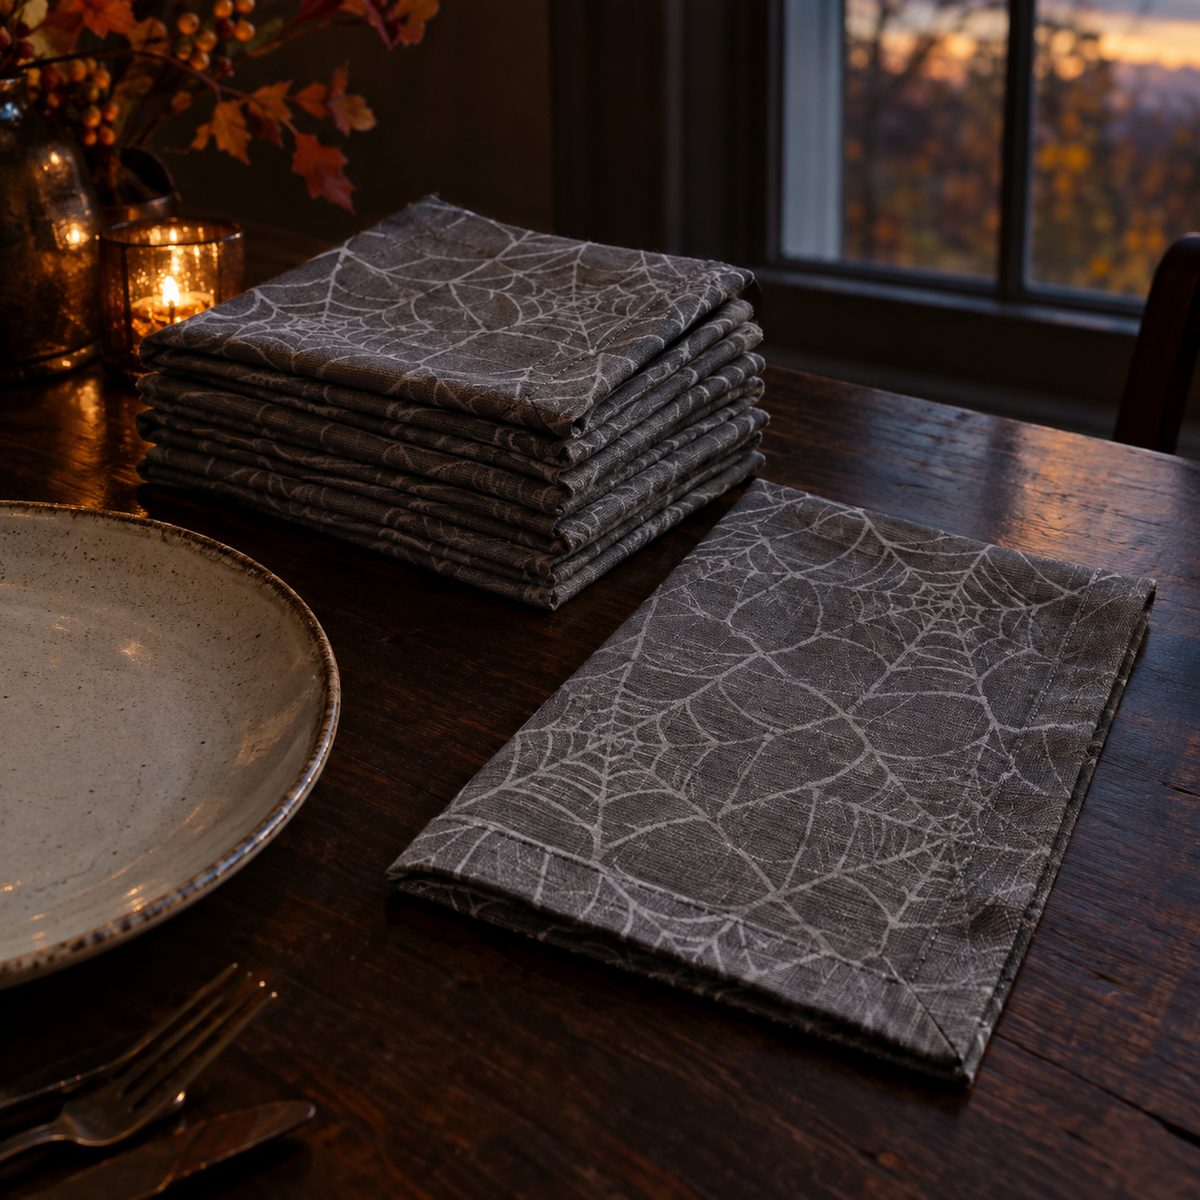
A set of cloth napkins in a spiderweb or bat print makes a Halloween dinner feel special, and they come out every year. Mitered corners give them a polished, store-bought look.
Cut 18-inch squares from quilting cotton or a cotton-linen blend. Prewash the fabric first so the napkins don’t shrink out of square after the first wash. Press a 1/4-inch fold on every edge, then a 1-inch fold.
To miter each corner, unfold the second fold, fold the corner point in diagonally, then refold the edges so they meet in a neat 45-degree line. Pin and topstitch close to the inner fold all the way around. Eight napkins use about 2 1/4 yards of 44-inch fabric. For a quicker finish, a narrow rolled hem on a serger works well too.
18. Quilted Pot Holder
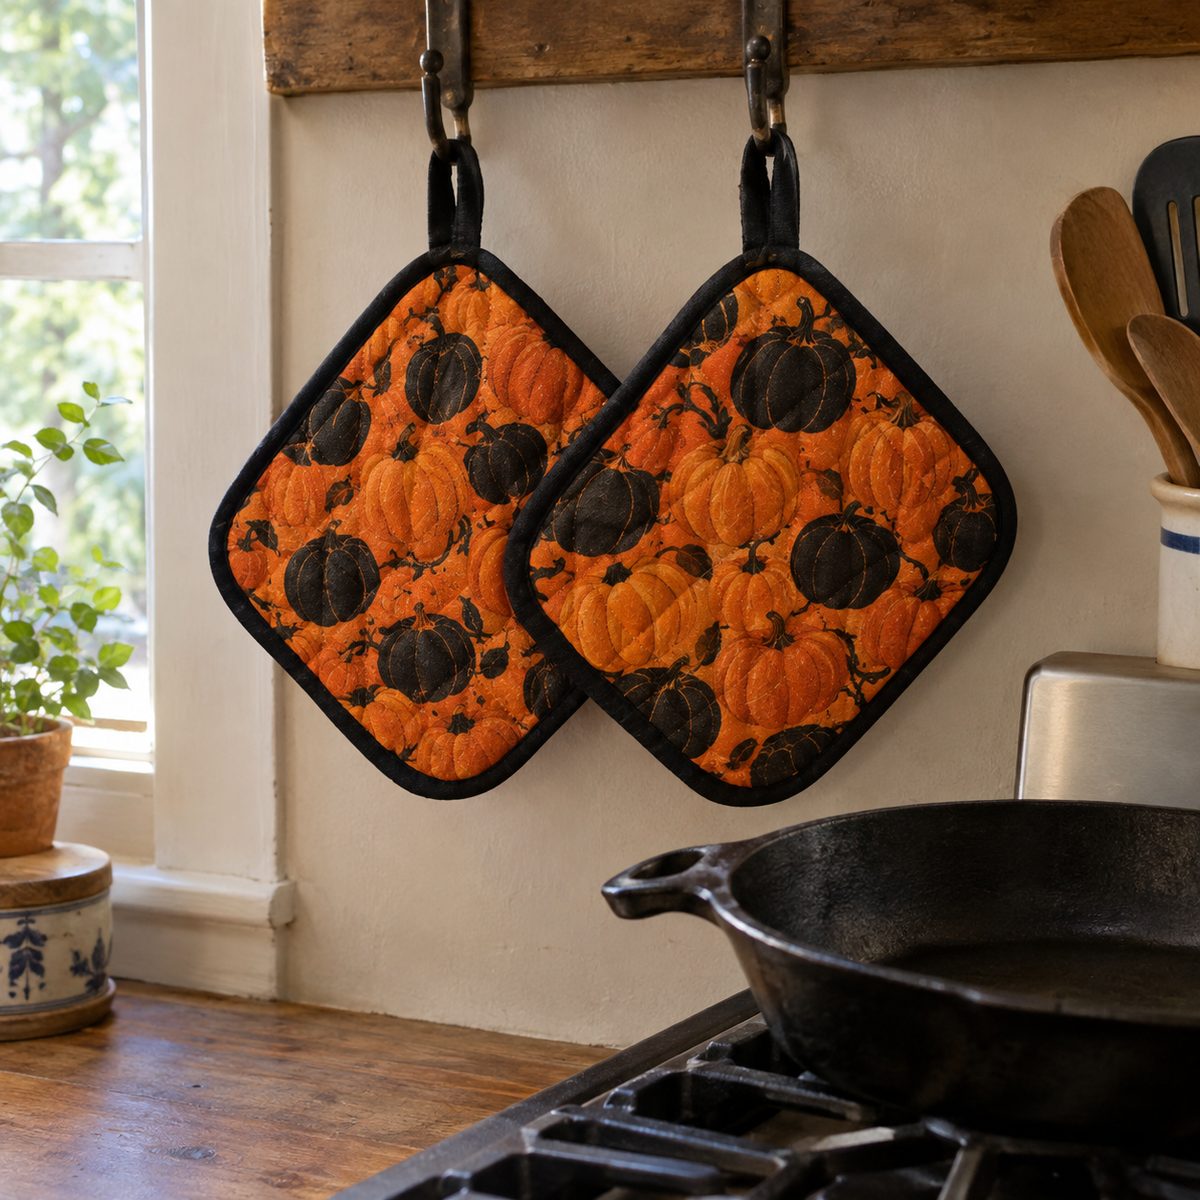
Pot holders are a small, useful project that uses up leftover batting and binding, and a Halloween set makes the kitchen feel festive.
Cut two 9-inch squares of cotton in a Halloween print, and two 9-inch squares of batting: one cotton and one heat-resistant insulated batting. The insulated layer is the important part, because cotton batting alone won’t protect hands from a hot pan.
Layer the back fabric, insulated batting, cotton batting, and top fabric. Quilt a grid of diagonal lines 1 1/2 inches apart. Round the corners with a small bowl as a template, then bind with 2 1/4-inch bias binding, which curves smoothly around rounded corners. Before you finish the binding, fold a 5-inch strip into a hanging loop and catch it in the corner.
19. Black Cat Draft Stopper
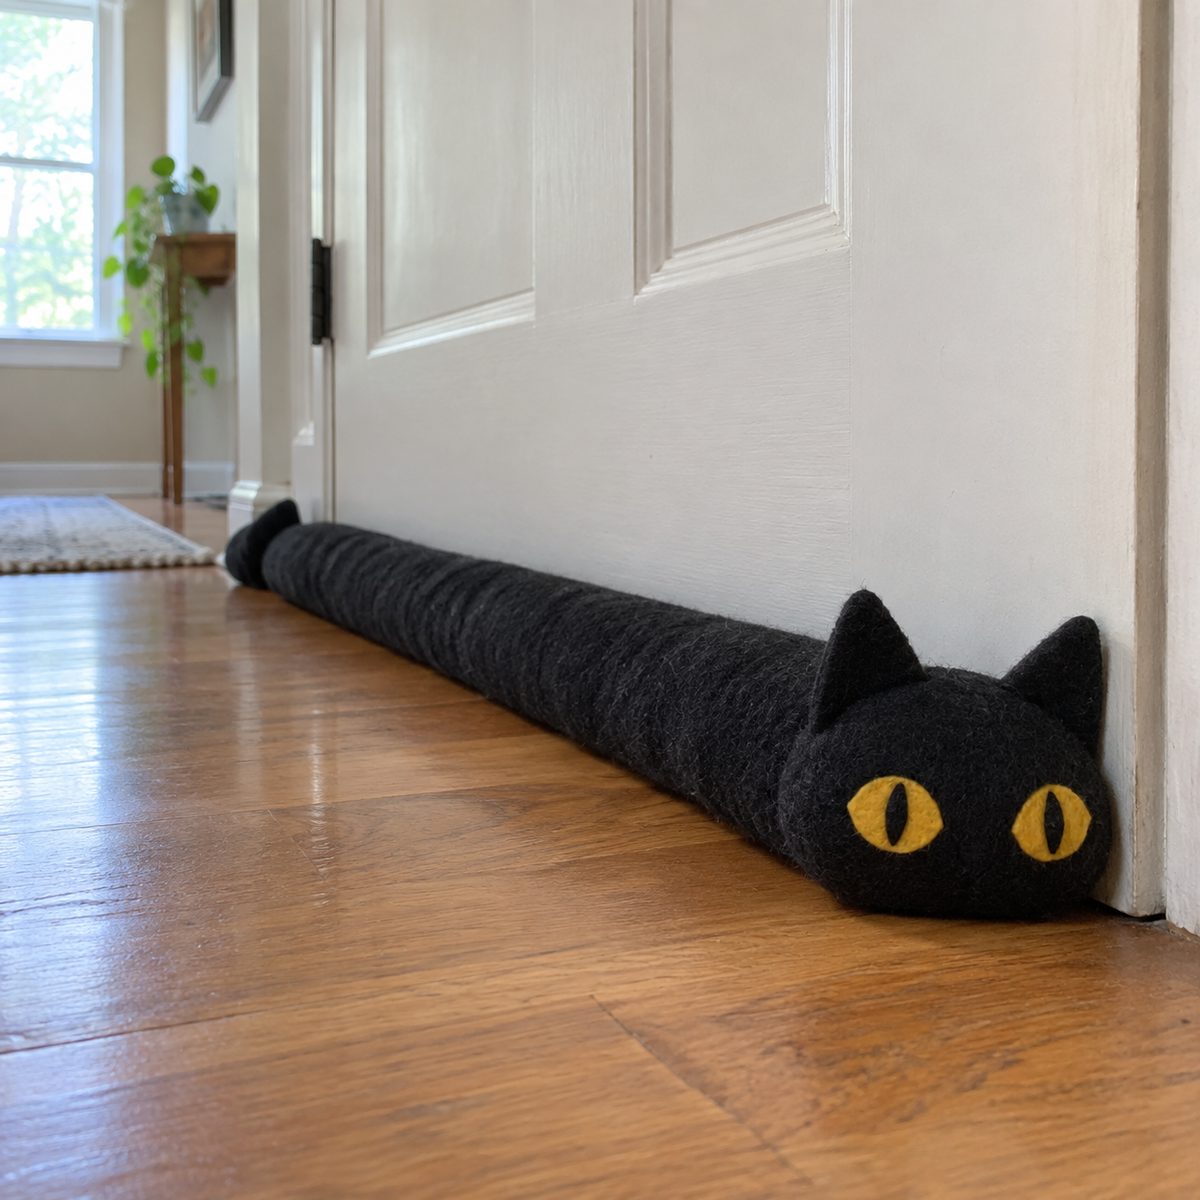
A long black cat draft stopper blocks chilly air under a door and doubles as fall decor. It’s a satisfying intermediate project with some simple shaping and a sweet finished result.
Cut two 6 x 36 inch strips of black cotton or corduroy. At one end, round the corners and add two small triangle ears to the top edge. At the other end, round the corners for the tail. Embroider or appliqué yellow felt eyes and a pink nose on the head end of one strip.
Sew the pieces right sides together, leaving a 4-inch opening in the middle of the long side. Turn and fill the first and last 6 inches with polyfill, then pour in rice, dry beans, or plastic pellets in the middle for weight. Hand-stitch the opening closed. A lined inner bag for the filling makes it washable.
20. Jack-o’-Lantern Appliqué T-Shirt
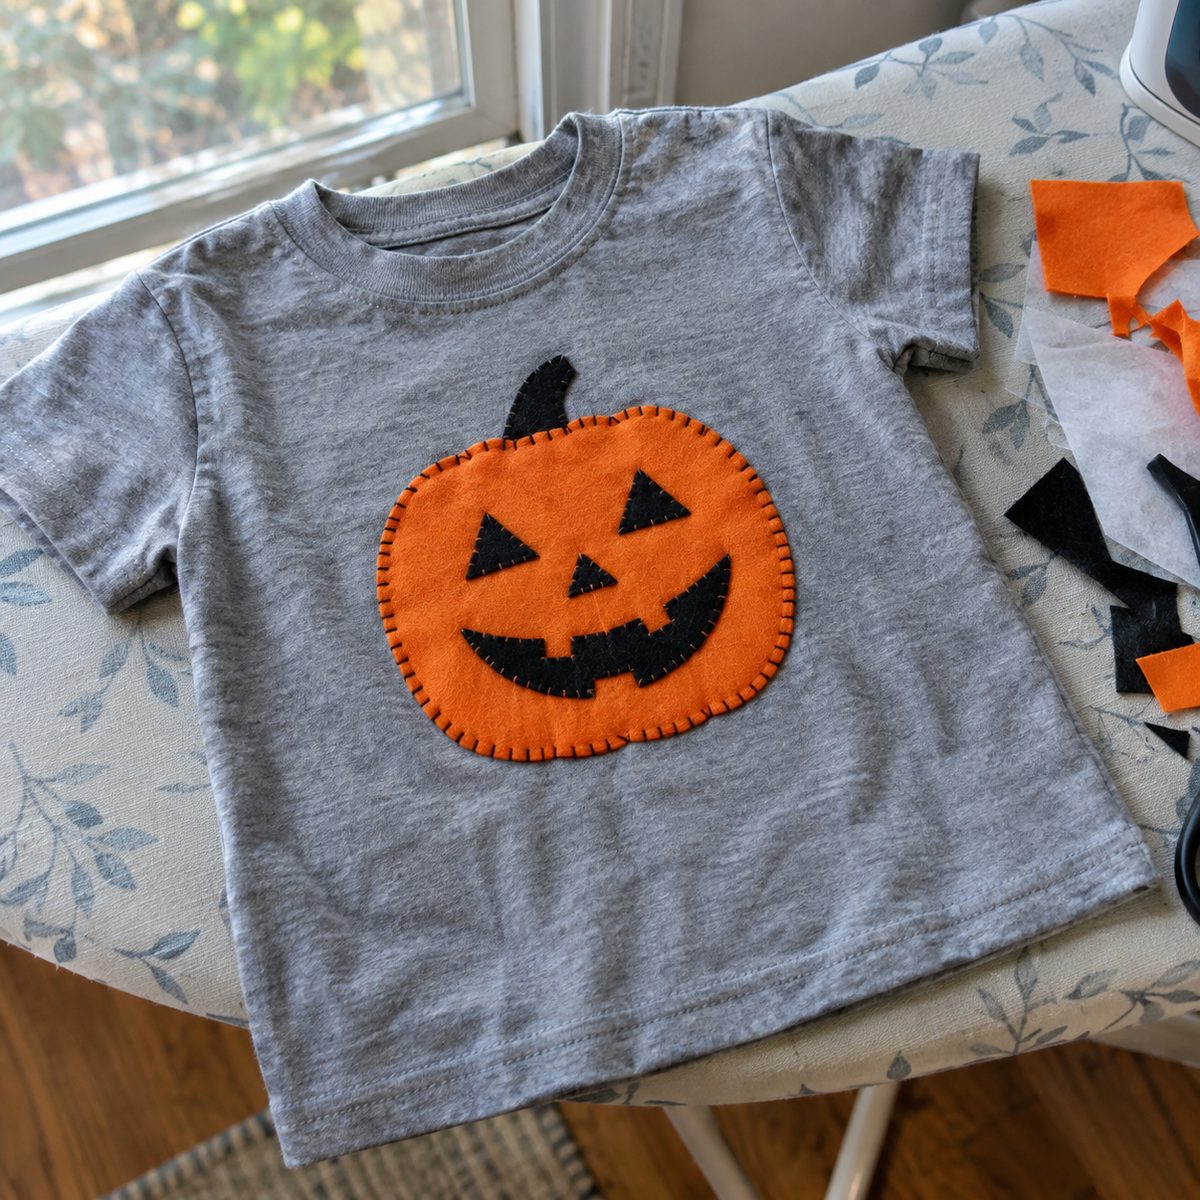
An appliqué T-shirt is a costume shortcut that kids can wear to school on Halloween, then all fall. Fusible web makes the appliqué simple even for beginners.
Trace a 7-inch jack-o’-lantern shape onto the paper side of fusible web, fuse it to the back of an orange cotton scrap, and cut it out. Do the same for black eyes, a triangle nose, and a grin, plus a small green stem. Peel the paper and press the pieces onto a prewashed T-shirt.
Knit shirts stretch as you stitch, so put a tear-away stabilizer inside the shirt behind the design. Sew around each piece with a narrow zigzag or a blanket stitch, using a ballpoint needle. Once the edges are stitched, tear away the stabilizer. The finished shirt can go through the washer inside out on cold.
Pick One and Start Sewing
If you only have one evening, start with the bunting, the fabric pumpkins, or a pet bandana. They’re quick, use scraps, and make an instant impact. With a free weekend, the candy corn pillow and trick-or-treat tote will get pulled out every October for years. Remember that Halloween sewing is supposed to be fun: felt forgives, and a slightly wonky ghost has more personality. When you’re ready for more seasonal ideas, browse these fall sewing projects for harvest and Thanksgiving makes.