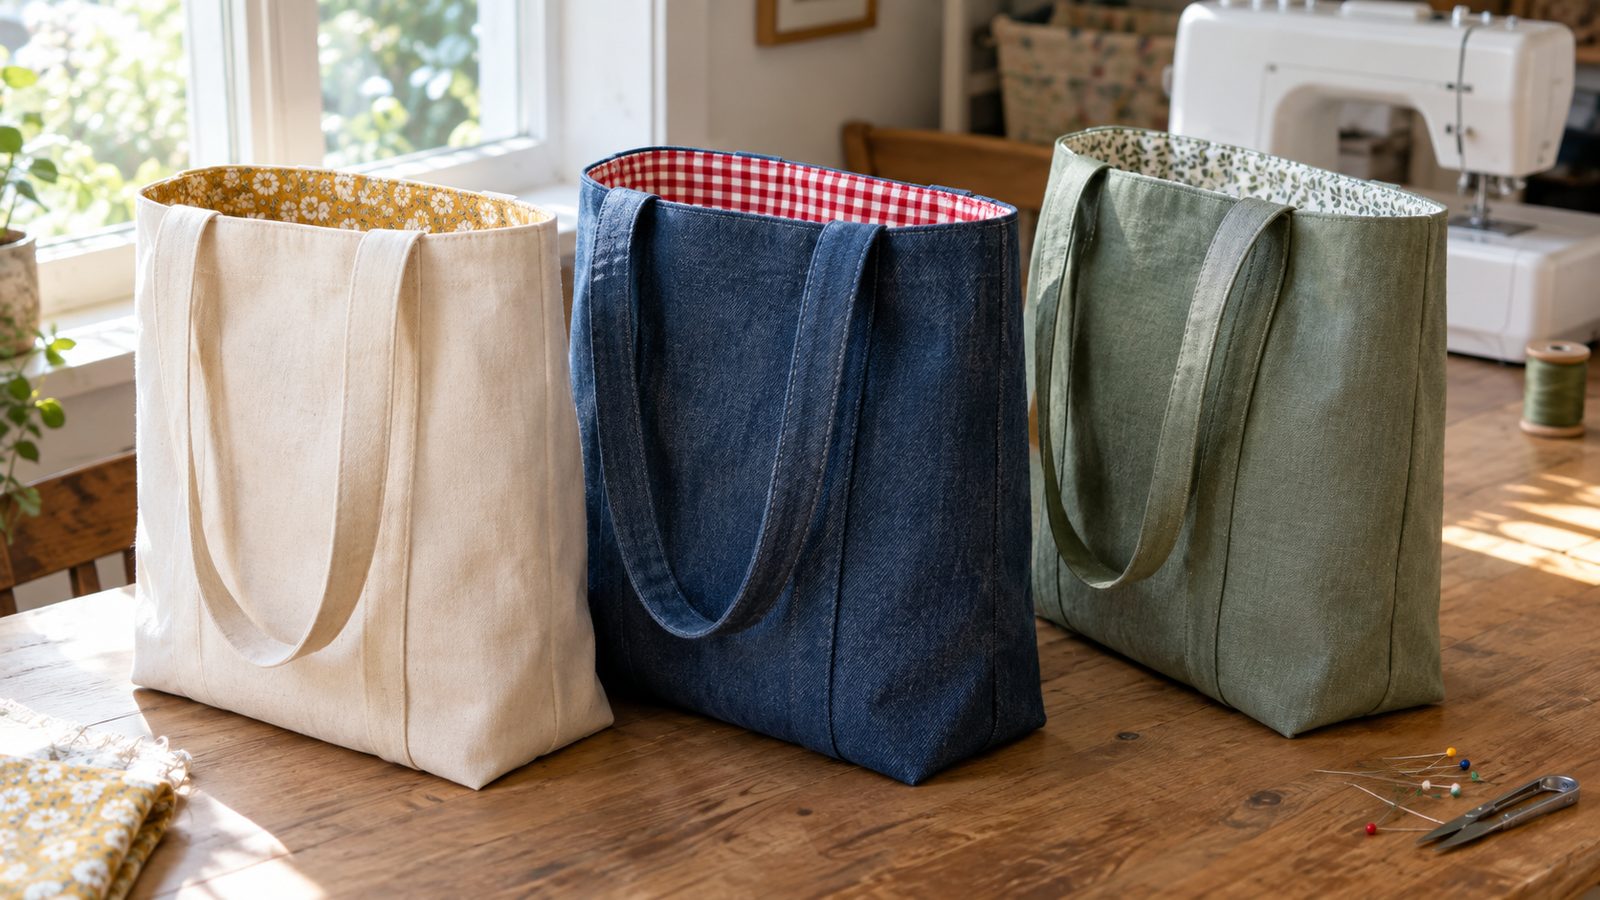
A lined tote with boxed corners looks like something you bought, but it’s one of the most forgiving bags you can make. You need two outer panels, two lining panels, two straps, and a few straight seams. The boxed corners give it a flat bottom, so it stands up on its own and actually holds groceries, library books, or a project in progress.
This pattern makes a bag about 14 inches wide, 15 inches tall, and 4 inches deep. Every cut is a plain rectangle, all the measurements are given, and there’s a short formula near the end if you want to resize it.
At a glance
- Finished size: about 14 inches wide x 15 inches tall x 4 inches deep
- Strap length: about 25 inches, long enough to carry on the shoulder
- Time: 2 to 3 hours, including cutting and pressing
- Skill level: confident beginner (straight seams, pressing, a little topstitching)
- Seam allowance: 1/2 inch throughout, already included in the cutting list
What you’ll need
- 1 yard of 44-inch-wide outer fabric, such as canvas, duck, denim, or quilting cotton
- 5/8 yard of 44-inch-wide lining fabric (3/4 yard if you add an inner pocket)
- About 1 3/4 yards of 20-inch-wide mid-weight fusible woven interfacing
- All-purpose polyester thread to match or contrast with the outer fabric
- A size 90/14 universal or denim needle
- Rotary cutter and mat or sharp fabric shears, a clear ruler, pins or clips, a fabric marker, and an iron
- Optional: a magnetic snap and a small scrap of extra interfacing
Cutting list
Wash and dry both fabrics the way you plan to wash the finished bag before you cut anything. Canvas and cotton can shrink, and it’s better for that to happen now than after the lining is sewn in. If you’re not sure how to prep them, the guide to washing fabric before sewing covers it.
All measurements are width x height, and 1/2-inch seam allowances are included in every piece. Cut the panels with the height running along the lengthwise grain, parallel to the selvage.
- Outer fabric: two panels 19 x 18 inches, plus two straps 4 x 26 inches
- Lining fabric: two panels 19 x 18 inches
- Interfacing: two pieces 19 x 18 inches for the outer panels, plus two strips 4 x 26 inches for the straps
With 44-inch fabric, the two outer panels fit side by side across the width in an 18-inch band, and both straps come from the next 8 inches, cut across the width. That’s 26 inches, so a full yard leaves room to straighten the edge and fix a mistake.
Fuse the interfacing to the wrong side of each outer panel and each strap now, following the instructions for your product. Mid-weight woven interfacing gives the tote enough body to stand up without making it stiff. If you want to know how the different types compare, see what interfacing is and how it works.
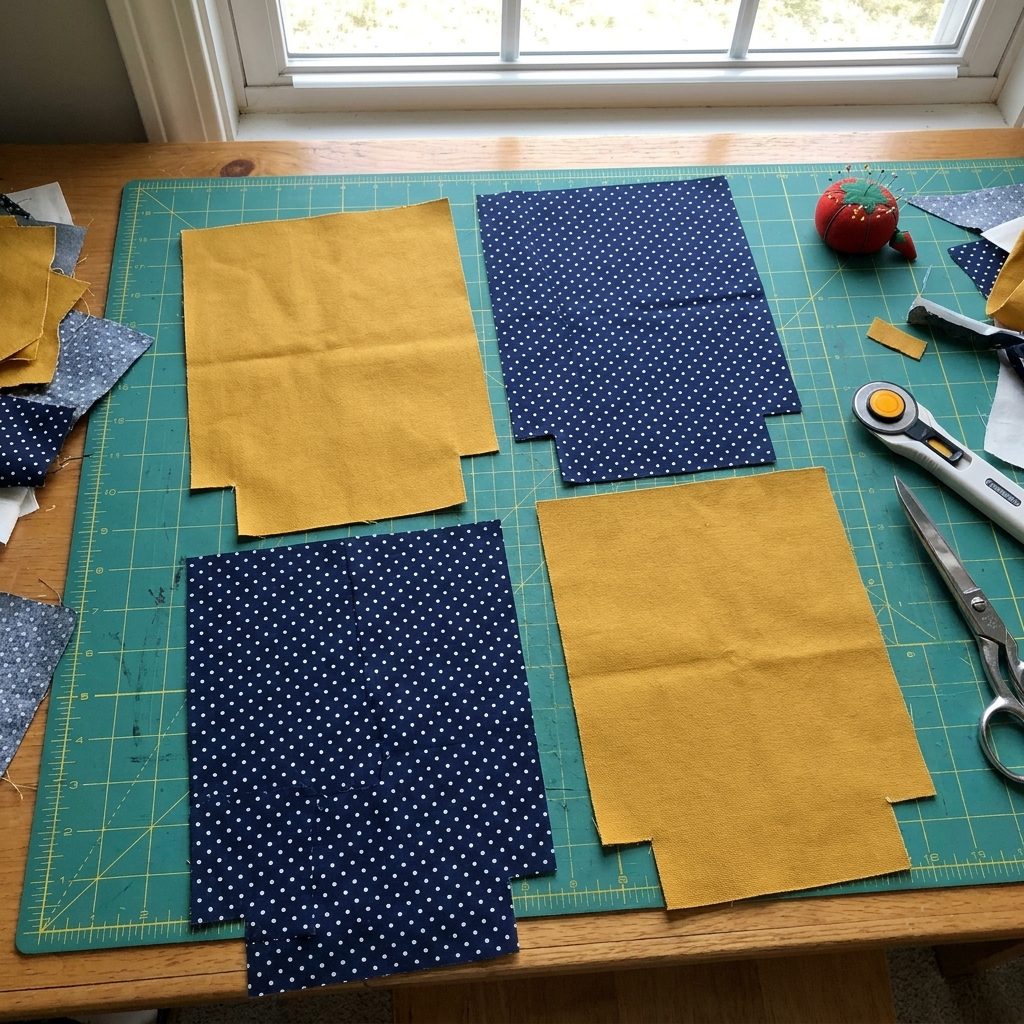
Finally, cut a 2 x 2-inch square out of the two bottom corners of all four panels, measured from the raw edges. Only the bottom corners get squares. The top corners stay square. The next few sections explain why the square is 2 inches.
Make the straps
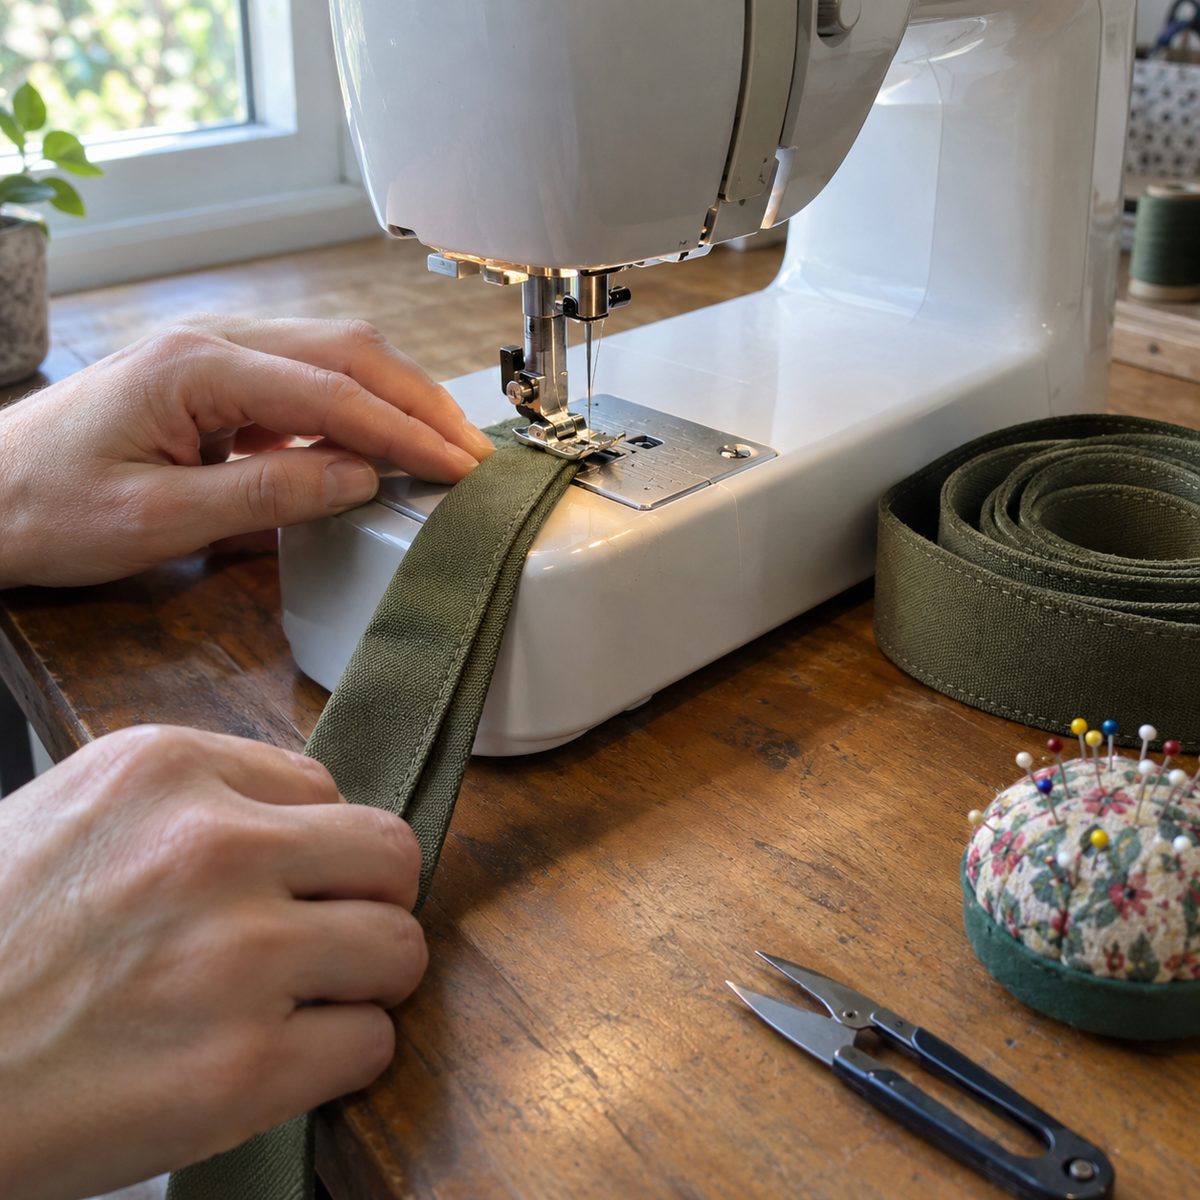
These are four-fold straps. They finish at 1 inch wide and all the raw edges end up tucked inside, so there’s nothing to fray.
- Press one interfaced strap in half lengthwise, wrong sides together, then open it back up. You now have a center crease.
- Fold each long raw edge in to meet the center crease and press. The strip is now 2 inches wide.
- Fold it in half again along the original crease, enclosing the raw edges, and press firmly. The strap is now 1 inch wide and four layers thick.
- Clip or pin the open edge closed. Edgestitch about 1/8 inch from the open edge, then edgestitch the folded edge the same distance in, so both sides match.
- Repeat for the second strap. Each strap should measure about 1 x 26 inches.
Lengthen your stitch to about 3 mm for the edgestitching. It sits better on four layers and looks more polished. If the machine struggles at the start, hold the thread tails behind the foot for the first few stitches.
Sew the outer bag
- Place the two outer panels right sides together, matching all edges and the cut-out corners. Pin or clip the two sides and the bottom.
- Sew down one side, across the bottom, and up the other side with a 1/2-inch seam allowance, backstitching at each end. Leave the notched corners open. You’ll stitch from the top edge down to the notch, and from notch to notch across the bottom.
- Press the seams open. It takes a minute on canvas, but open seams make the boxed corners much flatter.
- Leave the bag wrong side out for now and set it aside.
Box the corners
Boxing a corner turns a flat envelope into a bag with a bottom and sides. There are two ways to do it. They give the same result, and it helps to understand why.
Why the cut-out square is 2 inches
When you box a corner, you sew a short seam across it, at a right angle to the side seam. The length of that seam becomes the depth of the bag. For a 4-inch-deep bag, you need that seam to be 4 inches long.
That short seam sits halfway along the depth on each side of the side seam, so the rule is simple: cut a square that is half the depth you want. Half of 4 inches is 2 inches. Because you cut the square from the raw edges and then close the opening with the same 1/2-inch seam allowance you used for the side and bottom seams, the allowances cancel out. A 2-inch square gives a 4-inch box.
Boxing also takes fabric from the bag’s width and height. Each boxed corner uses 2 inches from each side, so the 18-inch stitched width of each panel becomes 14 inches across the front, and the 4 inches you lose from the width becomes the bag’s depth. The bag also loses 2 inches of height, which is why the panels are cut taller than the finished 15 inches.
Closing the cut-out corners
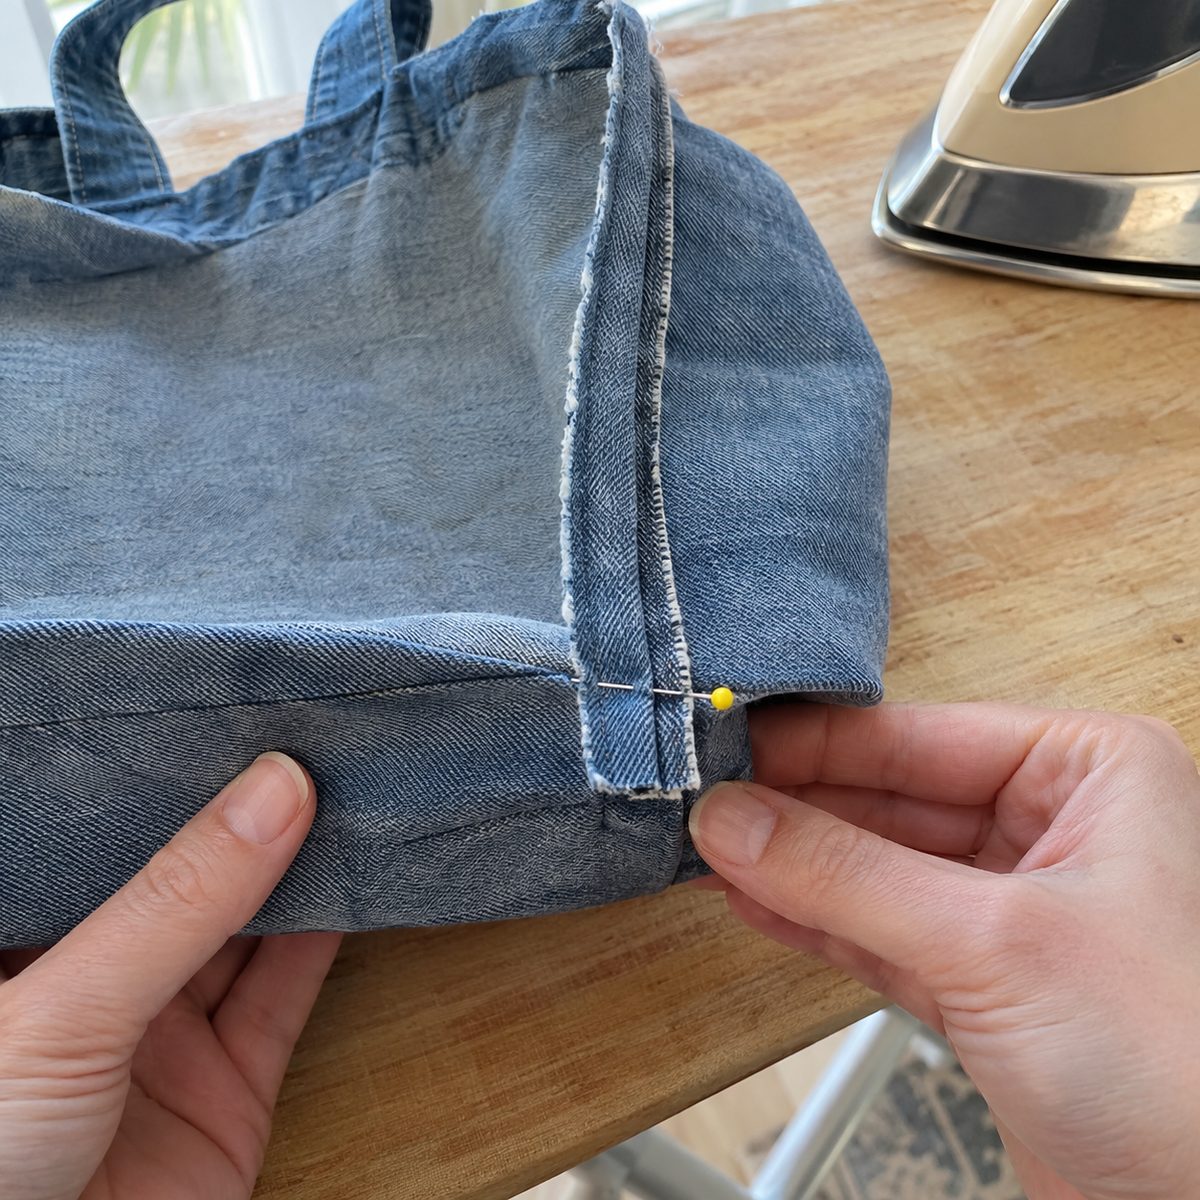
- At one bottom corner, pull the front and back of the opening apart so the side seam and the bottom seam meet in the middle, one on top of the other.
- The notch flattens into one straight raw edge about 4 inches long. Nest the pressed-open seam allowances so they lie flat, and pin through both seams so they stay lined up.
- Sew straight across the raw edge with a 1/2-inch seam allowance, backstitching at both ends. Sew over it a second time for strength, because this seam takes the weight of whatever’s in the bag.
- Repeat on the other bottom corner.
The pinch method, if you didn’t cut squares
If you forgot to cut the squares, or you’re boxing a bag you’ve already sewn, you can pinch the corner instead. Sew the side and bottom seams straight through the corners. Then pull the corner into a triangle with the side seam centered on the bottom seam. Measure down from the point and draw a line straight across the triangle, perpendicular to the seam, where the line is exactly 4 inches long. That lands 2 inches from the point, the same half-the-depth rule. Sew on the line, check it from the right side, then trim the triangle to leave a 1/2-inch seam allowance.
Both methods work. Cutting squares is easier to get even on all four corners, because the measuring happens while the fabric is flat. The pinch method lets you try the depth before you commit, which is handy when you’re resizing.
Make the lining with a turning gap
The lining is built just like the outer bag, with one difference: you leave an opening in the bottom seam to turn the bag through.
- Place the two lining panels right sides together. If you’re adding a pocket or a magnetic snap, attach it to one panel first (see the ideas further down).
- Sew the two sides with a 1/2-inch seam allowance.
- Sew the bottom seam, but leave a gap of about 6 inches in the center. Backstitch firmly at both sides of the gap, because you’ll be pulling the whole bag through it.
- Press the seams open, including the seam allowance along the gap. That pressed crease makes the opening much easier to close neatly later.
- Box both lining corners exactly as you did for the outer bag. Leave the lining wrong side out.
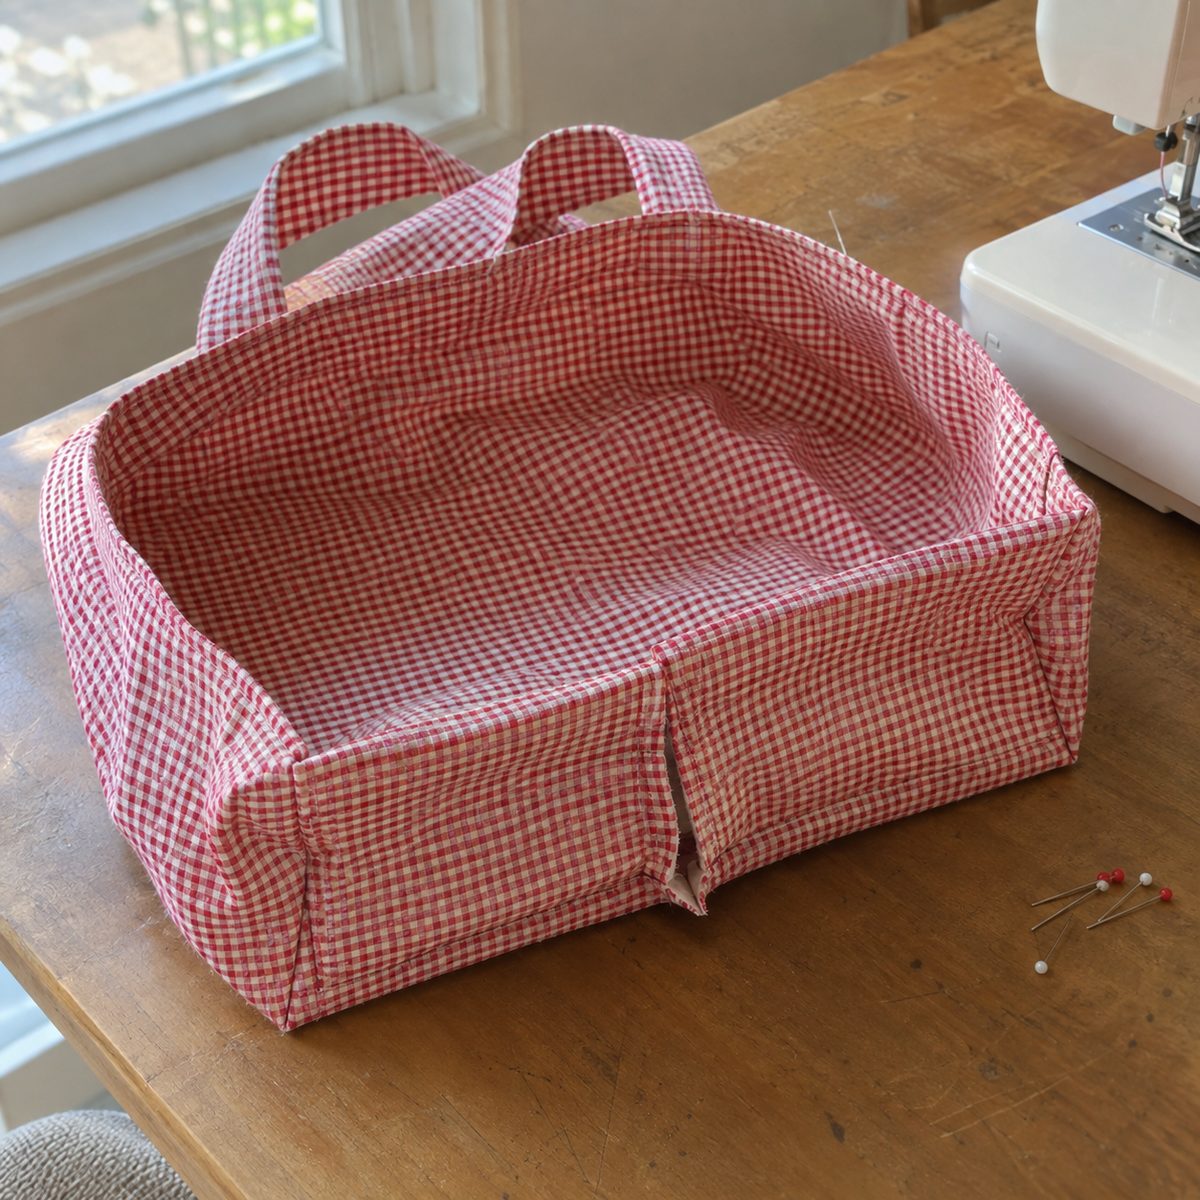
Put the bag together
- Turn the outer bag right side out and push out the boxed corners.
- Pin the straps to the outer bag. On the front, lay one strap so its raw ends line up with the top raw edge, and place the outside edge of each strap end 4 1/2 inches in from the side seam’s raw edge. Keep the strap hanging down against the bag and make sure it isn’t twisted. Repeat on the back with the second strap, matching the placement.
- Baste the strap ends in place about 1/4 inch from the top edge, inside the seam allowance. A long basting stitch is fine here.
- Slide the outer bag, right side out, inside the lining, which is still wrong side out. The right sides of the two bags now face each other, and the straps are sandwiched between them, hanging down inside.
- Line up the side seams of the outer bag and lining, and nest the seam allowances in opposite directions to reduce bulk. Pin or clip all the way around the top edge.
- Sew around the top edge with a 1/2-inch seam allowance. Go slowly over the strap ends and backstitch over each strap for extra strength.
- Reach through the gap in the lining and pull the outer bag out through it, straps and all. Take your time, because the interfaced canvas is stiff. Once it’s through, push the lining down inside the outer bag.
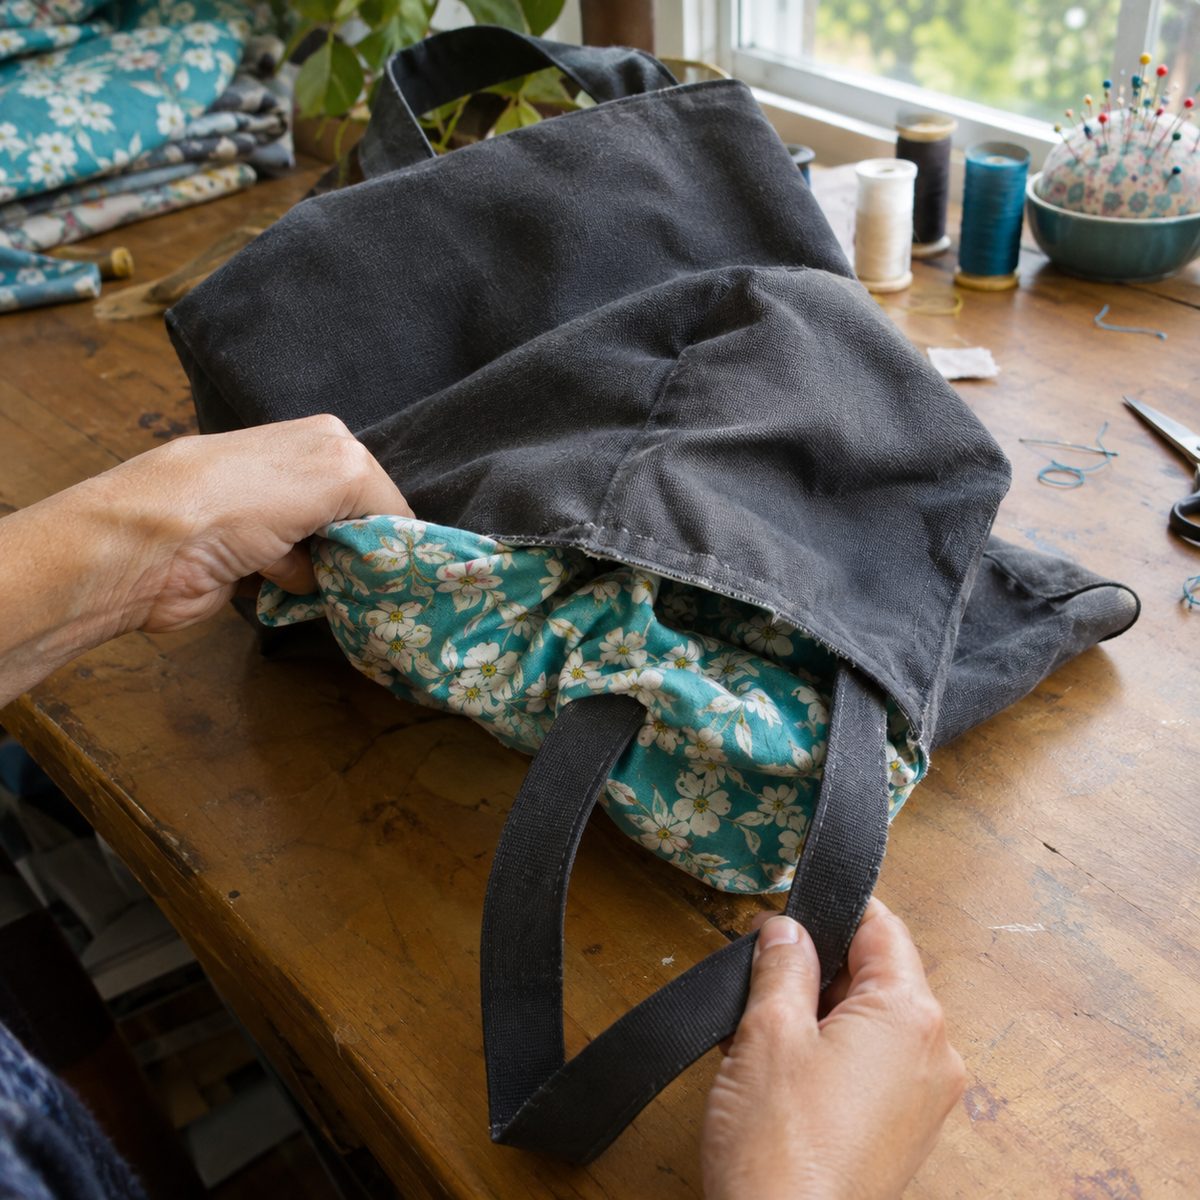
Topstitch and finish
- Pull the lining back out and close the turning gap. Fold the pressed seam allowances in, then either edgestitch the gap closed by machine about 1/8 inch from the fold, or ladder-stitch it by hand for an invisible finish. The gap won’t show once the lining is inside, so machine stitching is fine.
- Push the lining back into the bag and work the lining corners into the outer corners.
- Roll the top seam between your fingers until it sits right at the top edge, with no lining showing on the outside. Press the whole top edge well.
- Topstitch around the top edge about 1/4 inch from the fold, with the lining side up if the free arm fits inside the bag. Use the same 3 mm stitch length you used on the straps.
- For extra strength, sew a small box with an X through it where each strap meets the bag, staying within the topstitching band.
- Give the whole bag a final press, and use a point turner or a chopstick to sharpen the boxed corners from inside.
If the bag feels softer than you’d like, there are several ways to add body without starting over. See how to make fabric stiff for a bag for fleece, foam, and bottom-panel options.
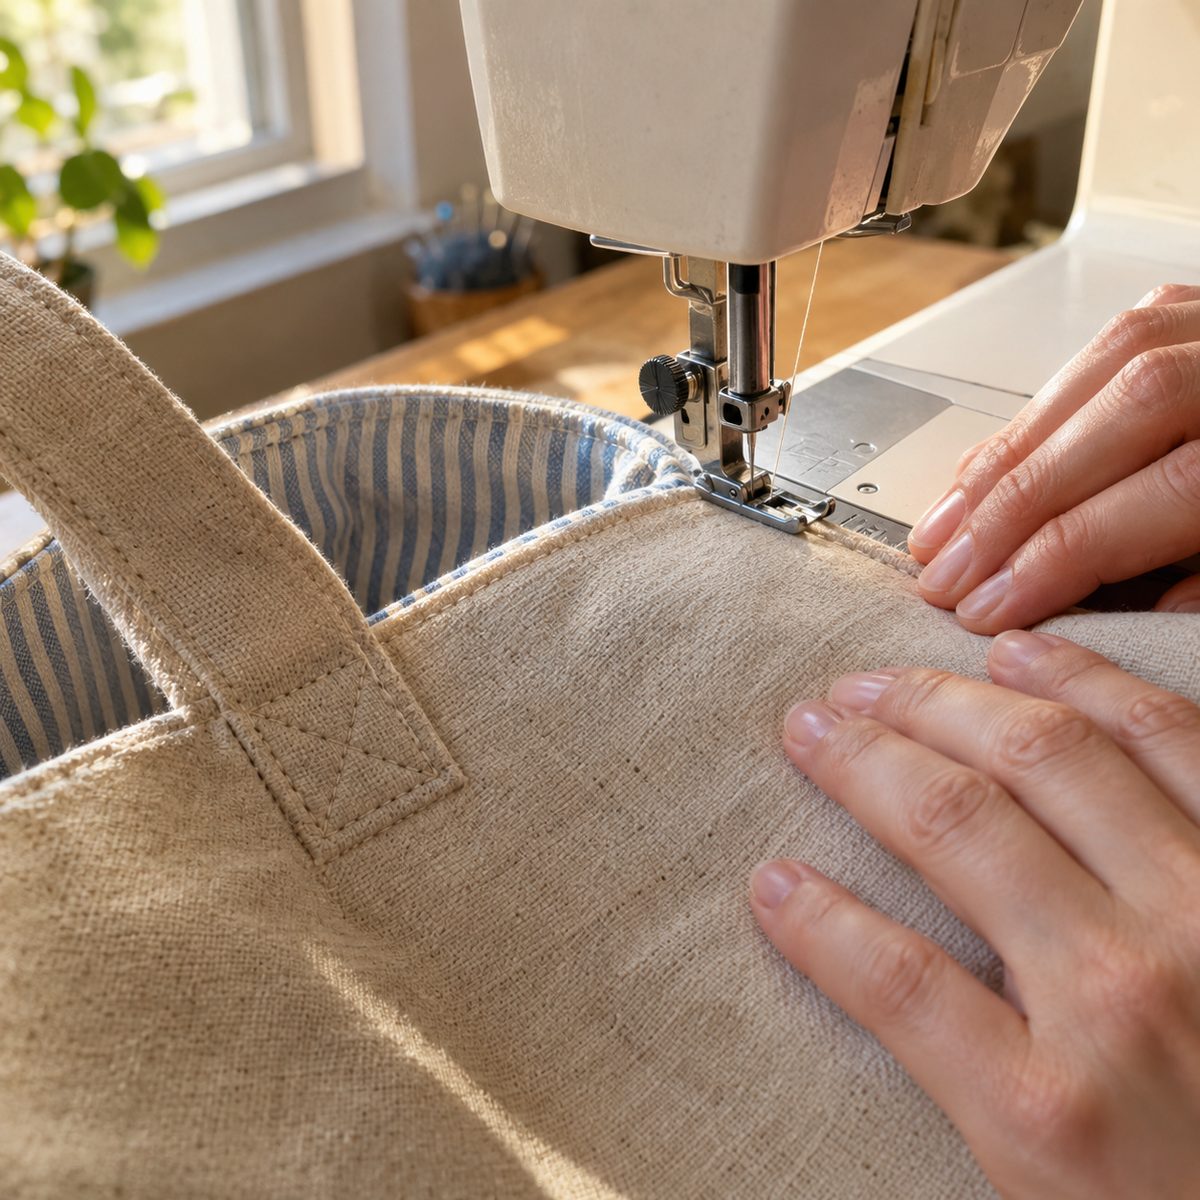
Ways to change it up
Add an inner pocket. A slip pocket is the most useful upgrade, and it takes about 15 minutes. Cut two 10 x 8-inch rectangles from lining fabric, sew them right sides together with a 1/2-inch seam allowance, and leave a 3-inch gap on the bottom edge. Clip the corners, turn, press, and you have a finished 9 x 7-inch pocket. Topstitch the top edge. Center it on one lining panel with its top edge 3 inches below the top raw edge, then edgestitch the sides and bottom, closing the gap as you go. A line of stitching down the middle makes it a divided pocket for your phone and keys. Do all of this before you sew the lining panels together.
Add a magnetic snap. Install the two halves on the lining panels before you sew them together. Center each half across the panel width, 2 inches below the top raw edge. That puts it 1 1/2 inches below the finished top. Fuse a 2-inch square of extra interfacing behind each snap first, because the prongs will eventually tear through a single layer of cotton. Check that the halves line up by holding the panels together before you bend the prongs.
Make it a different size. This is where the boxing math pays off. For any finished width, height, and depth, cut each panel to finished width plus depth plus 1 inch across, and finished height plus half the depth plus 1 inch tall. The corner squares are always half the depth. For this bag, that’s 14 + 4 + 1 = 19 inches wide and 15 + 2 + 1 = 18 inches tall, with 2-inch squares. A smaller 11 x 12 x 3-inch lunch or book tote works out to 15 x 14 1/2-inch panels with 1 1/2-inch squares. A roomier 16 x 16 x 6-inch market bag needs 23 x 20-inch panels with 3-inch squares. Scale the strap length to suit: about 14 inches for hand-carry, or 25 to 28 inches for the shoulder.
You can also swap fabrics freely. A quilting-cotton outer with heavier interfacing makes a lighter everyday bag, and a waxed or heavy canvas outer with lighter interfacing makes a sturdy market tote. If you’re still building your basic skills, the beginner’s sewing guide is a good companion to this project.
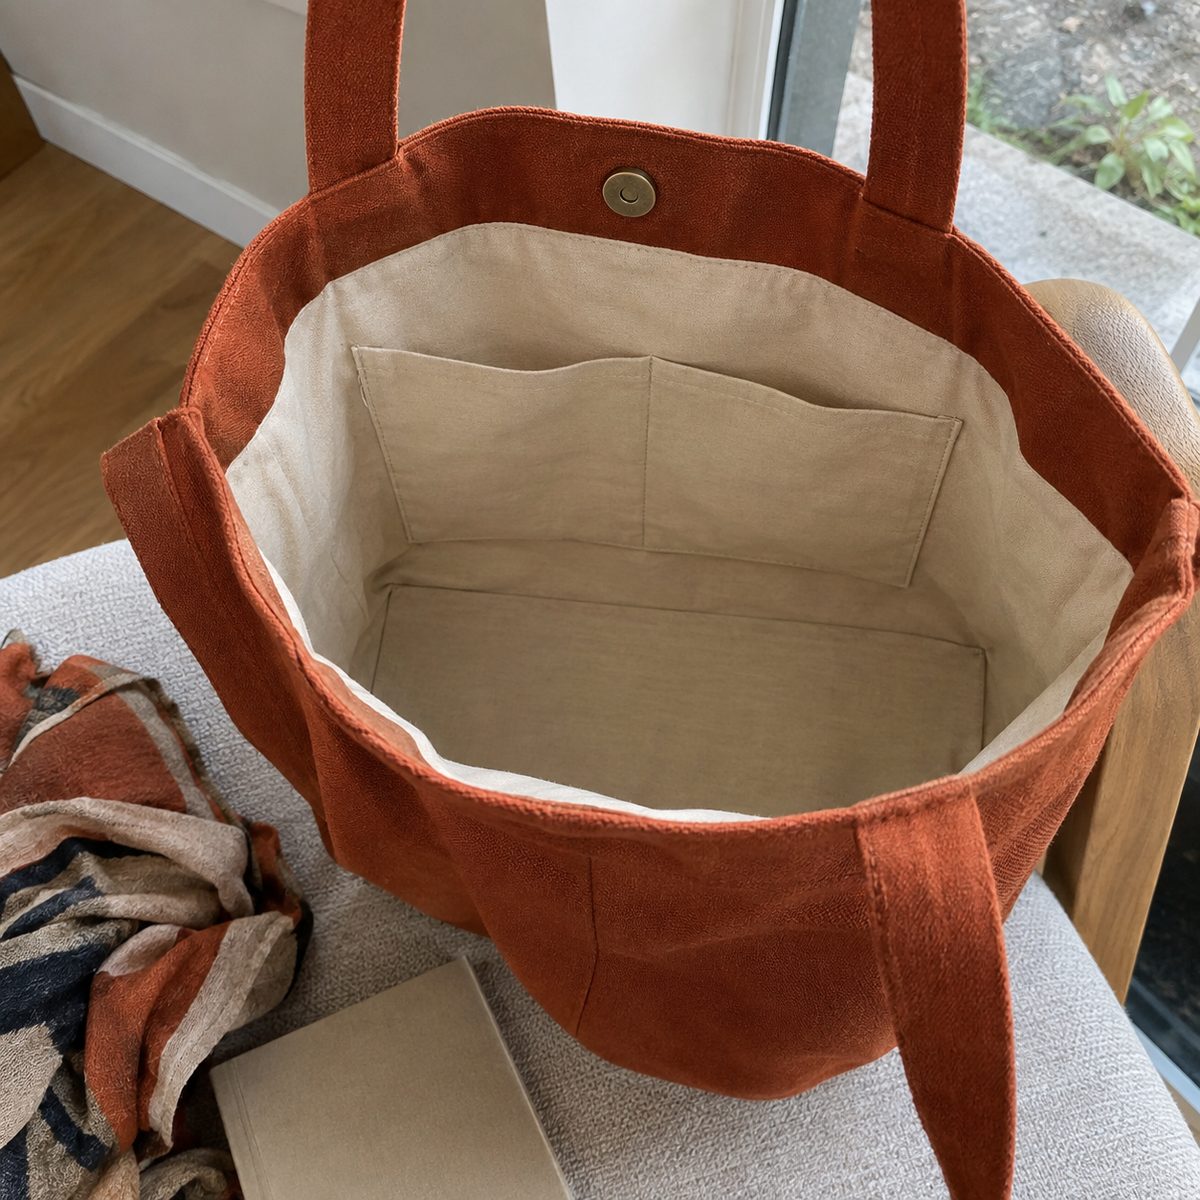
Frequently asked questions
Can I make this tote without interfacing?
Yes, if your outer fabric already has some weight, like 10- or 12-ounce canvas, duck, or denim. The bag will be slouchier and won’t stand up on its own as well, but it will still hold its shape at the corners. With quilting cotton, skip the interfacing only if you don’t mind a soft, drapey bag. Otherwise the boxed bottom tends to collapse when the bag is empty.
Why don’t my boxed corners match in size?
Usually the squares weren’t cut exactly the same, or the side seam and bottom seam weren’t lined up when the corner was closed. Before you sew, pin straight through both seams to make sure they’re sitting directly on top of each other. With the pinch method, measure the 4-inch line on every corner rather than eyeballing it. Small differences at the corners show up as a lopsided bottom.
What needle and stitch length work best for this bag?
A 90/14 universal or denim needle handles interfaced canvas and the four-layer straps without skipping. Use about 2.5 mm for construction seams and 3 mm for topstitching. Where the straps cross the top seam, you may be sewing through eight or more layers, so slow down and walk the needle by hand if the machine hesitates. If you see skipped stitches, a fresh needle is the first fix.
Can I wash the finished tote?
Yes, as long as you pre-washed both fabrics before cutting. Machine wash on cold, then air dry or tumble dry low, and press the top edge and corners afterward. Fusible interfacing usually holds up to regular washing, but high heat in the dryer can make it bubble over time. If you plan to wash the bag often, a gentle cycle and air drying will keep it looking crisp.
Once you’ve made one, the second goes much faster. All the pieces are rectangles, so it’s easy to batch-cut a few in different fabrics for gifts, and to adjust the size with the formula above. As long as you keep the 1/2-inch seam allowance consistent and cut the corner squares to half the depth, the bag will come out square.