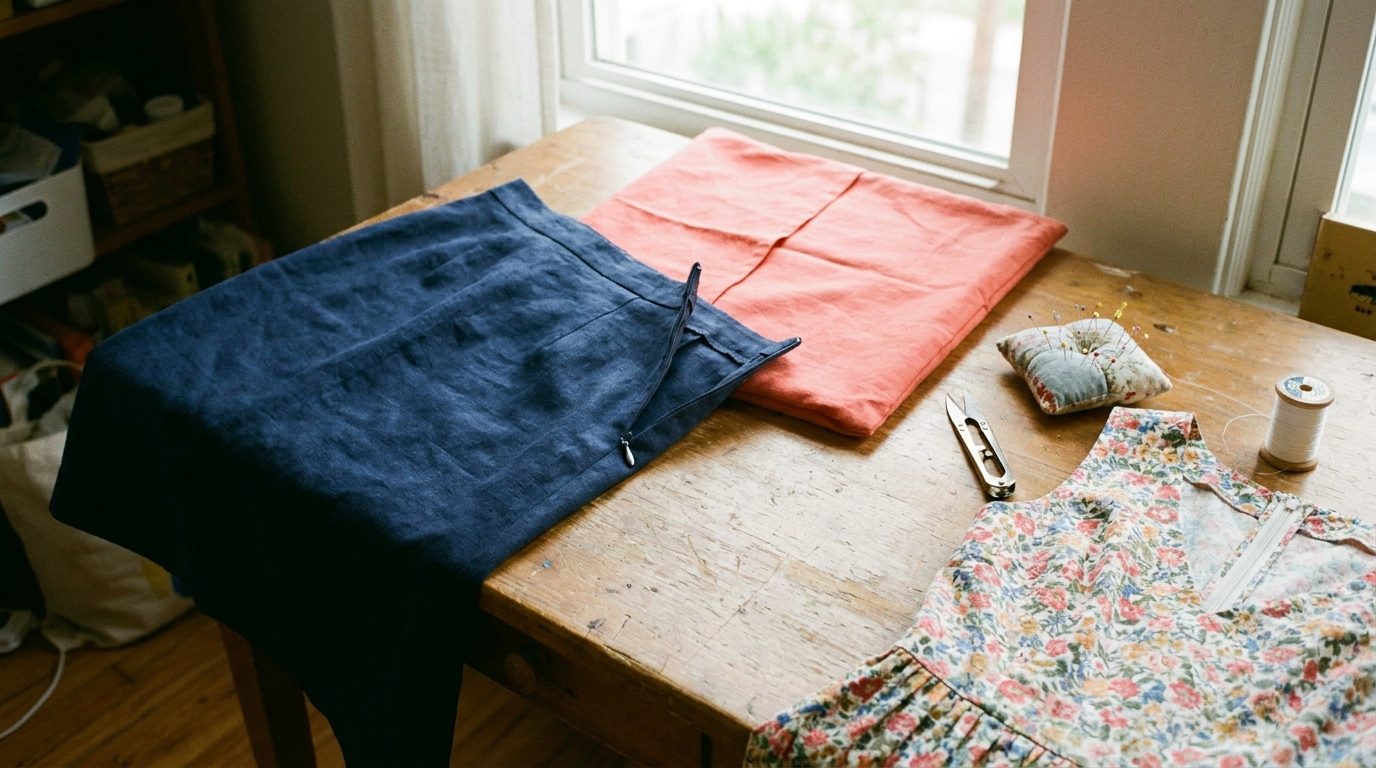
An invisible zipper disappears into the seam, and all that shows on the outside is a tiny teardrop pull. It looks like a skill reserved for couture sewists, but it’s one of the easiest zippers to put in once you know the one big difference: you sew the zipper in before you close the seam, not after.
You’ll need an invisible zipper foot (or a regular zipper foot and a little patience), a zipper a couple of inches longer than your opening, and about half an hour. The steps below walk through the whole process, from pressing the coil flat to closing the seam underneath, plus how to fix the three problems that trip most people up.
At a glance
- Time: 20 to 40 minutes for your first one, about 15 once it clicks
- Difficulty: Confident beginner to intermediate
- Skill you’ll learn: Inserting a concealed zipper in an open seam and blending the seam below it
- Best for: Skirts, dresses, pillow covers and fitted tops in woven fabric
What you’ll need
- Invisible zipper, at least 1 to 2 inches longer than the finished opening
- Invisible zipper foot (plus a standard zipper foot for closing the seam)
- Two strips of lightweight fusible interfacing, about 3/4 inch wide
- Pins or fabric clips, and a fabric marker or chalk
- Thread to match your fabric and a universal or sharp needle suited to the fabric weight
- Iron and a press cloth
Prepare the zipper and the fabric
Most invisible zipper frustration starts before the first stitch. A few minutes of prep here makes the sewing part nearly automatic. The one rule to remember: leave the seam below the zipper open. If you’re following a pattern that tells you to sew the seam first, skip that step for now.
- Stabilize the seam allowances. Fuse a 3/4-inch strip of lightweight interfacing to the wrong side of each seam allowance where the zipper will go, running it an inch or so past the bottom of the opening. This keeps the fabric from stretching and rippling as you sew. If you’re unsure which kind to buy, my guide to interfacing covers the options.
- Finish the raw edges. Serge or zigzag the long edges of both seam allowances now. It’s much harder to do neatly once the zipper is in.
- Mark the seam line and the stop point. Chalk the seam line (usually 5/8 inch from the edge) along the zipper area on the right side of both pieces. Then mark where the opening ends; this is where your stitching will stop.
- Press the coil flat. Open the zipper and lay it face down on the ironing board. With a cool iron (synthetic setting) and a press cloth, use the tip of the iron to gently roll the coil away from the tape so it stands up rather than curling under. Don’t let the iron sit on the coil; nylon melts.
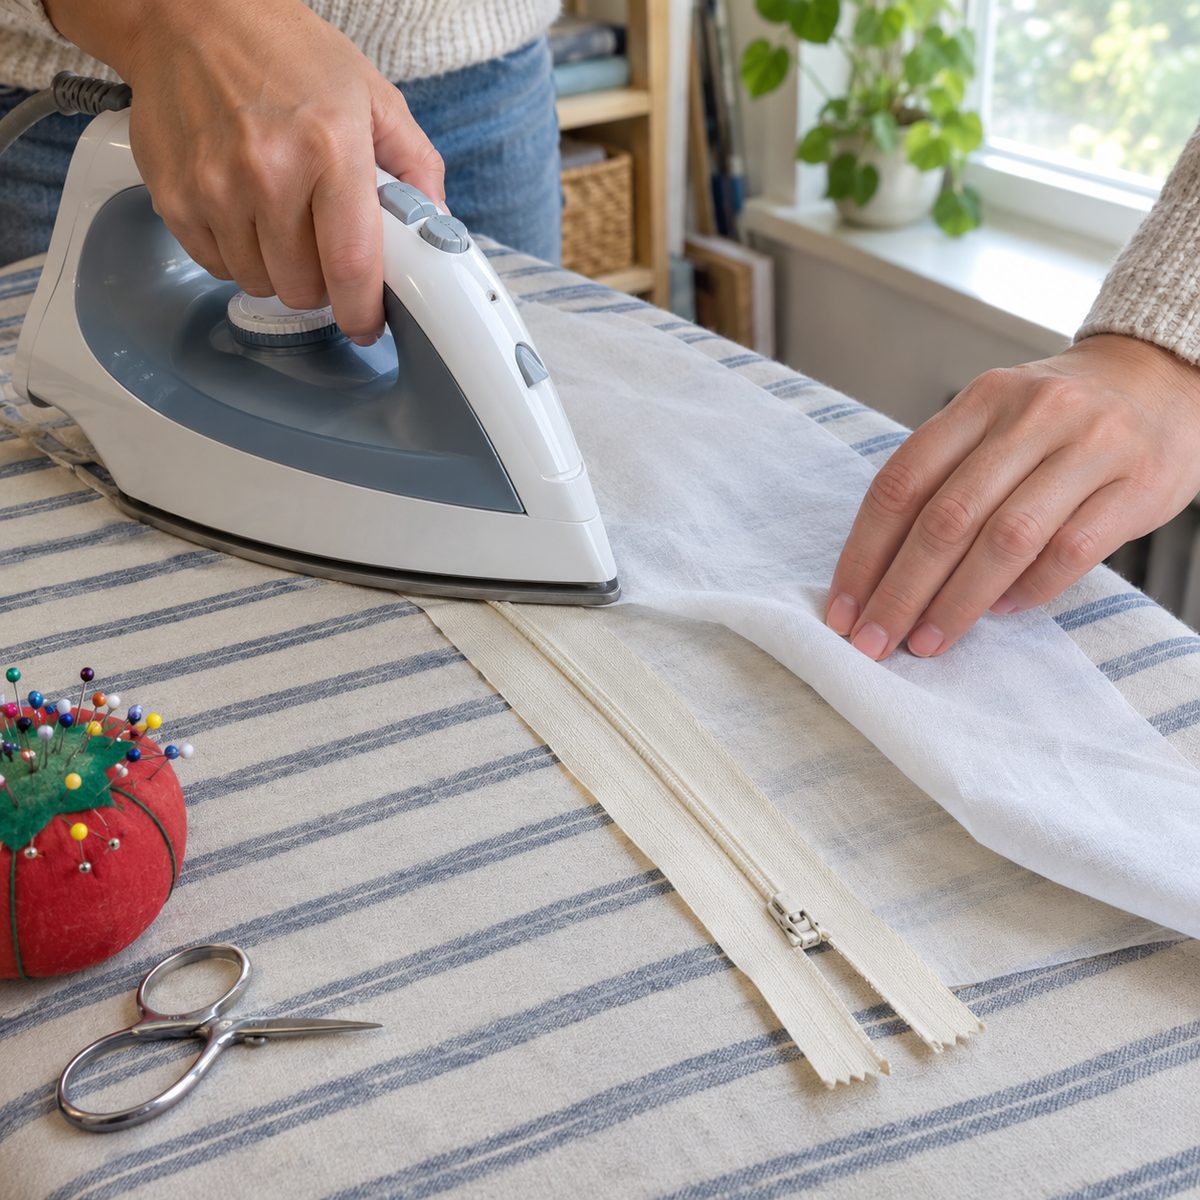
Pressing the coil is the step people skip, and it’s the step that decides whether your zipper is truly invisible. Flattened teeth let the needle stitch right in the fold, so the fabric can meet over the coil and hide it completely.
Sew the first side
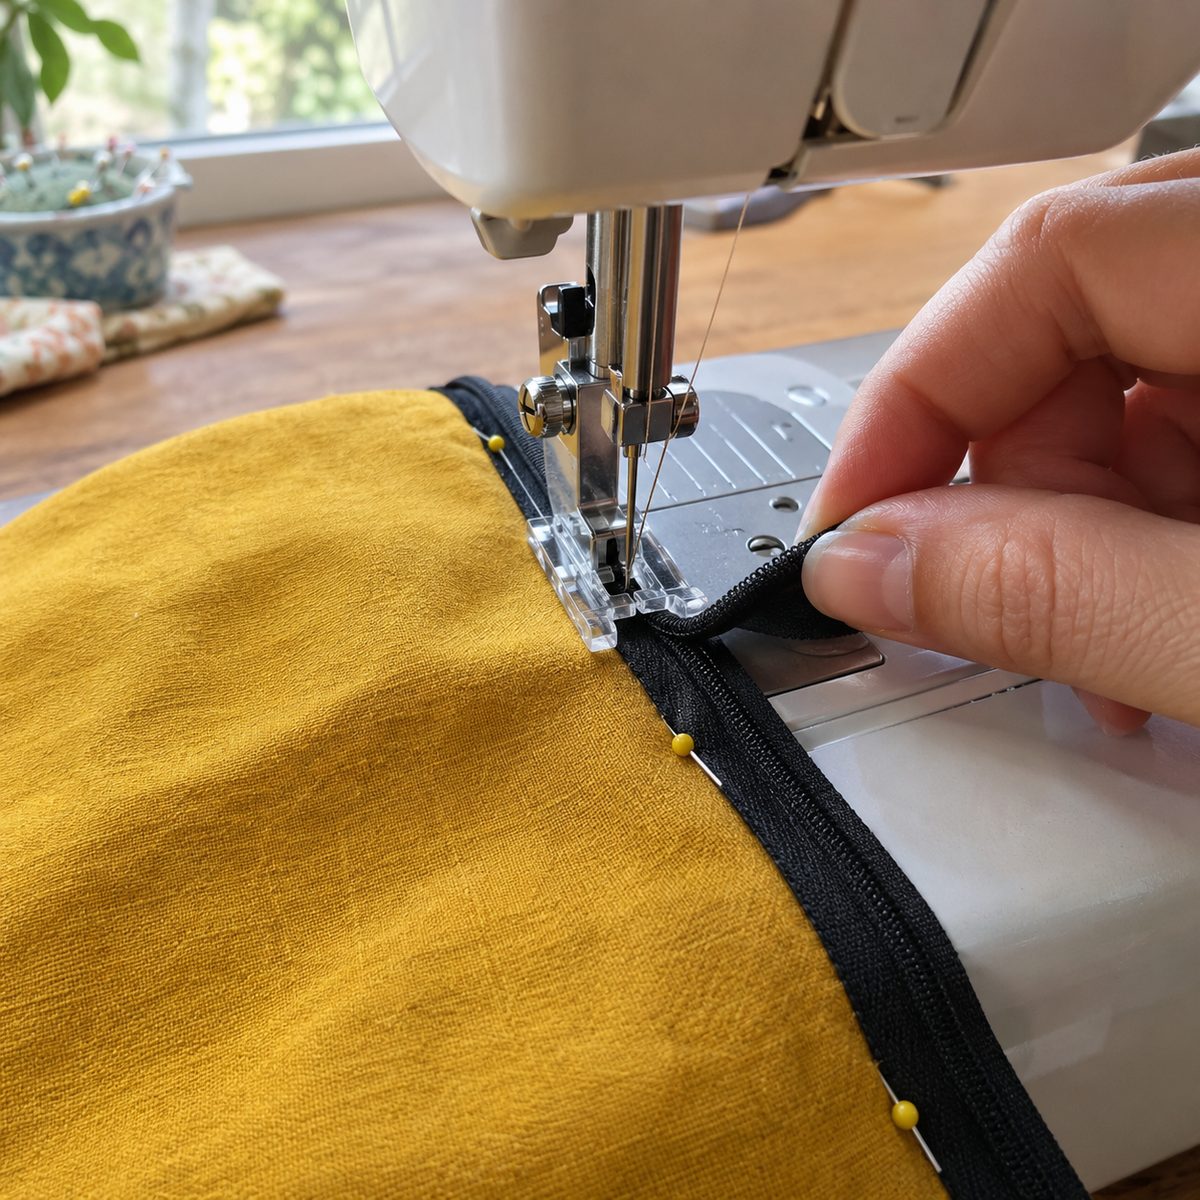
Put the invisible zipper foot on your machine now. Its underside has two grooves; the coil rides in one of them, which holds the teeth open and guides the needle into the space right beside them.
- Position the zipper. With the zipper open, place it face down on the right side of the left fabric piece. Line the coil up exactly on your chalked seam line, with the tape extending toward the raw edge. The top stop should sit about 1/4 inch below the top seam line (the waistline or neckline seam) so the pull has room to slide all the way up later.
- Pin or clip it in place. Pin parallel to the coil, or use clips along the edge. For slippery or bias-cut fabrics, a quick row of basting stitches in the tape is worth the extra minute.
- Set the coil in the groove. Lower the foot so the coil sits in the groove closest to the seam allowance and the needle lines up next to the coil. Uncurl the teeth with your fingertip as you lower the foot if they want to roll back.
- Sew from top to bottom. Backstitch at the top and sew slowly toward the bottom, uncurling the coil just ahead of the foot as you go. Keep the fabric flat and let the feed dogs do the work; don’t pull.
- Stop at the slider. Sew until the foot bumps into the zipper pull, usually 1/2 to 3/4 inch above the bottom stop. Backstitch and cut the threads. You won’t be able to sew all the way to the end, and that’s normal.
Sew the second side
The second side is where alignment matters. If your garment has a waist seam, a yoke, or a stripe that crosses the zipper, take a moment to match it before you pin.
- Close the zipper and check the match. Zip it up, lay the two fabric pieces right sides together as they’ll be sewn, and mark the loose zipper tape at the top seam line and at any cross seams or pattern lines. These marks tell you exactly where the tape needs to sit on the second piece.
- Check for a twist. Before you open it again, make sure the zipper tape isn’t twisted. The unsewn side should lie flat against the second fabric piece with the zipper’s right side facing the fabric’s right side.
- Pin the second tape. Open the zipper and place the free tape face down on the right side of the right fabric piece, coil on the seam line, matching your marks. Pin or baste as before.
- Use the other groove. Move the fabric so the coil sits in the opposite groove of the invisible zipper foot. The needle position stays the same; only the side of the foot changes.
- Sew top to bottom again. Always sew both sides in the same direction, top to bottom. Stop when the foot reaches the slider, at the same distance from the bottom as the first side, and backstitch.
- Test it. Close the zipper and look at the right side. The fabric edges should meet over the coil and hide it, with only the pull showing at the top.
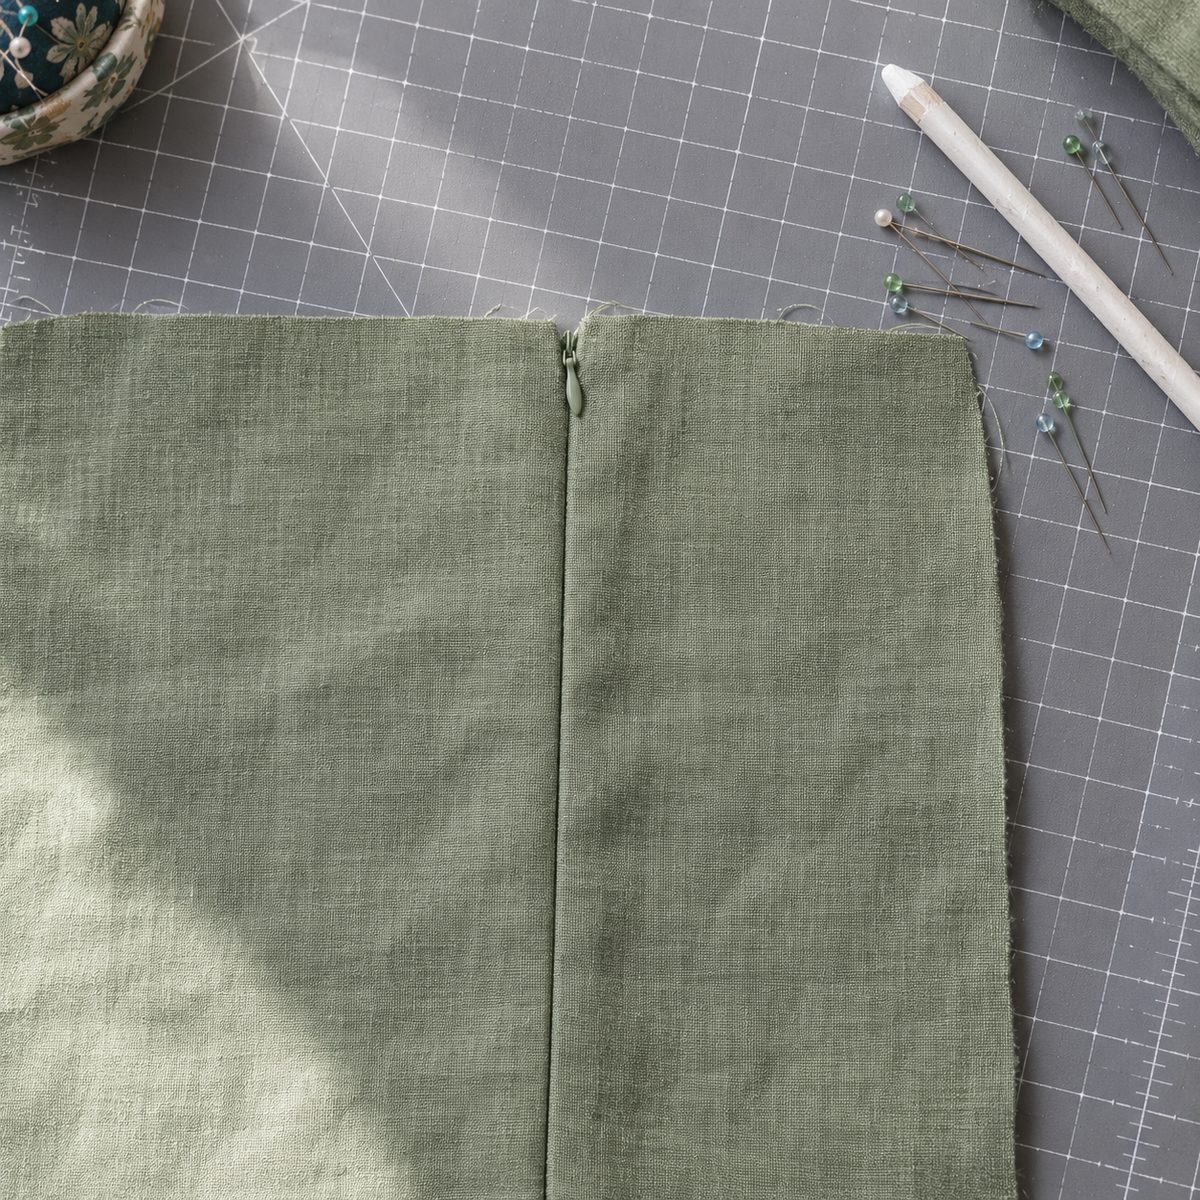
If a bit of coil peeks through in one spot, you can go back and stitch just a hair closer to the teeth in that area. See the troubleshooting section below for more on that.
Close the seam below the zipper
This is the only slightly fiddly part, and the trick is to switch feet. An invisible zipper foot is too wide to get close to the end of the zipper, so swap to your regular zipper foot, the narrow one you’d use for a lapped or centered zipper.
- Pin the seam. Close the zipper. Place the fabric pieces right sides together below the zipper, matching the raw edges and pinning down to the hem.
- Move the zipper tail aside. Fold the loose bottom end of the zipper away from the seam allowance, toward the garment, so you won’t catch it in the stitching.
- Start just outside the last stitch. Position the needle about 1/2 inch above the end of your zipper stitching and about 1/16 inch outside it (toward the raw edge). Starting slightly above means there’s no gap between the zipper stitching and the seam.
- Sew down to the hem. Backstitch lightly and sew the rest of the seam at the normal seam allowance, easing gradually from that first 1/16-inch offset onto your 5/8-inch seam line.
- Check the transition. Turn the piece right side out. There should be no hole or pucker where the zipper ends and the seam begins. A tiny dimple at the bottom of the zipper is common and usually presses out.
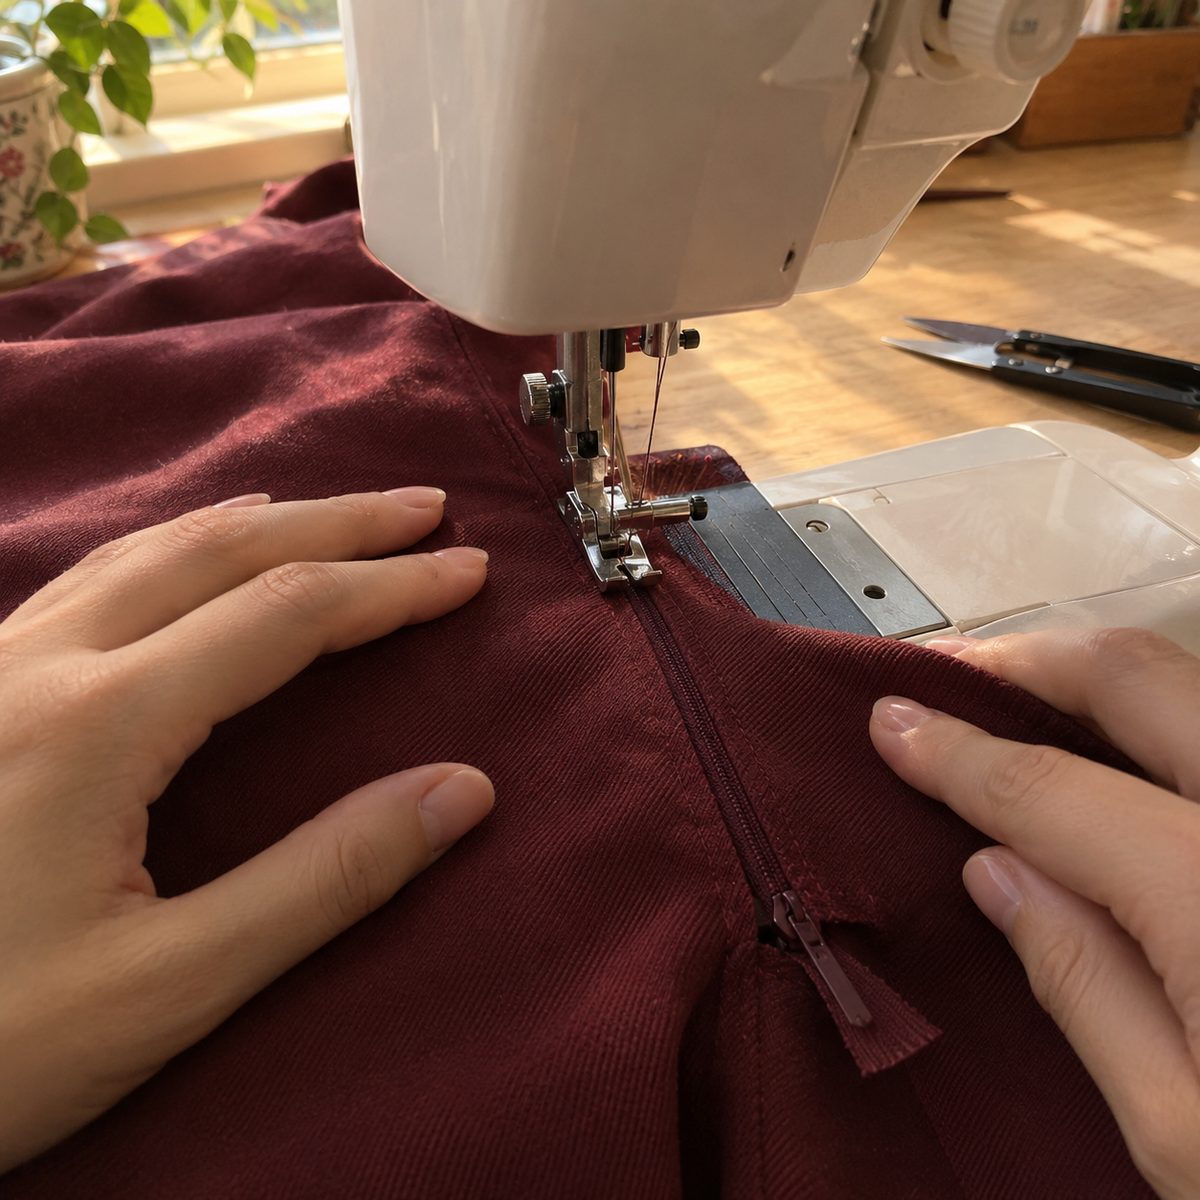
If you do see a small bubble, unpick an inch of the seam stitching and restart a little closer to the zipper stitching. You’ll get a feel for how close to go after one or two zippers.
Finishing and pressing
A few finishing steps keep the zipper tails from flopping around inside and give the seam a crisp, professional look.
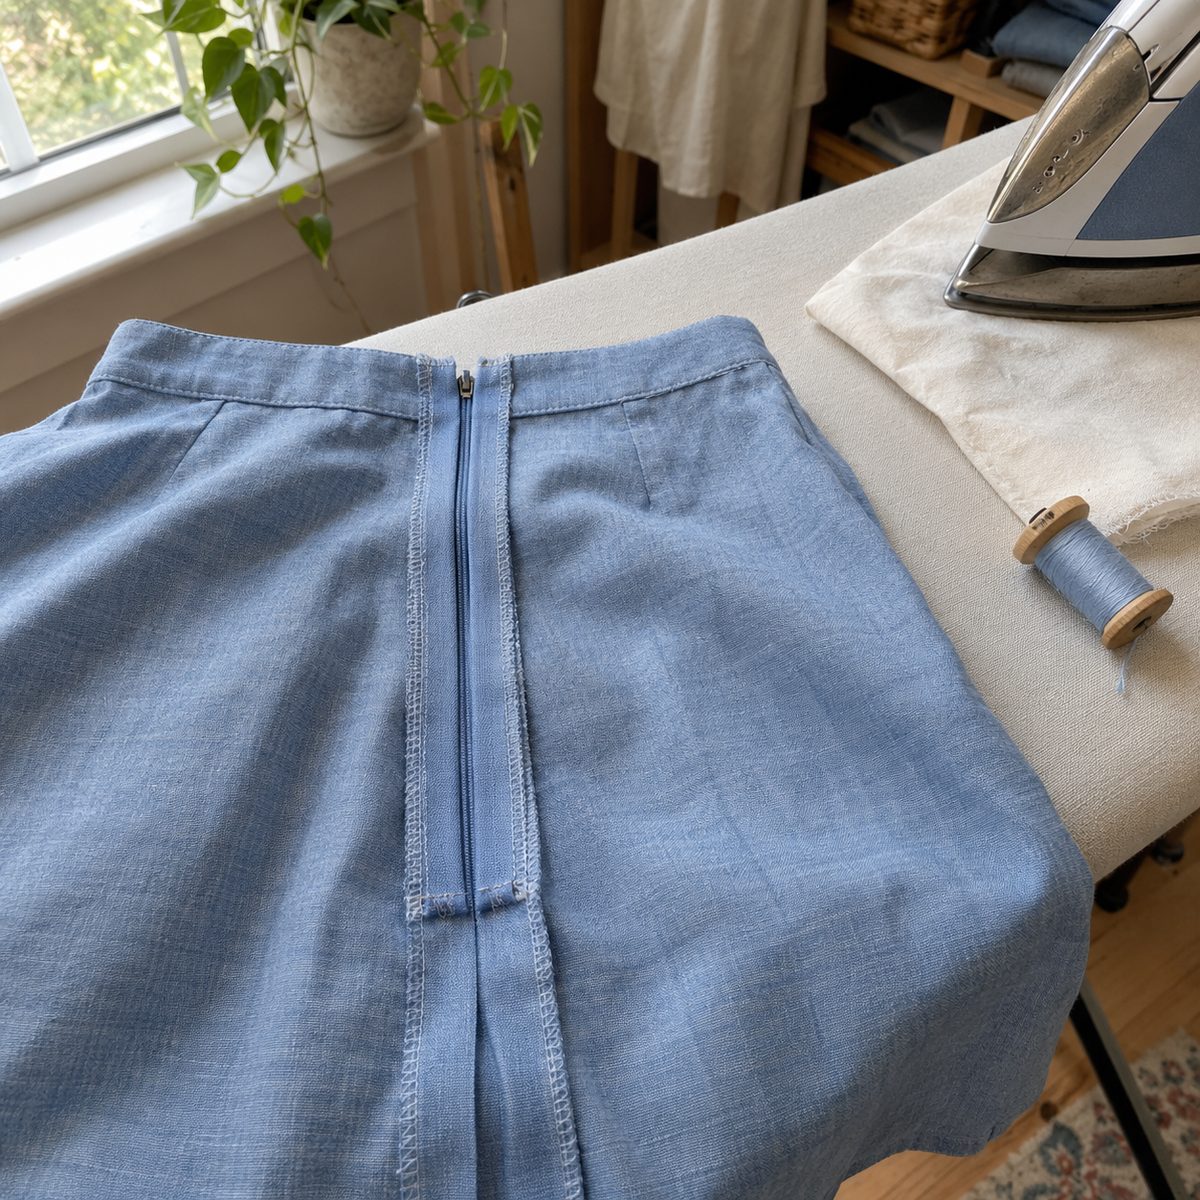
- Anchor the zipper tails. Stitch each side of the loose zipper tape at the bottom to its seam allowance only, not through to the right side. This stops the end of the zipper from twisting or showing through.
- Press the seam open. Press the seam below the zipper open from the wrong side, blending into the zipper area.
- Press lightly from the right side. Using a press cloth and moderate heat, press over the zipper from the outside. Don’t press hard directly on the coil, and don’t leave the iron in one place.
- Handle the top edge. When you attach a facing, lining or waistband, fold the top ends of the zipper tape toward the seam allowance so they don’t get caught. If the zipper is much longer than needed, you can shorten it from the bottom: stitch a bar tack across the coil at the new length and trim the excess an inch below it.
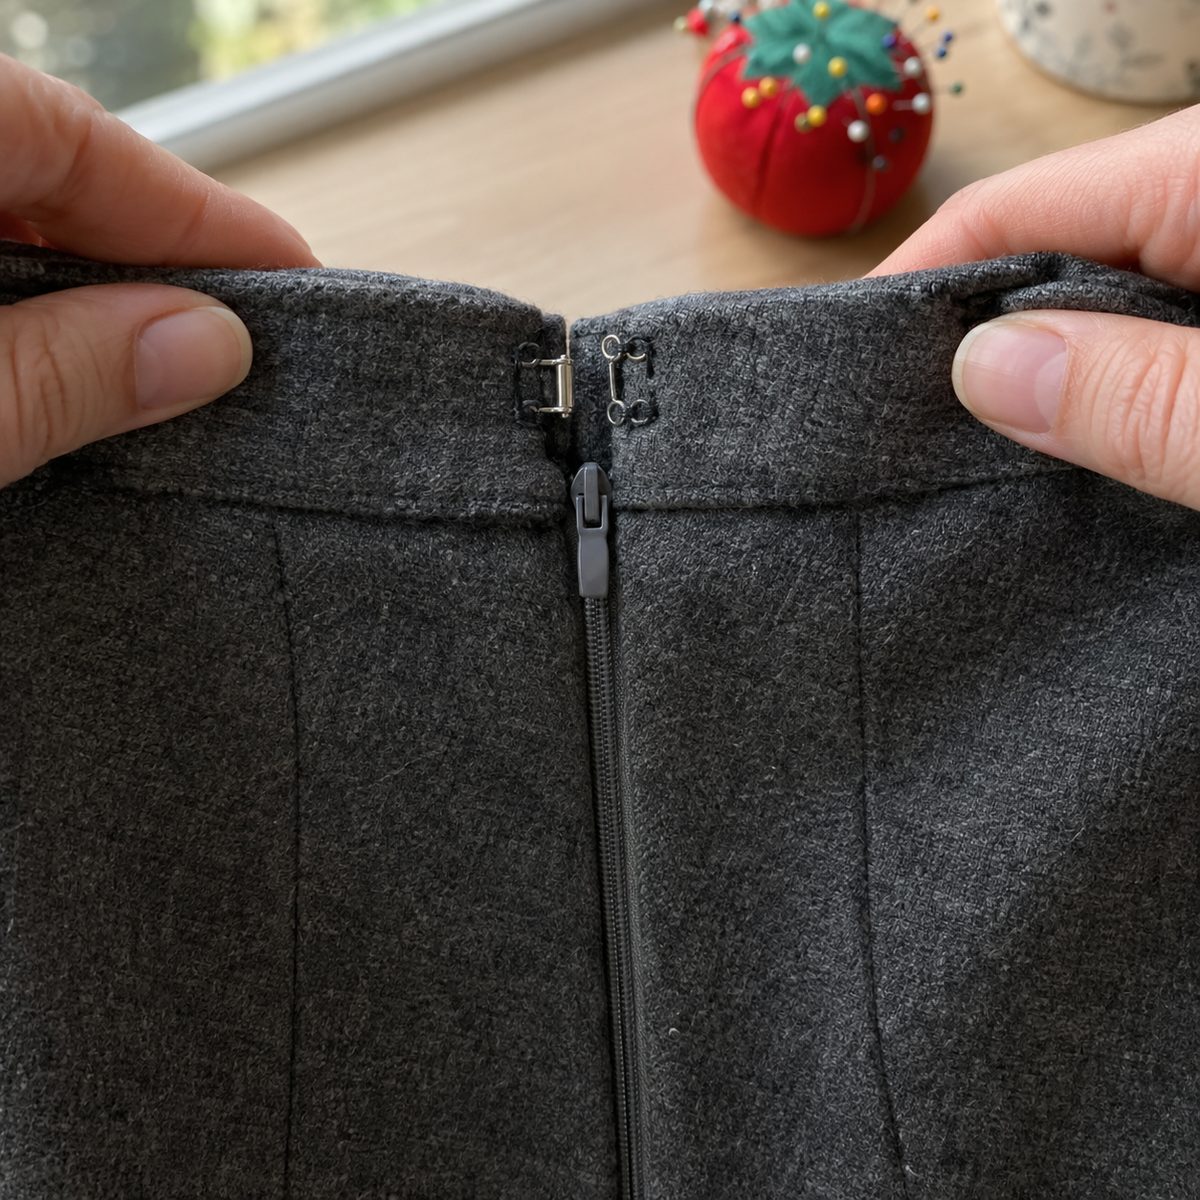
- Add a hook and eye (optional). A small hook and eye above the zipper at a waistband or neckline takes the strain off the top of the zipper and keeps it from slipping open.
Troubleshooting common invisible zipper problems
The zipper looks wavy or rippled. Waves along the zipper almost always come from the fabric stretching while you sew. The zipper tape is stable, so if the fabric grows even a little, it bunches up next to it. The fix starts in prep: fuse interfacing strips to the seam allowances, especially on bias-cut pieces, lightweight fabrics or anything with a little give. When you sew, let the machine feed the fabric instead of pushing or pulling it, and consider basting first so nothing shifts. If you’re working with a stretchy fabric, the tips in my guide on stabilizing knit fabric help here too. On an already-sewn zipper, the most reliable fix is to unpick the rippled side, fuse a strip of interfacing, and resew.
The zipper pull won’t reach the top. This happens when the top stop ends up too close to, or inside, the top seam line, so the stitching of the facing or waistband blocks the pull. Position the top stop about 1/4 inch below the top seam line when you pin the first side. If the problem only shows up after you attach the facing, check whether the tape ends got caught in that seam; unpick a little, fold the tape ends away, and restitch. It can also happen if the zipper is shorter than the opening, which is why buying one a couple of inches longer is the safer choice.
You can see the teeth from the outside. Visible teeth mean the stitching is too far from the coil. First, make sure you pressed the coil flat so it isn’t curling back under the foot. Next, check that the coil is seated in the groove and that you’re uncurling it just ahead of the needle as you sew. If a section is already sewn, you don’t need to redo the whole side: stitch again just inside your first line, a thread’s width closer to the coil, in the problem area only. On very thick fabric, a slight glimpse of coil can be hard to avoid, so choose a zipper color that matches the fabric as closely as possible.
Frequently asked questions
Can I sew an invisible zipper without an invisible zipper foot?
Yes, though it takes more care. Use a regular zipper foot with the needle positioned as close to the coil as it will go, and uncurl the teeth with your fingers as you stitch. Pressing the coil well beforehand matters even more here. Many sewists find an inexpensive universal invisible zipper foot pays for itself after one project, so it’s worth checking whether one fits your machine.
How long should the zipper be compared to the opening?
Buy an invisible zipper at least 1 to 2 inches longer than the finished opening. Because the pull stops the foot before you reach the bottom, the extra length lets you stitch the full length of the opening. The excess hangs below inside the garment, and you can shorten it with a bar tack if it’s in the way.
Why is the invisible zipper sewn before the seam?
With the seam still open, each side of the zipper can lie flat against a single layer of fabric, which is what lets the needle stitch right in the fold beside the coil. If the seam were already closed, you couldn’t reach that close to the teeth, and the zipper would show. Closing the seam afterward, just outside the zipper stitching, makes the transition seamless.
Can I put an invisible zipper in a lined garment?
Yes. Sew the zipper to the outer fabric first, following the steps above. Then attach the lining by hand-stitching or machine-stitching it to the zipper tape along each side, keeping it well away from the coil so it can’t jam the pull. Many patterns include instructions for this, and it’s a tidy way to hide all the zipper tape.
Your first invisible zipper may take a couple of tries, and that’s completely fine. Once you’ve pressed the coil, sewn both sides top to bottom, and blended the seam underneath, the whole sequence starts to feel natural, and you’ll find yourself choosing invisible zippers for skirts, dresses and pillow covers alike. If you’re still building your basic skills, my beginner’s sewing guide is a good place to fill in the gaps.