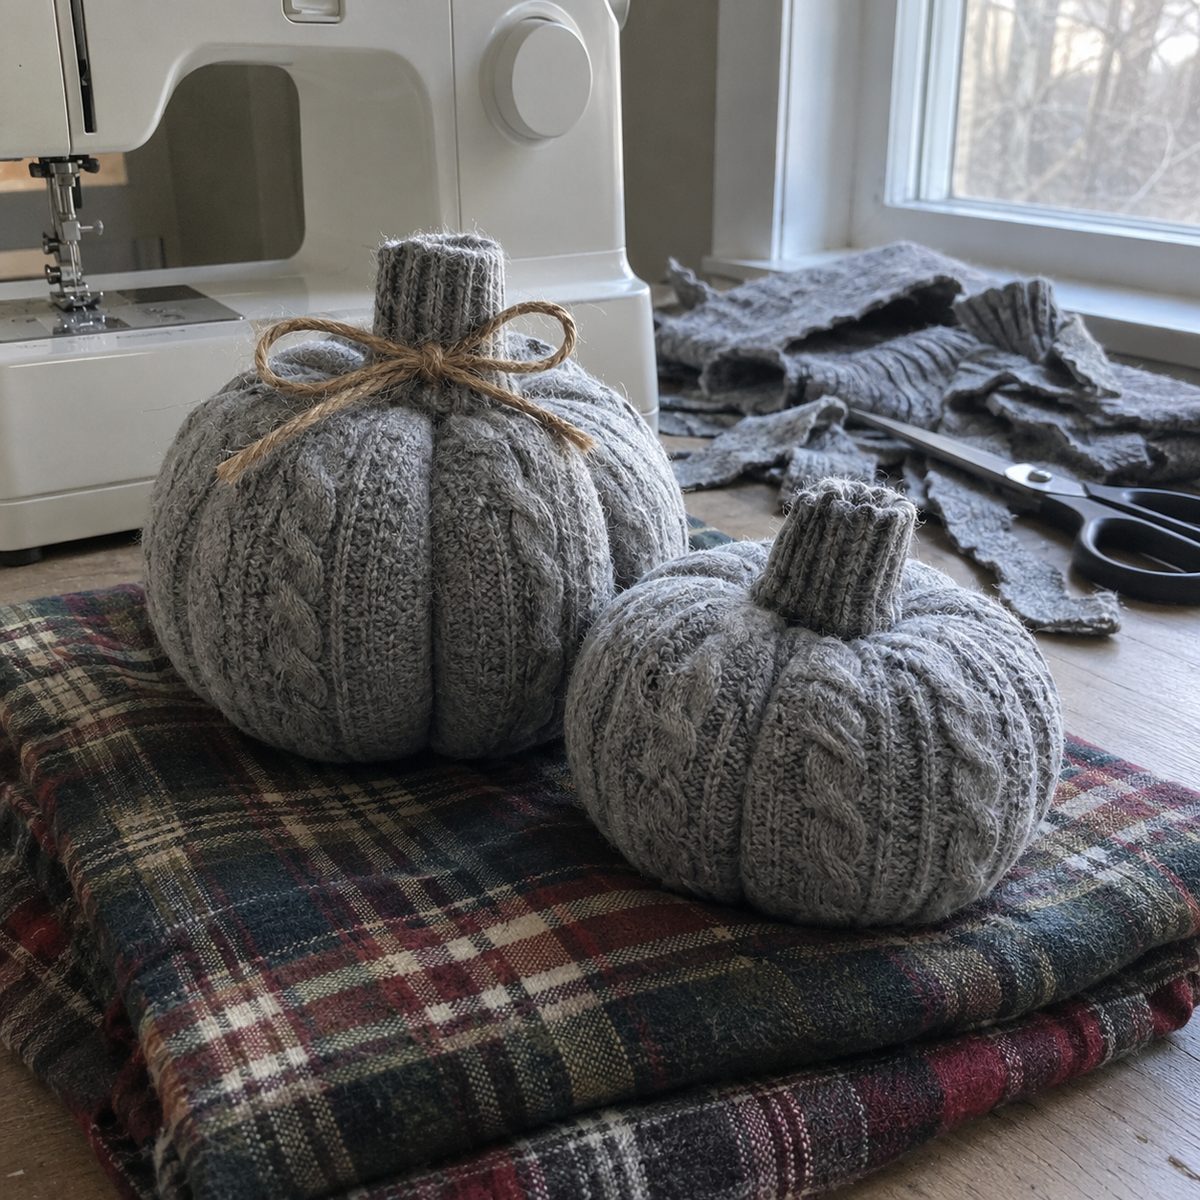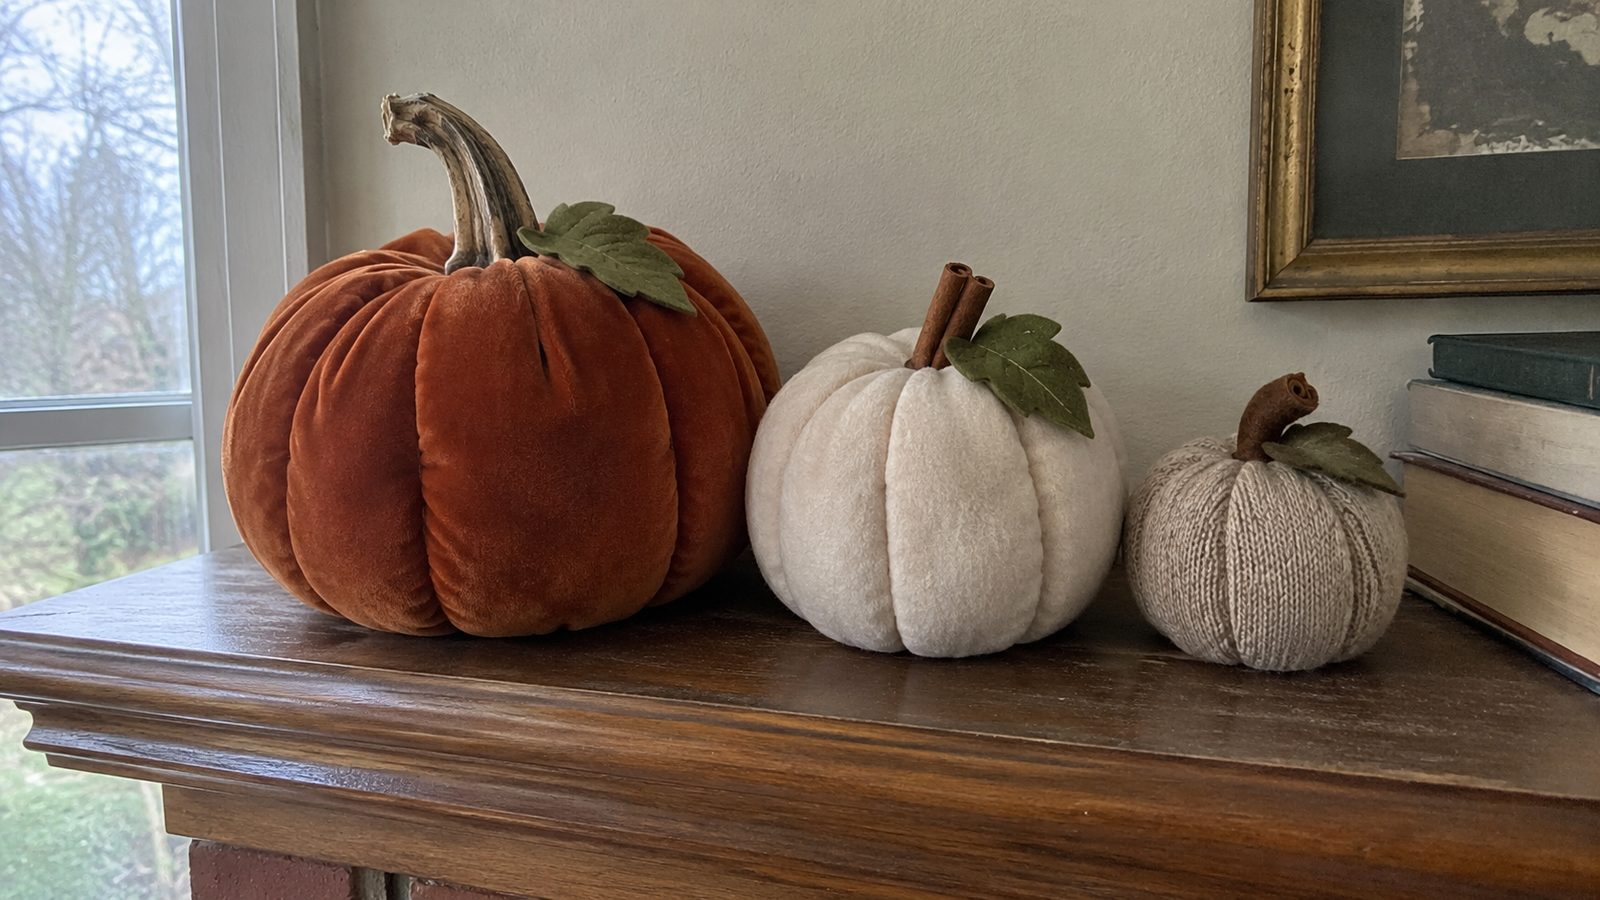
A fabric pumpkin is a rectangle sewn into a tube, gathered shut at both ends, stuffed, then cinched into segments with one long needle and strong thread. That is the whole project. One takes me about 30 minutes, and a beginner with a working machine and a doll needle can make one on the first try.
The thing that makes or breaks it is the bottom. A loose gather at the base gives you a soft blob that rolls over on the mantel. A tight gather with a button inside, plus a little weight, gives you a pumpkin that sits up and holds its segments for years.
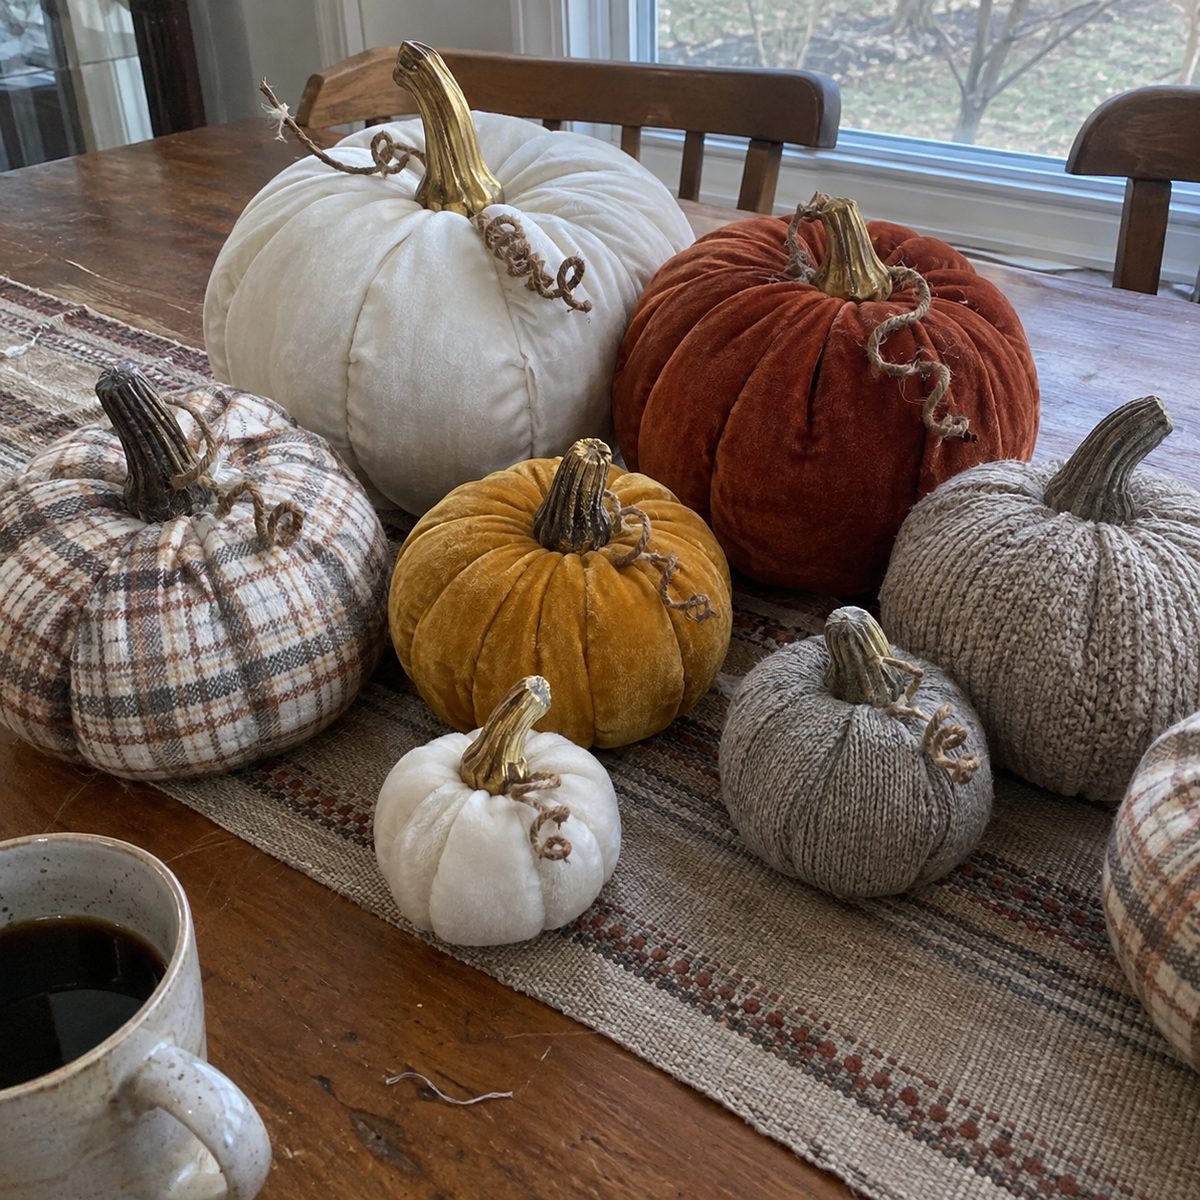
I make these in threes. Three sizes, three fabrics, one afternoon.
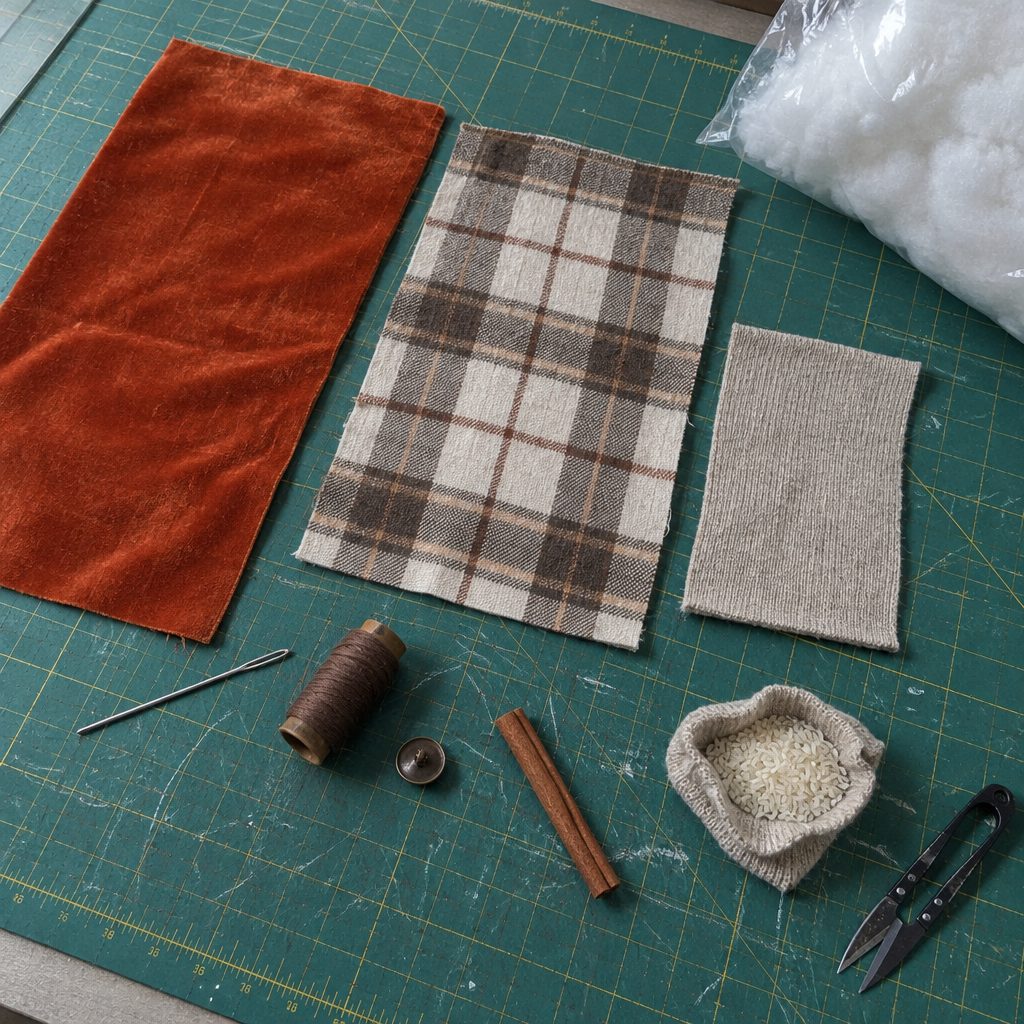
What you’ll need
- Fabric: 1/4 yard of velvet, flannel, or quilting cotton makes one large or two medium pumpkins. A thrifted wool sweater makes three or four.
- Polyester fiberfill: 1/2 oz small, 1 oz medium, 2 oz large (a 12 oz bag covers a batch).
- Dry rice or beans: 1/4 to 1/2 cup per pumpkin, plus a knit scrap or old knee-high stocking to hold it.
- Upholstery thread, button and craft thread, or #8 perle cotton for the segments. All-purpose thread for the seam.
- A 5 inch doll needle (sometimes sold as a soft sculpture needle) and a regular hand needle.
- One shank button or large wooden bead, about 1/2 inch, per pumpkin.
- Stem: a real dried pumpkin stem, a 3 inch cinnamon stick, or a 2 x 5 inch strip of brown wool felt.
- Hot glue gun, fabric scissors, pins or clips, a chalk pencil.
Cut chart and finished sizes
The long side becomes the circumference and the short side the height. Keep the ratio at 2 to 1. It ends up wider than the math says because the segment thread squashes it down.
| Piece | Cut size | Qty |
|---|---|---|
| Small body (about 3 inches across, 2 inches tall) | 8 x 4 inches | 1 |
| Medium body (about 4 inches across, 3 inches tall) | 12 x 6 inches | 1 |
| Large body (about 5 1/2 inches across, 4 inches tall) | 16 x 8 inches | 1 |
| Felt stem (optional) | 2 x 5 inches | 1 |
| Felt leaf (optional) | 2 x 3 inches | 1 |
| Rice pouch (knit scrap or stocking) | 4 x 4 inches | 1 |
Fabric choices and prep
Velvet looks the richest. Buy stretch velvet, not upholstery velvet. The knit backing molds around the stuffing and the segments pull in cleanly. Upholstery velvet is stiff and gathers lumpy. Panne velvet from the costume aisle works and costs less.
Flannel and quilting cotton are the easy choice. Cotton gives crisp segments and takes a print well, so plaid, gingham, and small florals all work. Flannel is softer and hides the gathers. Both need a prewash so dye does not transfer to a white runner later. More on that in my post on washing fabric before you sew.
A thrifted wool sweater is my favorite for texture. Hot wash and hot dry it first so it felts and the cut edges stop unraveling. Cut from the body, keep the ribbing for stems, and use a 3.5 mm stitch.
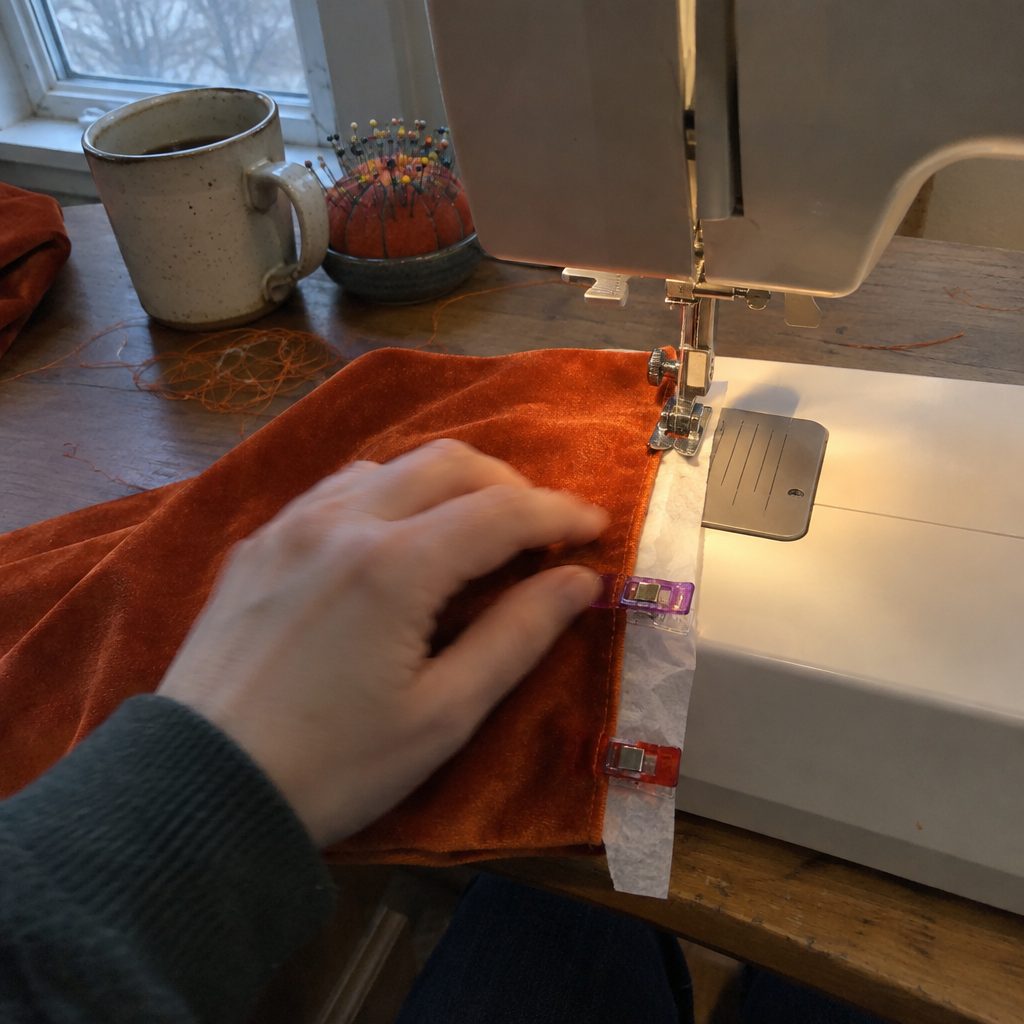
Velvet handling, in short. Cut every piece with the nap running the same way. Pin only inside the seam allowance, because pin holes show forever. Never press velvet face down. Steam from above, then finger press from the back. If the layers creep under the foot, a walking foot or a strip of tissue paper fixes it.
Mark the gathering line with chalk on the wrong side, 1/4 inch in from both long edges, so the gather comes out even.
Sew the tube
- Fold the rectangle in half, right sides together, so the short ends meet. A 16 x 8 rectangle is now an 8 x 8 square. Pin or clip the short edges together.
- Sew that short edge with a 1/2 inch seam allowance and a 2.5 mm stitch length (3.5 mm for velvet and sweater knits). Backstitch at both ends. You now have a tube open at top and bottom.
- Press the seam open, or finger press on velvet. The tube should lie flat with no twist. If the raw ends are uneven by more than 1/4 inch, trim them level now or the gathers will show it.
- Turn the tube right side out and check the seam. It should be straight with no puckers. A slightly wobbly seam is fine, it ends up buried in a segment groove.
Gather the bottom and add the weight
Gather by machine for a batch (see what a basting stitch is used for) or by hand for more control on velvet.
- Machine: stitch length 5.0 mm, top tension loosened one number, sew around one raw end 1/4 inch from the edge. Leave 6 inch tails, no backstitch. Hand: doubled upholstery thread, knotted, in a running stitch about 1/4 inch long.
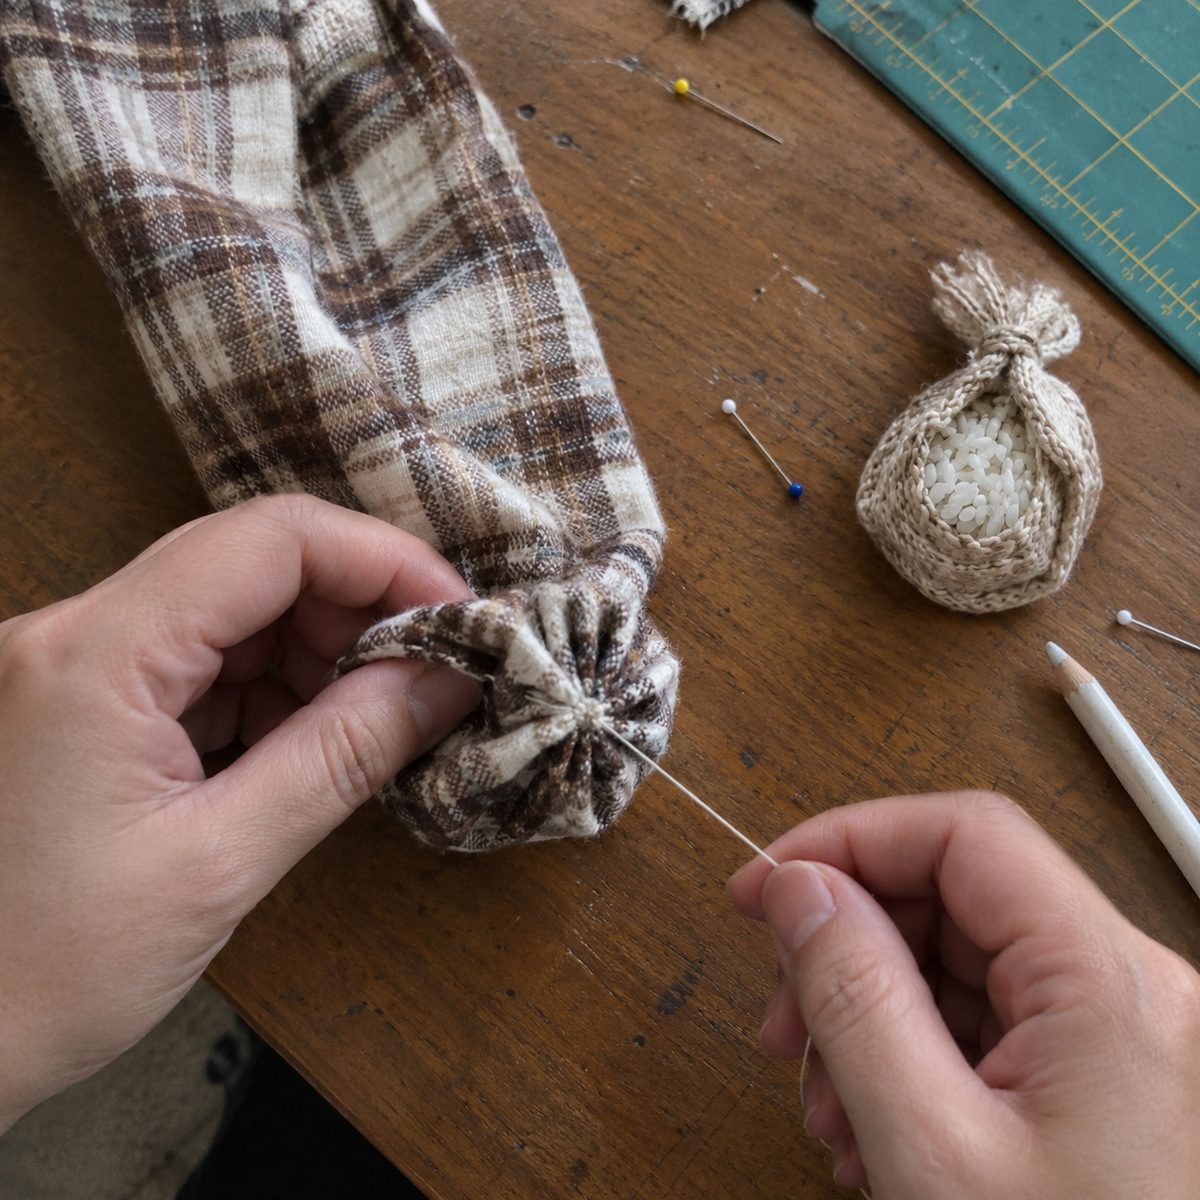
- Pull the bobbin thread (or your hand thread) until the opening closes completely, pushing the raw edge inside with your finger as it goes. It should pucker into a tight rosette with no hole.
- Thread the tails on a hand needle and take four or five stitches across the rosette to lock it. Knot off the way I show in how to end a hand stitch. This is now the bottom.
- Make the weight. Pour 1/4 cup rice for small, 1/3 cup for medium, 1/2 cup for large into the knit scrap or the toe of a stocking, twist, and knot. Drop it into the tube so it sits flat on the gathered base. Skip it for a wreath or garland, but for a mantel or table you want it.
Stuff it and gather the top
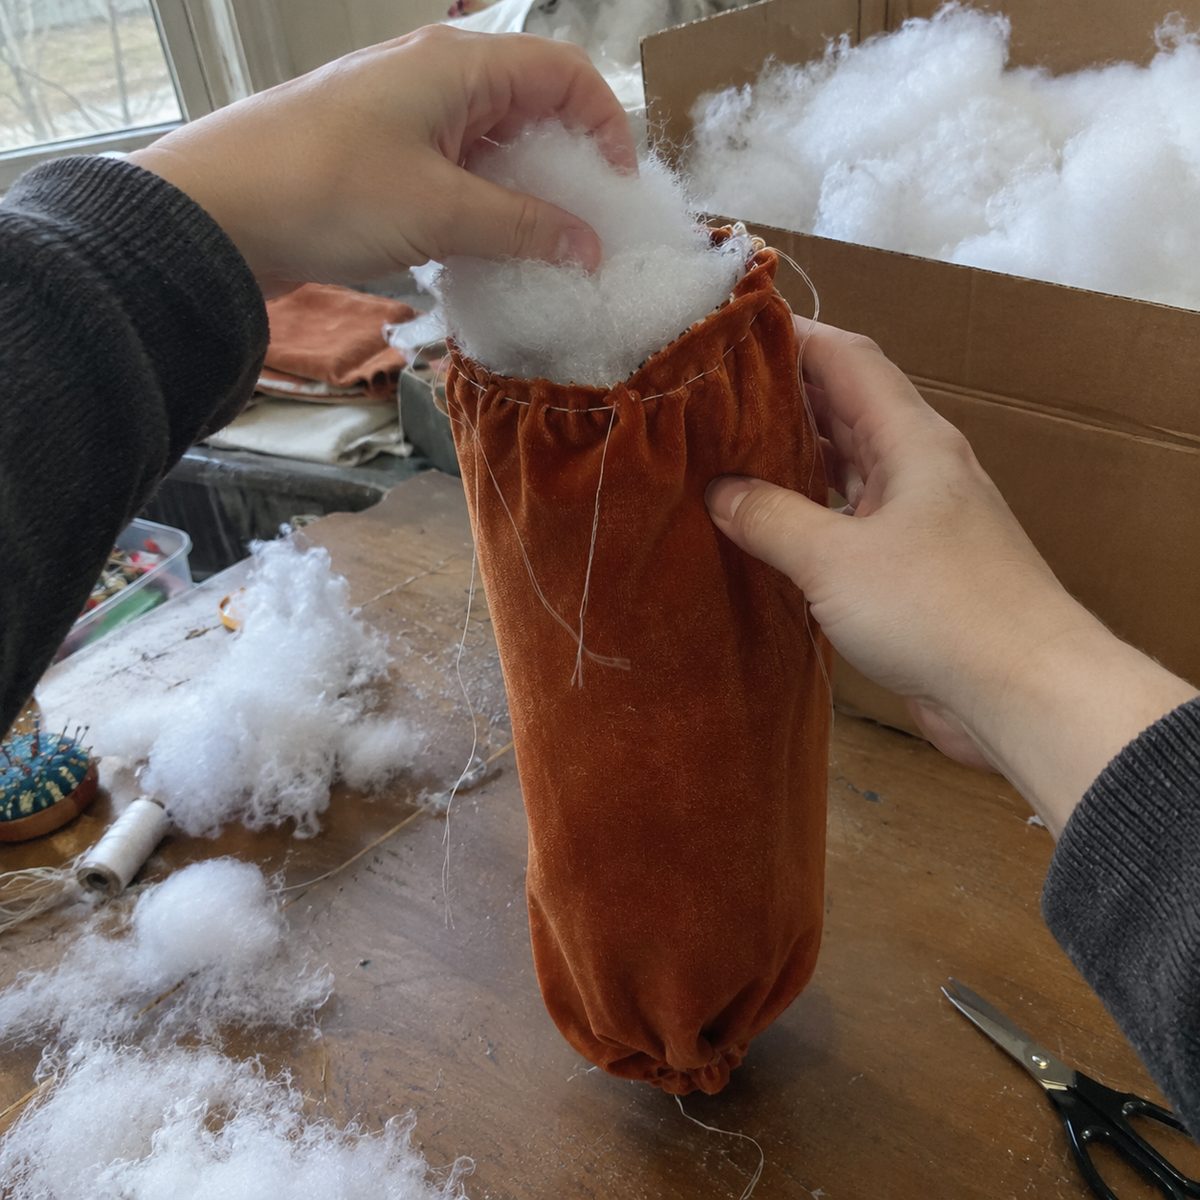
- Pull the fiberfill apart into loose wisps first. Big wads make lumps. Fill a small handful at a time, packing around the rice pouch first so it stays centered on the bottom.
- Stop when it feels like a firm pillow and springs back when squeezed. Firm matters. The segment thread compresses it by a third, and an understuffed pumpkin ends up wrinkled and slumped. A 16 x 8 body takes about 2 oz, or two packed handfuls.
- Run the gathering stitch around the top the same way. Pull it most of the way closed, then add one more pinch of stuffing right under the opening so the top is domed rather than dented.
- Pull the gather closed, tuck the raw edge inside, and lock it with stitches across the rosette. On velvet the top looks messy. That is normal, the stem covers it.
Pull the segments
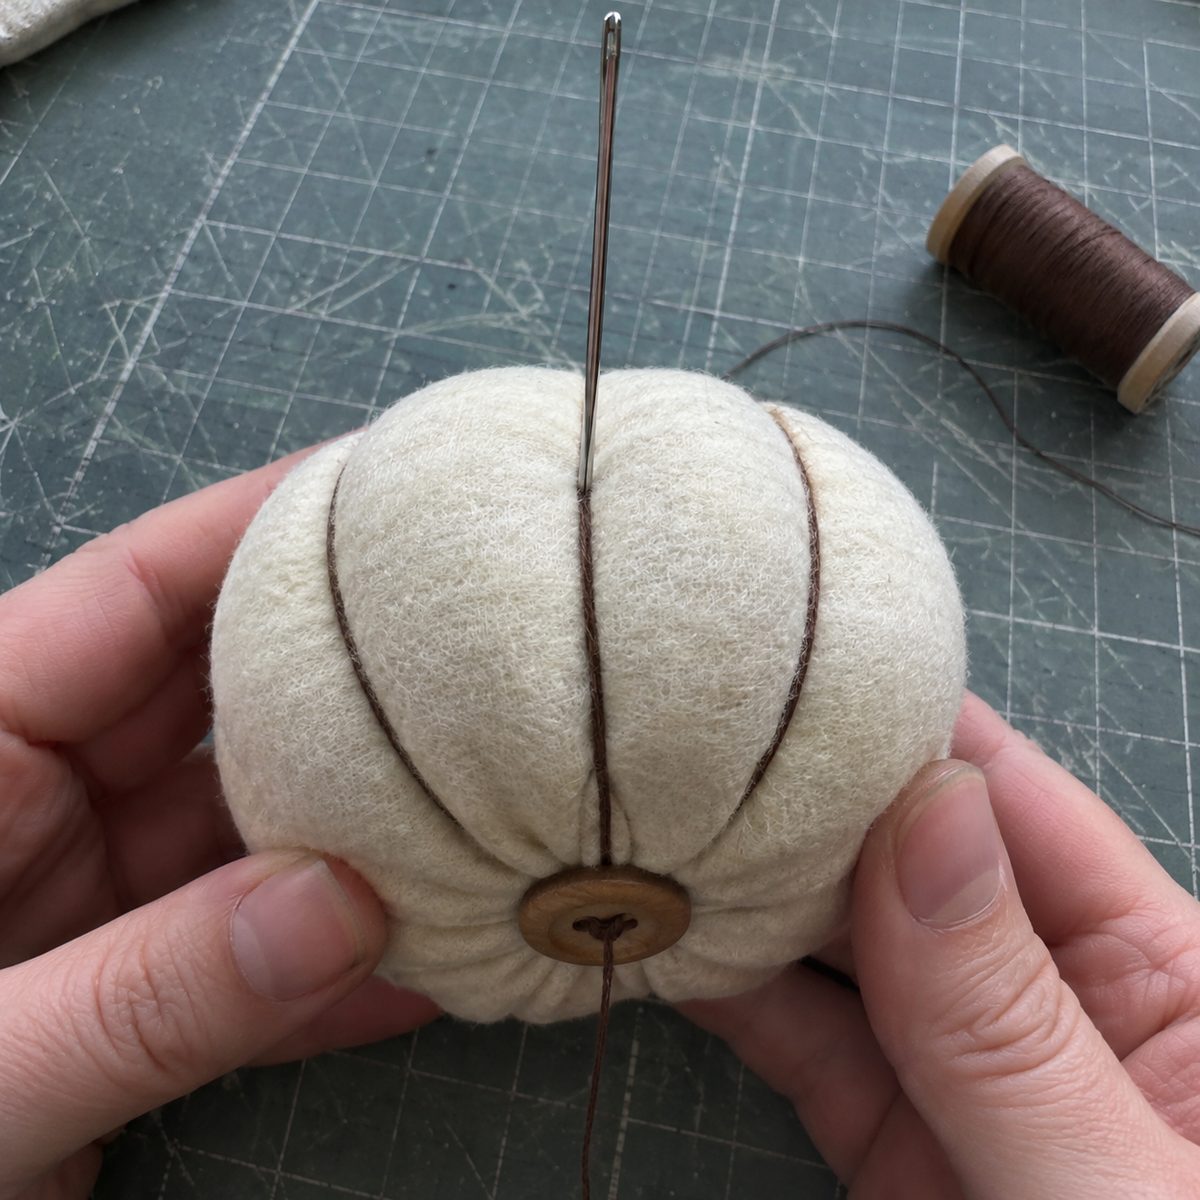
This is where a stuffed ball becomes a pumpkin, and where the thread cutting through the bottom ruins people’s work. The fix is the button. The gather is a cluster of raw edges, and a button or bead spreads the pull over a hard surface instead of sawing through them.
- Cut 2 yards of upholstery thread, fold it in half, and thread both cut ends through the doll needle so you pull four strands. Tie the loop end around the shank button, or through a large bead and knot it.
- Push the needle straight down through the center of the top rosette and out the center of the bottom one. Pull until the button sits snug and the pumpkin squashes down about a third of its height, then take one stitch through the button and back up through the center to lock that depth.
- Bring the thread straight down the outside and push the needle back in at the bottom center beside the button, through to the top. Pull hard until the thread sinks in and a groove appears. On velvet, pull in one steady motion rather than sawing, or the thread cuts a line in the pile.
- Repeat on the opposite side, then split each half for four grooves. Split again for eight on a large pumpkin, or stop at six on a small one. Eyeballing is fine, pumpkins are not symmetrical. Every pass goes through the exact center, or the top twists.
- Finish at the top. Take three small stitches through the rosette, knot twice, and bury the tail by pushing the needle in at the top and out the side of a groove, then snip flush. The grooves should be even and the pumpkin should sit flat.
Attach the stem and leaf
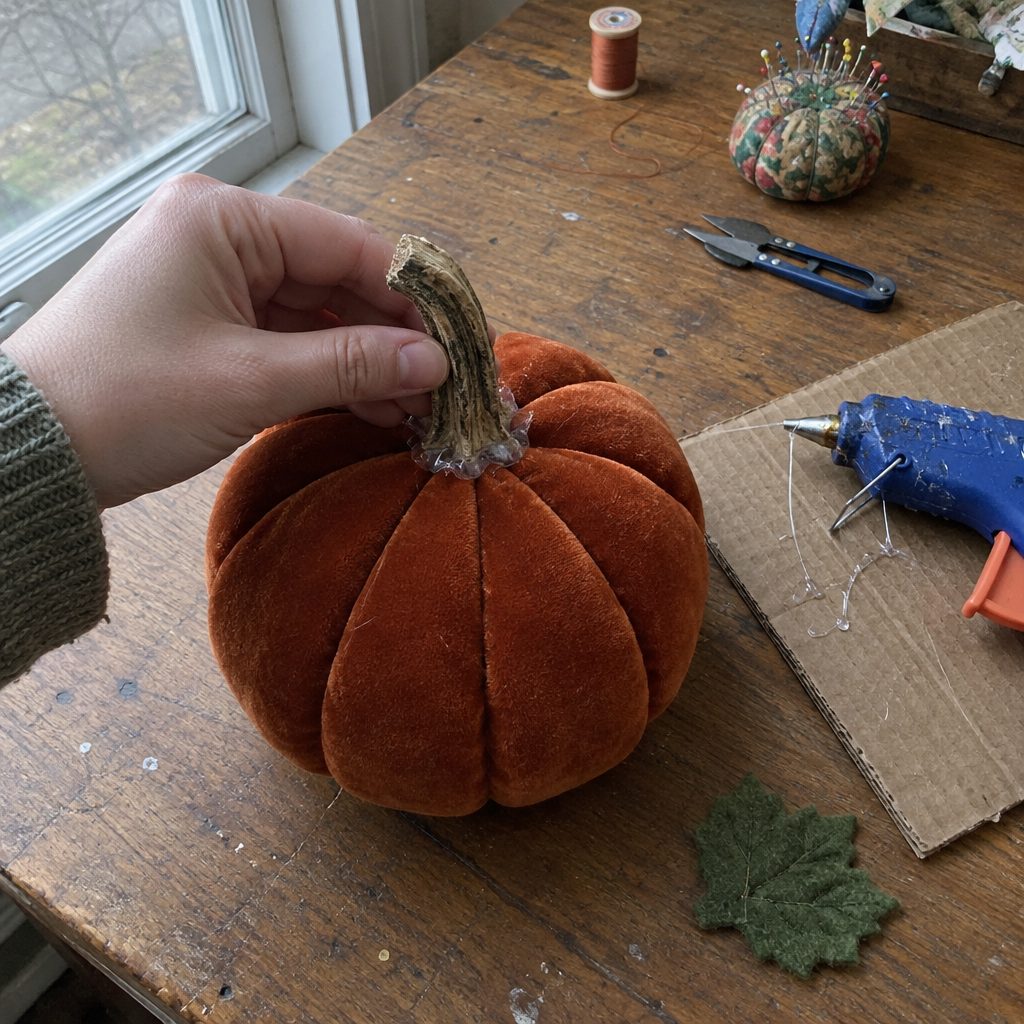
- Pick the stem. A real dried stem looks best. Twist it off a grocery store pumpkin and dry it on a windowsill for two weeks until hard and gray-brown. A 3 inch cinnamon stick is fastest and smells right. For felt, roll the 2 x 5 strip tightly, whip stitch the edge down, and snip the top at an angle.
- Anchor with thread before you glue. Ladder stitch a felt stem to the top rosette. For a real stem or cinnamon stick, take six or eight stitches of upholstery thread around the base, catching the rosette and wrapping the stem, so it stays on if the glue lets go in a hot attic.
- Fill the dimple around the stem with hot glue and press for 30 seconds. The glue hides the rosette and locks the stem upright. Pull off the strings once it cools.
- Cut a felt leaf, sew a 1/8 inch pleat down the center so it curls, and glue it at the stem base. For a vine, wrap 6 inches of jute twine around a pencil, spritz with water, let it dry, and glue one end under the leaf. The stem should stand straight and not wobble when nudged.
Fixes for the things that go wrong
The thread cut through the bottom
You skipped the button, or used a flat two-hole button and the thread sawed through beside it. Pull the thread out and redo the segments with a shank button or a bead. If the base is torn, hand sew a 1 inch circle of felt over it first and anchor through that.
The segments are shallow and keep disappearing
The pumpkin is understuffed or the thread was not pulled hard enough. The thread needs to sink until you lose sight of it. Open the top rosette, add stuffing until the body is firm, close it, and redo the segments with four strands so you can pull hard without snapping.
The pumpkin leans or will not sit flat
The rice pouch slid up the side during stuffing, or the first segment stitch went in off center. Squeeze the body, find the pouch, and massage it back to the bottom. If the center stitch is off, cut the thread at the top and start again through the exact middle of each rosette.
The velvet has shiny lines and pin marks
You pressed it face down or pinned outside the seam allowance. Steam the pumpkin from 3 inches away and brush the pile with a soft toothbrush while warm. Most marks lift. Next time, use clips and press only from the wrong side.
Variations and batch tips
White velvet with gold-painted cinnamon stems carries through to Thanksgiving and looks good on a dark wood table. For Halloween, black velvet with a twisted orange felt stem still reads as a pumpkin once the segments go in. Both sit on my fall sewing projects list.
For a centerpiece, cut 20 x 10 from stretch velvet, use 3 oz of stuffing, 3/4 cup of rice, eight segments, and a stem at least 2 inches tall. For gifts, a set of three in one fabric family in a kraft box with tissue paper is a 90 minute project. Sweater pumpkins with ribbing stems are the ones people ask about.
Batches go quicker in stages. Cut every rectangle, sew every tube, then gather all the bottoms with the machine still at 5.0 mm. Stuff and segment in front of the TV, glue stems the next morning. Ten in an evening is realistic. My home decor sewing projects post has runners and pillow covers that use the same fabrics.
Frequently asked questions
Can I use regular thread for the segments?
Not on its own. All-purpose polyester snaps when you pull hard enough for a deep groove, and if it holds, it stretches over a few weeks and the segments soften. Use upholstery thread, button and craft thread, or #8 perle cotton, doubled so you pull four strands. Six-strand floss, doubled, works in a pinch.
Do I have to use a doll needle?
You need something long enough to pass through the whole pumpkin in one push. A 5 inch doll needle handles a large pumpkin and a 3 inch darning needle covers a small one. With a short needle you end up fishing for it inside the stuffing, which is how the thread lands off center and the pumpkin leans.
How do I wash a fabric pumpkin?
You do not. Rice and hot glue do not go in a washer. Shake it out, spot clean with a damp cloth, and brush velvet with a soft toothbrush. For a washable version, skip the rice, sew the stem on instead of gluing, and use cotton. Then it can take a gentle cycle in a pillowcase and be reshaped while damp.
Can I sew the whole thing by hand?
Yes. The only machine seam is the short side of the tube. A hand backstitch with a 1/2 inch seam allowance takes about five minutes on a large pumpkin and holds fine. The gathers, segments, and stem are already hand work, so it is a good car project if you precut the rectangles.
Make the first one in cotton so you can see the gathers and learn how hard to pull. The second, in velvet, will come out right. After that you will be cutting up every sweater in the donate pile.