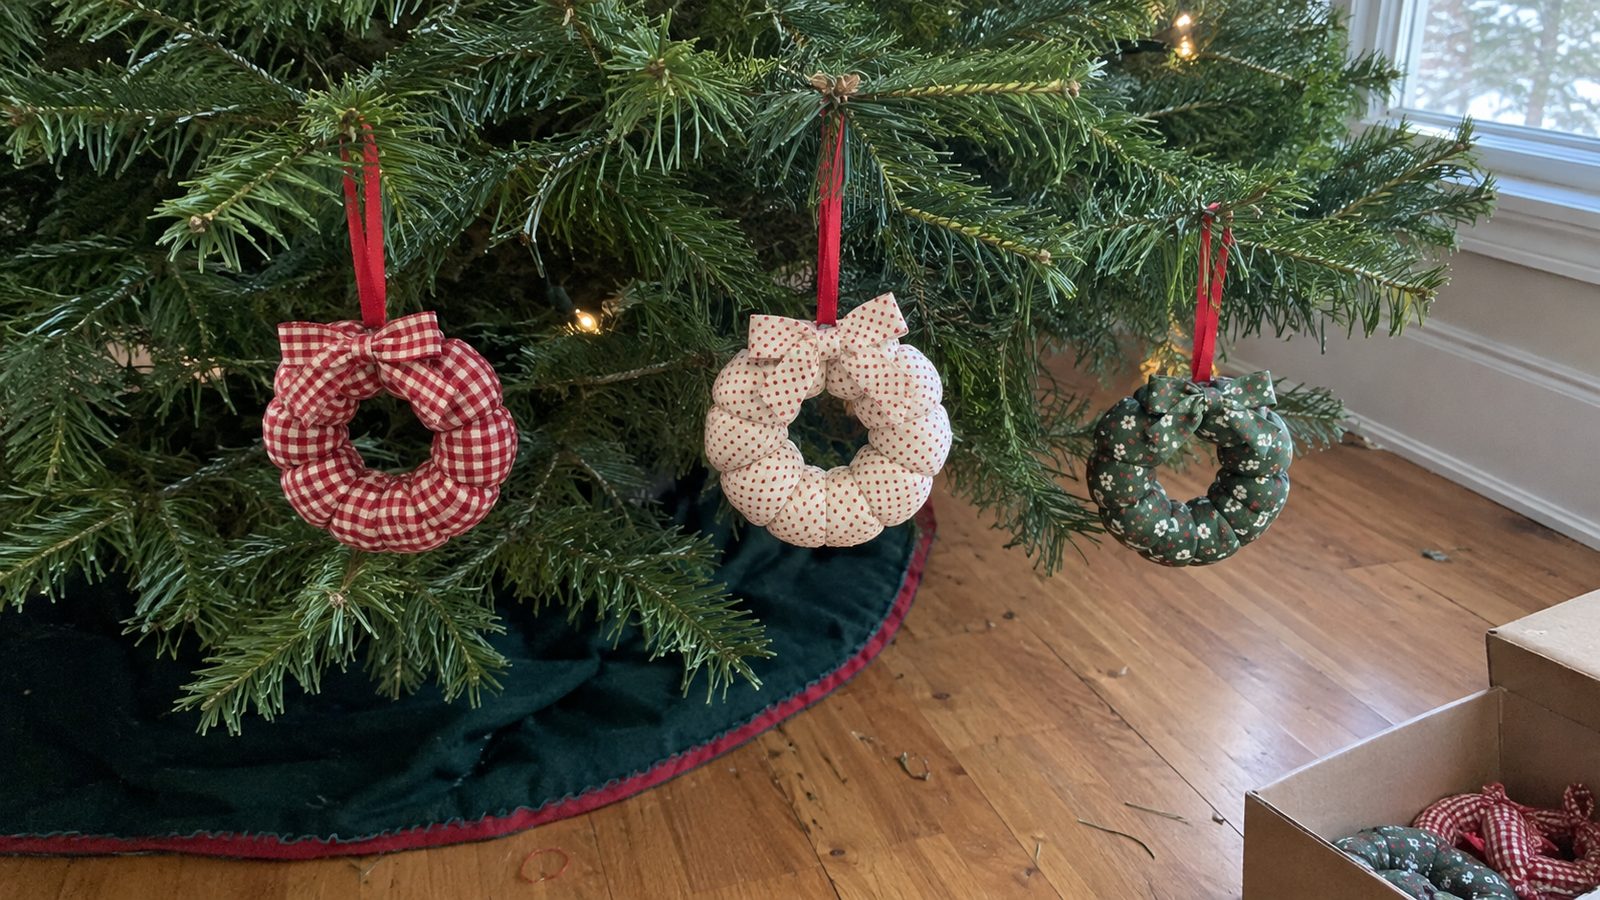
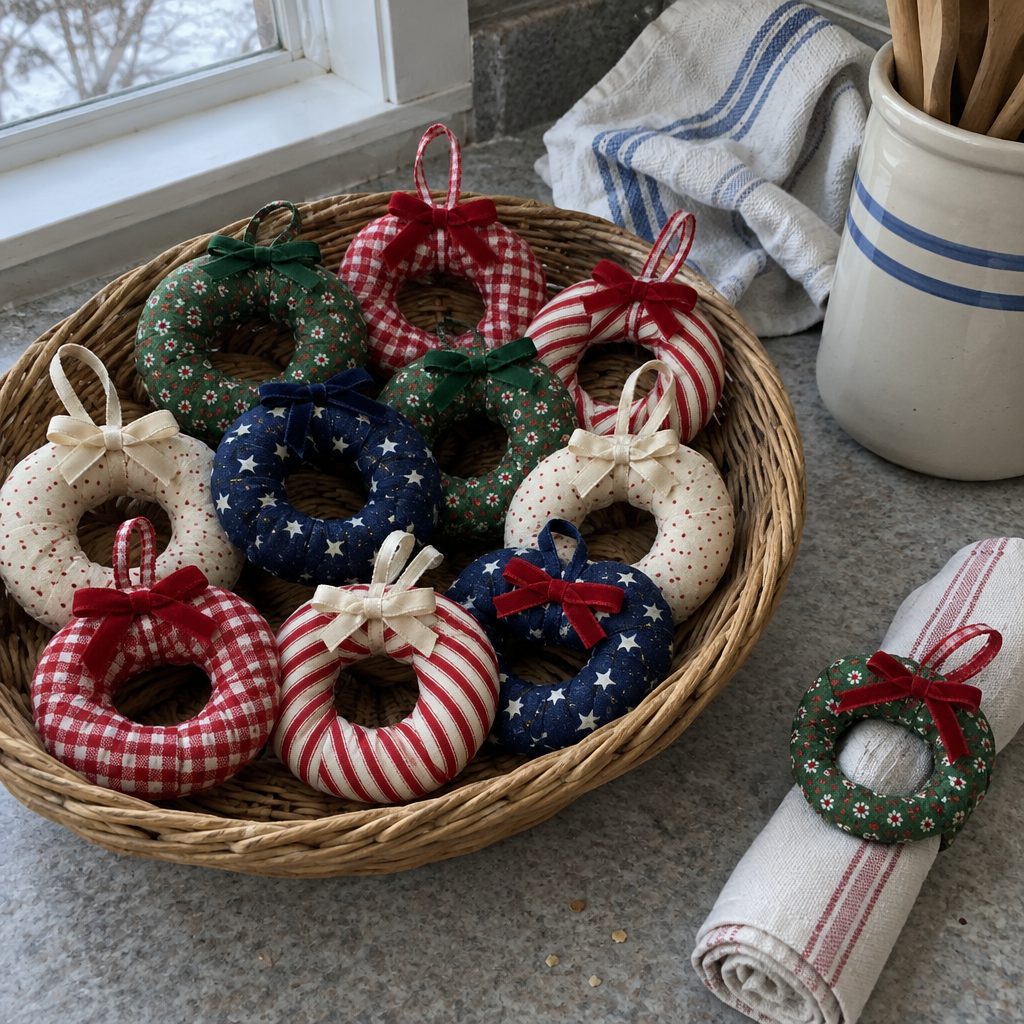
A mini fabric wreath is a stuffed tube of quilting cotton bent into a ring, with a bow over the join and a hanging loop. It finishes about 4 inches across, takes 20 to 30 minutes, and is a true beginner project: one straight seam on the machine, then hand work you can do on the couch.
The one thing that makes it come out well is stuffing it lightly. A loosely filled tube bends into a smooth circle. A firm one fights you, kinks at the join and ends up looking like a donut that got sat on.
This was one of the three most clicked ideas in our fabric Christmas ornaments roundup, so here is the build, plus a tied rag-strip version for anyone who would rather not sew.
What you’ll need
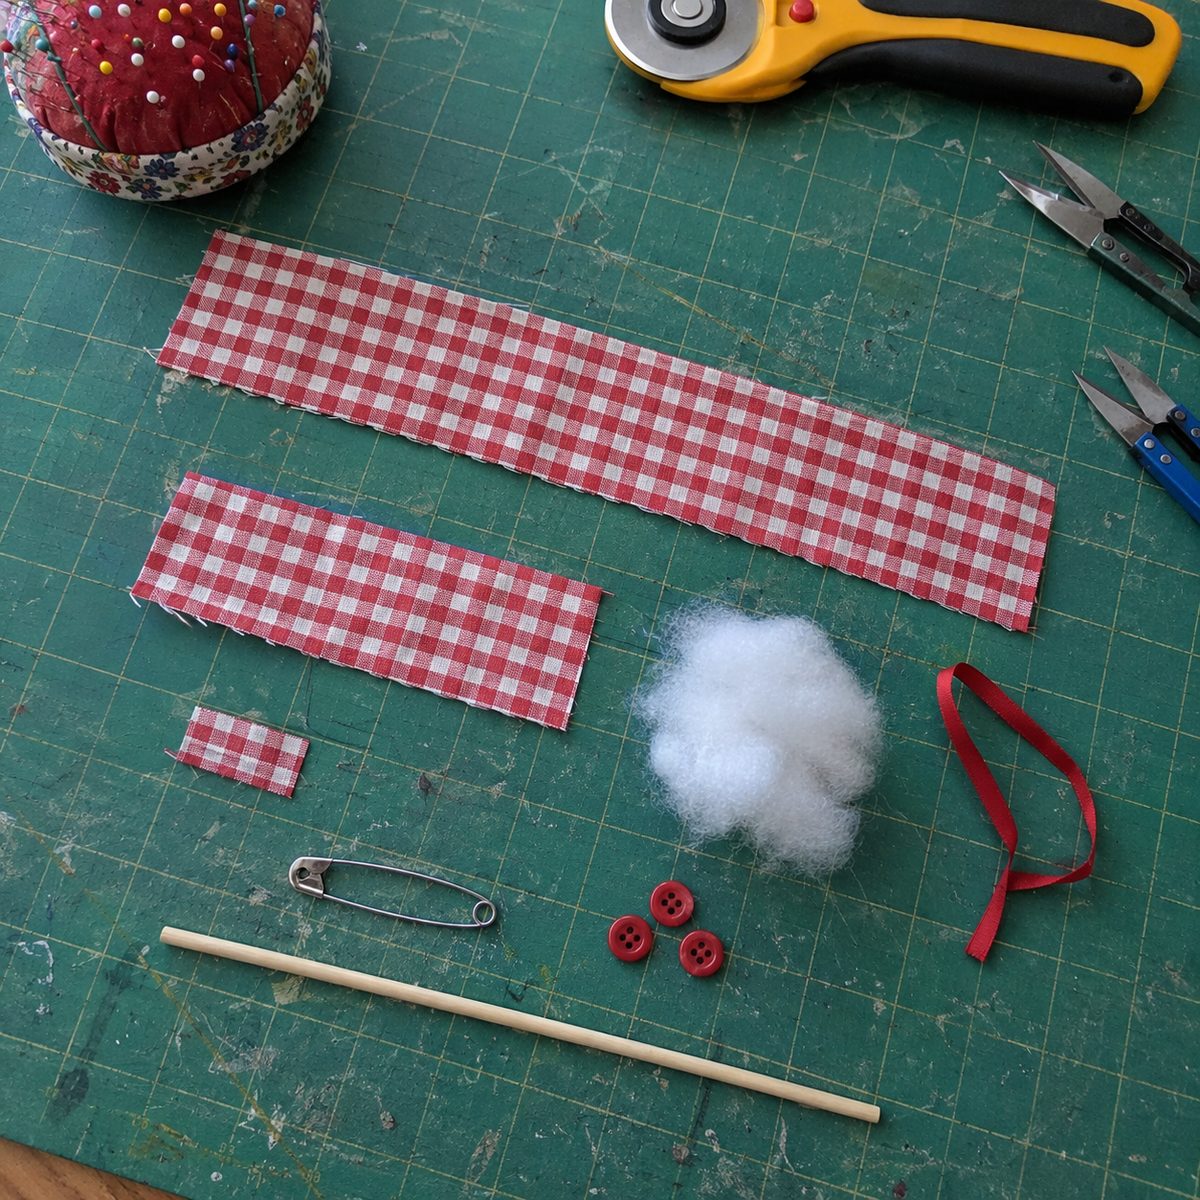
- Quilting cotton: a 2.5 x 14 inch strip for the wreath (a jelly roll strip is exactly right) and a 2.5 x 7 inch piece for the bow
- Polyester fiberfill, a loose puff about the size of a lemon, roughly a third of an ounce
- 6 inches of 1/8 inch satin ribbon or baker’s twine for the loop
- All-purpose thread to match, plus a size 8 sharp hand needle
- A large safety pin (size 2) or a tube turner
- A chopstick or an unsharpened pencil for stuffing
- Optional: three 1/4 inch red buttons or 6 mm red wooden beads for berries
- Rotary cutter and mat, or scissors and a chalk pencil
Cut chart for three sizes
The 4 inch wreath is the one I make most. Scale both numbers together when you change size, or the ring looks skinny or fat.
| Piece | Cut size | Qty |
|---|---|---|
| Wreath tube, 3 inch ornament or napkin ring | 2 x 10 inches | 1 |
| Wreath tube, 4 inch ornament | 2.5 x 14 inches | 1 |
| Wreath tube, 6 inch doorknob size | 3 x 20 inches | 1 |
| Wreath tube, 10 to 12 inch door wreath | 5 x 20 inches, joined end to end | 2 |
| Bow for the 4 inch wreath | 2.5 x 7 inches | 1 |
| Bow center wrap | 1 x 2.5 inches | 1 |
| Hanging loop | 6 inches of 1/8 inch ribbon | 1 |
Fabric and prep
Quilting cotton is the right fabric. It turns through a 1 inch tube, presses crisp and holds a curve without wrinkling. Flannel is too thick for the sewn tube, though it is lovely in the rag version. Skip knits, which stretch as you stuff, and satin, which frays at the join.
Small prints win on a 1 inch tube. Tiny gingham, pin dots, ditsy florals and 1/8 inch stripes all read clearly. Any motif bigger than a quarter turns into random blobs of color. One trick worth knowing: cut a narrow stripe on the 45 degree bias and the tube twists into a candy cane spiral when you bend it into a ring.
I do not prewash fabric for ornaments, since they never get washed. I do press each strip with spray starch; a stiffer strip feeds straight, turns cleaner and keeps its fold while you stuff.
Machine setup: an 80/12 universal needle, stitch length 2.0 mm, 1/4 inch seam allowance. If you are unsure, see which needle size to use for cotton.
Sew the tube
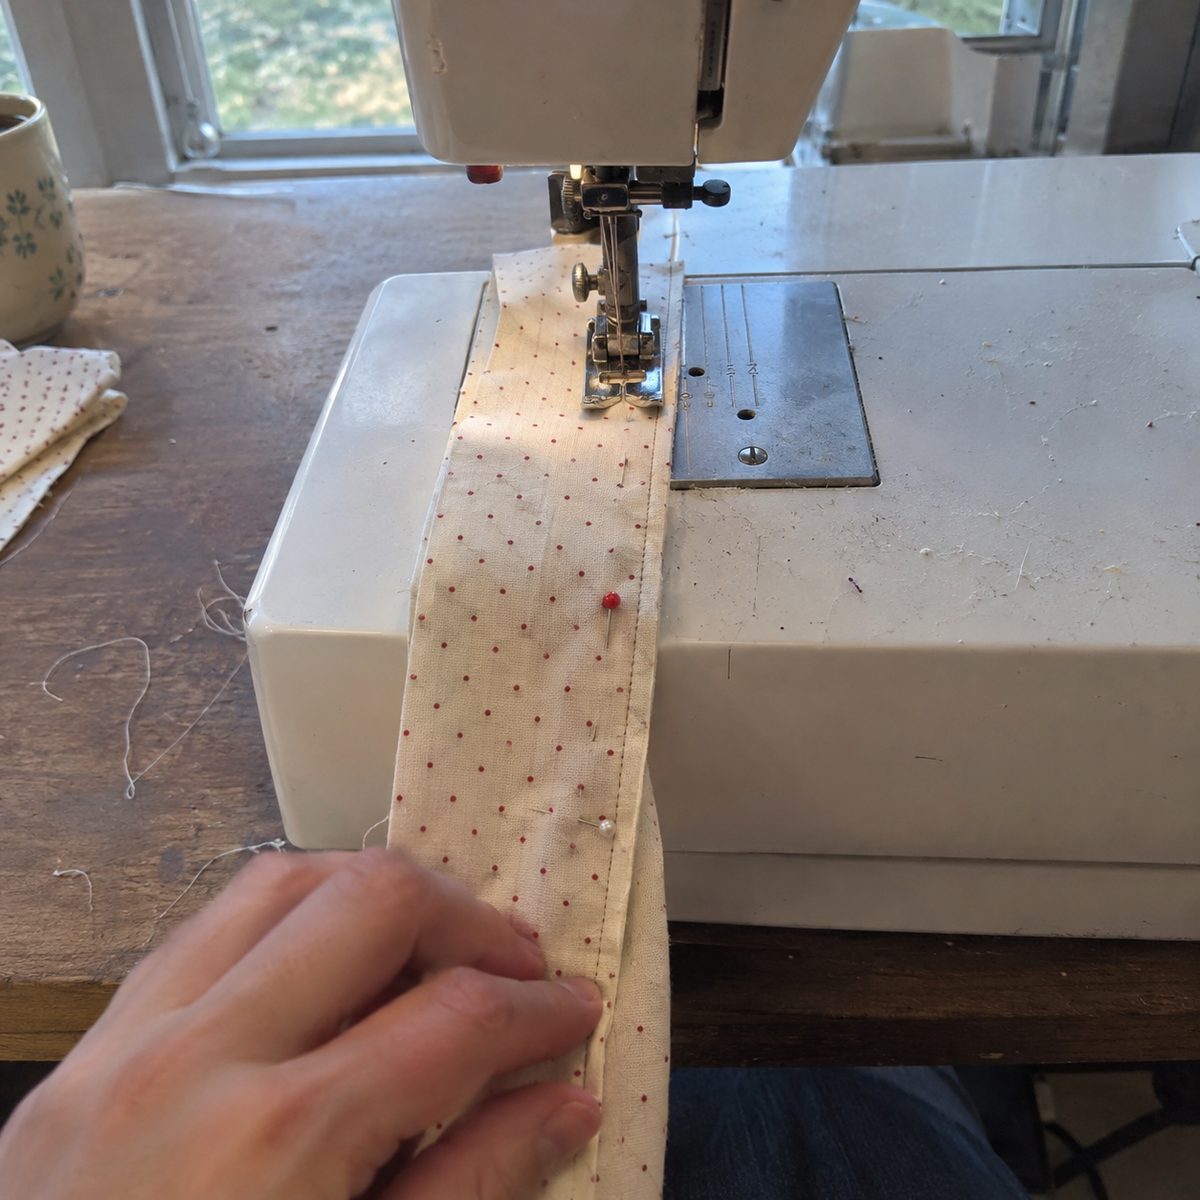
- Fold the 2.5 x 14 inch strip in half lengthwise, right sides together, so it is 1.25 inches wide. Press the fold. Pin every 3 inches with the pins across the seam line.
- Sew the long raw edge with a 1/4 inch seam. Backstitch two stitches at each end and leave both short ends open. You should have a flat, inside-out tube with a dead-straight seam along one edge.
- Trim the seam allowance to a scant 1/8 inch along the whole length. This is the step beginners skip, and it is why their safety pin gets stuck. A 2.0 mm stitch on cotton holds fine at 1/8 inch.
- Press the seam allowance to one side, not open, while the tube is still inside out. The fold line it leaves gives the pin a channel to follow.
Turn the tube right side out
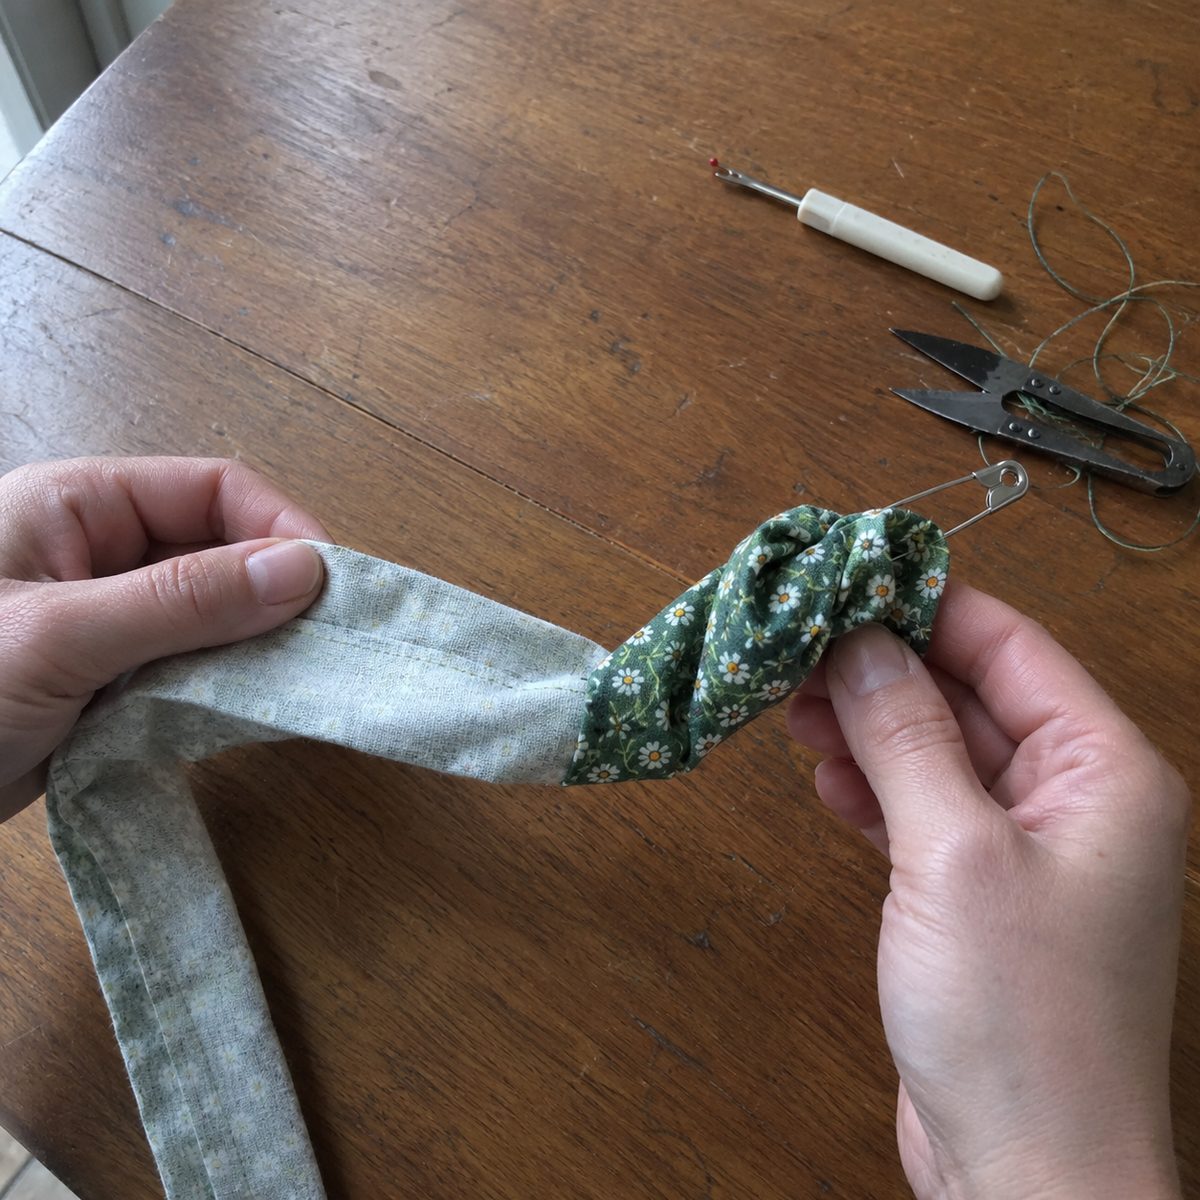
- Pin a size 2 safety pin through one layer of fabric at one open end, 1/4 inch from the raw edge, and close it.
- Push the pin, closed end first, into the tube. Bunch the fabric up over the pin with one hand, then slide the gathers back down the tube behind it with the other. Repeat. The fabric swallows itself as you go.
- When the pin pops out the far end, hold it and pull gently. The whole tube follows and comes out right side out. A tube turner (a hollow brass tube with a wire hook) does the same job in half the time.
- Roll the tube so the seam runs along one folded edge and press it flat with steam. You want a crisp 1 inch tape with no twist; the seam edge faces the inside of the ring later.
Stuff it lightly
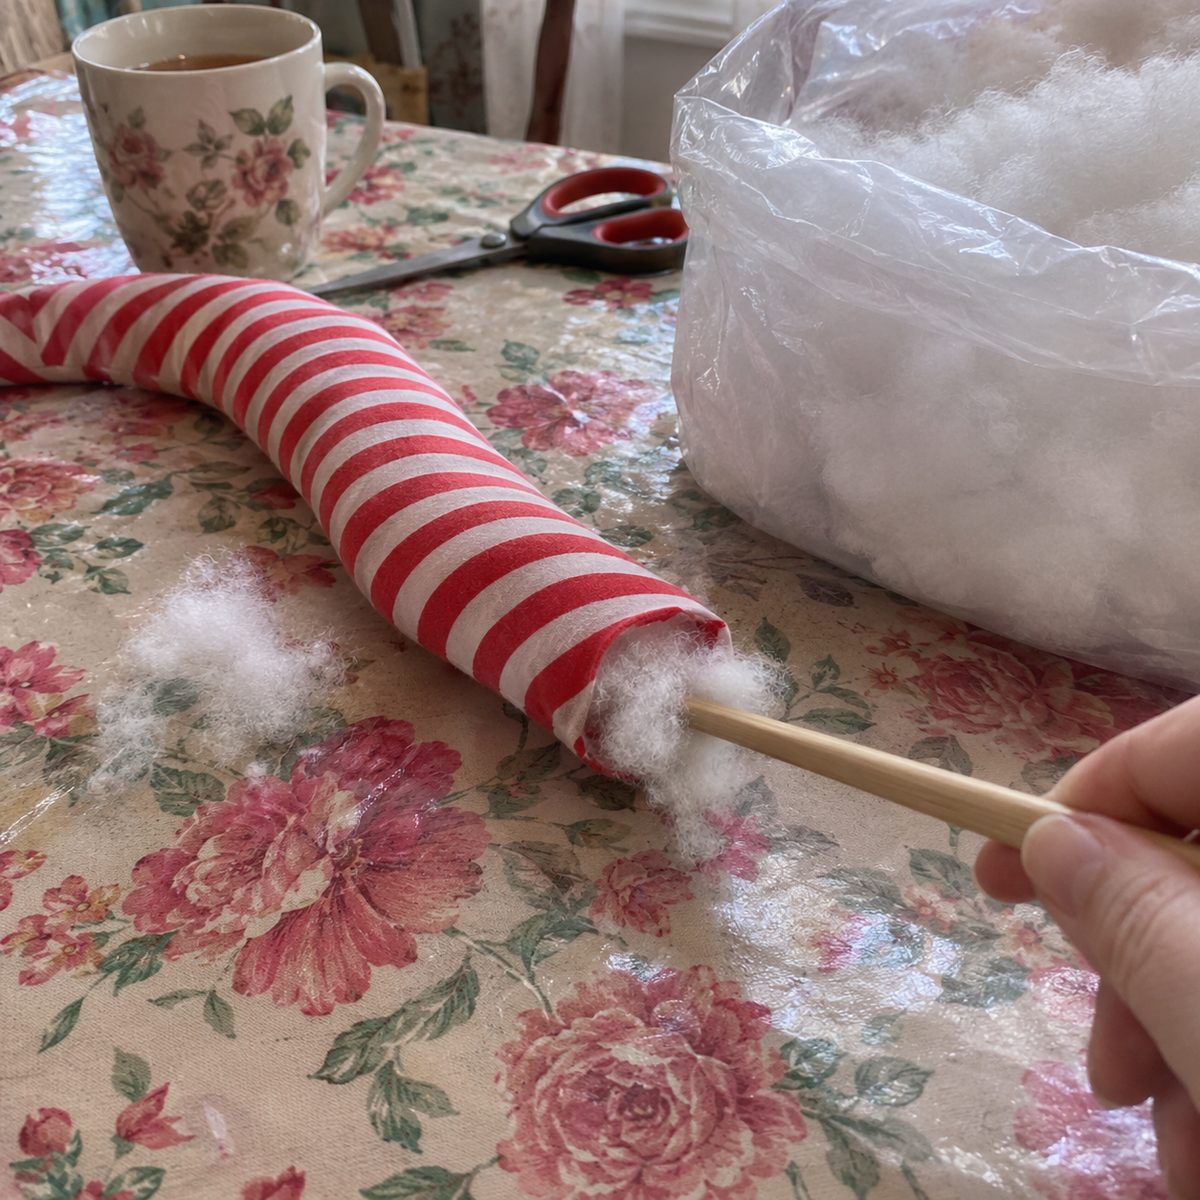
- Pull the lemon-sized puff of fiberfill apart into loose wisps, each about the size of a grape. Never push in a wad; it makes a hard lump that shows as a bump on the finished ring.
- Feed the wisps in from one end with the chopstick, pushing each one just past the last. Stop every 3 inches and squeeze. The tube should feel like a soft pool noodle, not a stick. Fill to within 1/2 inch of each end and leave that last 1/2 inch empty so the join can nest.
- Do the bend test. Curve the tube into a U. If it bends in a smooth arc, you are done. If it creases hard on the inside of the curve, that spot is underfilled, so poke in another wisp. If it springs back straight, pull some out with tweezers.
Join the ends into a ring
- At one end, tuck the raw edge inside the tube by 1/4 inch so that end has a clean folded rim. Finger press it.
- Slide the other, raw end into the folded end by 1/2 inch. Line up the seams so the seam runs around the inside of the ring.
- Pin once through all the layers. Set the ring flat and look straight down at it. Nudge the overlap deeper or shallower until the ring is round, not egg-shaped. Fix the shape now; you cannot fix it after the join is sewn.
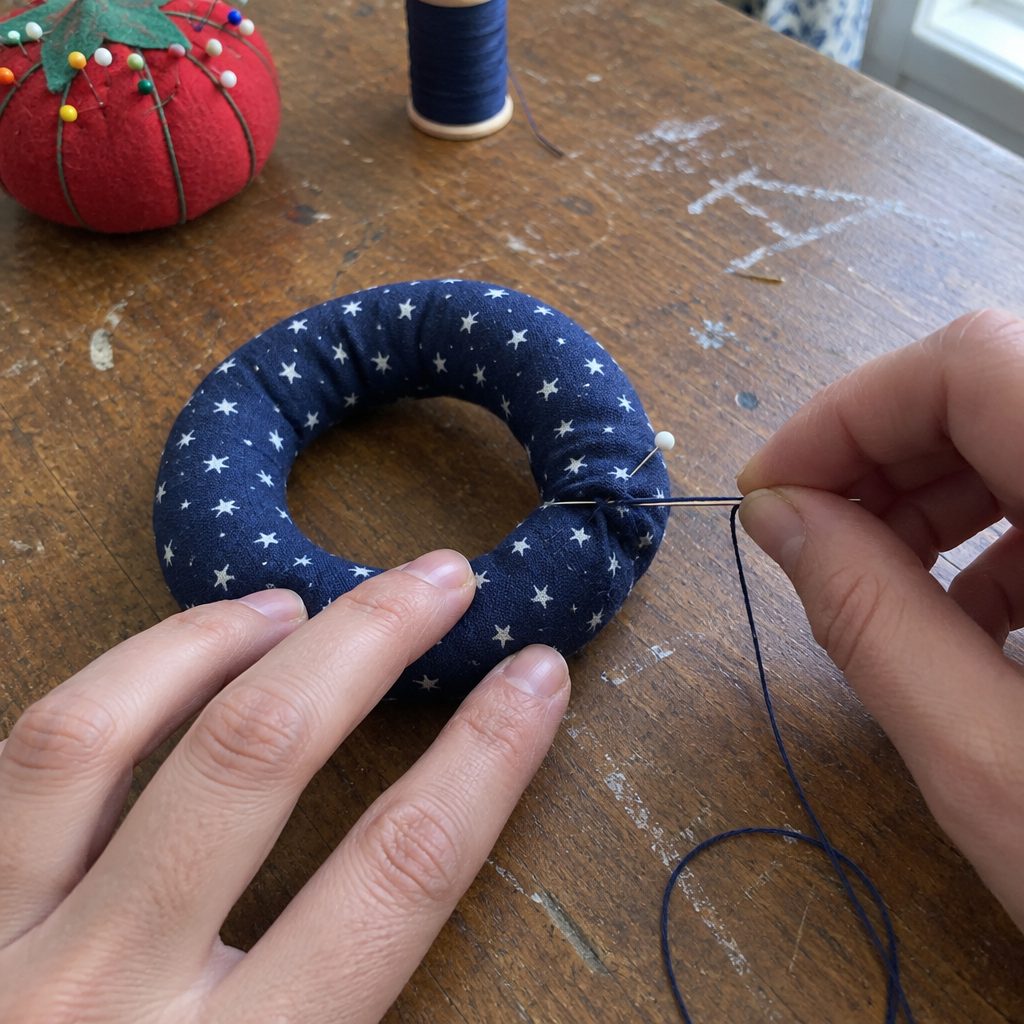
- Ladder stitch around the join with doubled thread. Come up from inside the fold, take a 1/8 inch stitch along the folded rim of the outer tube, then a 1/8 inch stitch straight across in the inner tube, and repeat. Every four stitches, pull snug and the thread sinks out of sight.
- End with two tiny backstitches under the fold, then push the needle through the stuffing and out an inch away. Snip flush and the tail disappears inside. For the knot explained slowly, see how to end a hand stitch.
Add the bow, the loop and the berries
A bow about two thirds the width of the wreath looks right, so 2.5 to 3 inches here. Bigger and the bow is the ornament, not the wreath.
- Fold the 2.5 x 7 inch bow piece in half lengthwise, right sides together. Sew the long edge and one short end at 1/4 inch, turn, press, and tuck the open end inside. Bring the two short ends to the center, overlapping 1/2 inch, to make a flat loop about 3 inches wide.
- Pinch the center of the loop into three or four accordion folds. Fold the long edges of the 1 x 2.5 inch wrap piece in to meet, press, and wrap it around the pinched center. Overlap at the back and stitch through all layers four or five times. You get two plump loops and no tails.
- Fold the 6 inch ribbon in half and tack the cut ends to the back of the ring, directly behind the join, with six stitches through the tube fabric only. The loop should stand 2 to 2.5 inches above the ring.
- Set the bow over the join, loop at the top, and sew it on through the center wrap with six to eight stitches into the tube. Pull slightly so it nestles into the ring.
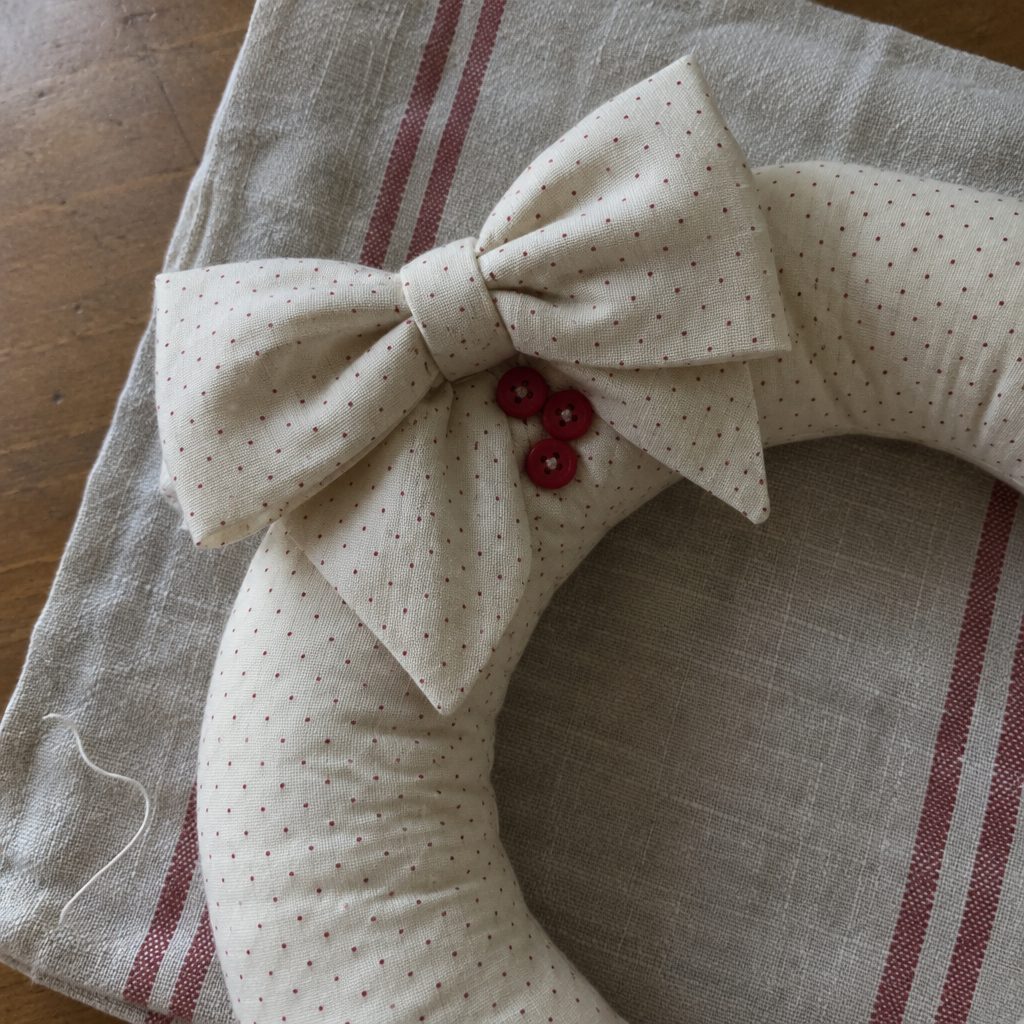
- For berries, sew three 1/4 inch red buttons in a tight triangle beside the bow, at about the four o’clock position. Use doubled thread, go right through the stuffing and back, and pull each button a hair into the tube so it looks tucked in. Red 6 mm beads or French knots in perle cotton work the same way.
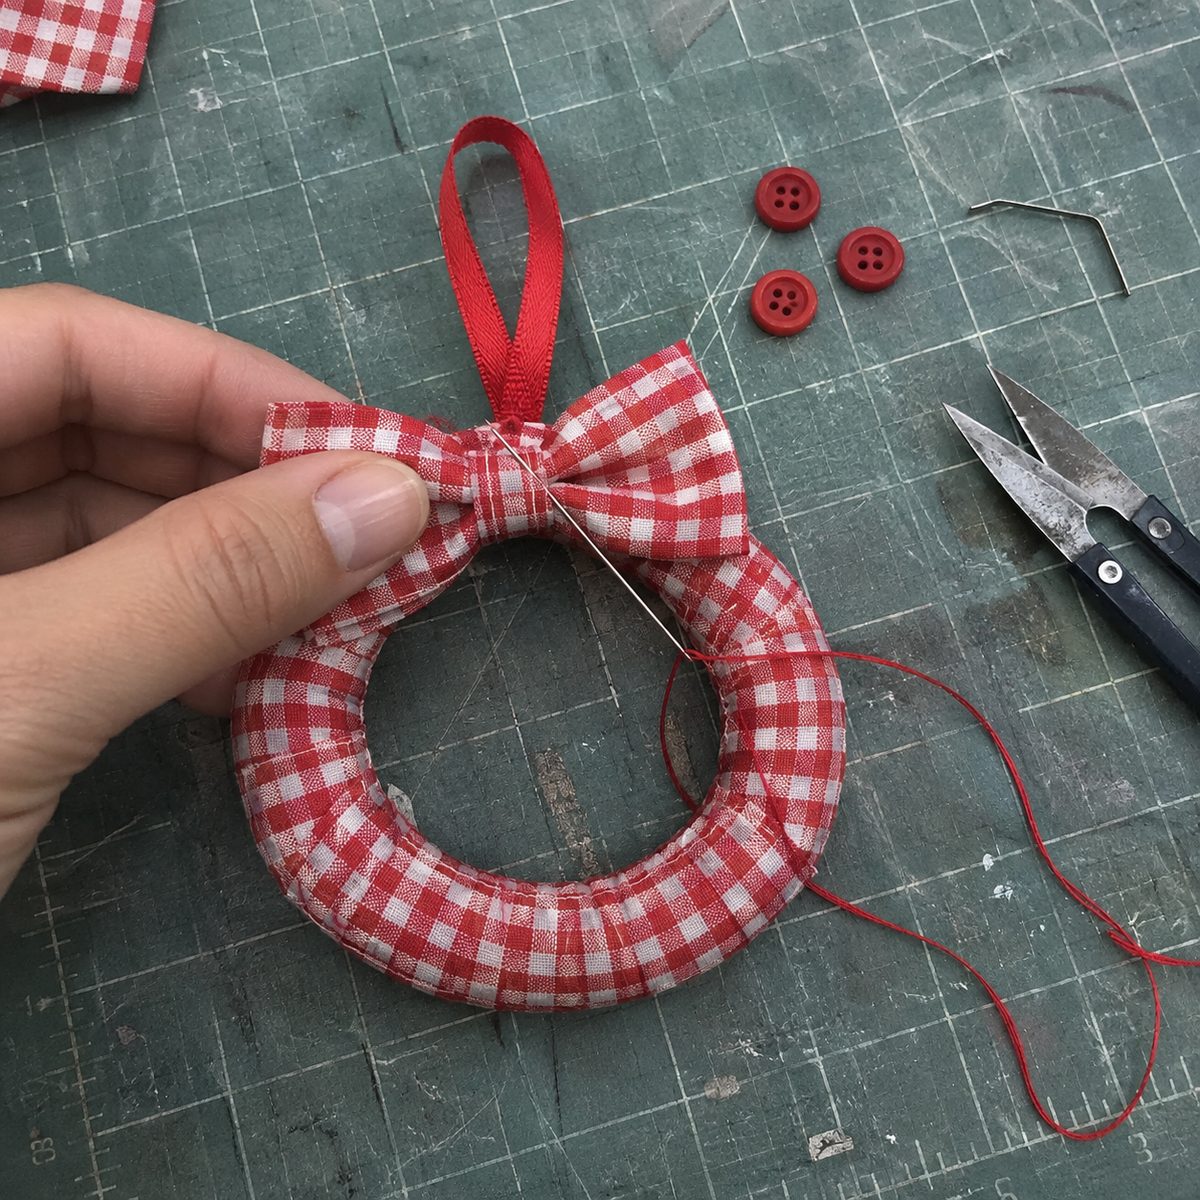
Most of mine take 25 minutes from strip to hook.
Fixes for the things that go wrong
The ring is egg-shaped or has a flat spot
Usually the flat spot is at the join, which means that area is underfilled or the overlap went in crooked. Roll the ring between your palms like a snake of dough for a minute and the stuffing redistributes. If not, open three ladder stitches, poke in one grape-sized wisp and close it again.
The tube kinked at the join
Overstuffed. A tube packed firm cannot bend around a 4 inch circle, so it folds instead. Pull a wisp or two out of each end with tweezers before joining. A kink mid-tube means a wad; squeeze and roll it until it breaks up.
The seam shows on the outside of the ring
The tube twisted while you stuffed it. Before you pin the join, roll the tube in your fingers so the seam faces inward all the way around. If it is already sewn, put the bow over the worst inch and let the berries cover the rest.
The ladder stitches are visible
The bites are too long or the thread color is off. Keep each stitch at 1/8 inch, pull snug every four stitches rather than at the end, and match the thread to the background of the print, not the motif.
Variations, sizes and a no-sew rag version
Other sizes. The 3 inch version (2 x 10 inch strip) makes a gift topper or a napkin ring. A stuffed 3 inch ring has a 1.5 inch hole that fits a rolled napkin; skip the loop and keep the bow to 2 inches. The 6 inch version (3 x 20 inches) hangs well on a doorknob. For a 10 to 12 inch door wreath, join two 5 x 20 inch strips end to end and treat the long strip exactly like the small one, with about 2 ounces of fiberfill and a 4 x 12 inch bow piece.
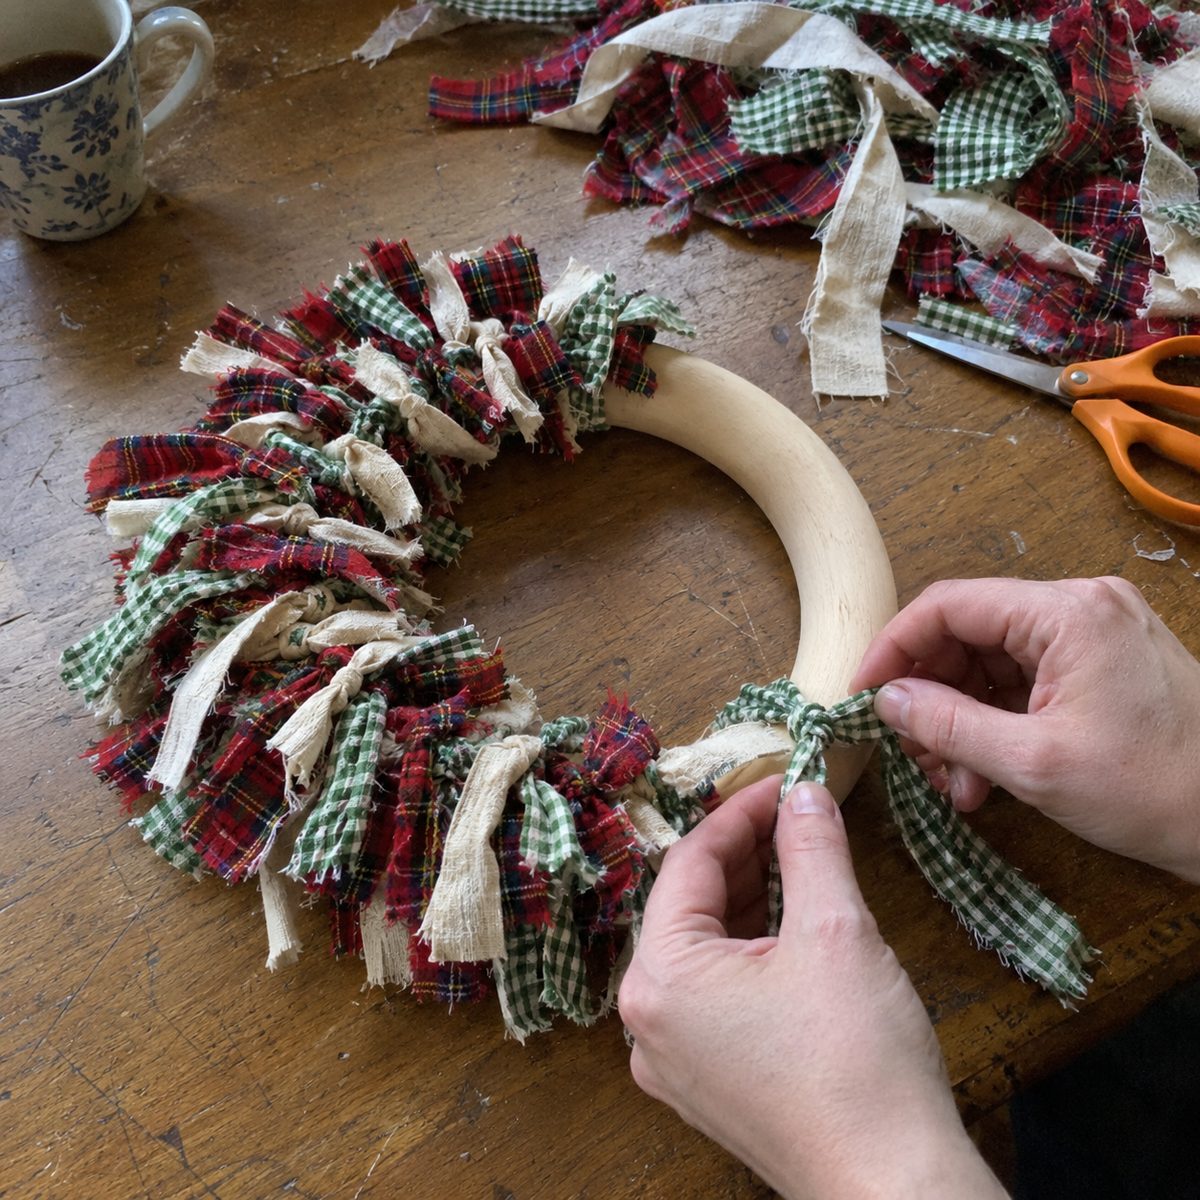
The rag-strip wreath. No machine, and children can help. You need a 4 inch ring: a wooden curtain ring, a metal macrame ring, or a circle bent from 16 gauge floral wire. Tear 1 x 4 inch strips of cotton and flannel, 40 to 50 of them, in two or three prints. Tie each around the ring with a single knot, pull it tight and shove it up against the last one, until no ring shows and the strips stand out like a fuzzy brush. Trim long tails to about 1.25 inches so it stays round. For a 12 inch wire wreath form, cut 1.5 x 8 inch strips and plan on about 250 of them, around 2.5 yards.
Fabric swaps by season. Red gingham and pin dots are Christmas. Cream linen-look cotton with a jute twine loop reads as farmhouse. Pastel florals suit a nursery door, and a rust and mustard stripe cut on the bias is fall. Our Christmas sewing projects and scrap fabric projects are full of prints that pair up.
Making a batch. One 40 strip jelly roll is 40 wreaths, and the seam is short enough to chain sew. Sew all the tubes without cutting threads between them, trim apart, turn them all, then stuff and join while watching something. I get about ten an hour. Tie a dozen on twine, 5 inches apart, for a mantel garland.
Frequently asked questions
Can I make this without a sewing machine?
Yes. Backstitch the long seam by hand with 1/8 inch stitches, 1/4 inch from the raw edge. A 14 inch seam takes about 15 minutes and the tube turns the same way. The join, bow and loop are hand sewn anyway, so the machine only saves that one seam.
What can I use instead of fiberfill?
Batting scraps cut into 1 inch strips and rolled loosely work well and bend evenly. Wool roving is lovely but pricey. Cotton balls go lumpy. Shredded fabric scraps are free but heavy, and they settle. Avoid rice or beans: the weight pulls the ring into an oval on the hook and attracts pantry moths in storage.
How do I keep the ring round while it hangs?
Put the loop and the bow at the same spot, the join, and hang it with that spot at the top. The bow then carries no weight and the ring hangs from its stiffest point. If you want the bow at the bottom, stuff a little firmer, or the bow’s weight tugs the bottom of the ring flat.
Can the wreath be washed?
Not in a machine. Fiberfill shifts and the ladder stitch can open. Spot clean with a damp cloth and a drop of dish soap, blot, and dry flat. Store the ornaments flat in a shoebox between layers of tissue so the rings are not crushed into ovals between Decembers.
Make one and you will see why these show up on so many trees. It is one seam, a minute with a safety pin and a bow. A jelly roll strip and a lemon-sized puff of stuffing gets you an ornament before the kettle boils.