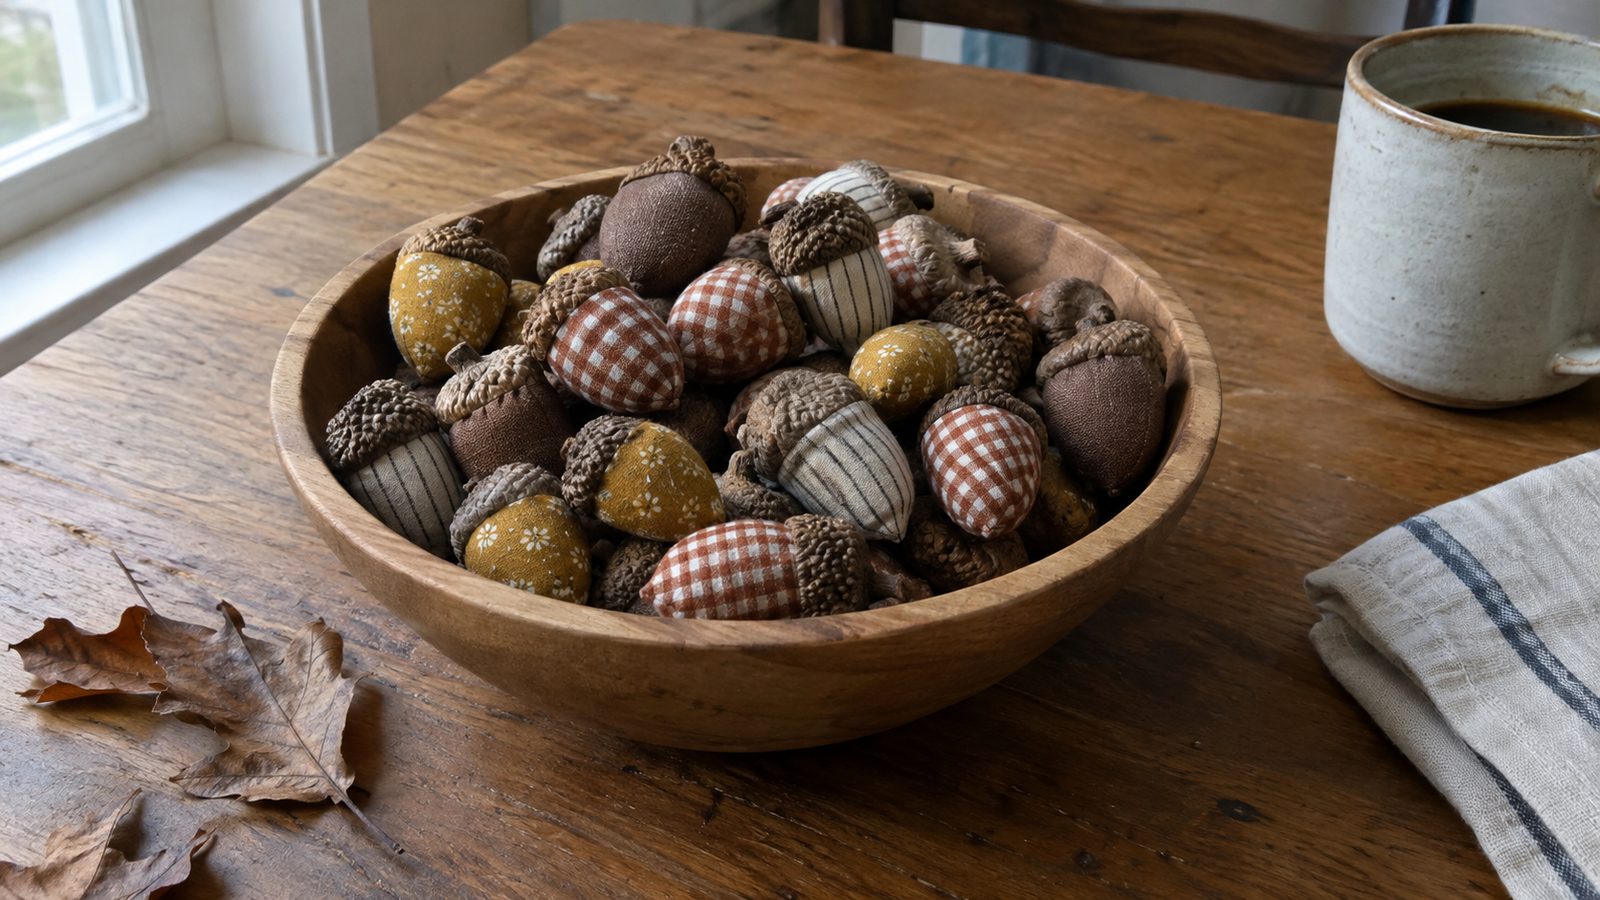
Fabric acorns are small stuffed cotton balls, gathered up like a tiny drawstring bag and topped with a real acorn cap or a sewn felt one. Each takes about 15 minutes by hand, with no machine and no pattern to print. You trace a circle, sew around it, pull, stuff, and close.
This is a true beginner project. If you can thread a needle and tie a knot, you can make a bowlful tonight.
The one thing that decides how good they look is how hard you stuff them. A soft acorn wrinkles and sags under the cap. A firm one holds a tight, round shape that reads as an acorn from across the room.
What you’ll need
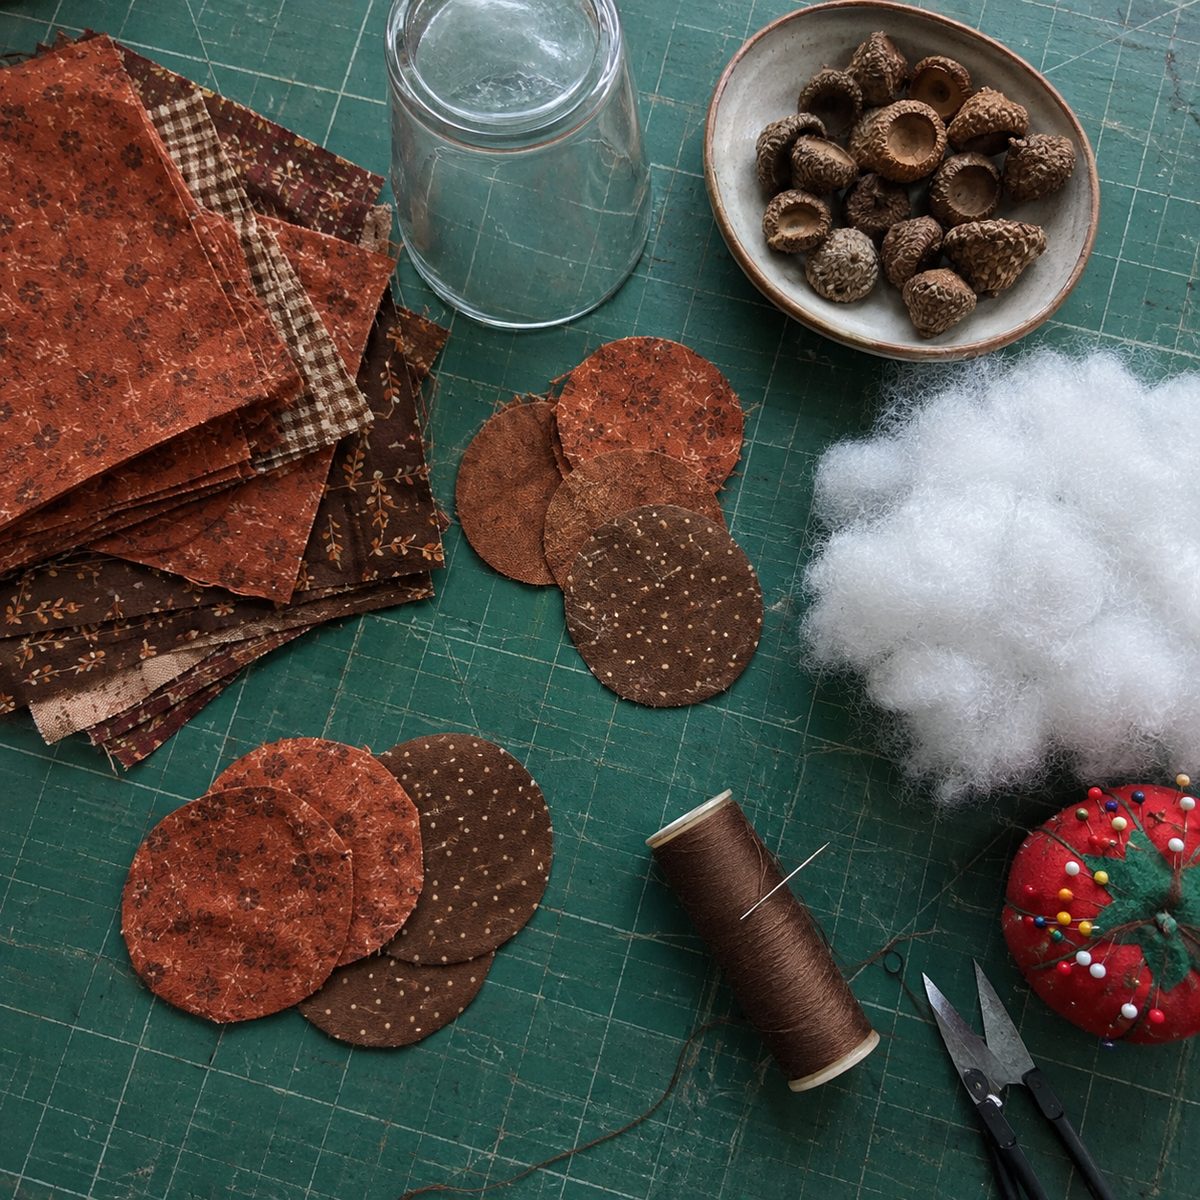
- Quilting cotton scraps, at least 5 by 5 inches each (one fat quarter gives you about 12 standard acorns)
- Polyester fiberfill, roughly a loose handful for every 6 acorns
- Hand-sewing needle, size 7 or 8 sharp, and strong thread: quilting thread, or all-purpose used doubled, in a color close to the fabric
- Real acorn caps, cleaned and baked (instructions below), or one 9 by 12 inch sheet of brown wool-blend felt
- Hot glue gun and glue sticks (low temp is fine), or E6000 if you want them to survive years in storage
- Jute twine, 6 inches per hanging loop, plus 6 feet if you are making a garland
- Cinnamon sticks for stem nubs, optional
- A circle template (a drinking glass or mug) and a fabric pen or pencil
| Piece | Cut size | Qty |
|---|---|---|
| Acorn body, small | 3 inch circle (finished acorn about 1 1/4 inches wide) | 1 per acorn |
| Acorn body, standard | 4 inch circle (finished acorn about 1 3/4 inches wide) | 1 per acorn |
| Acorn body, large | 5 inch circle (finished acorn about 2 1/4 inches wide) | 1 per acorn |
| Felt cap, if not using real caps | 2 inch circle for small, 2 1/2 inch for standard, 3 inch for large | 1 per acorn |
| Hanging loop | 6 inch length of jute twine | 1 per acorn, optional |
| Stem nub | 3/4 inch piece of cinnamon stick or twig | 1 per acorn, optional |
Fabric and prep
Quilting cotton is the right fabric, and this is one of the best scrap fabric projects I know because a 5 inch square is all you need. Small prints beat large ones. A print with a 2 inch repeat gets swallowed when the circle gathers into one random blob of color. Tiny florals, gingham, shirting stripes, and solids all read as acorns.
Skip anything stretchy. Knits gather unevenly and the stuffing shows through. Skip loosely woven linen too, because it frays at the gathered edge. My notes on how to choose fabric for sewing cover what to look for in a weave.
No prewashing. These never get washed. Press each scrap flat and trace your circle on the wrong side. A drinking glass is usually about 3 inches across the mouth, a coffee mug close to 4, a cereal bowl 5 or 6. Cut right on the line. A wobbly circle is fine, since the gathering hides every wobble.
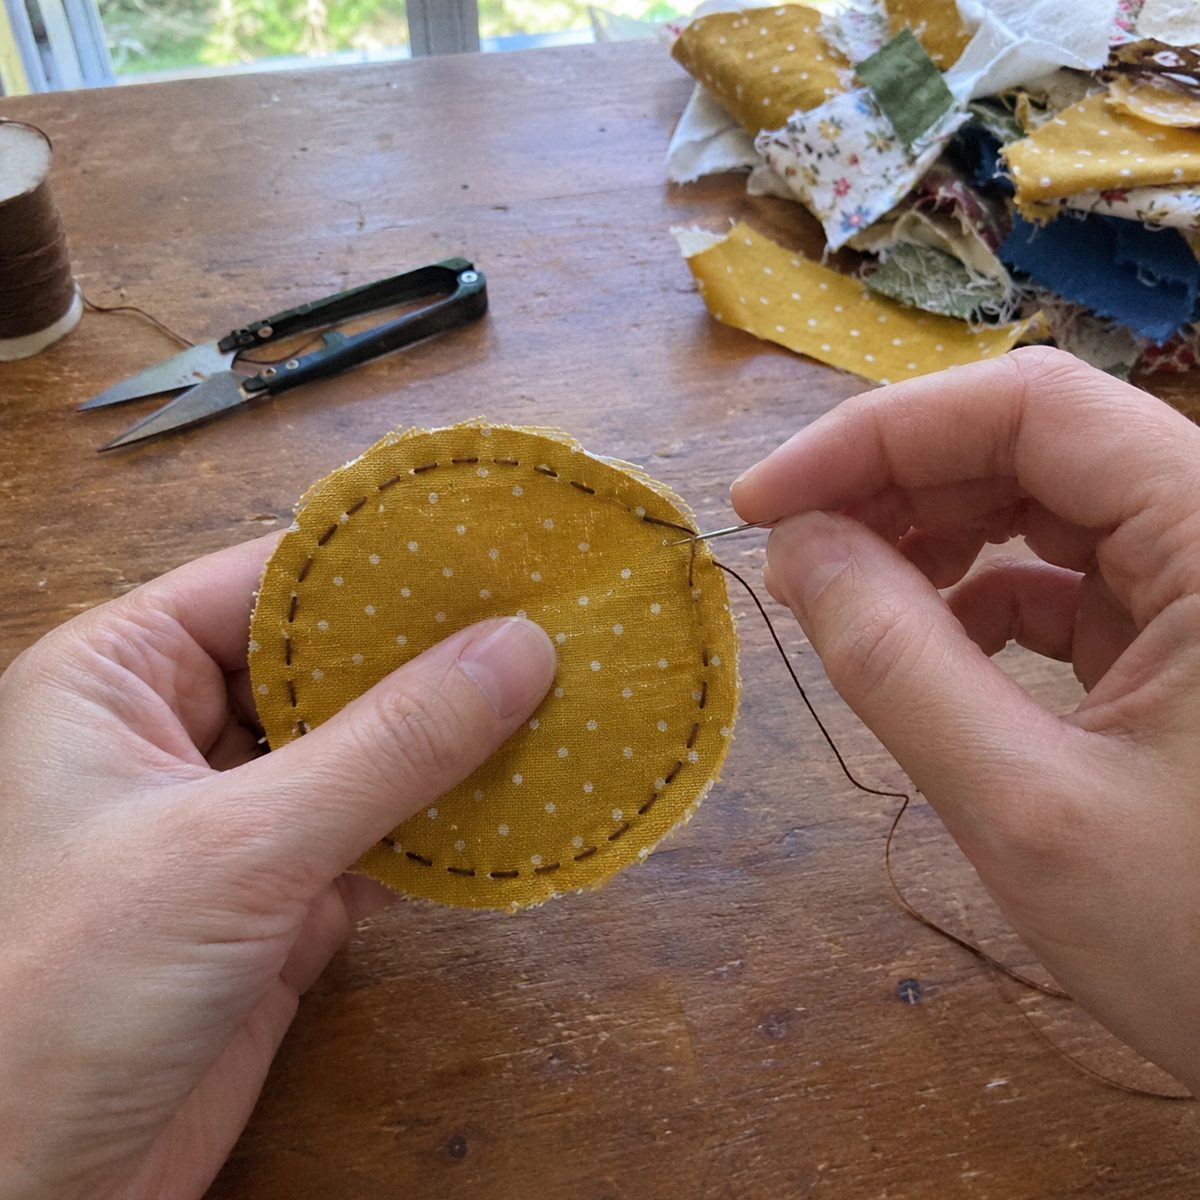
Sew the running stitch around the circle
- Cut about 24 inches of thread. With all-purpose thread, pull the ends even so you sew with a doubled strand, then tie a double knot. Quilting thread can be used single. The knot must be fat enough not to pull through cotton.
- Bring the needle up from the wrong side about 1/4 inch in from the raw edge. Sew a plain running stitch all the way around, each stitch about 3/16 inch long with gaps about the same. You should see a dashed ring sitting a steady 1/4 inch inside the edge. Do not make the stitches tiny. Tiny stitches gather into a stiff, bunchy top that will not close.
- If any stitch wanders closer than 1/8 inch to the edge, pull back to that point and redo it. A stitch that close rips through when you gather and leaves a gap you cannot fix.
- Finish next to where you started, on the wrong side, and do not knot off. Leave the needle threaded and hanging. The circle is still flat, with a loose thread tail and a ring of stitches.
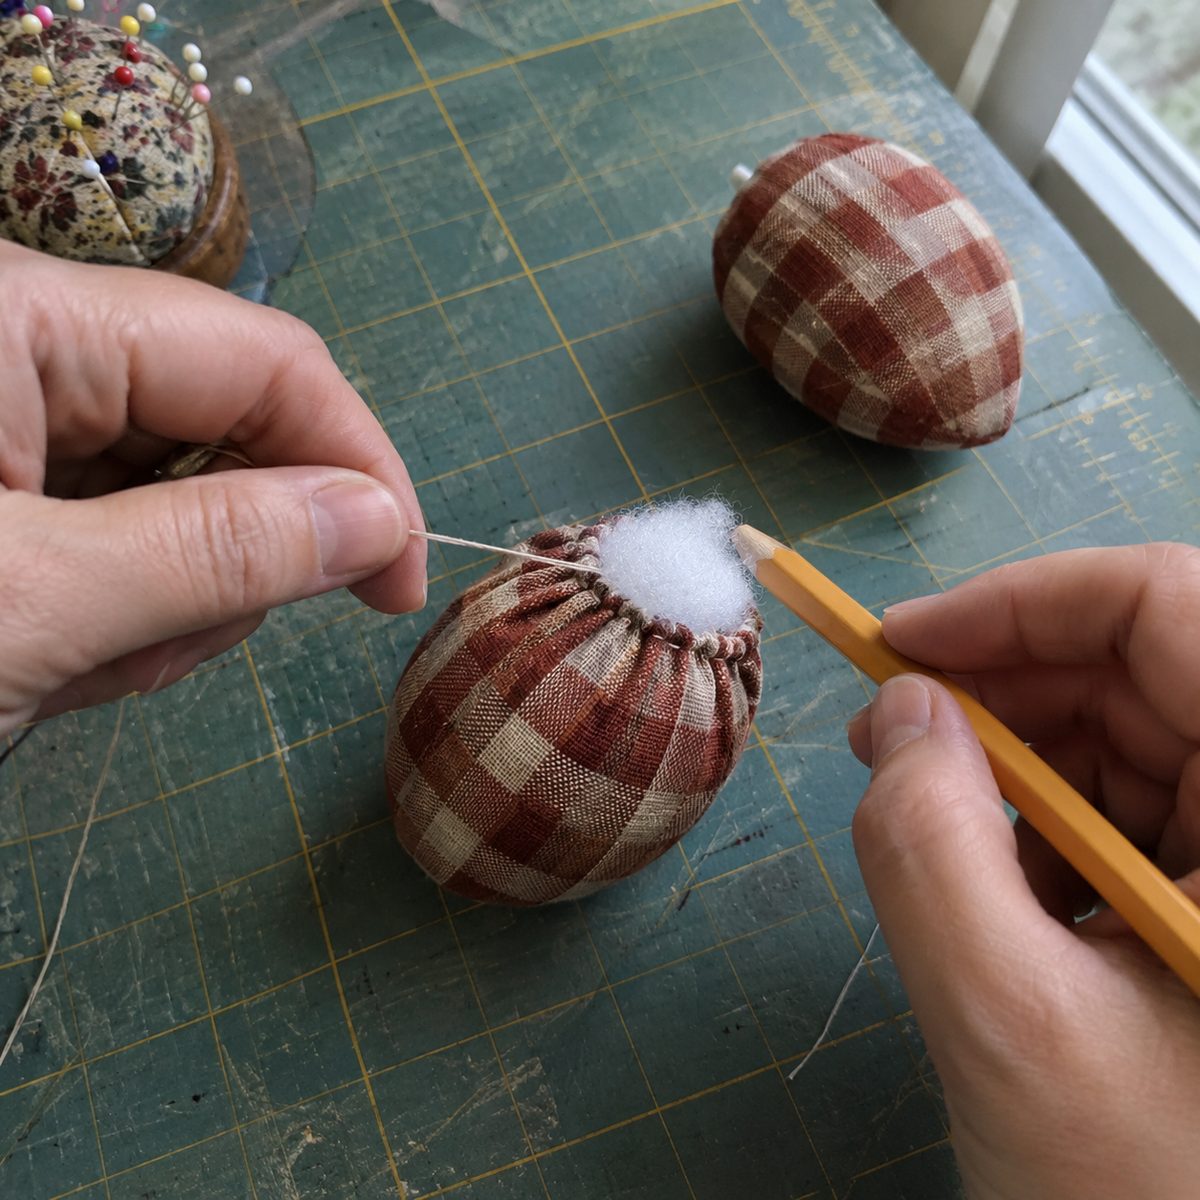
Gather, stuff, and close
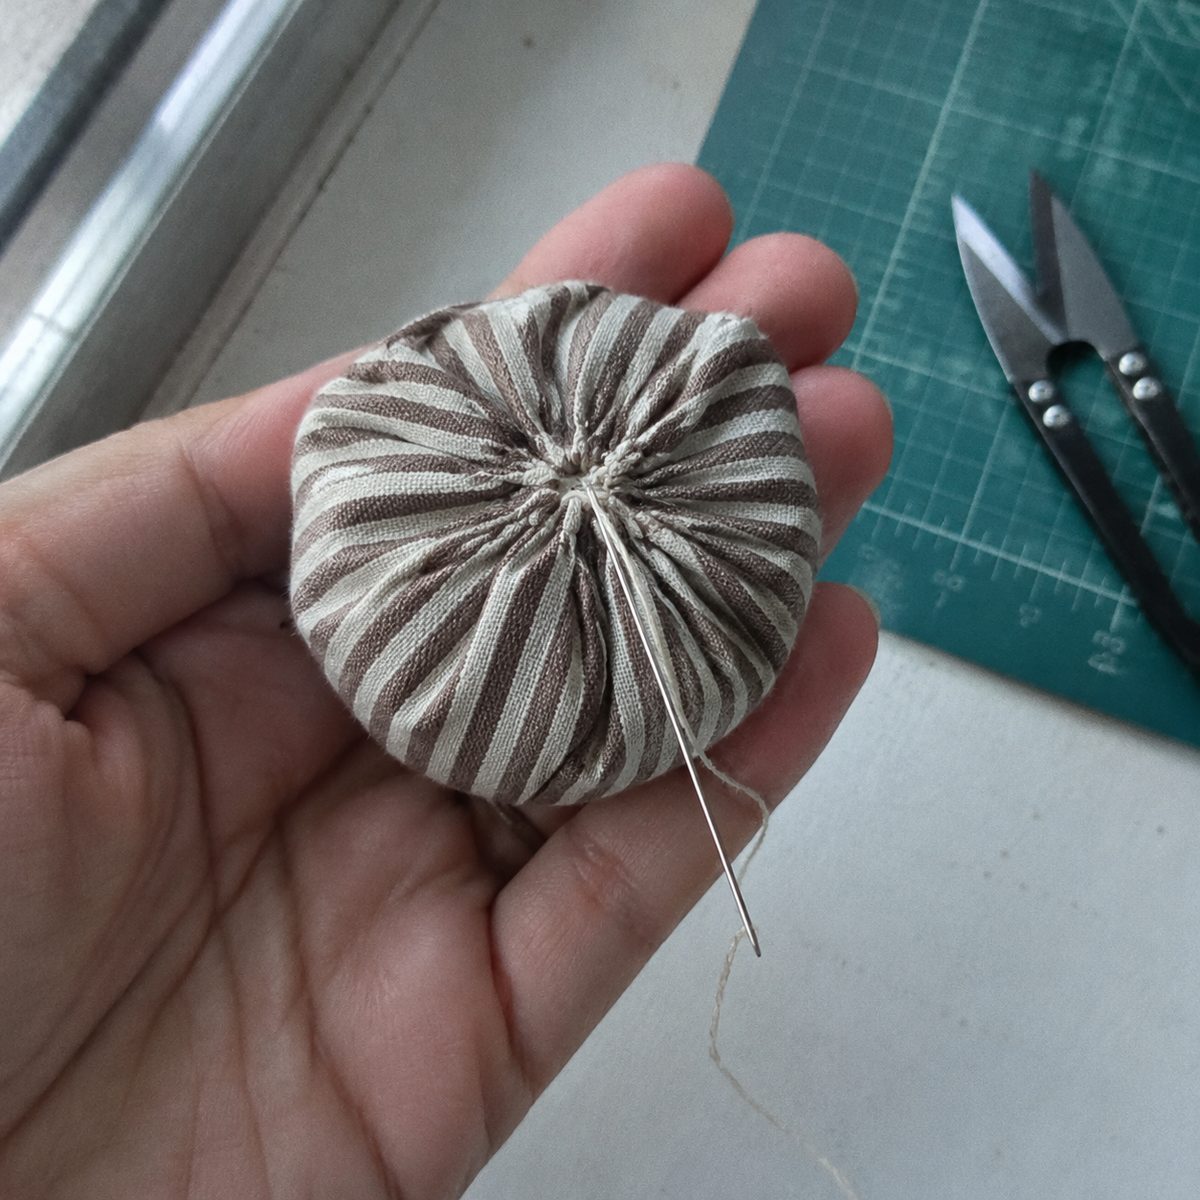
- Pull the thread gently so the circle cups up about halfway closed. It should look like a shallow fabric nest with the raw edges turning in.
- Push in stuffing in small pinches, not one wad. For a 4 inch circle you want about a walnut’s worth of fiberfill. Pack each pinch down with your thumb or a pencil end until the cup is overfull and pressing the side barely dents it. It will feel like too much. It is not.
- Pull the thread tight with your thumb holding the stuffing down. Tuck any raw edges that flare outward into the hole with the pencil as you pull. The opening should close to smaller than a pea, with neat little gathers standing up all the way around it.
- Take 4 or 5 stitches straight across the hole, crossing like the spokes of a wheel. This locks the gathers and flattens the top so a cap will sit on it. Knot off under the gathers with the end stitch, looping through the last stitch twice so it stays put.
- Roll the acorn between your palms to even out the stuffing. You should have a firm ball with one flat gathered top and one smooth round bottom.
Clean and glue a real acorn cap
Real caps are what make these look like acorns instead of fabric balls. Gather them in September and October from under any oak. White and red oak caps run about 3/4 to 1 inch across, which fits a 4 inch acorn. Bur oak caps are big and fringed and fit a 5 inch acorn.
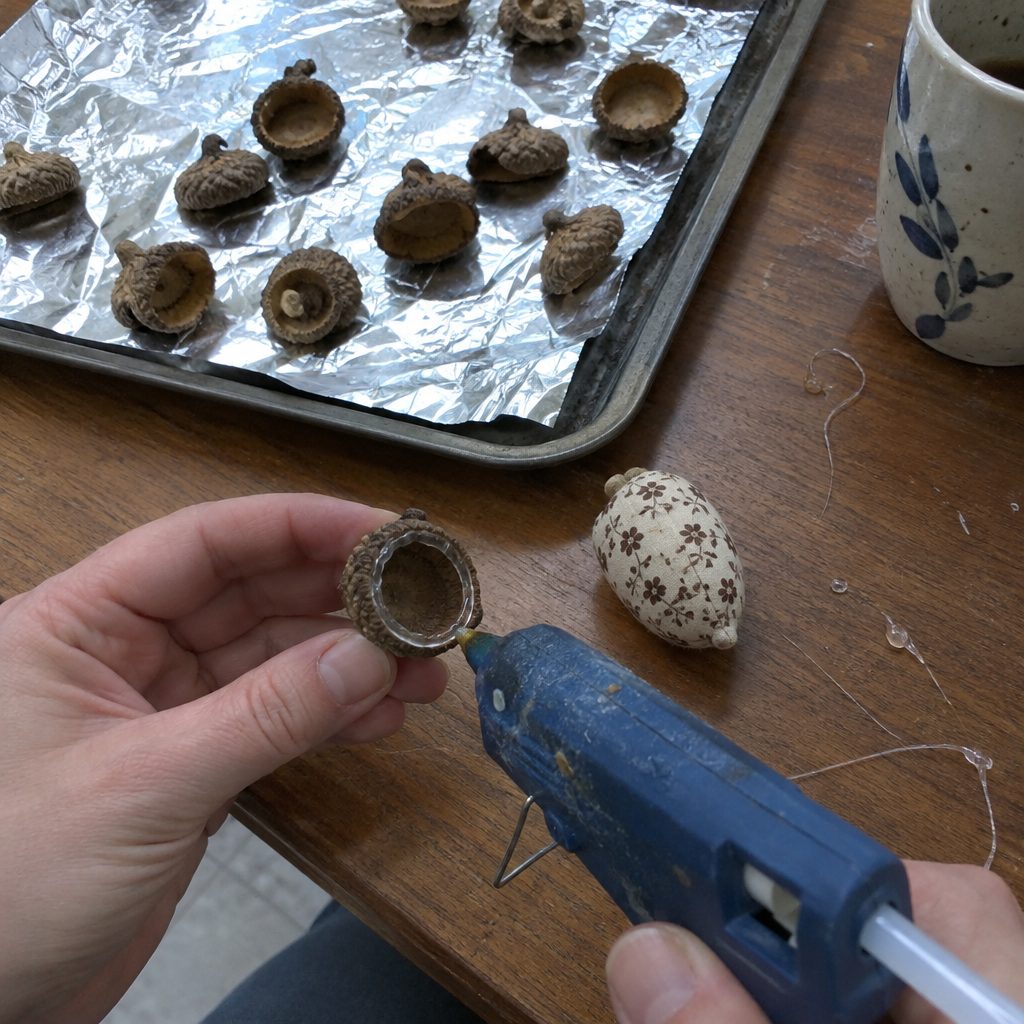
- Soak the caps in warm water with a squirt of dish soap for 10 minutes, swish, rinse, and spread on a towel. Caps with a round pinhole have had a weevil inside. Toss those.
- Put the damp caps on a foil-lined baking sheet and bake at 200 degrees F for 45 minutes. This dries them and kills anything living inside. A bowl of acorns hatching larvae in January is a real thing that happens. Cool completely. They should be dry, light, and smell faintly of toast.
- Match each cap to an acorn. The cap should cover the gathered top completely, with its edge about 1/8 inch down the side. If gathers peek out, try a bigger cap or a smaller acorn.
- Run a ring of hot glue around the inside rim of the cap, not a blob in the center. A center blob holds nothing because the cap is hollow there. For a hanging loop, fold a 6 inch piece of twine in half, knot the ends, and press the knot into the glue first. Press the cap onto the gathered top and hold for 10 seconds.
- Turn the acorn over and check that the cap does not rock or spin. If it does, pull it off while the glue is soft, add more to the rim, and reseat it. E6000 holds longer but needs 24 hours under a book.
Sew a felt cap instead
If you have no oaks nearby or want every cap to match, sew one. Use wool-blend felt. Craft felt pills and looks thin over the gathers.
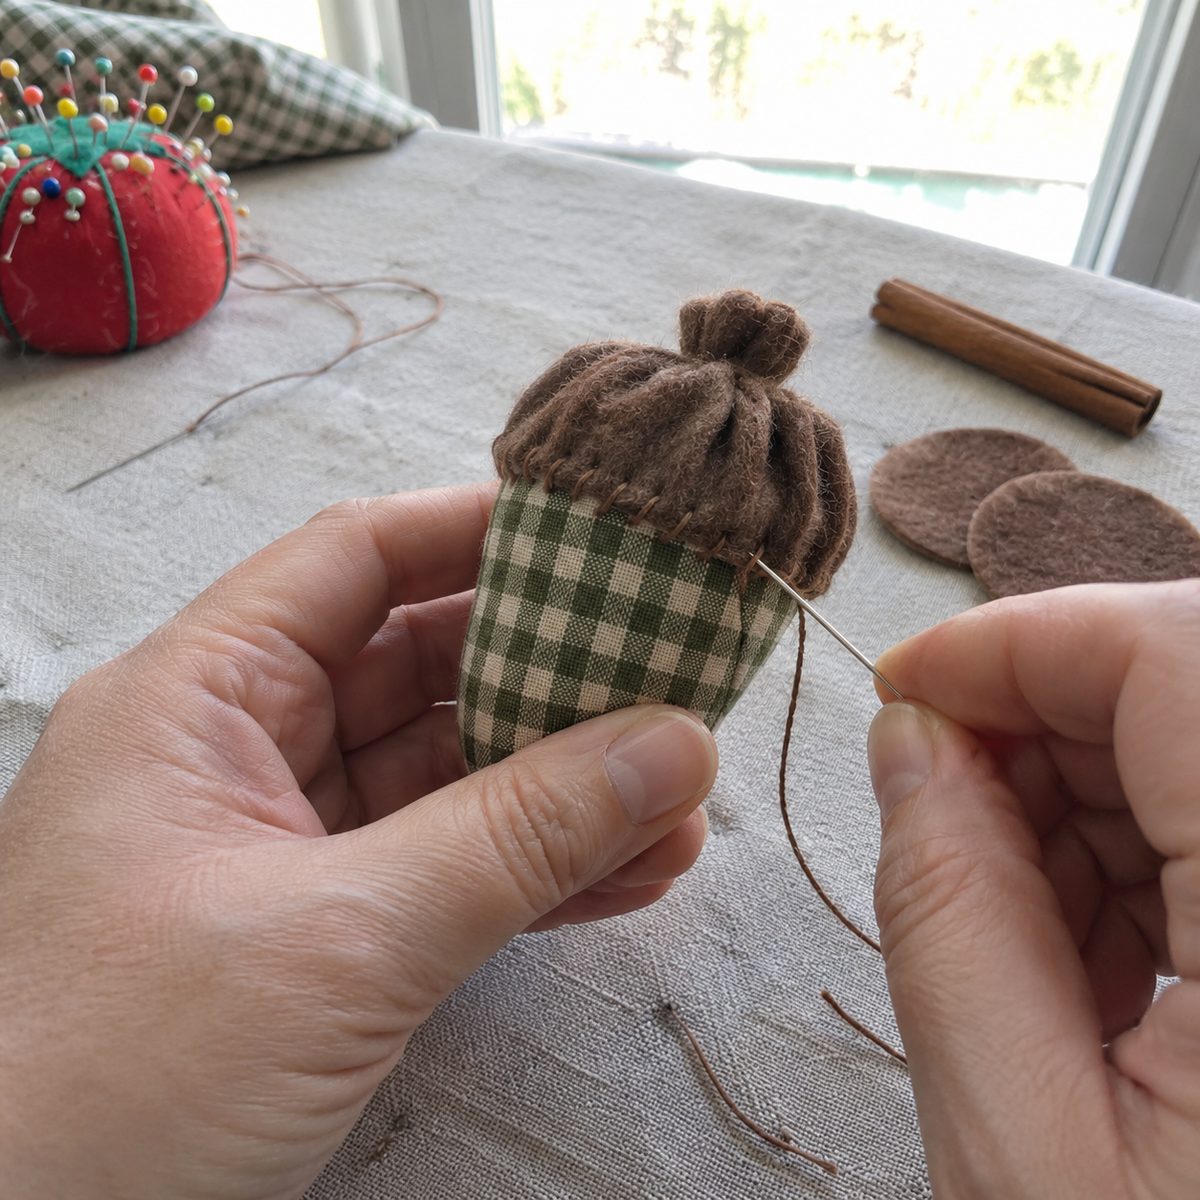
- Cut a felt circle from the cut chart (2 1/2 inches for a standard acorn). Sew a running stitch 1/4 inch from the edge as you did for the body, pull it into a loose cup, add a grape-sized pinch of stuffing, and pull tight. You should have a small domed puff with a flat gathered side.
- Set the puff gathered-side down on the top of the acorn so both raw sides are sandwiched and hidden.
- Whipstitch the felt edge to the body with brown thread, stitches about 1/8 inch apart, catching the felt and then a thread or two of cotton. Pull each stitch snug so the felt edge rolls down onto the ball. The seam should nearly disappear with no gap under the cap.
- For a stem, snip a 3/4 inch piece off a cinnamon stick. Press the blunt end of your scissors into the center of the cap to make a dent, dab hot glue in it, and hold the stem upright for 10 seconds. The room smells like cinnamon for the rest of the day, which I count as a feature.
Loops, place settings, and a garland
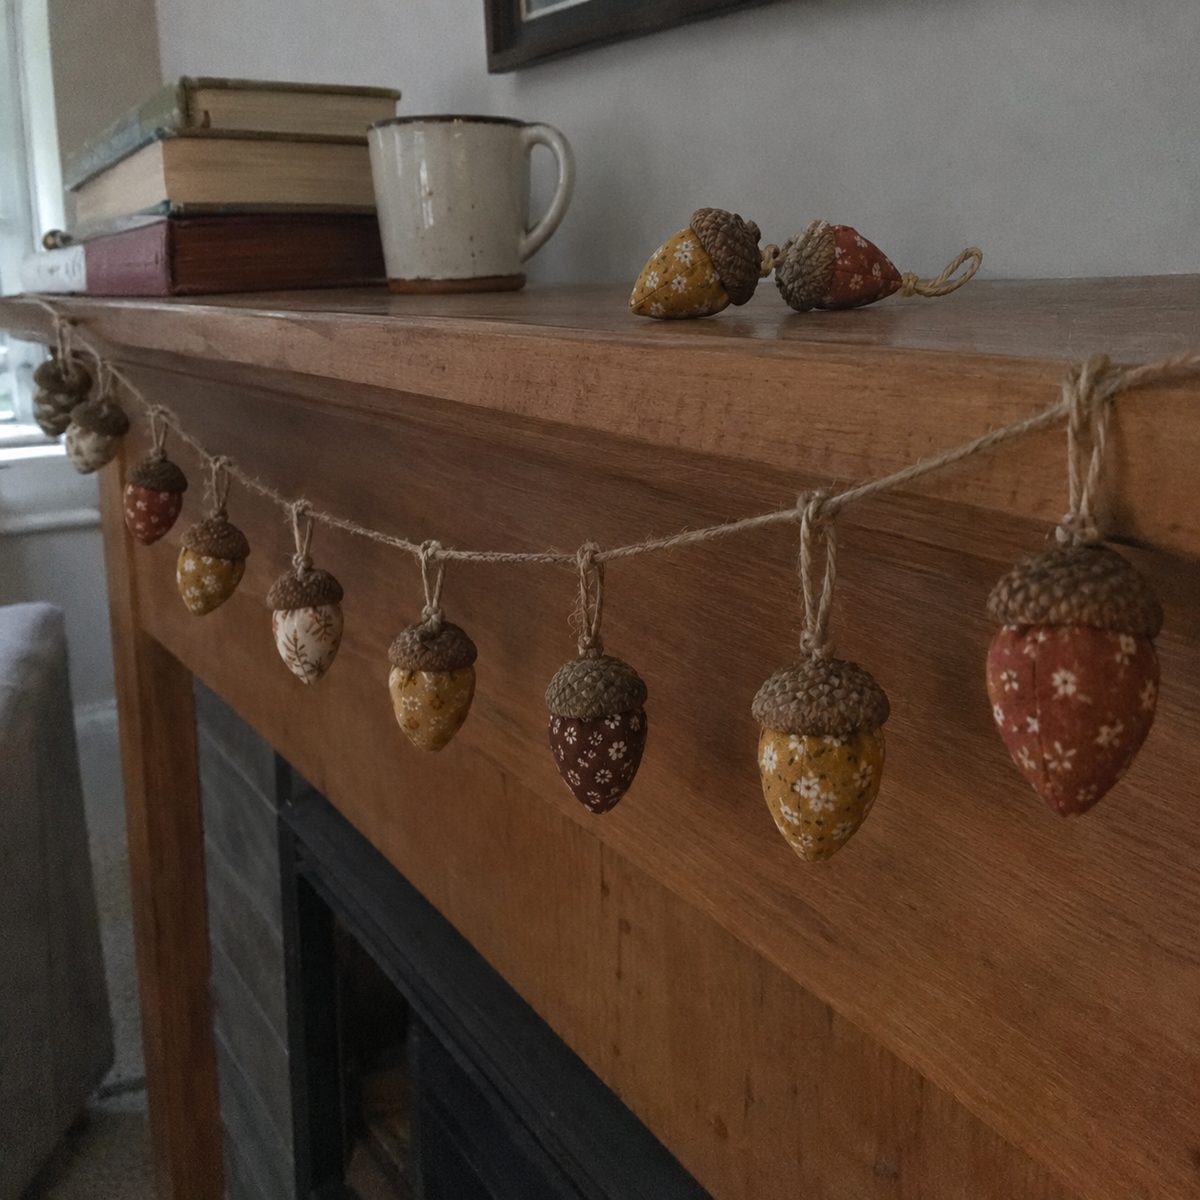
- For a garland, make 15 to 20 standard acorns with twine loops under the caps, and cut 6 feet of jute for the main cord. Tie a 2 inch loop at each end for hanging.
- Thread each acorn’s loop over the cord and pass the acorn through its own loop. That forms a lark’s head knot that grips the cord but still slides. Space them 3 to 4 inches apart. The acorns should hang cap-up with the cord nearly hidden behind the caps.
- Mix sizes and prints along the cord. I alternate a large acorn with two standards and keep solids between the prints so no two matching fabrics touch.
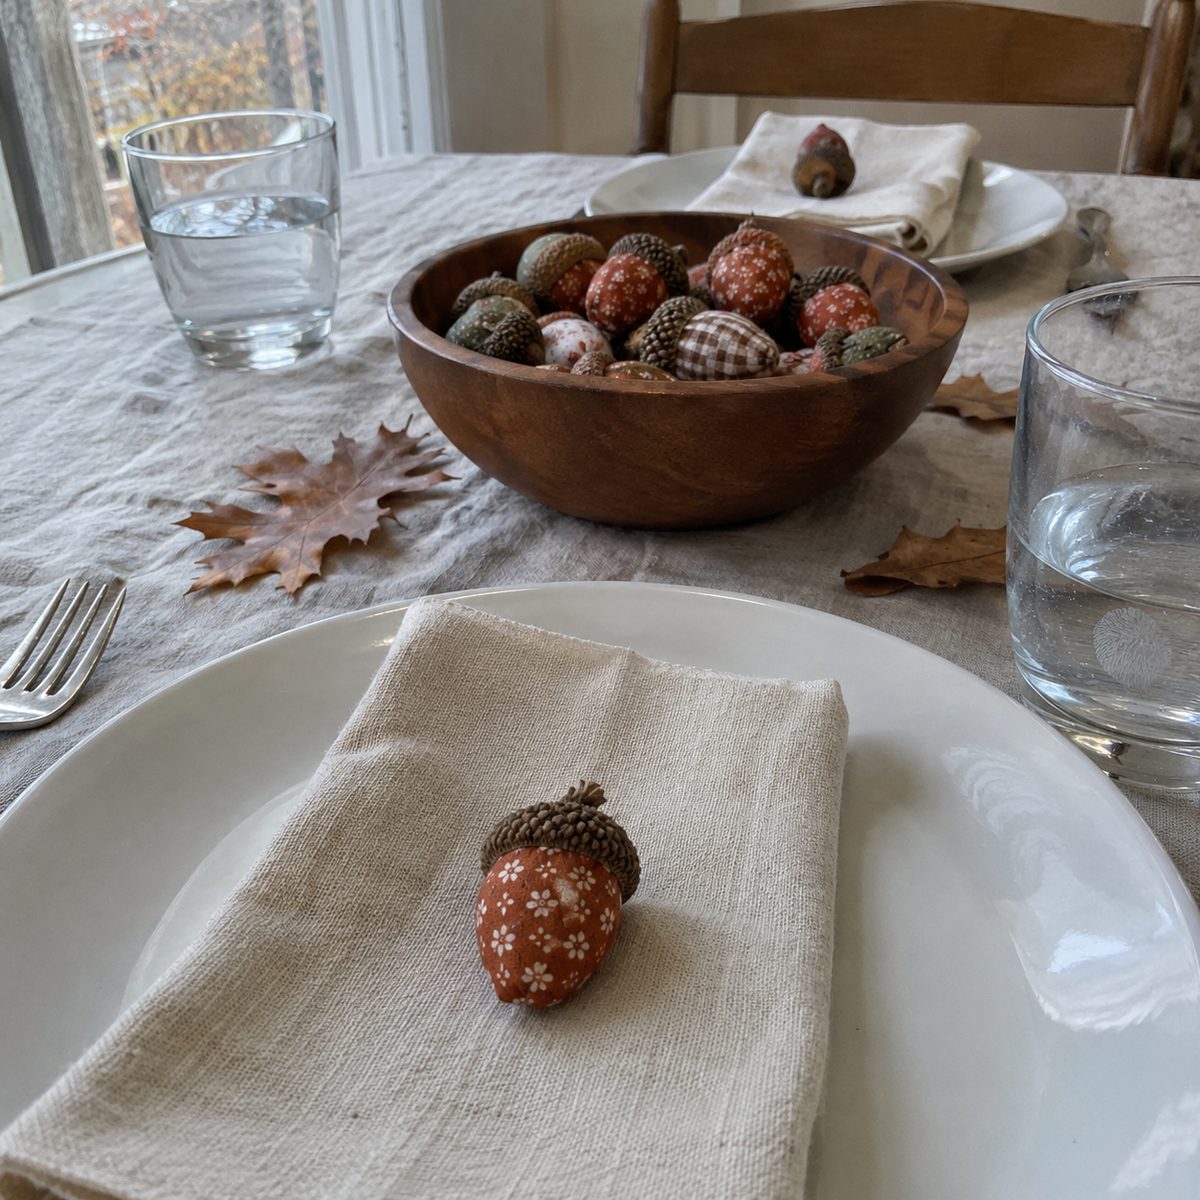
- For place settings, make one small acorn per guest and set it on the folded napkin. Twelve small ones use one fat quarter and about an hour and a half of sewing.
Fixes for the things that go wrong
The gathered top is lumpy or has a hole showing
Your stitches were too short or too close to the edge, or you did not tuck the raw edges in before pulling tight. Loosen the gather, poke the edges inside with a pencil, pull again, and relock. A real cap hides a slightly rough top. A felt cap hides anything.
The acorn is soft or wrinkled
Not enough stuffing. Snip the locking stitches, loosen the gather, pack in more fiberfill in small pinches, and close it again. A firm acorn takes about twice the stuffing you first guess. If the side dents under a thumb and stays dented, add more.
The cap keeps popping off
Glue in the middle of the cap instead of around the rim. The inside of a real cap is a hollow dome, so a center blob dries in midair touching nothing. Peel it off, run a bead around the rim, and press the cap down with a slight twist. Also check that the top of the acorn is flat. A pointy top gives the cap one contact point.
Dust or tiny larvae appear under the caps weeks later
The caps were not baked long enough. Acorn weevils lay eggs in the nut and some caps carry them too. Pull the caps, bake at 200 degrees F for 45 minutes, and reglue.
Variations and batch ideas
The three sizes mix well in one bowl. For an 8 inch wooden bowl I make 6 large, 10 standard, and 6 small. Keep one fabric family across the batch, like all plaids or all rust and mustard prints, and let the mixed sizes do the work.
Fabric swaps change the season. Red gingham with a forest green felt cap makes a Christmas ornament, and the jute loop hangs it on the tree. Black and orange ticking stripe turns them into Halloween bowl fillers that store with everything else from the fall sewing projects list. Velveteen makes a fancier Thanksgiving acorn, but it frays at the gathers, so cut the circle 1/4 inch bigger.
A set of five in a small kraft box with a few real leaves is a good hostess gift and costs under two dollars in materials. For batch making, work in stages. Trace and cut 20 circles in one sitting, sew all 20 running stitches during a movie, stuff and close the next evening, then glue all the caps at once. Twenty acorns take about three hours this way.
Frequently asked questions
Can I use a sewing machine for fabric acorns?
Not really, and you would not want to. The running stitch has to be pulled to gather, so it needs a free thread tail, and machine stitches lock at both ends. You could sew a long machine basting stitch and pull the bobbin thread, but threading a hand needle is faster than winding a bobbin. Each acorn is a five-minute sewing job.
Where do I find acorn caps if I have no oak trees?
Ask a neighbor with an oak, check any park or school grounds in late September, or look in the floral aisle of a craft store, where bags of dried caps sell for a few dollars in fall. Online sellers ship them by the hundred. Bake store-bought caps too, since they are not always treated. Otherwise, sew the felt cap version.
How firm should a fabric acorn be?
Firm enough that pressing a thumb into the side leaves almost no dent and the dent springs back. Squeeze it between finger and thumb. If it compresses more than about a quarter of its width, it needs more stuffing. Firmness is what gives the acorn a smooth round body and a flat top for the cap.
Which fabrics look most like real acorns?
Solid rust, caramel, and brown cotton read as acorns at a glance. Small-scale prints in warm fall colors look like a decorated acorn, which is the point for most people. Avoid large prints, anything shiny, and anything with stretch. Flannel is soft but puffs up at the gathers, so cut flannel circles 1/4 inch smaller than the chart.
Once you have made two or three of these you will stop measuring and start grabbing whatever scrap is on top of the pile. That is when they get good. Make a bowlful this week and you will have them for ten falls.