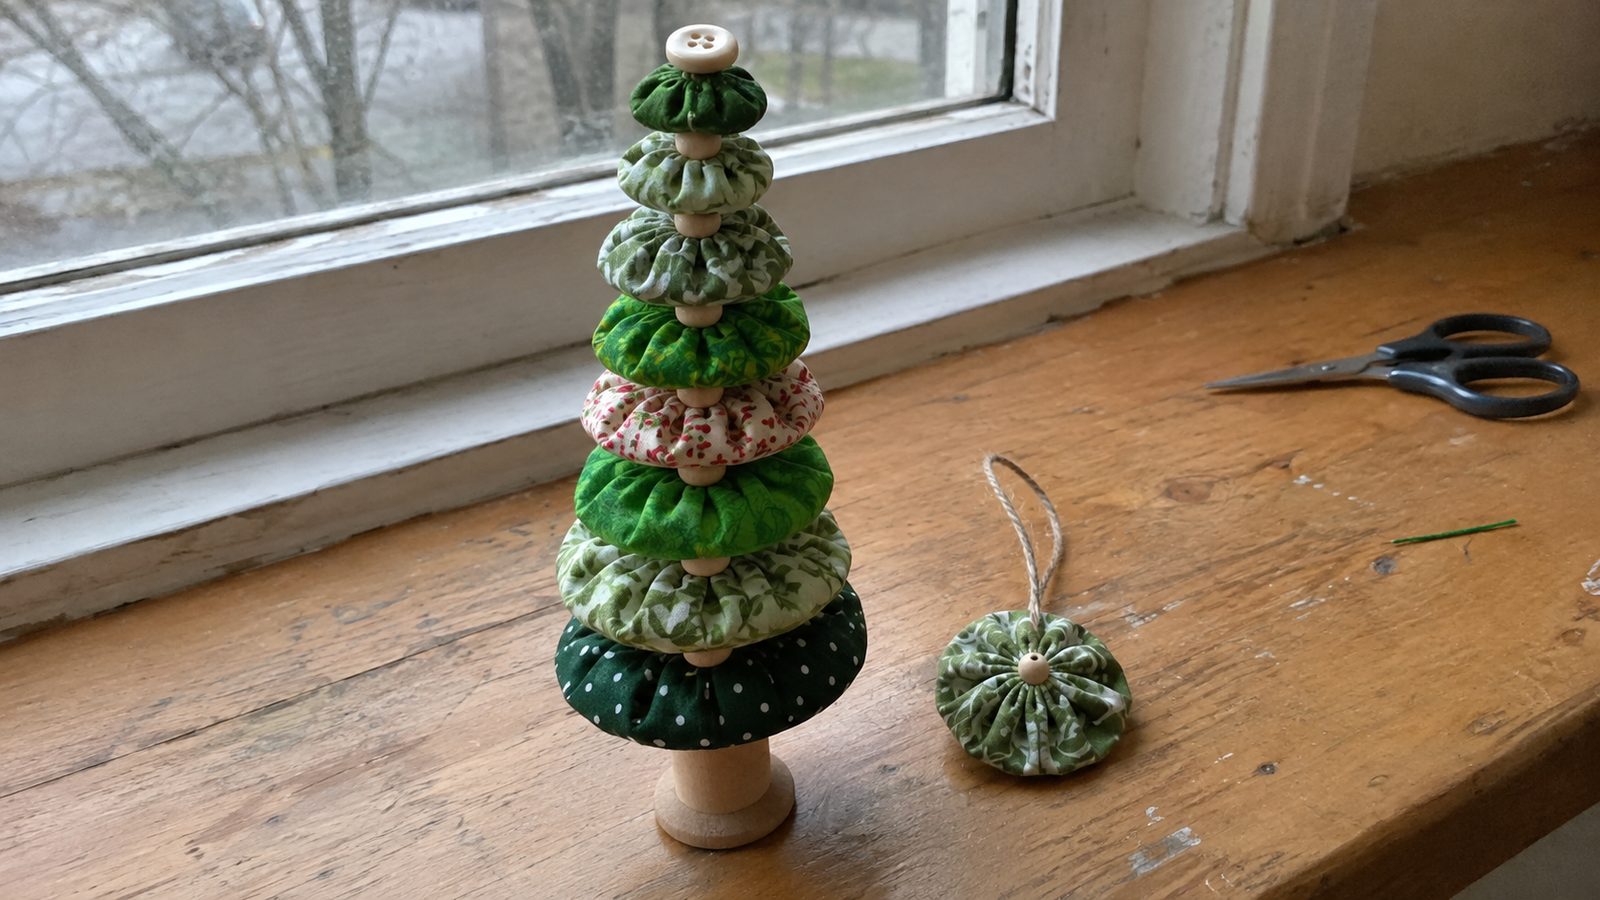
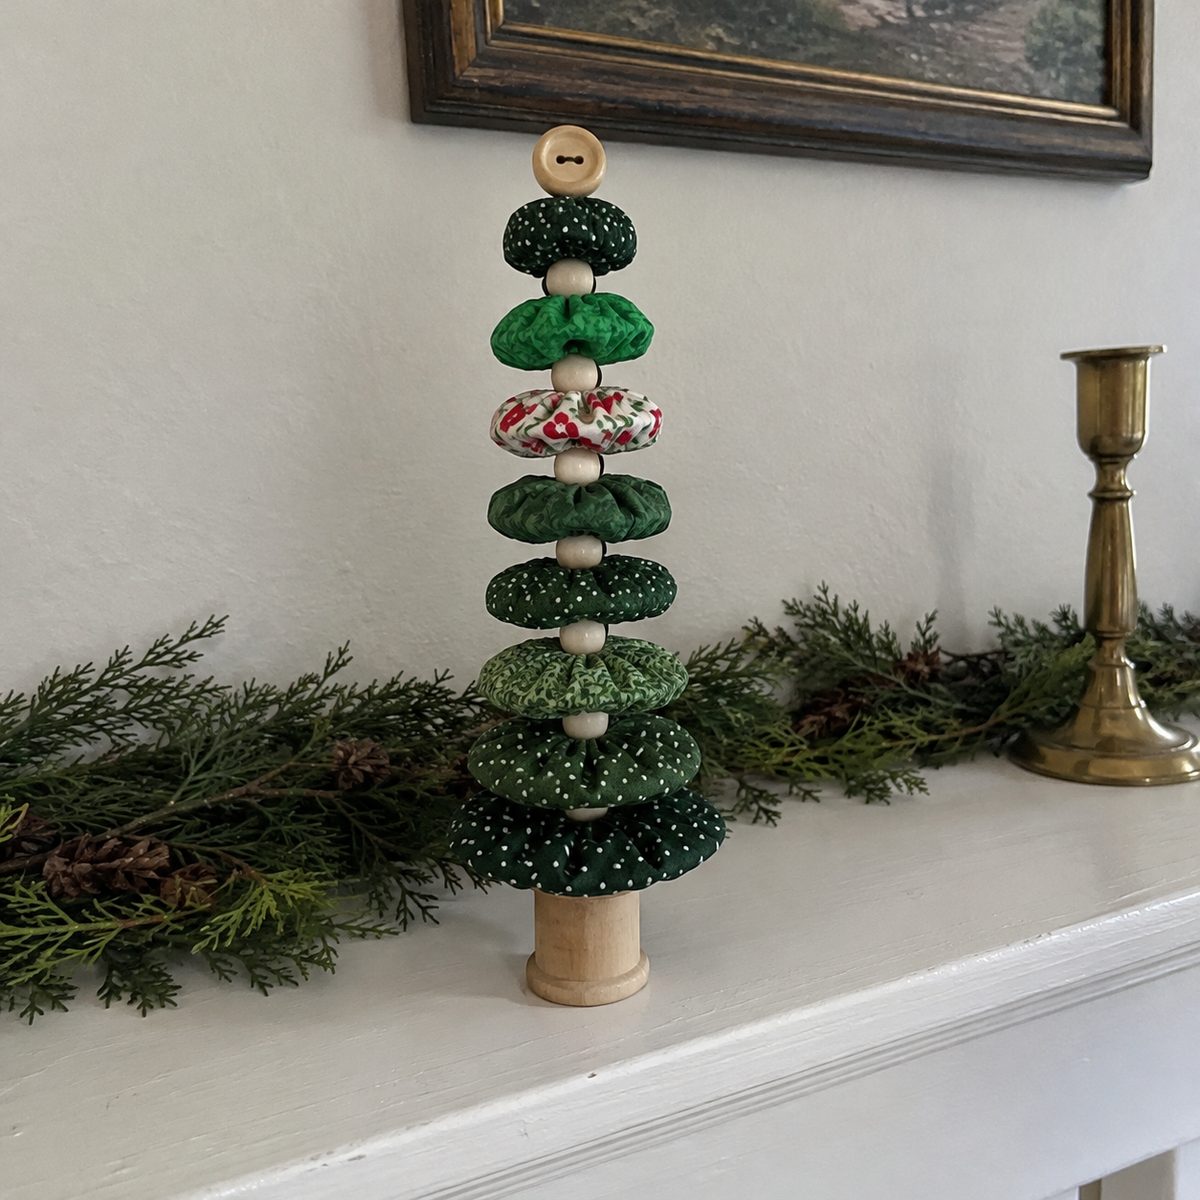
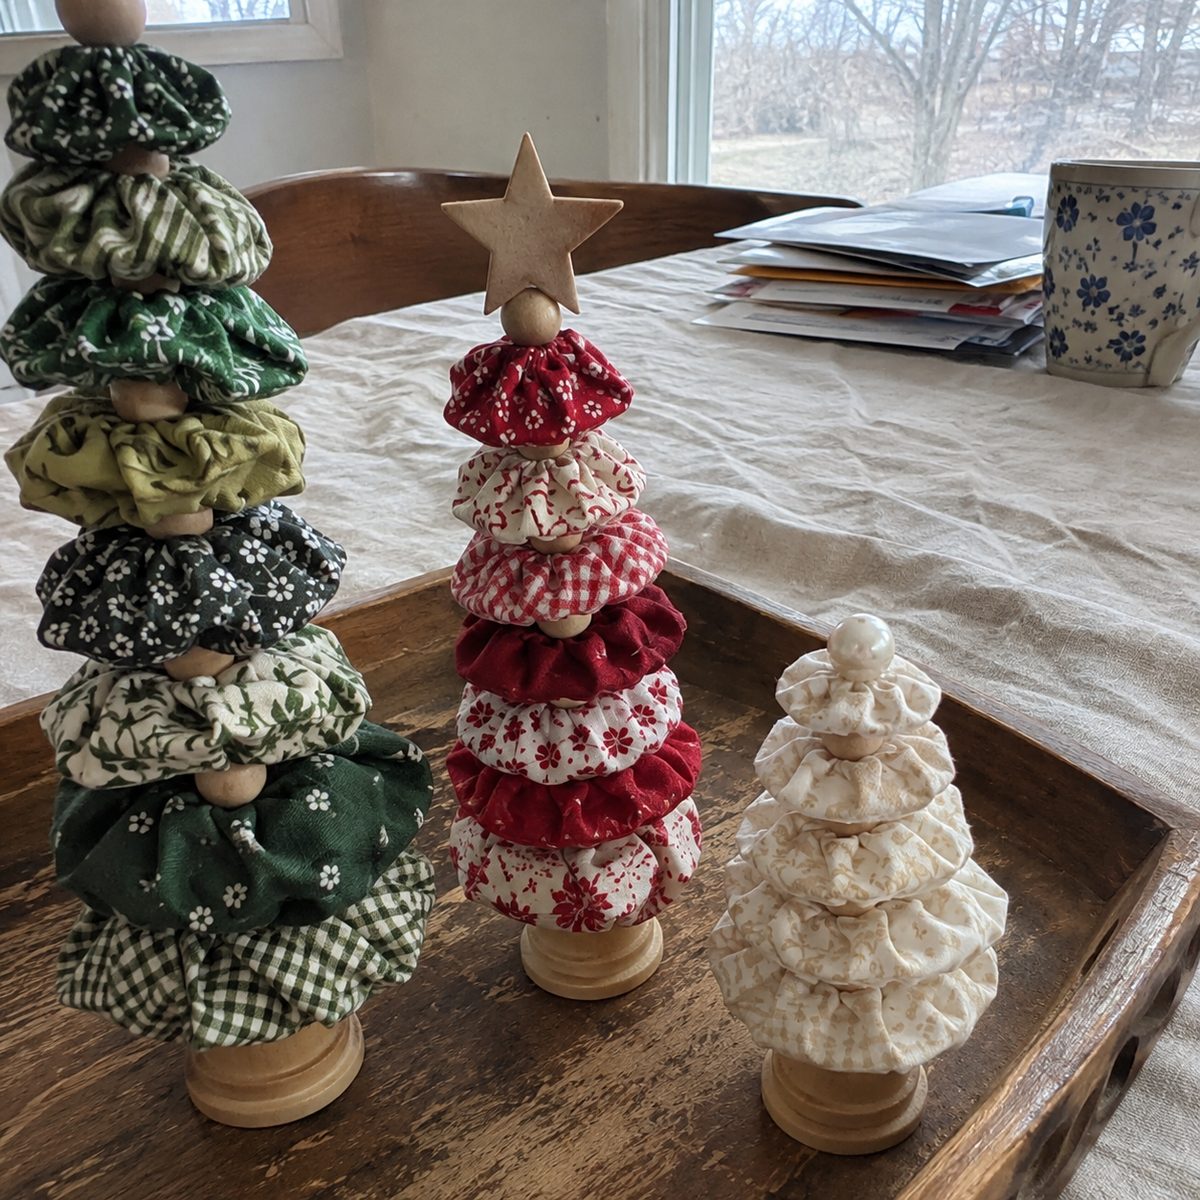
A yo-yo Christmas tree is a stack of fabric yo-yos, the gathered circles quilters also call Suffolk puffs, threaded onto a skewer from biggest to smallest so they build a cone. Mine stands on an old wooden thread spool with a button on top. A smaller five-layer version hangs on the tree.
The tabletop tree takes nine yo-yos and about an hour. The ornament takes five and about 25 minutes. All of it is hand sewing with one running stitch, so this is a true beginner project.
The one thing that makes it come out well: take bigger running stitches than feel natural. Long stitches gather into a small, tidy hole. Tiny stitches leave a gaping center that no amount of tugging will close.
What you’ll need
- Green quilting cotton scraps in 5 to 7 prints, each at least 6 by 6 inches (one fat quarter covers the whole tree in a single fabric)
- Hand quilting thread, 40 weight, green or tan, used doubled
- A size 8 sharp hand needle (a between works; a long milliner’s needle does not)
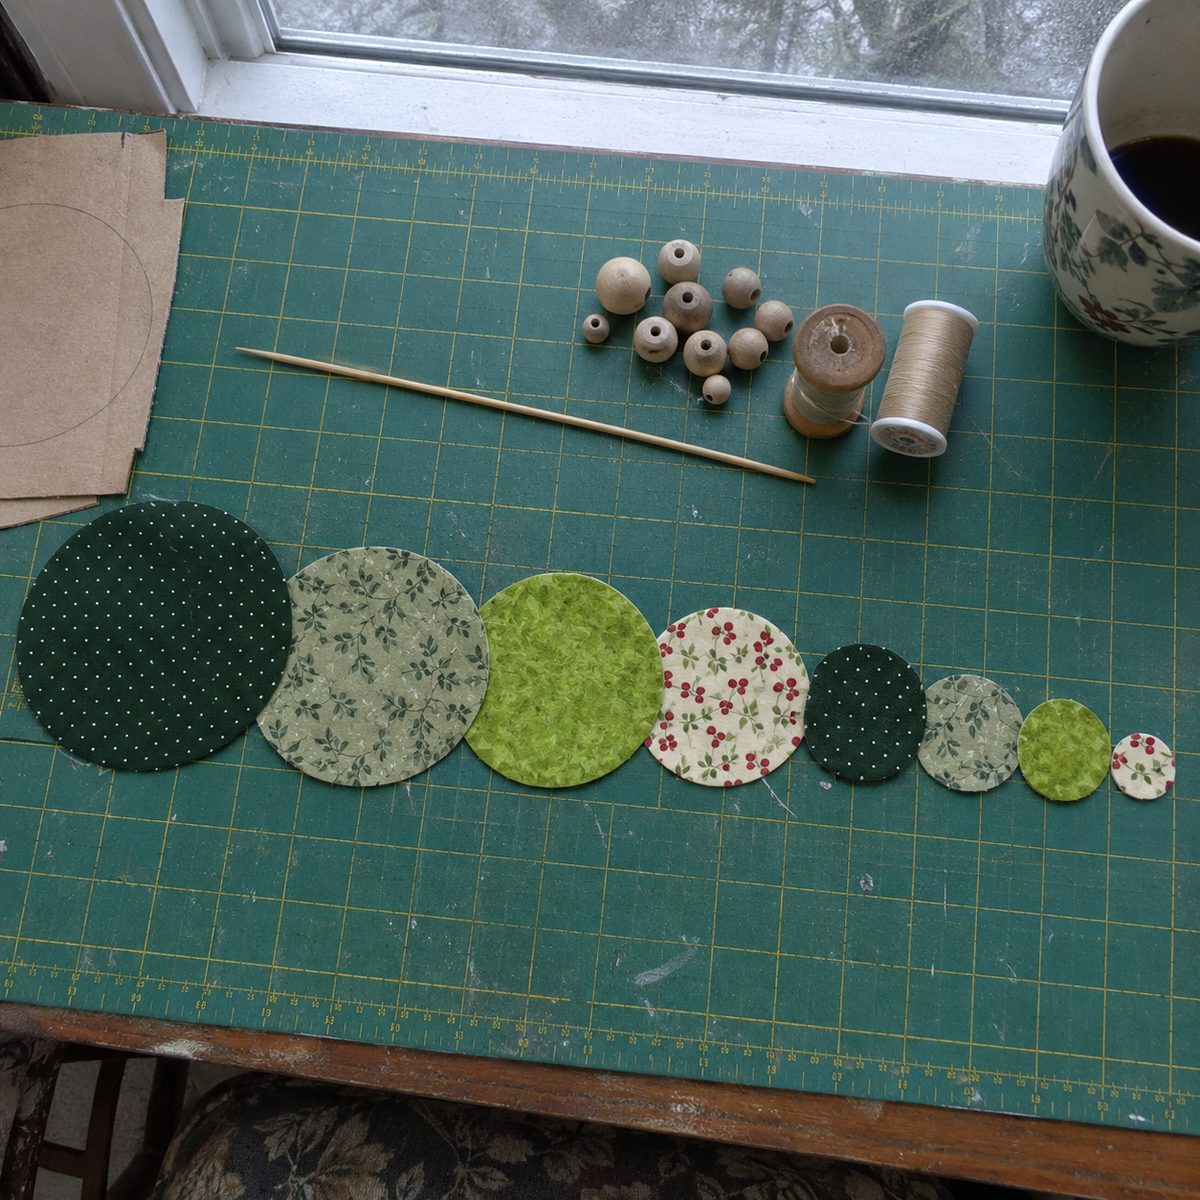
- Circle templates cut from a cereal box, or jar lids and plates of the right widths
- A 10-inch bamboo skewer or 1/8-inch dowel
- Wooden beads: eight at 1/2 inch (12 mm) with a hole the skewer fits through, plus six at 1/4 inch (6 mm) for the ornament
- A base: a wooden thread spool about 1 1/4 inches tall or a wine cork, plus a dab of hot glue
- A 3/4-inch button or a star bead for the top, a sharp pencil, small scissors and spray starch
Circle sizes and what they finish at
A yo-yo finishes at about half its cut size, less a scant quarter inch for the hem. The 6-inch circle gives a 2 3/4-inch yo-yo and the 2-inch circle gives a 3/4-inch one. Half-inch steps in cut size give a clear taper.
| Piece | Cut size | Qty |
|---|---|---|
| Tree layer 1, bottom (finishes 2 3/4 in) | 6-inch circle | 1 |
| Tree layer 2 (2 1/2 in) | 5 1/2-inch circle | 1 |
| Tree layer 3 (2 1/4 in) | 5-inch circle | 1 |
| Tree layer 4 (2 in) | 4 1/2-inch circle | 1 |
| Tree layer 5 (1 3/4 in) | 4-inch circle | 1 |
| Tree layer 6 (1 1/2 in) | 3 1/2-inch circle | 1 |
| Tree layer 7 (1 1/4 in) | 3-inch circle | 1 |
| Tree layer 8 (1 in) | 2 1/2-inch circle | 1 |
| Tree layer 9, top (3/4 in) | 2-inch circle | 1 |
| Hanging ornament, 5 layers (1 3/4 in down to 3/4 in) | 4, 3 1/2, 3, 2 1/2 and 2-inch circles | 1 each |
Fabric and prep
Quilting cotton, nothing else. It folds crisply and holds a press. Flannel makes fat gathers and a hole you could put a finger through. Thin lawn cups instead of lying flat.
Pull 5 to 7 green prints and mix the scale. Large prints go on the three biggest circles. Tiny dots go on the small ones, because a 2-inch circle shows about a square inch of fabric once gathered. Alternate dark and light up the tree. One layer of red or cream print in the middle gives the eye a place to land.
No need to prewash a decor piece. Do starch. Spray each scrap, wait 30 seconds and press it dry. Starched cotton cuts cleaner and the hem folds itself.
Trace the templates on the wrong side with a sharp pencil and cut just inside the line. Pencil the size on each circle. Small wobbles in the cutting disappear in the gathers.
Sew the yo-yos
The 6-inch yo-yo takes about seven minutes, the 2-inch one about three. Do them in a row.
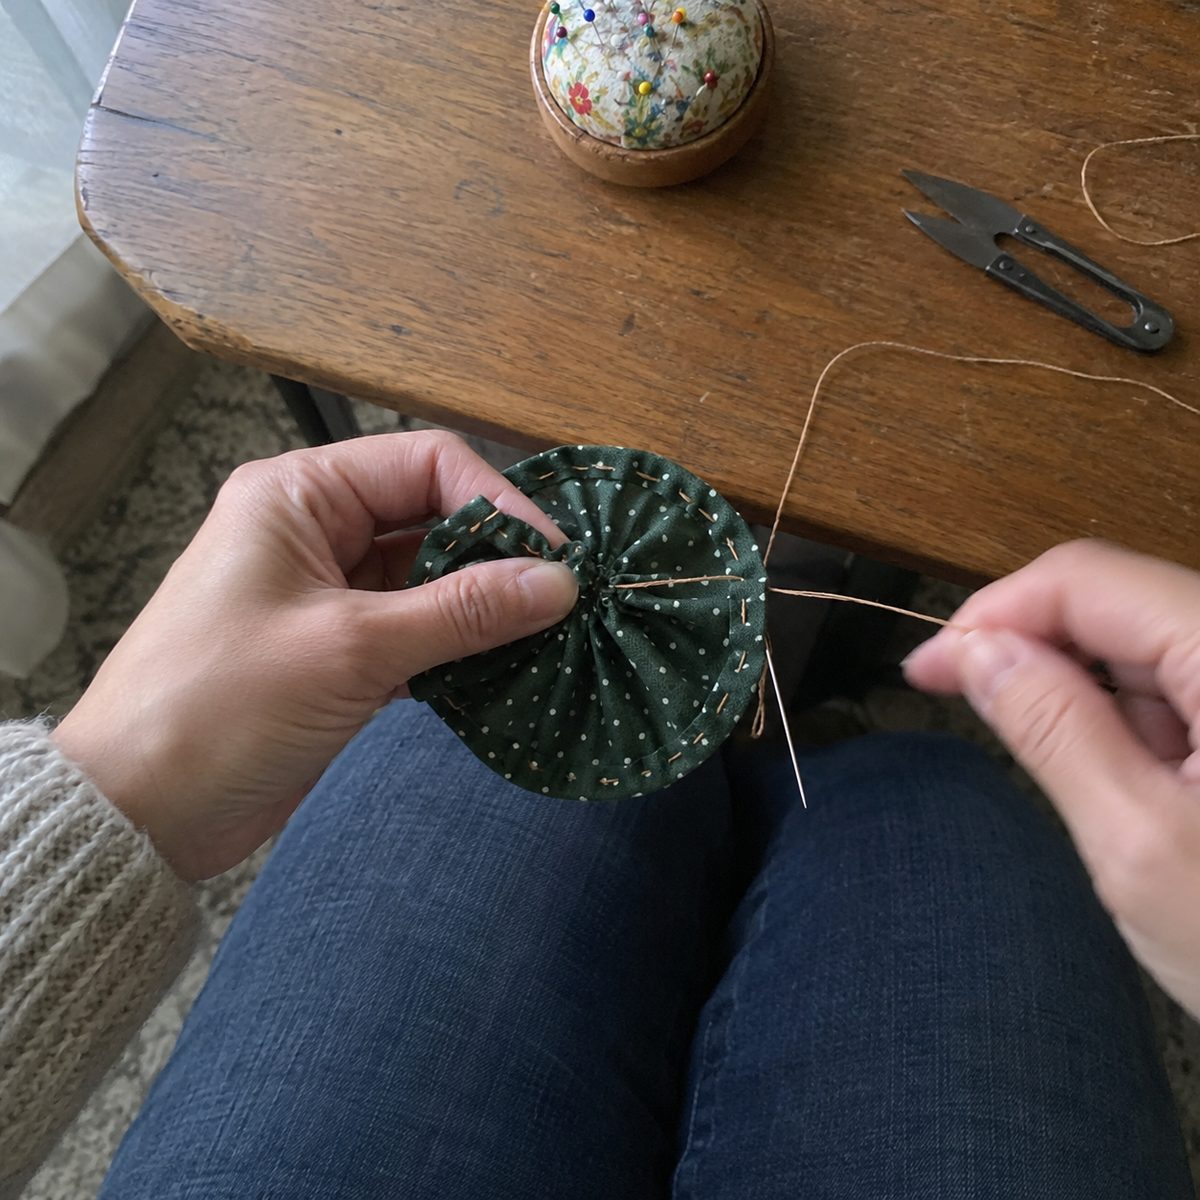
- Cut two strands of quilting thread about four times the circle’s width (24 inches for the 6-inch circle, 8 inches for the 2-inch). Thread both through the needle and knot the four ends together. A single strand snaps when you gather.
- Hold the circle wrong side up. Fold a 1/4-inch hem toward you along a couple of inches of edge and pinch it. Bring the needle up from inside the fold so the knot is buried in the hem, with nothing showing on either side.
- Sew a running stitch through both layers of the fold, about 1/8 inch from the folded edge. Make the stitches 1/4 to 3/8 inch long on circles 4 inches and up, and about 3/16 inch on the small ones. Fold the hem as you go, an inch ahead of the needle. The fold should be roughly the same width all round.
- Back at the start, pull the thread. The edge draws into the middle. Pull firmly, push the gathers toward the center with your fingertips and pull again. On a 6-inch circle the hole should be smaller than a pea. On the 2-inch circle it should almost disappear.
- Take two small stitches across the gathered hole, pass the needle through to the back and knot off against the back. Pass the tail between the layers and trim. Tug the yo-yo. The hole should not loosen at all.
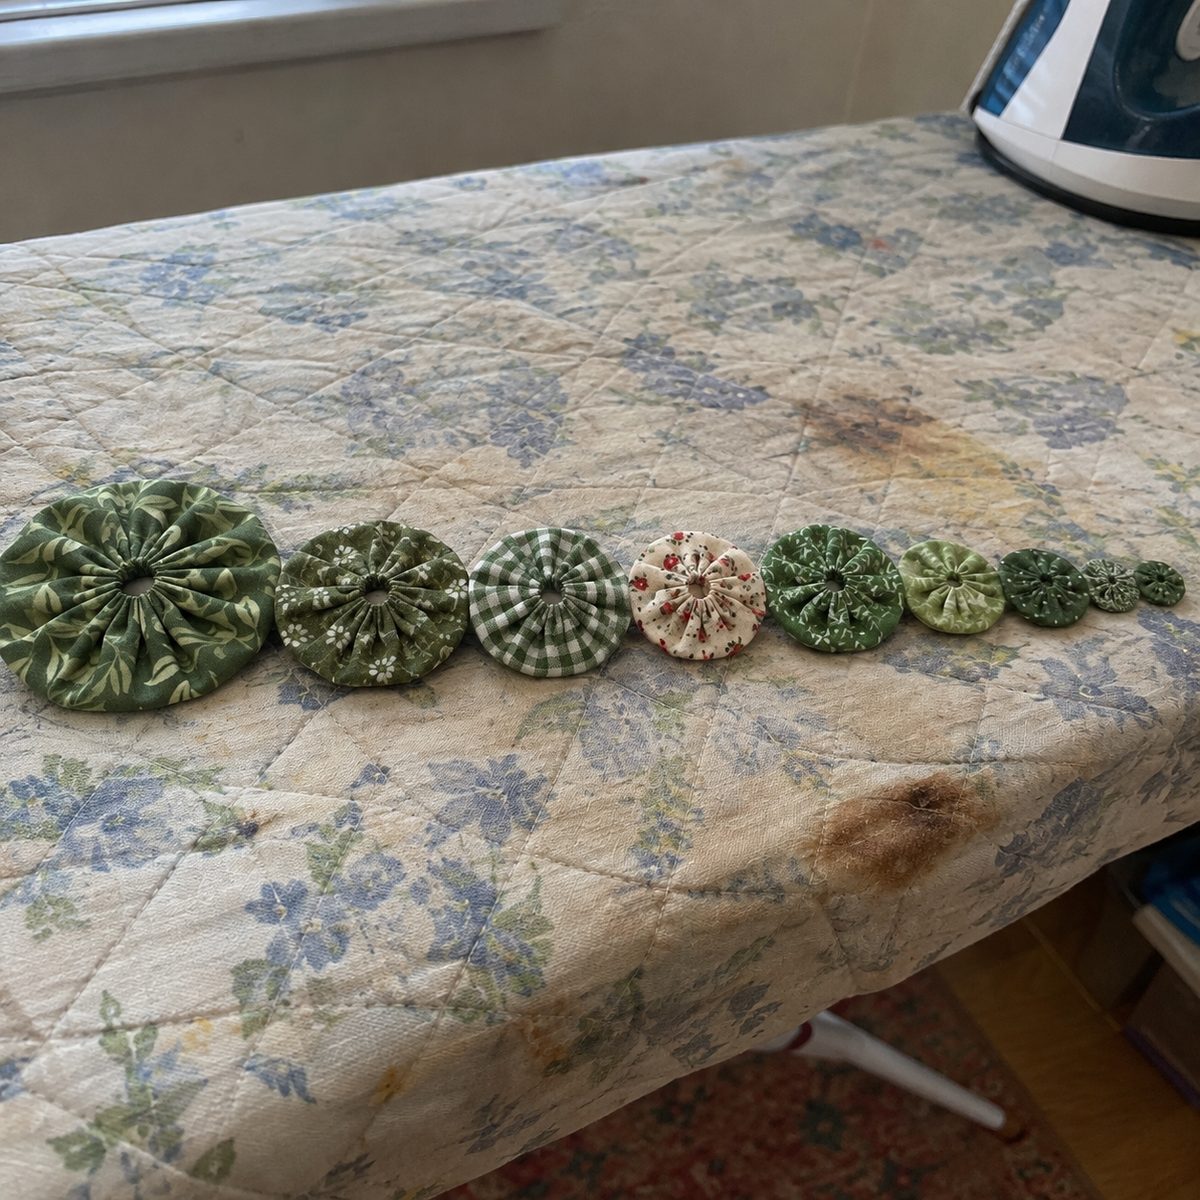
- Lay it gathered side up, press it flat with your palm and nudge the hole to the center. Give it three seconds under a dry iron on the cotton setting. You want a flat disc with the hole dead center and the pleats fanning out evenly.
Make all nine and line them up biggest to smallest. If two look nearly the same size, one had a wider hem. It happens on every batch and the beads between layers hide it.
Make the base
A wooden thread spool is my favorite base because it already looks like a trunk in a pot. A cork is easiest.
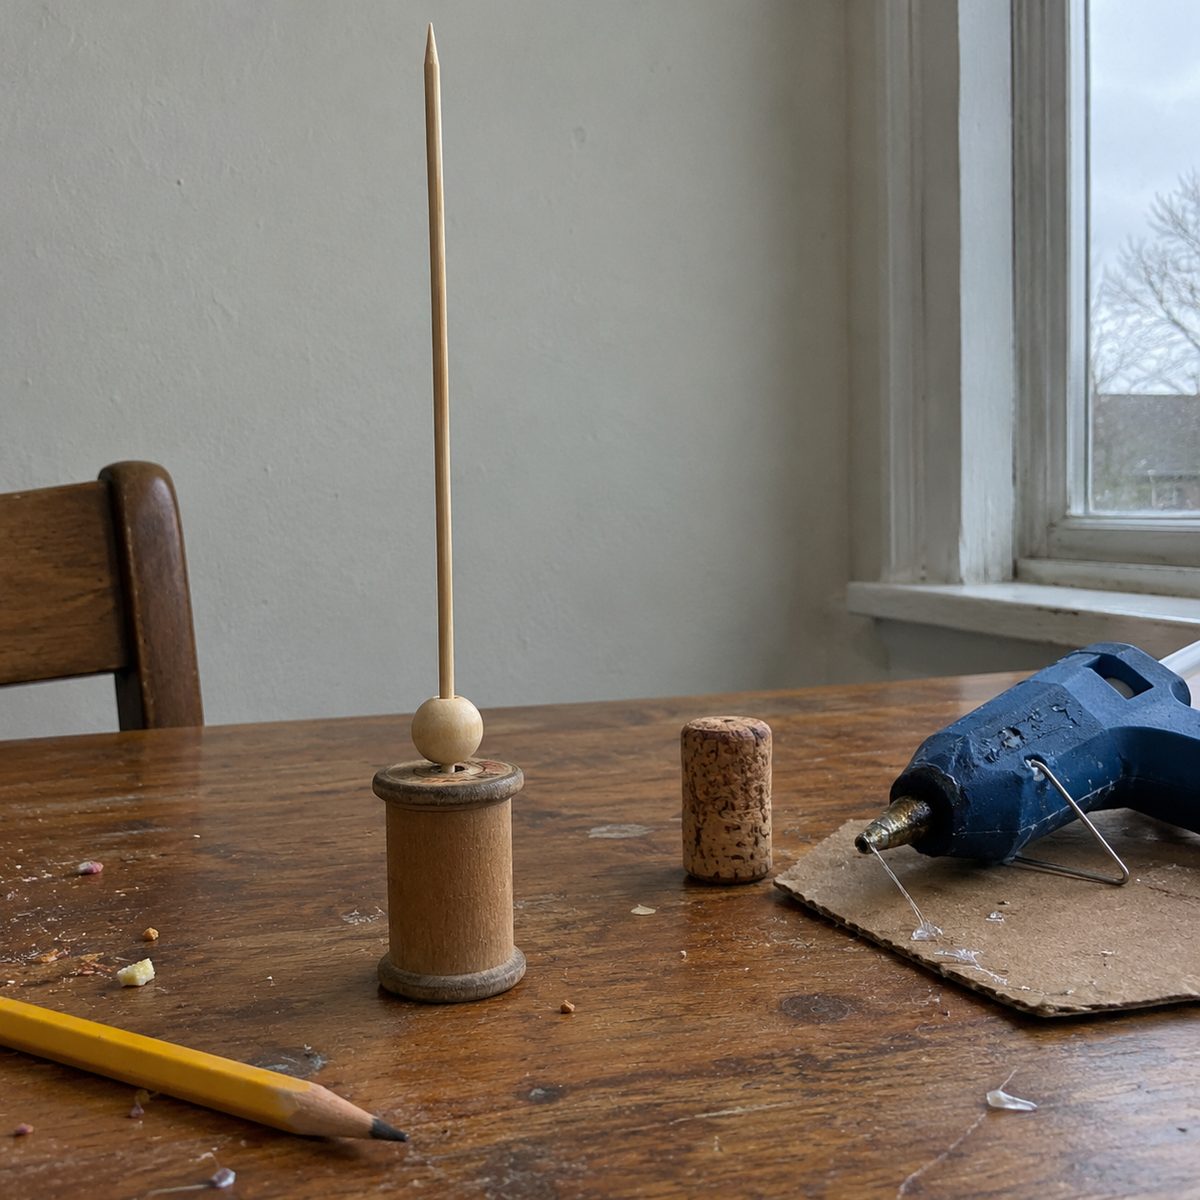
- Spool: stand the skewer pointed end up in the spool’s center hole. The hole is wider than the skewer, so squeeze hot glue into the gap and hold the skewer against a square object for 30 seconds. Check from two sides. It should be dead upright.
- Cork: push an awl 1 inch straight into the center of the cork, then push the blunt end of the skewer into that hole. No glue needed. It should stand with no wobble when you flick it.
- Let the glue cure five minutes. Slide one 1/2-inch bead down onto the base with a dot of glue under it. That bead lifts the bottom yo-yo off the base so you get a visible trunk.
Stack the tree
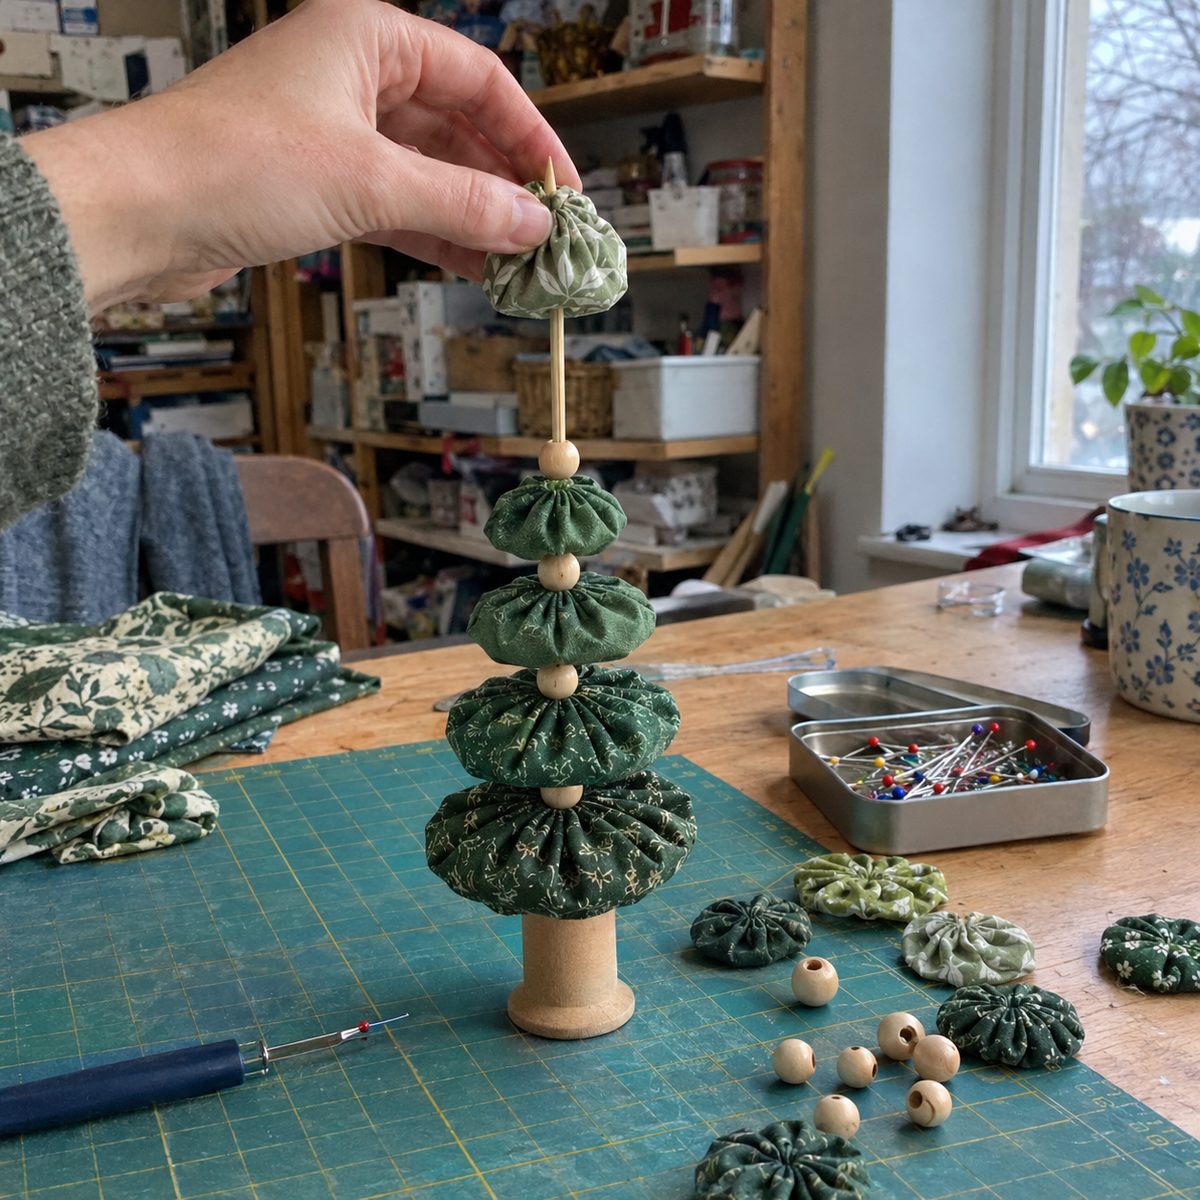
- Take the 6-inch yo-yo. Push the skewer tip up through the flat back and out through the gathered hole. If the hole is tight, wiggle the point through rather than forcing it. Slide it down to the bead, gathered side up.
- Add a 1/2-inch bead, then the 5 1/2-inch yo-yo, then a bead, and keep alternating. Every yo-yo should be visibly smaller than the one under it.
- Stop after the fourth yo-yo and look from arm’s length. The sides should run in a straight line toward the skewer tip. If one layer juts out, two sizes got swapped. Fix it now.
- Carry on to the 2-inch yo-yo and press the top layers down gently so each one sits on its bead. Nothing should flop or spin freely; a spinner has a hole gathered too wide, see the fixes below.
- Turn the tree slowly and check the prints. If two of the same fabric landed together, swap one. The right look is dark, light, dark, light up the tree, with the odd pop of red or cream.
Top it off
- Mark the skewer 1/4 inch above the top yo-yo and cut it with wire cutters or garden pruners. You want a short stub, not a spike.
- For a button, put a dot of glue on the stub and press the button on, flat side down, for 20 seconds. For a star bead, put the glue inside the bead’s hole and push it onto the stub. The topper should sit level.
- Run a dab of glue under the bottom yo-yo where it meets the first bead so the stack cannot ride up. Turn the tree upside down. Nothing should slide.
- Fluff each layer by pinching the edges and turning it a little. The finished tree reads as a layered cone about 9 inches tall with the spool. Add a second bead between the bottom three layers if you want closer to 10.
The hanging ornament version
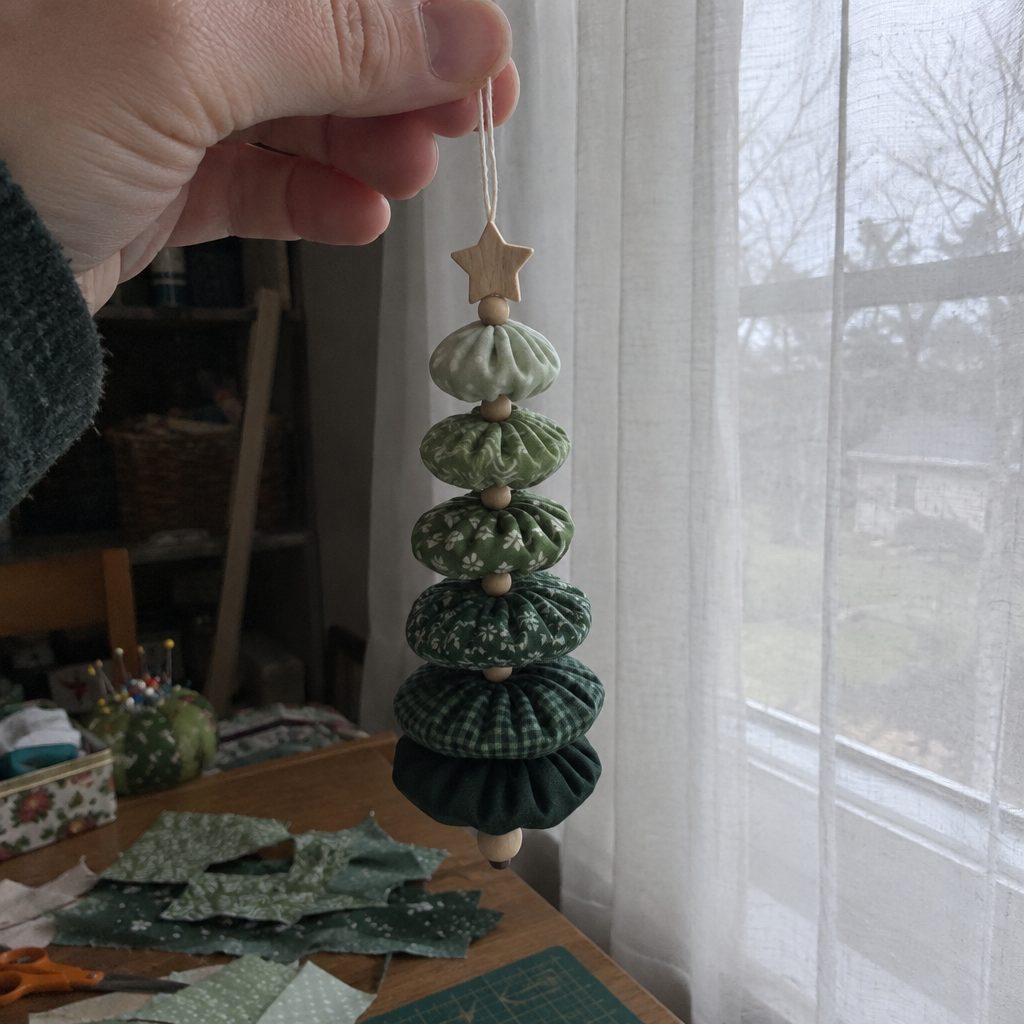
Same yo-yos, no skewer. A doubled thread runs up through the center of every layer, with small beads as spacers. This is the one from the fabric Christmas ornaments roundup, and you can make three in an evening.
- Make five yo-yos from the 4, 3 1/2, 3, 2 1/2 and 2-inch circles the same way. You get five discs from 1 3/4 inch down to 3/4.
- Thread the needle with 20 inches of doubled quilting thread. Pass it through a 1/4-inch bead twice and knot it so the bead becomes the bottom stopper. Tug it to check.
- Take the needle up through the flat back of the biggest yo-yo and out the gathered hole, add a 1/4-inch bead, then the next yo-yo, and so on to the smallest. Every yo-yo sits gathered side up with a bead keeping each layer visible.
- Add the star bead, form a 3-inch loop and knot the thread tight against the star. Take the tail back down through the star and the top yo-yo, bury it between layers and trim. It hangs straight because the thread runs through the exact center of every piece.
- Pinch each layer and give it a quarter turn so the prints alternate. Finished, it stands about 3 inches tall and 1 3/4 inches across.
Fixes for the things that go wrong
The hole in the middle is big and loose
Your stitches were too short. Counterintuitive, but a 3/8-inch stitch on a 6-inch circle closes to a tiny hole, and a 1/8-inch stitch leaves a gap the size of a dime. On a finished yo-yo, run a second row of small stitches around the edge of the hole, cinch and knot.
Raw edges poke out of the center
Either the hem was folded under less than 1/4 inch or the stitches ran too close to the fold. Keep a full 1/4-inch fold and sew 1/8 inch in from the folded edge. On a finished yo-yo, poke the stray threads into the hole with a pin and add a pinhead of fray stop.
The tree leans or the layers spin
A lean means the skewer set crooked in the glue. Pull it and reglue. Layers that spin have holes gathered too loose for the skewer. Wrap thread around the skewer six or eight times just under that layer, or put a dot of glue on the skewer before you slide the layer on.
It looks like a tube, not a tree
The steps between sizes are too small. Half an inch in cut size is the minimum. Check that your templates measure what you think, because a jar lid you guessed was 4 inches is often 3 5/8. If the finished yo-yos came out too close in size, drop a middle layer.
Variations
Color is the easy change. Red and white prints with a wooden star look like a candy cane tree. All cream and white with a pearl button is quiet and pretty on a mantel. The scrappiest version, made from Christmas quilt leftovers, is my favorite and one of the better scrap fabric projects for pieces too small for anything else.
For a taller tree, start at an 8-inch circle and step down by 1/2 inch to 2 inches. That is 13 yo-yos on a 12-inch dowel, about 13 inches tall with its base. Three trees in three heights on one tray is the version people ask about.
For gifts, batch the boring part. Cut circles for four trees in one sitting, about 20 minutes, and keep them in a zip bag by the couch. One tree’s worth of yo-yos is one evening of TV.
Frequently asked questions
How many yo-yos do I need for a 10-inch tree?
Nine yo-yos from circles cut 6 inches down to 2 inches in half-inch steps, with a 1/2-inch bead between layers, give a tree about 9 inches tall on a spool base. Add a second bead between the bottom three layers for a full 10 inches.
Can I make yo-yos on the sewing machine?
Not really. The fold-and-gather happens in your hands and no machine does it well. A plastic yo-yo maker tool speeds things up if you make hundreds, but for nine yo-yos a needle and 45 minutes on the couch is faster than learning a gadget.
What thread should I use for yo-yos?
Hand quilting thread, used doubled. It is waxed, so it slides through the fold without tangling, and two strands take the hard pull at the gathering stage without snapping. Avoid a single strand of anything, and avoid embroidery floss, which frays as you pull it.
How do I store a yo-yo tree?
Stand the tabletop trees in a shoebox with crumpled tissue around the bases and keep the box somewhere dry. If a layer gets flattened, pinch the edges and give it a quarter turn and it fluffs back. Ornaments go flat in a tin between layers of tissue.
Once you have made one you will see a tree in every green scrap you own, and that is fine, because they take an hour and nobody has ever turned one down. For more hand-sewn pieces for the season, the Christmas sewing projects roundup has the rest of my December list.