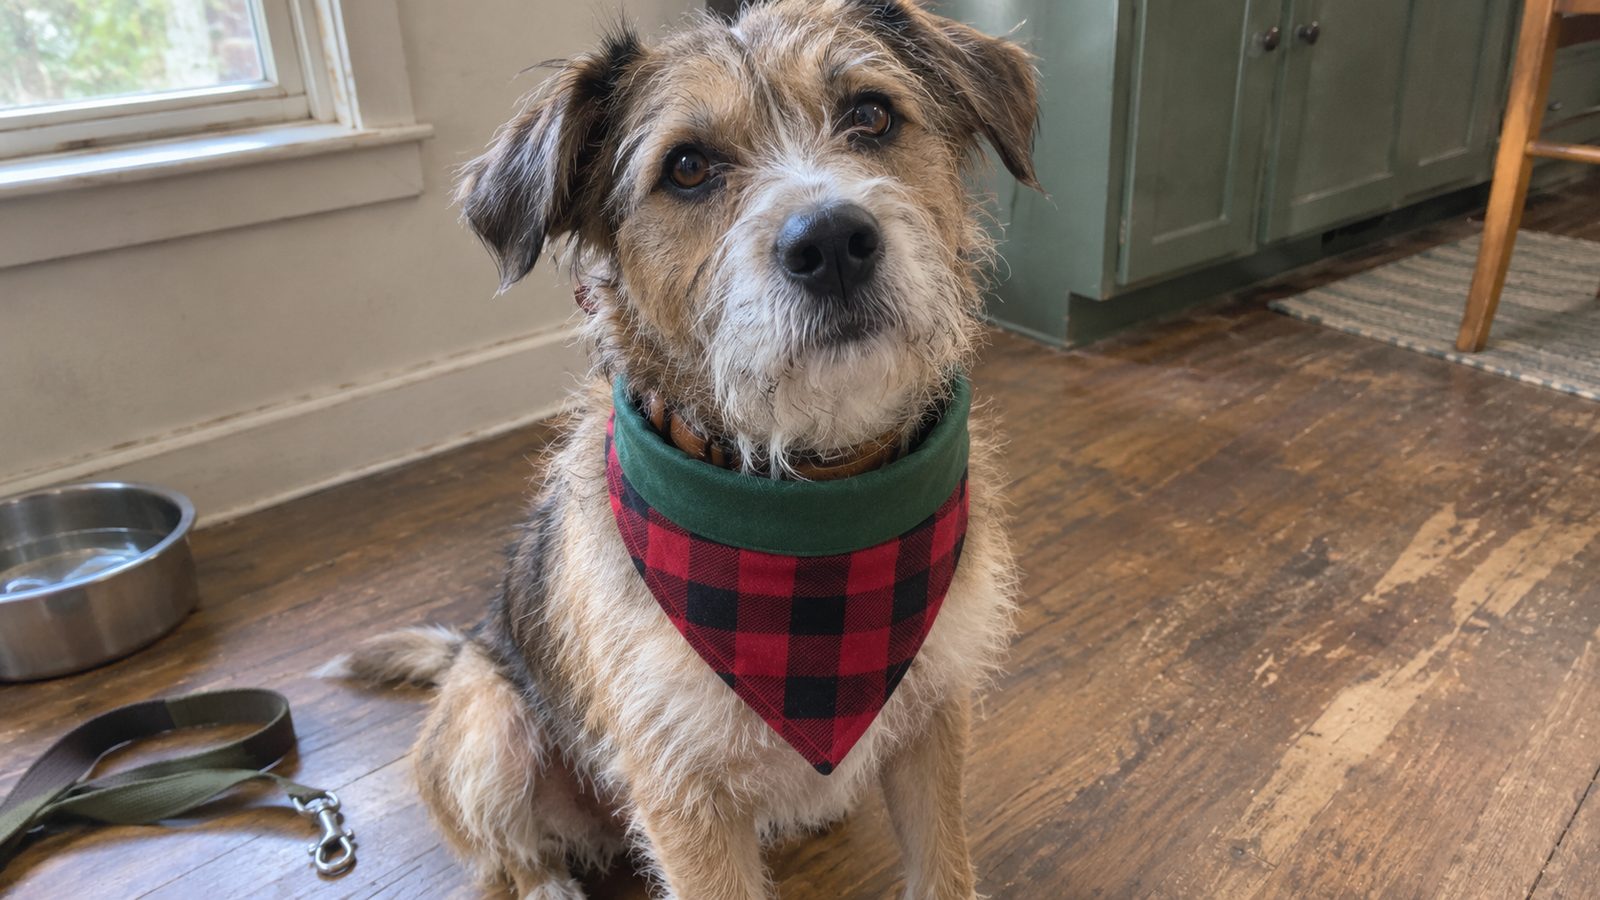
An over-the-collar dog bandana is a triangle of fabric with a sleeve along the long edge. The collar slides through the sleeve, so there is nothing to tie and nothing for the dog to chew loose. Two layers of quilting cotton, sewn and turned, make it reversible: two bandanas for the price of one.
The first one takes about 40 minutes. After that, 20 minutes each, which is why they pile up on my table every December. Beginner level, right after a pillow cover. Three straight seams, a turn, and a fold.
What makes it come out well is sizing the sleeve to the collar you own, not to the dog. A snug sleeve keeps the point centered on the chest instead of spinning around under the chin.
What you’ll need
- Two fat quarters (18 by 21 inches) of quilting cotton, one for each side. A pair of fat quarters makes two medium bandanas or one large.
- All-purpose polyester or 50 weight cotton thread in a color that matches the darker fabric
- Universal 80/12 machine needle, a fresh one
- Spray starch or a starch alternative
- Rotary cutter, 6 by 24 inch ruler and mat, or scissors and a square ruler
- Chalk pencil or water-soluble marker
- Point turner or a wooden chopstick
- Pins or clips, a steam iron, and the dog’s collar for fit checks
| Piece | Cut size | Qty |
|---|---|---|
| Small (neck 10 to 14 inches, collar up to 3/4 inch wide) | 13 inch square, cut once corner to corner | 1 square of each fabric (makes 2 bandanas) |
| Medium (neck 14 to 18 inches, collar up to 1 inch wide) | 16 inch square, cut once corner to corner | 1 square of each fabric (makes 2 bandanas) |
| Large (neck 18 to 24 inches, collar up to 1 1/2 inches wide) | 20 inch square, cut once corner to corner | 1 square of each fabric (makes 2 bandanas) |
One square of each print makes a pair, one to give and one to keep. The sizes include a 3/8 inch seam allowance and the sleeve fold: 1 3/4 inches for small, 2 1/4 for medium, 2 3/4 for large. Finished long edges run about 17 1/2 inches, 22 inches and 27 1/2 inches. Between sizes, go by collar width first. A bandana one size too big just has a longer point. A sleeve one size too small will not take the buckle.
Fabric and prep
Quilting cotton on both sides. It is light enough that two layers plus a fold do not turn the sleeve into a rope, it takes a crease, and it survives a hot wash. The original bandana was a square of printed cotton long before anyone put one on a dog, and cotton is still the right call.
Skip flannel. It bulks up in the sleeve and pills after three washes. Skip minky and fleece too. They stretch while you sew and will not hold a point.
Pair a busy print with a solid or a small tone-on-tone. Two big prints fight, and the band at the top, which shows the back fabric, disappears. My standard pair is a plaid with a solid pulled from it.
One thing about the diagonal cut: the print ends up at 45 degrees on the finished bandana. A plaid does not care. A directional print with dogs or bones will run sideways. For those, cut a rectangle on the grain, finished long edge plus 3/4 inch by finished height plus 3/4 inch, mark the center of the bottom edge, and cut from each top corner to that mark.
Prewash both fabrics, hot, and dry on hot. Reds and navies bleed, and a bandana gets wet at the water bowl, so I want the bleeding over before it meets the cream side. The routine is in how to wash fabric before sewing.
Starch and press before cutting. The long edge of a diagonally cut triangle sits on the bias and stretches if you look at it wrong. Starch stiffens it enough to sew without rippling and makes the points turn crisp. Cut the squares, line a long ruler up corner to corner, and cut once. Keep each pair of triangles stacked so the bias edges match.
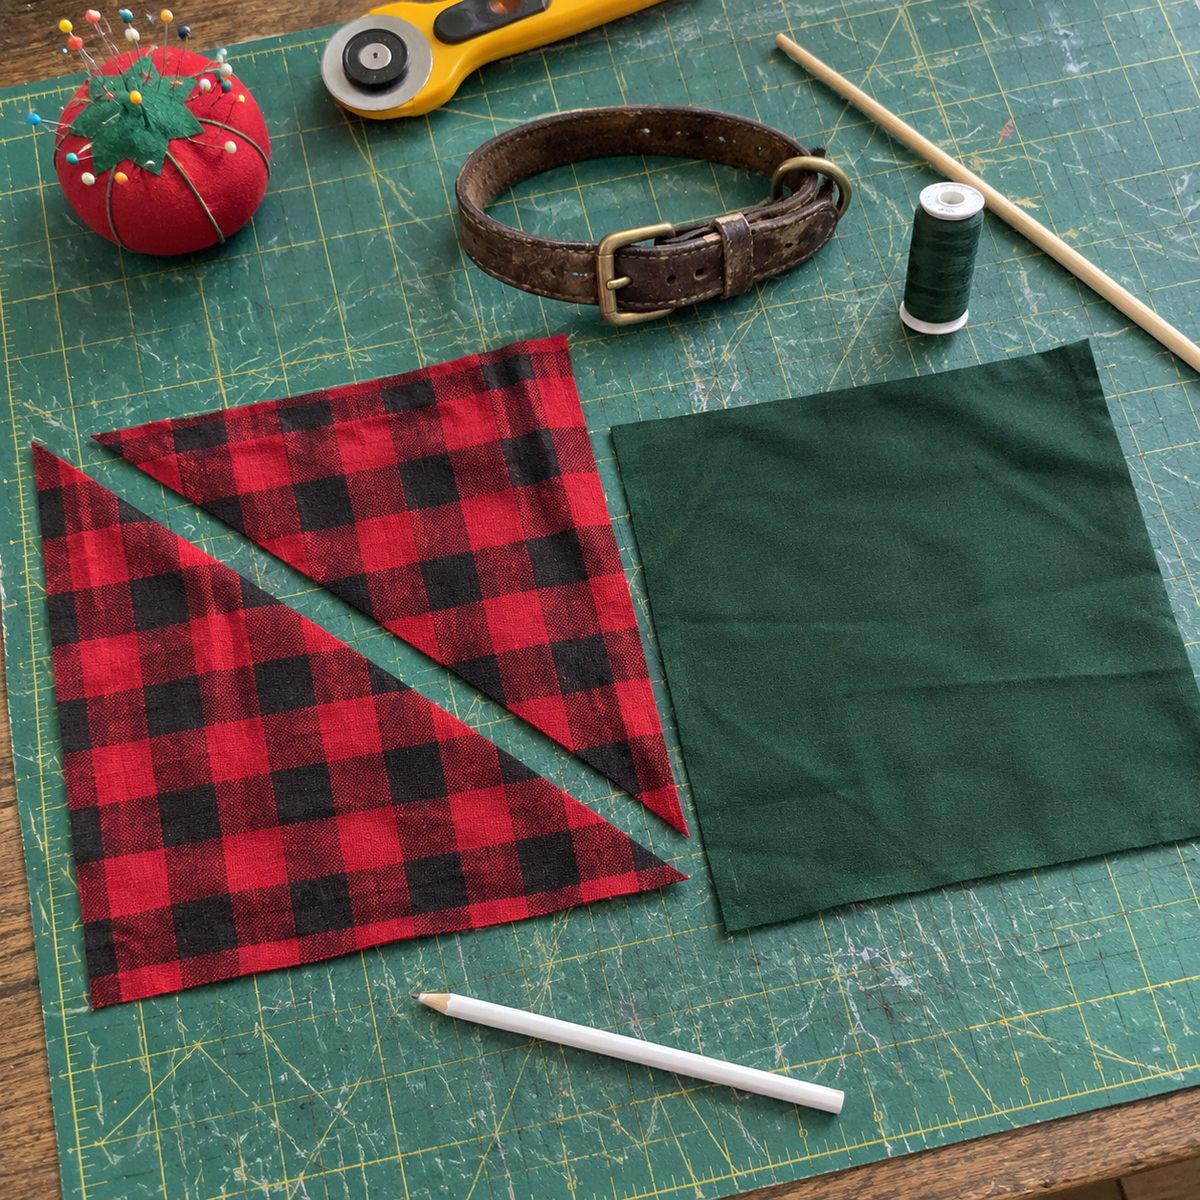
Sew the two triangles together
- Lay one triangle of each fabric right sides together, edges matched. The bias edge wants to shift, so pin every 3 inches along the long edge and once near each corner. Mark a 3 inch gap centered on the long edge with two pins set crosswise. The stack should lie flat with no edge peeking past the other.
- Stitch length 2.2, seam 3/8 inch. Start at one gap pin, backstitch, and sew to the nearest corner. Stop with the needle down 3/8 inch from the edge, pivot, sew to the bottom point, pivot, sew up the third side, pivot, and stop at the other gap pin. Backstitch. You should have one continuous line around three sides and a 3 inch opening on the long edge.
- At the bottom point, do not pivot sharply. Take one stitch straight across the tip, then pivot. That one stitch gives the allowances room to fold inside, and it is the difference between a point and a blob.
- Trim the bottom point to 1/8 inch from the stitching, then angle-cut both sides so the allowance tapers toward the tip. Trim the two top corners the same way. Do not trim along the gap. Press the gap allowances back 3/8 inch on both layers so they are ready to tuck.
- Turn right side out through the gap. Push the point out with the blunt end of the chopstick, never the sharp end, which goes straight through the stitches. All three corners should be sharp and the gap edges in line with the seam.
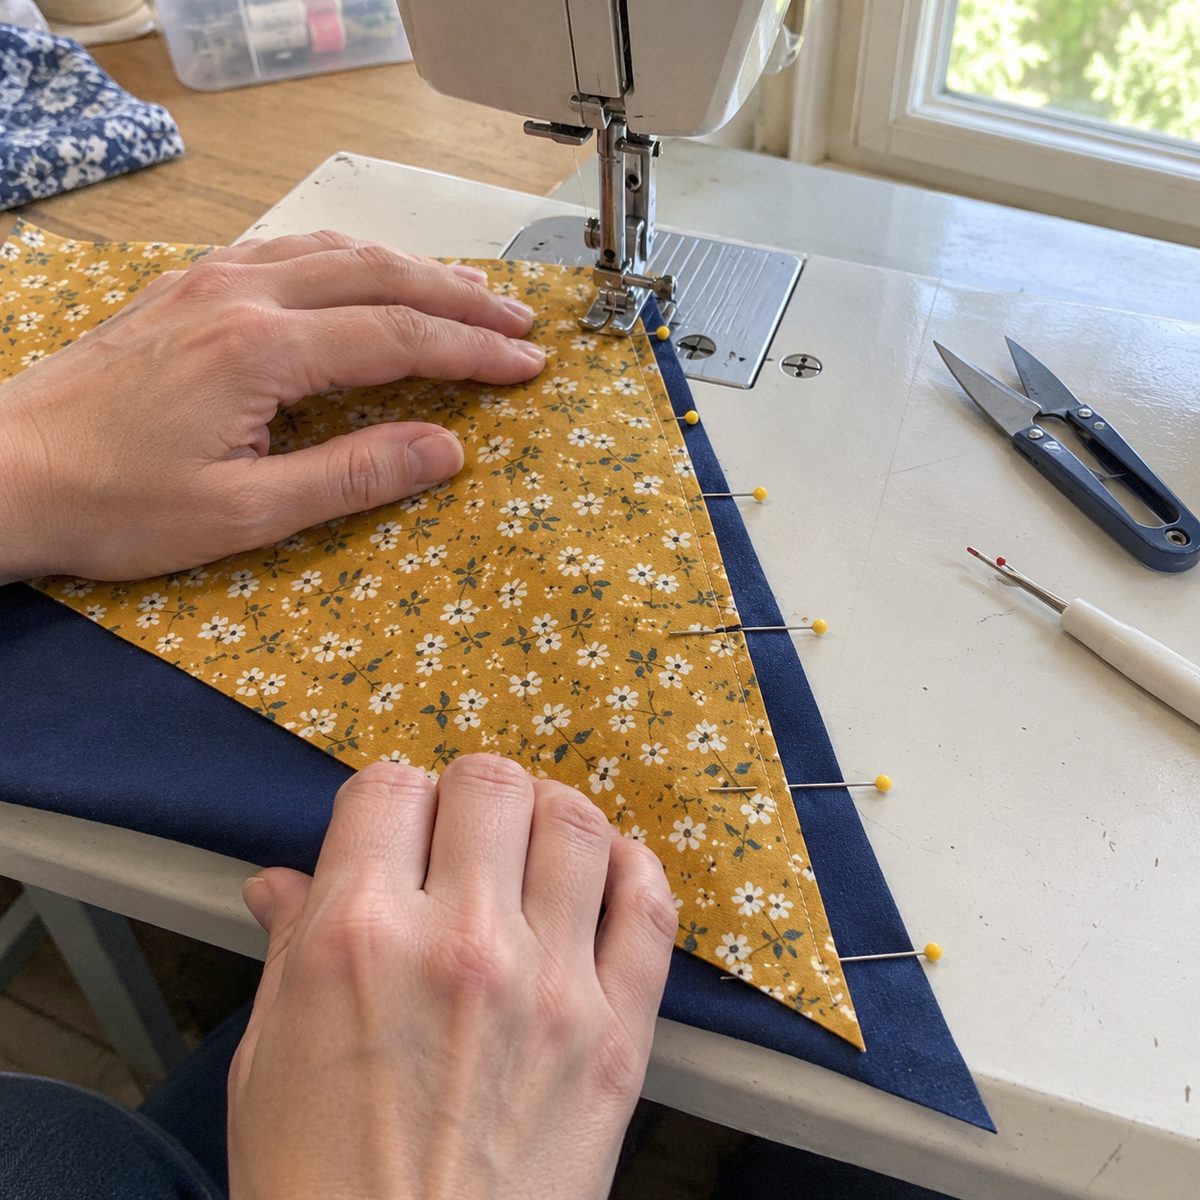
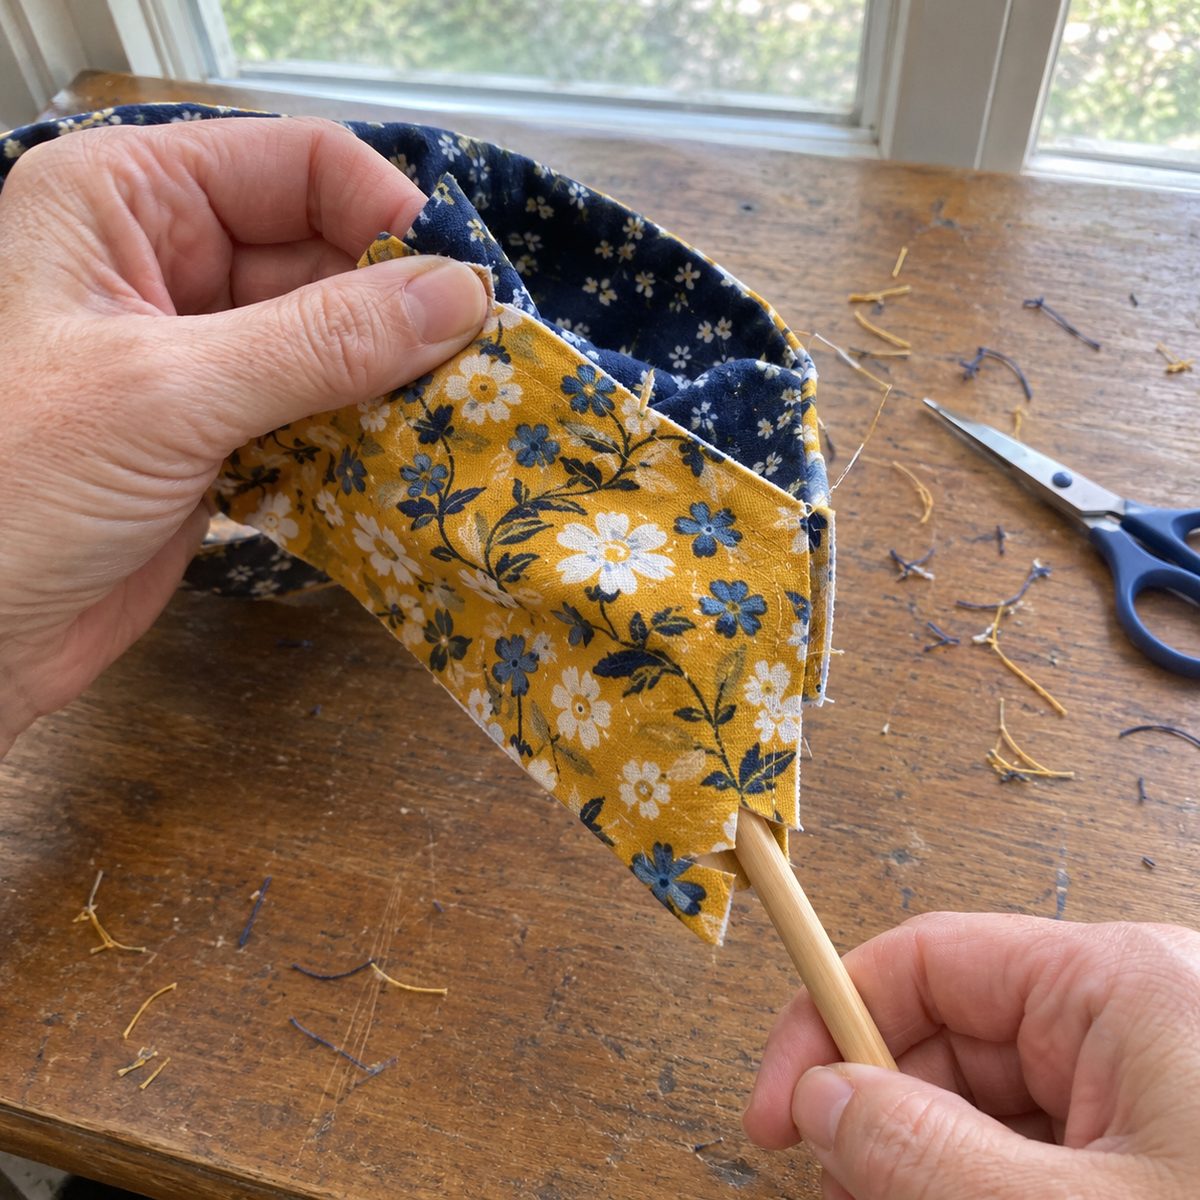
Press and topstitch the edges
The topstitching closes the gap, so there is no hand sewing, and keeps the edges from rolling after a wash.
- Press from the solid side, rolling the seam with your fingers so it sits right on the edge with no lip of fabric from either layer. Steam and a light mist of starch. Tuck the gap edges in on their pressed fold and pin them.
- Stitch length 3.0. Topstitch 1/8 inch from the edge around all three sides, starting on the long edge about 2 inches past the gap, with the edge of the presser foot riding the fabric edge. Matching thread hides, contrast thread shows every wobble, so match it the first time.
- Pivot at each corner with the needle down. At the bottom point, stop one stitch short, pivot, hand-walk one stitch across, pivot again. Finish by stitching over the first 1/2 inch. The join lands under the sleeve band later, so nobody sees it.
- Press again. You should see one even line of stitching around three sides, a closed gap you cannot find, and points that lie flat with no pleat behind them.
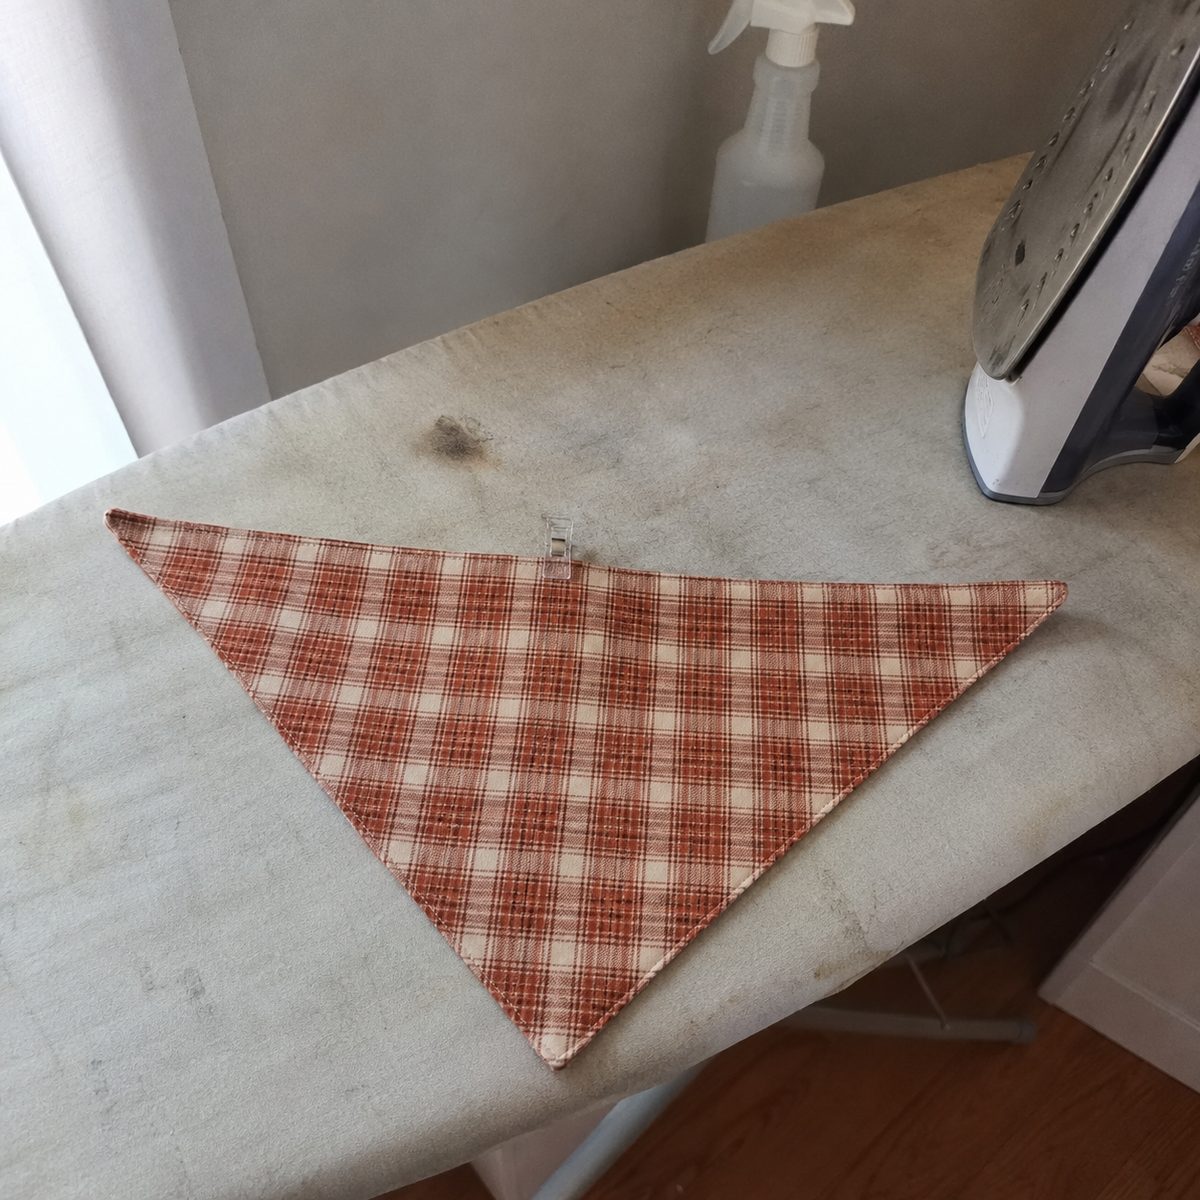
Fold and stitch the collar sleeve
The sleeve is a fold, not a separate piece. Side one gets a band in the back fabric. Side two is plain with one line of stitching across it. Both sides are wearable.
- Lay the bandana body fabric up. Fold the long edge down toward you by the sleeve depth for your size: 1 3/4 inches for small, 2 1/4 for medium, 2 3/4 for large. Measure at both ends and in the middle so the band is the same depth across, then press the fold.
- Before any stitching, slide the actual collar through the fold, buckle and all. It should pass with about 1/4 inch of room above the collar. If the buckle jams, fold 1/4 inch less. If the collar swims, fold 1/4 inch more. Pin the band every 3 inches once it passes.
- Stitch the band down 1/8 inch inside its lower edge, so the new line runs right beside the topstitching. Stitch length 3.0. Four layers here, so go slowly at the two ends where the band meets the sloped edges. Backstitch at both ends and stop at the fabric edge. Do not sew across the ends of the sleeve.
- Press the band flat and hold it up to the light. You should see daylight through the sleeve end to end, the stitching parallel to the top edge, and no pleat where the band meets the slopes.
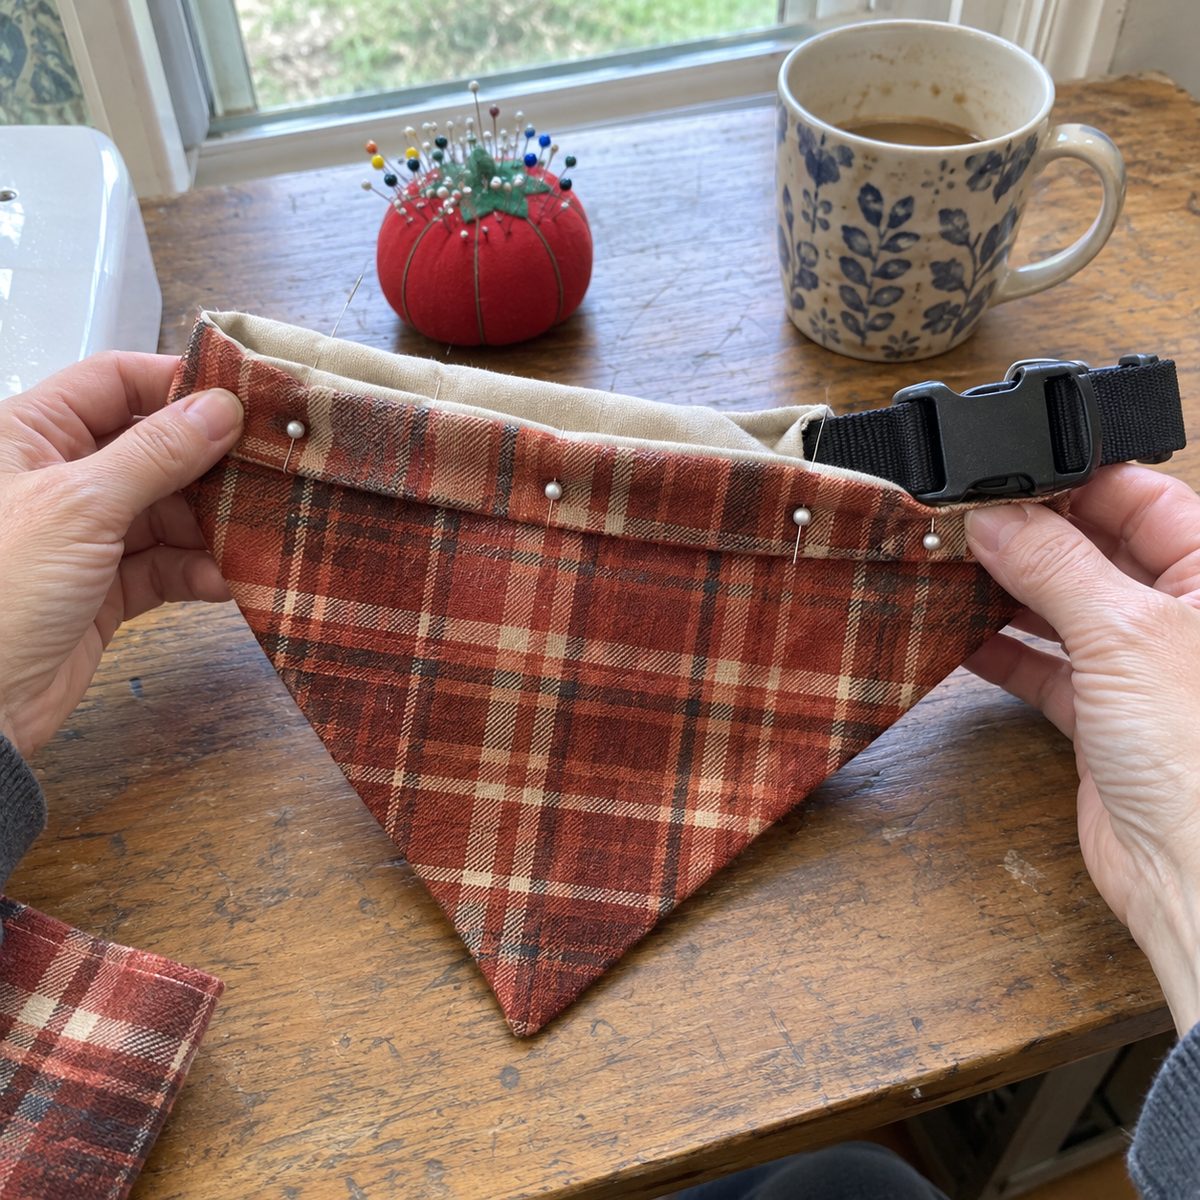
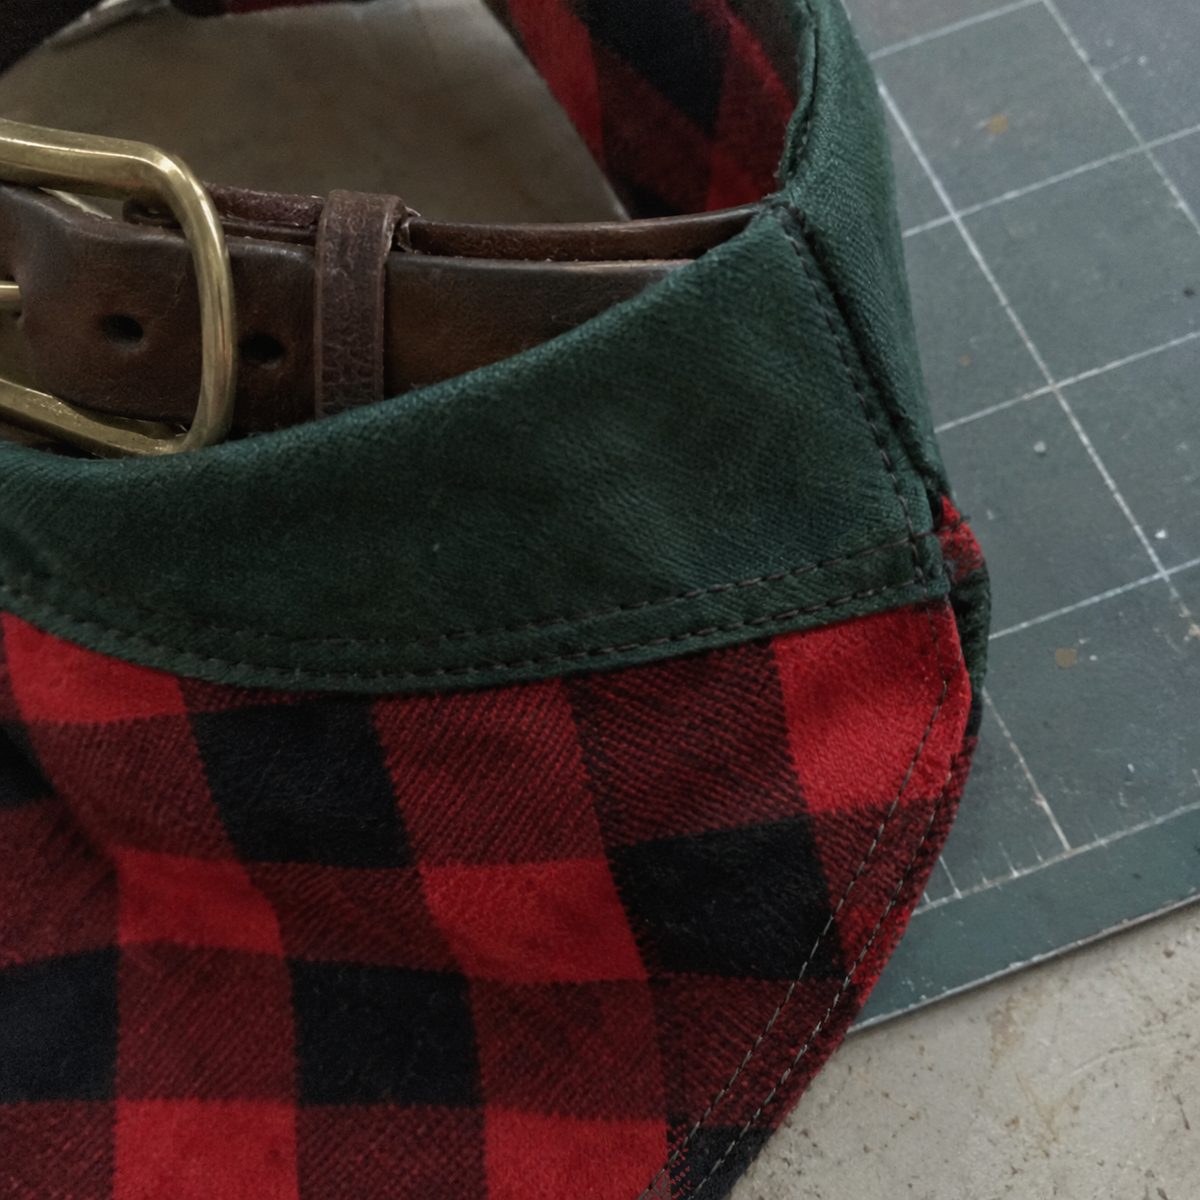
Put it on the collar and check the fit
- Unbuckle the collar and feed the buckle end through the sleeve. Buckle it back on the dog and slide the bandana around so the point sits in the center of the chest. The collar should move a little inside the sleeve and stop when you let go.
- Check the collar itself, since the bandana does not change how it fits. You should be able to slip two fingers under the collar and no more. A loose collar spins, and the bandana spins with it.
- Look at where the point lands. Mid-chest is right. If it hangs below the elbows on a short dog, size down. If it barely clears the collar, size up.
- To wash, pull the collar out and run the bandana with the dog’s bedding, warm, tumble low, and a quick starched press to keep the points flat.
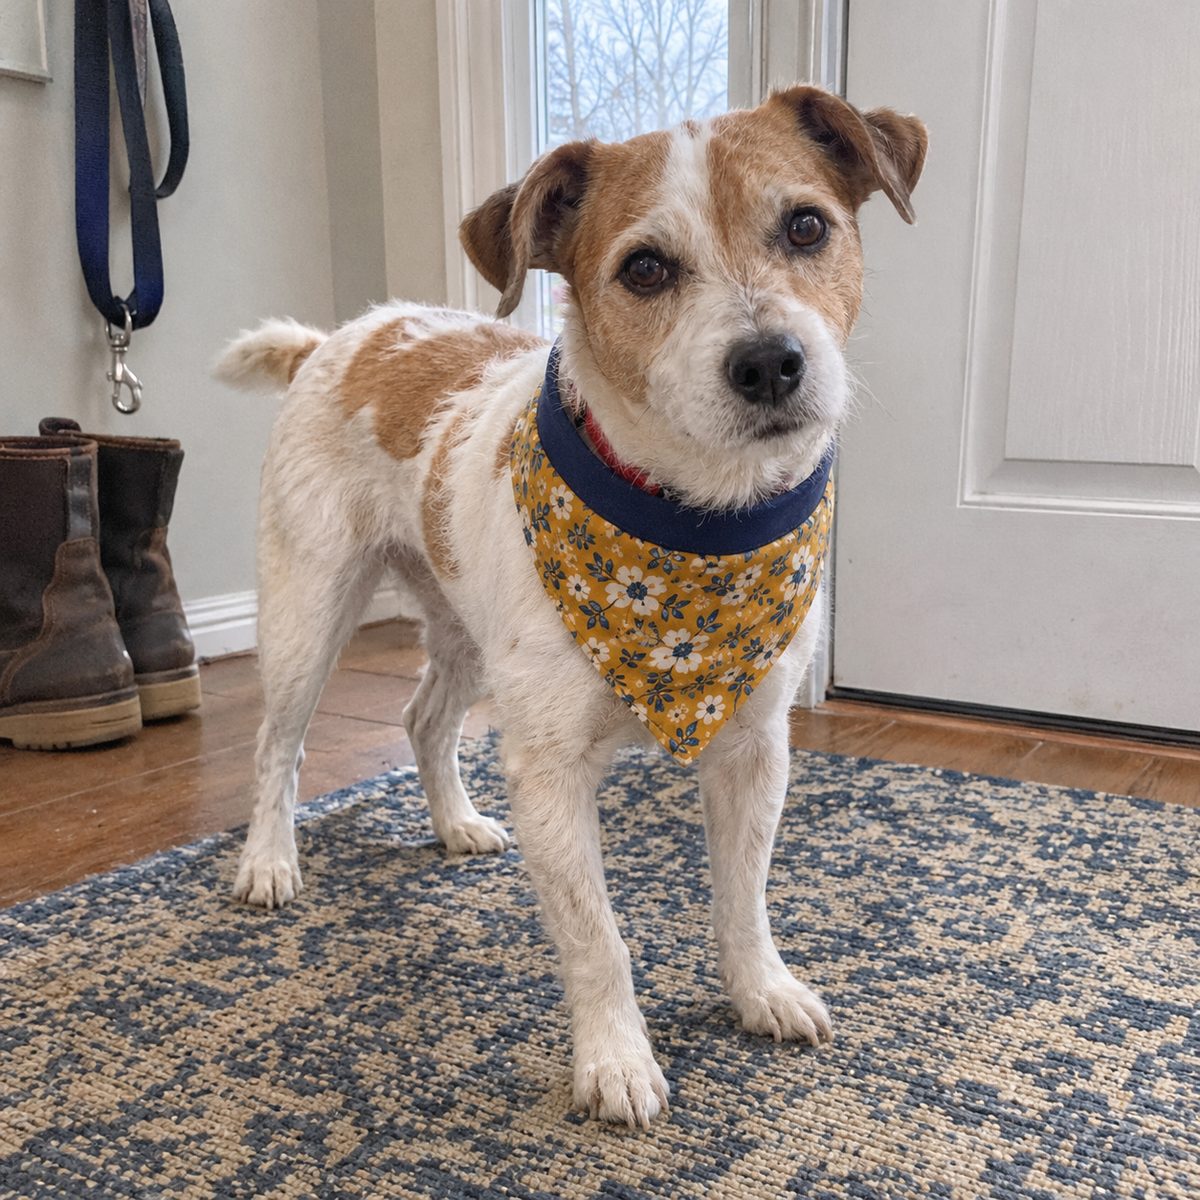
Fixes for the things that go wrong
The bottom point is rounded
Either the allowance was not trimmed close enough, or there was no stitch across the tip, so the bulk is jammed into the point. Unpick the last 2 inches on both sides of the point, resew with one stitch across the tip, trim to 1/8 inch, and turn with something blunt.
The bandana spins to the side or ends up under the chin
The sleeve is too deep for the collar. Add a second line of stitching 1/4 inch above the first to narrow the channel and leave the old line as decoration. A loose collar does the same thing, so check the two-finger fit before blaming the bandana.
The band bubbles or has a pleat at one end
The fold was not parallel to the top edge, or the bias stretched as you sewed. Unpick the band stitching, press the fold out, and remeasure the depth at three points. When you resew, let the feed dogs pull the fabric and keep your hands off the bias edge.
The dark print shows through the light side
A navy print behind a thin white solid shadows through, and white quilting cotton is thinner than you think. Pick a cream or a dense small print for the light side. If the fabric is already cut, fuse a lightweight woven interfacing to the wrong side of the light piece. It adds almost no bulk and blocks the shadow.
Variations, gift sets and batches
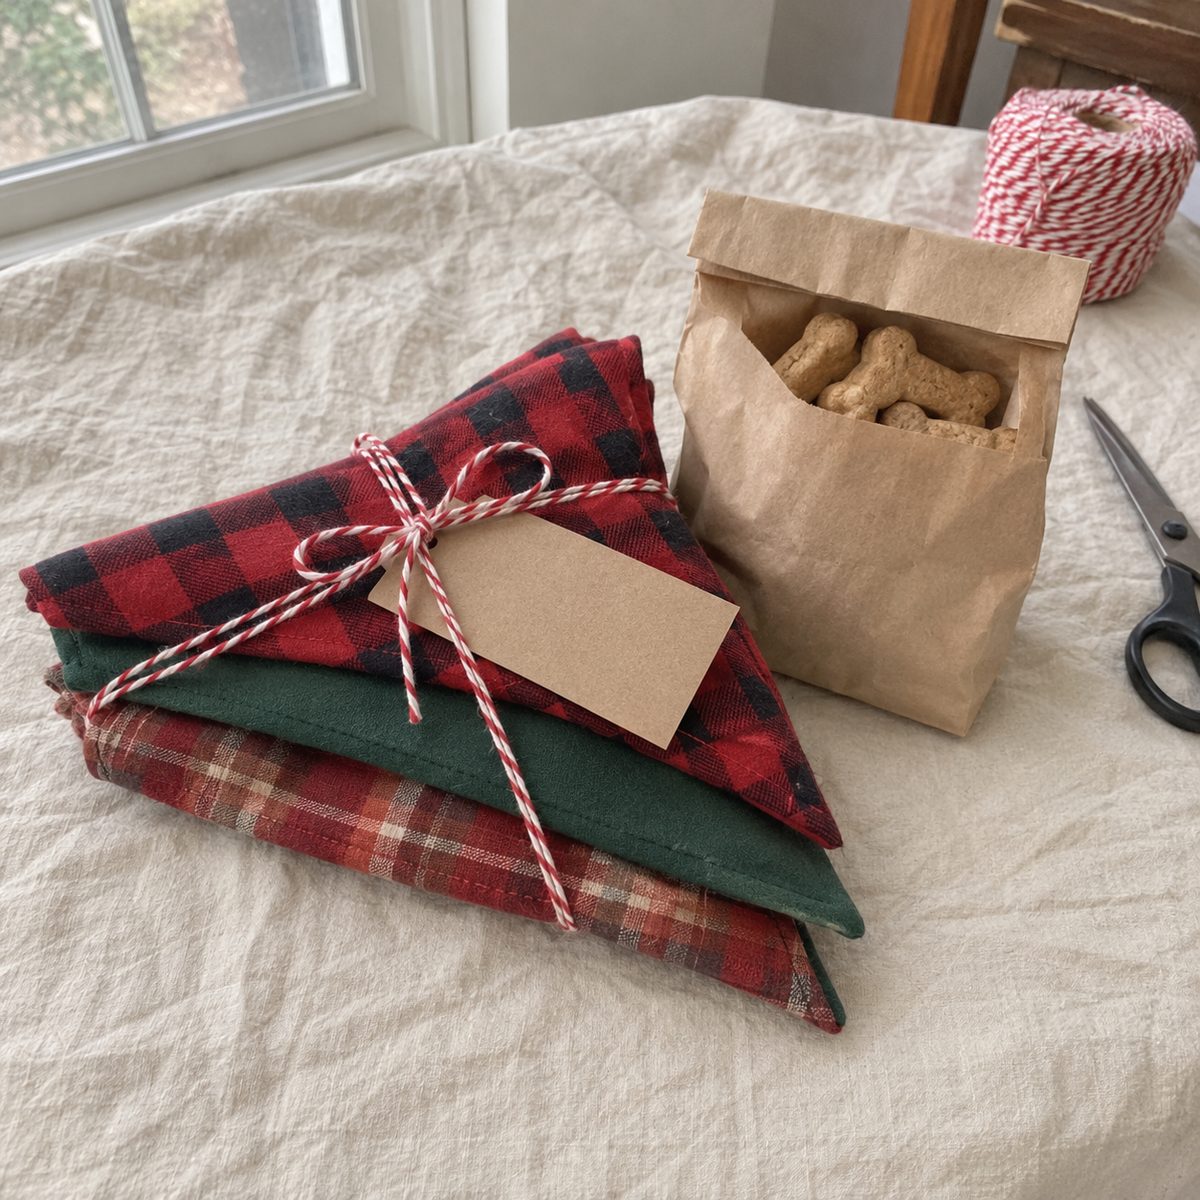
Seasonal fabric does most of the work. A red and black buffalo plaid with a hunter green solid is the one I make most in November, and it goes straight into the Christmas sewing pile. Rust plaid with cream for fall, gingham for summer. The dog does not care, but the people on the other end of the leash do.
For a dog-lover gift, make a set of two or three in the dog’s size, roll them, and tie the roll with baker’s twine. Tuck in a card with the size in plain words: medium, fits necks 14 to 18 inches and collars up to 1 inch. A bag of homemade treats finishes it. More ideas are in handmade gifts to sew.
The small size is a scrap buster. Two 13 inch squares come out of leftovers from almost any quilt, which is why these show up in my scrap fabric projects bin every year. The odd pairings are often the favorites.
If you sell at craft fairs, this is one of the better sewing projects to sell. Stack four squares, cut once, and chain-piece: ten bandanas take about two and a half hours. Make more mediums than anything else, and price by size.
Frequently asked questions
What size dog bandana does my dog need?
Measure the neck where the collar sits and measure the collar width. Small covers necks 10 to 14 inches and collars up to 3/4 inch, most dogs under 20 pounds. Medium is 14 to 18 inches, the 20 to 50 pound range. Large is 18 to 24 inches. Over 24 inches, add 3 inches to the large square.
Do I need interfacing in a dog bandana?
No. Two layers of quilting cotton are enough body for the point to hang straight, and interfacing makes the sleeve stiff and hard to fold. The one exception is a thin white solid over a dark print, where a lightweight woven fusible on the white piece stops the shadow. Starch does the rest.
Can I make it from one fabric instead of two?
Yes. Cut both triangles from the same print and nothing else changes. You lose the contrast band, but a solid chambray bandana with white topstitching looks sharp on a dark dog. Keep the two layers, since a single hemmed triangle is too floppy to hold a sleeve.
Is an over-the-collar bandana safe to leave on?
Safer than a tied one, because there is no knot to catch on a crate door or a fence. Still, it is an accessory, not equipment. Take it off for crate time and unsupervised play, and never add buttons, beads or bells a dog could chew off and swallow.
Once the first one is done, you will size the next by eye and finish it before the iron cools. Make the pair, keep one on the hook by the leash, and the other has a dog waiting for it somewhere on your list.