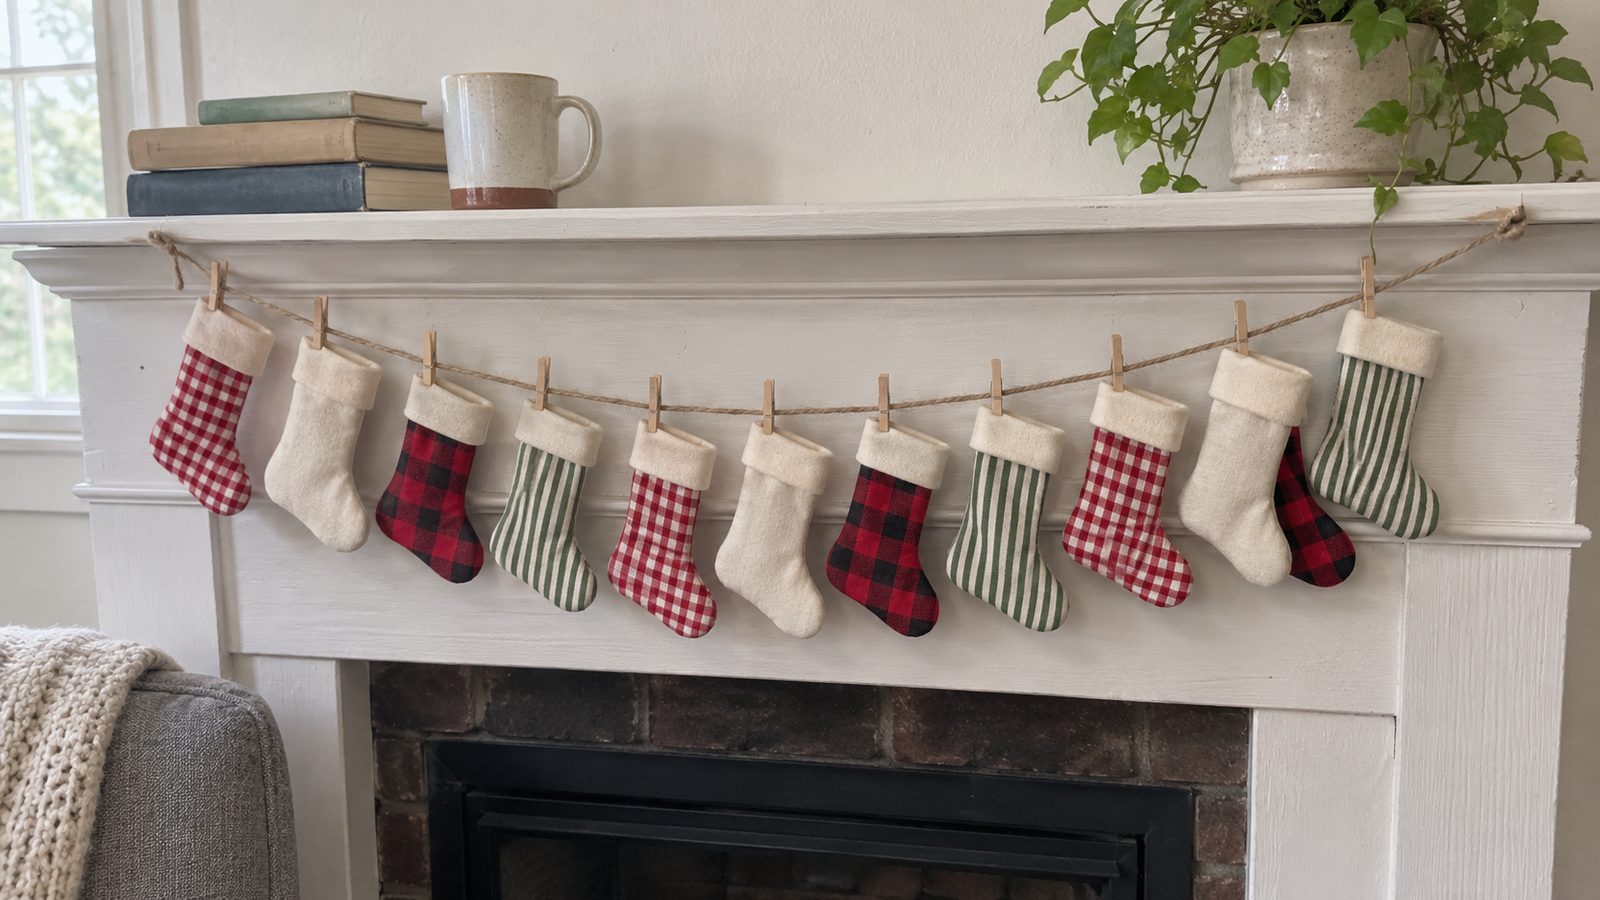
A mini stocking garland is a row of little fabric stockings, each about 4 by 6 inches, strung on jute or baker’s twine for a mantel or a stair rail. Each stocking is two body pieces, two cuff pieces, and one seam around the outline. Once the template is drawn, a stocking takes about 20 minutes, and a garland of 12 fills a Saturday afternoon.
Call it a confident beginner project. You sew a curve, clip it, and turn it.
The thing that makes them come out well is trimming the seam allowance to 1/8 inch around the toe and heel before you turn. Leave it at 1/4 inch and every foot on the string comes out lumpy.
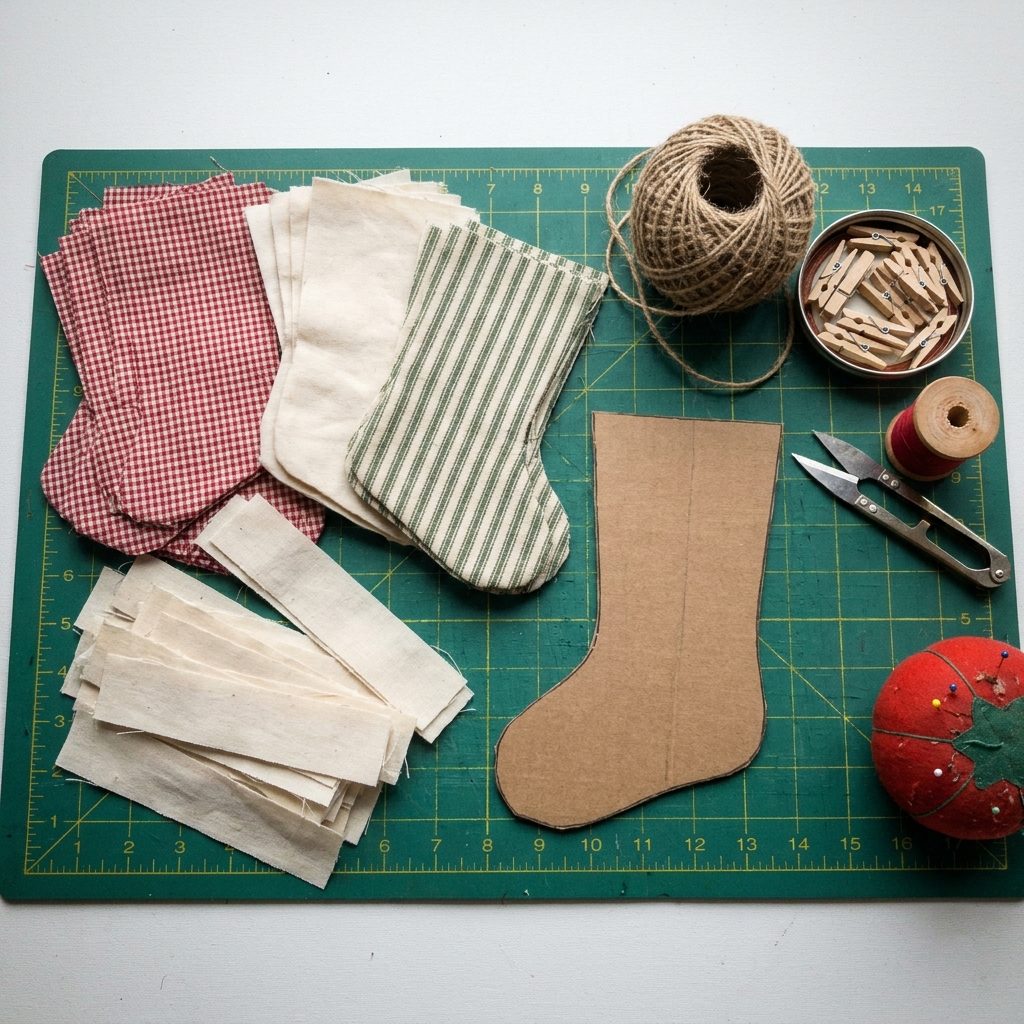
What you’ll need
- Quilting cotton or flannel for the bodies: two fat quarters make 12 stockings (one fat quarter cuts 15 body pieces)
- Cuff fabric: 1/4 yard, or two 3 inch strips cut across the width
- Muslin, optional, two fat quarters if you want the stockings underlined
- All-purpose polyester thread close to the body color
- Machine needle: 80/12 universal for cotton, 90/14 for flannel
- Jute twine or baker’s twine: 7 feet for the cord, plus 4 inches per stocking for sewn loops
- Mini wooden clothespins, about 1 inch long, one per stocking, if pinning instead of looping
- Cereal box cardboard for the template, a fabric pen, a mug about 4 inches across, pins, and small sharp scissors
| Piece | Cut size | Qty |
|---|---|---|
| Stocking body | Traced from the 4 by 6 inch template, cut in folded pairs | 2 per stocking (24 for 12) |
| Cuff | 3 by 2 1/2 inches | 2 per stocking (24 for 12) |
| Underlining, optional | Traced from the template, in muslin | 2 per stocking (24 for 12) |
| Hanging loop, optional | 4 inch length of twine | 1 per stocking (12 for 12) |
| Garland cord | 7 feet of jute or baker’s twine | 1 |
Fabric and prep
Quilting cotton is the easy choice. It cuts clean, holds a crease, and turns a 2 inch toe without complaint. Flannel reads cozier, but it stretches while you sew, sheds, and runs six layers thick at the cuff. For flannel, switch to a 90/14 needle (my post on needle sizes for cotton explains why) and pin twice as often.
Three palettes that always work. Classic red check: red gingham or buffalo check bodies, cream cuffs, and a green ticking stripe stocking every fourth one. Scandinavian cream and grey: unbleached cotton, grey chambray, and charcoal with a tiny white dot, cuffs in a linen look cotton, hung on plain jute. Scrappy: every body a different print from the bin, which is why this one sits on my scrap fabric projects list. Scrappy only looks intentional if all 12 cuffs match.
These never get washed, so I do not prewash cotton. Flannel gets a hard steam press before cutting, because it shrinks under the iron. Spray starch on every body piece. Starched cotton holds the curve under the presser foot and clips cleaner.
Underlining is the only lining I would bother with. Cut a muslin piece for each body, lay it on the wrong side, and treat the two as one. It stops dark seam allowances from shadowing through pale fabric. A separate bag lining is a lot of fiddling for something this small, and nobody looks inside.
Draw the template and cut
There is no pattern to print.
- On card stock, draw a rectangle 4 inches wide and 6 inches tall. Along the top edge, mark 2 1/2 inches in from the left corner. On the right edge, mark 2 inches up from the bottom corner. On the bottom edge, mark 2 inches in from the right corner.
- From the top mark, draw a straight line down 3 1/2 inches. That is the front of the leg. From the bottom of that line, draw a gentle scoop out to the right edge, landing on the 2 inch mark. That is the instep. It should look like a shallow bowl, not a corner.
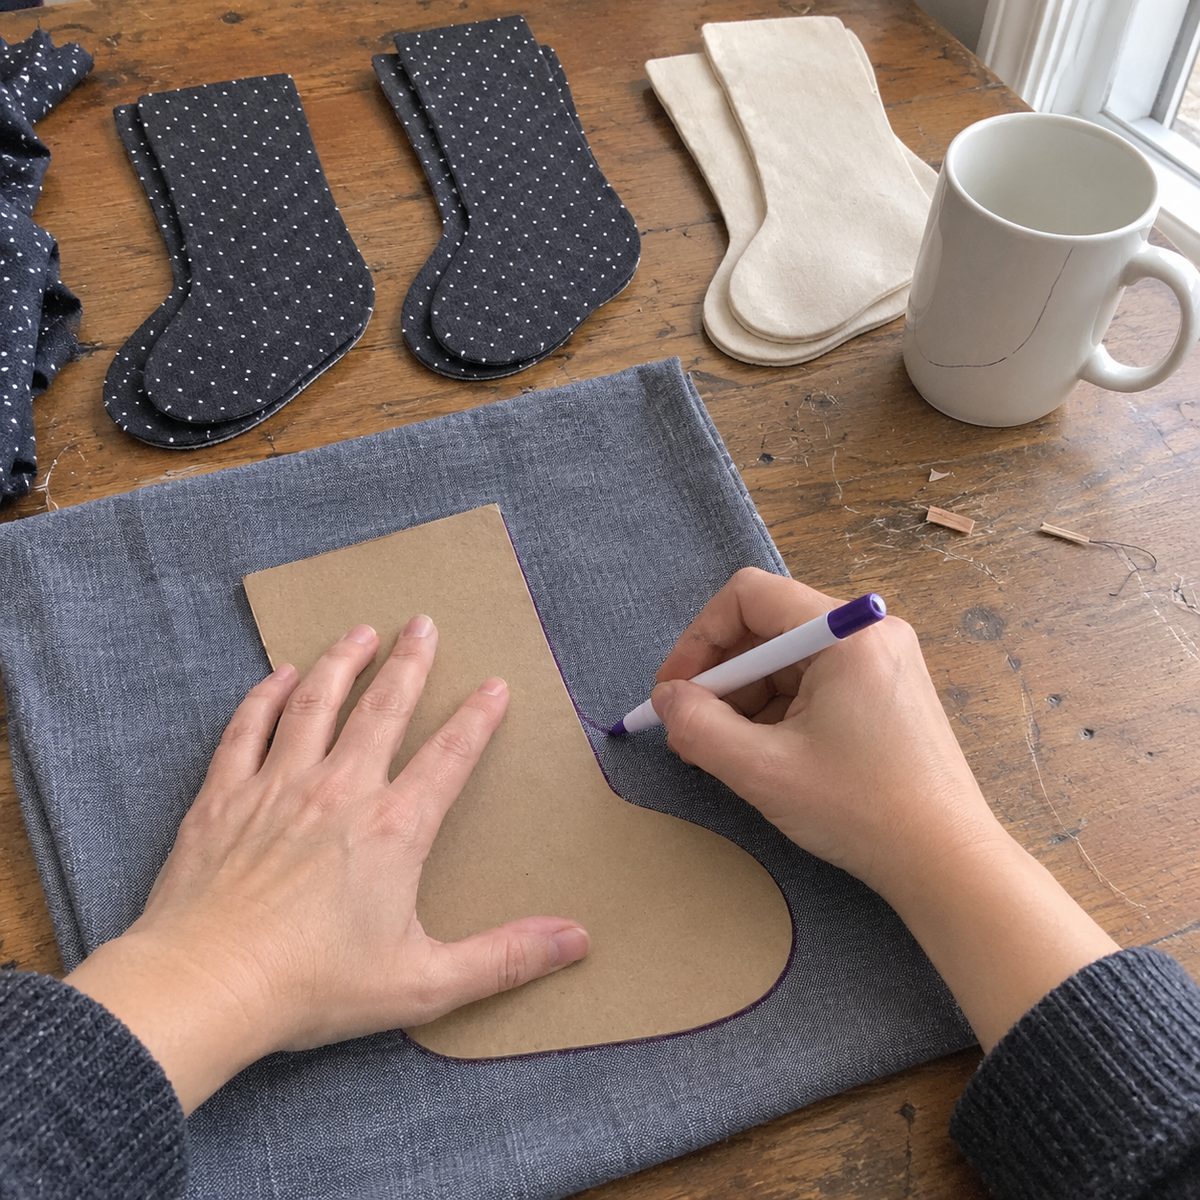
- Set a mug about 4 inches across in the bottom right corner so its rim touches both 2 inch marks, and trace the arc between them. That is the toe, a 2 inch curve. Round the bottom left corner by tracing the end of a thread spool. That is the heel.
- Cut the template out on the lines. It should look like a stocking with the toe pointing right. The 1/4 inch seam allowance is already inside the lines, so the finished stocking comes out about 2 inches wide and 5 1/2 inches tall.
- Fold the body fabric right sides together, trace the template on the wrong side, pin inside the line, and cut both layers at once. You get a mirrored, matched pair every time. Cut 12 pairs, then rotary cut 24 cuffs at 3 by 2 1/2 inches.
Put the cuffs on while everything is flat
Do not sew the stocking and then try to attach a cuff ring. The finished opening is 4 inches around, and no free arm is that small.
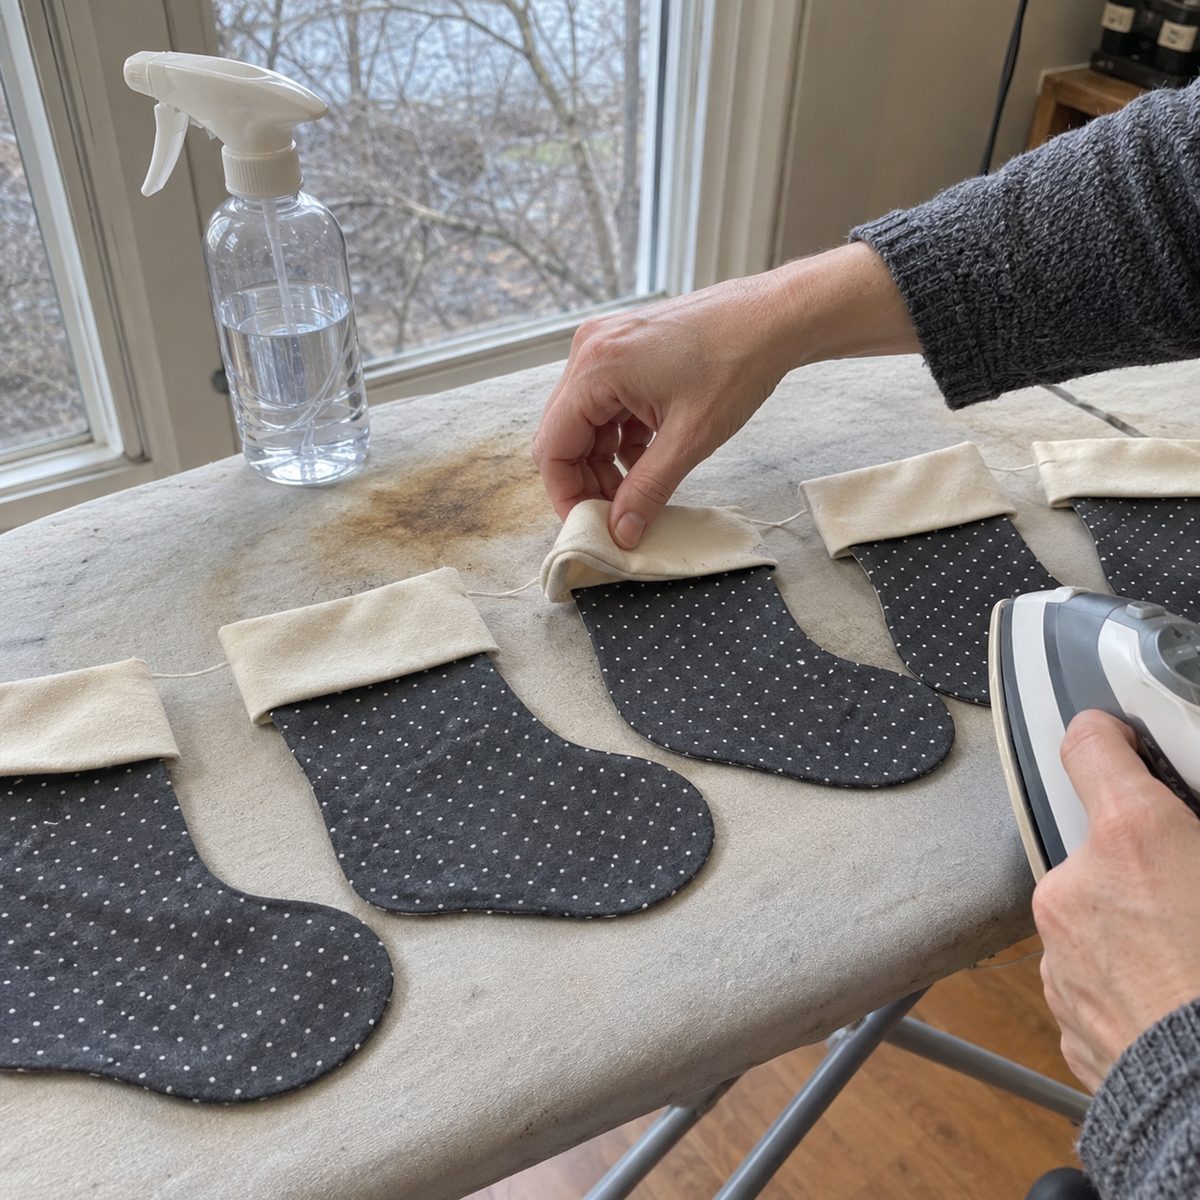
- Fold every cuff in half along the long side, wrong sides together, so it measures 1 1/2 by 2 1/2 inches, and press the fold.
- Lay a body piece wrong side up. Set a folded cuff on it with the raw edges even with the top of the stocking and the fold pointing toward the toe. If the cuff fabric has a right side, that side faces the stocking. Pin twice.
- Sew across the top with a 1/4 inch seam, backstitching at each end. Chain all 24 through without cutting the thread between them, then snip them apart.
- Flip each cuff up and over the top edge onto the right side of the body, and press the new top fold. The cuff now hangs 1 1/4 inches down the right side with its seam hidden underneath. Each piece looks like a flat stocking already wearing its cuff.
Sew around the outline and clip
- Set the stitch length to 2.0 mm. Short stitches follow a 2 inch curve. Long ones turn it into a polygon. Lay a front and back right sides together with the cuffs sandwiched inside and every edge matched.
- For a sewn loop, fold a 4 inch piece of twine in half and slip it between the layers at the top of the straight back edge, loop pointing in, ends poking 1/4 inch past the raw edge. Pin it so it cannot slide.
- Starting at the top of the back edge, sew 1/4 inch from the edge down the leg, around the heel, along the sole, around the toe, up the instep, and up the front of the leg. Backstitch at both ends and leave the top open. On the toe and heel, stop with the needle down every four or five stitches and pivot a few degrees. The stitching should be one smooth curve with no flat spots.
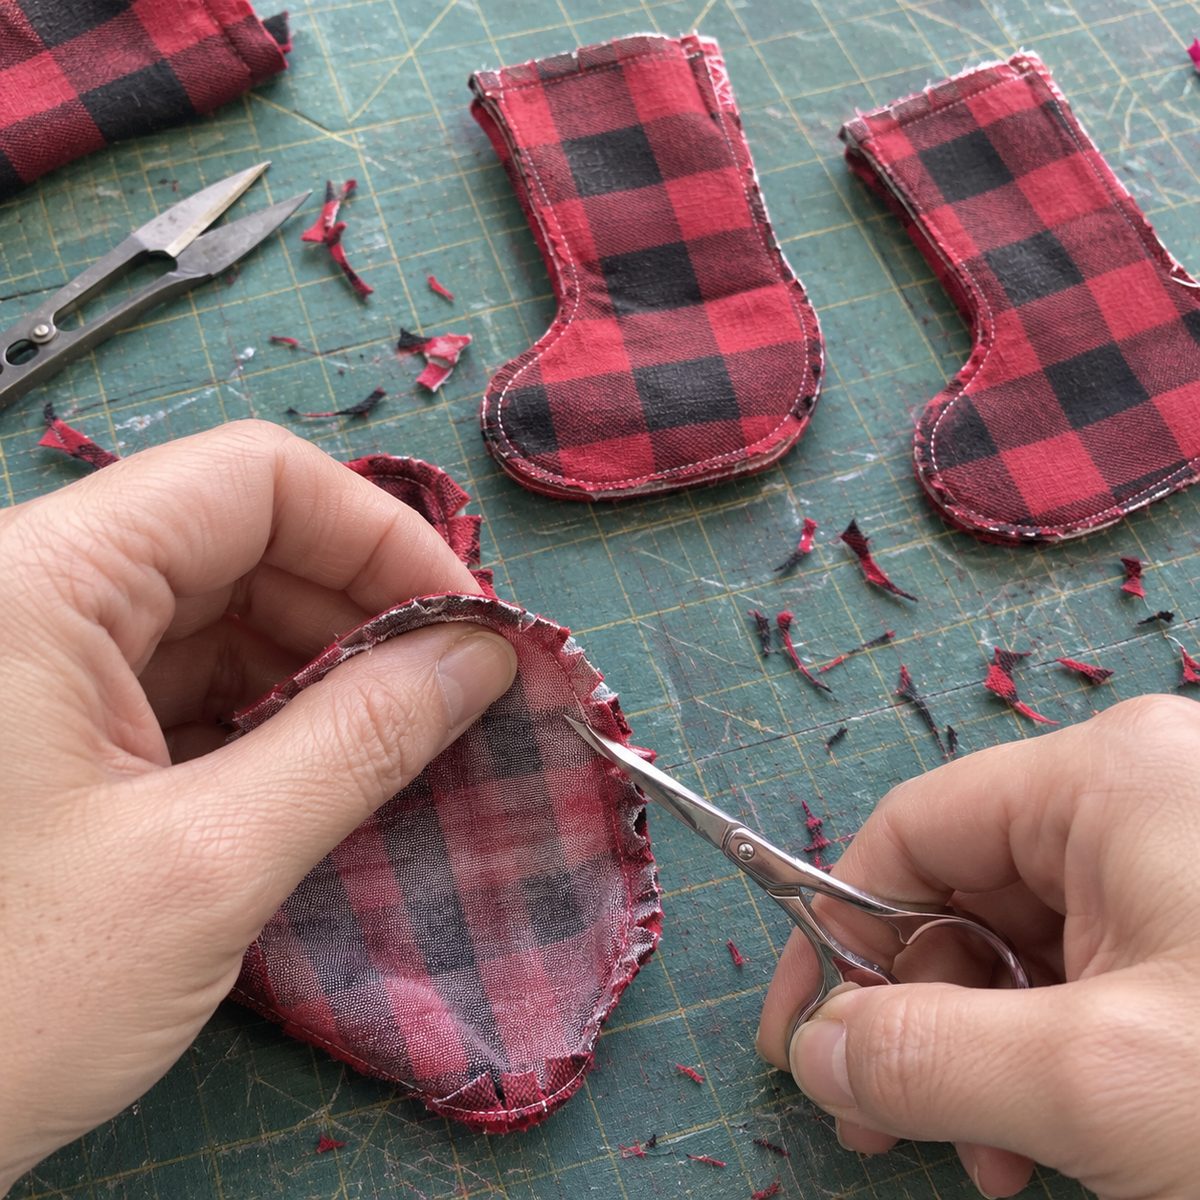
- Trim the seam allowance to 1/8 inch around the toe and heel only. On the instep, which curves the other way, clip straight into the seam allowance every 1/4 inch, stopping two threads short of the stitching. Leave the straight runs alone. Held up to the window, no clip should reach the thread.
Turn, press, and check the foot
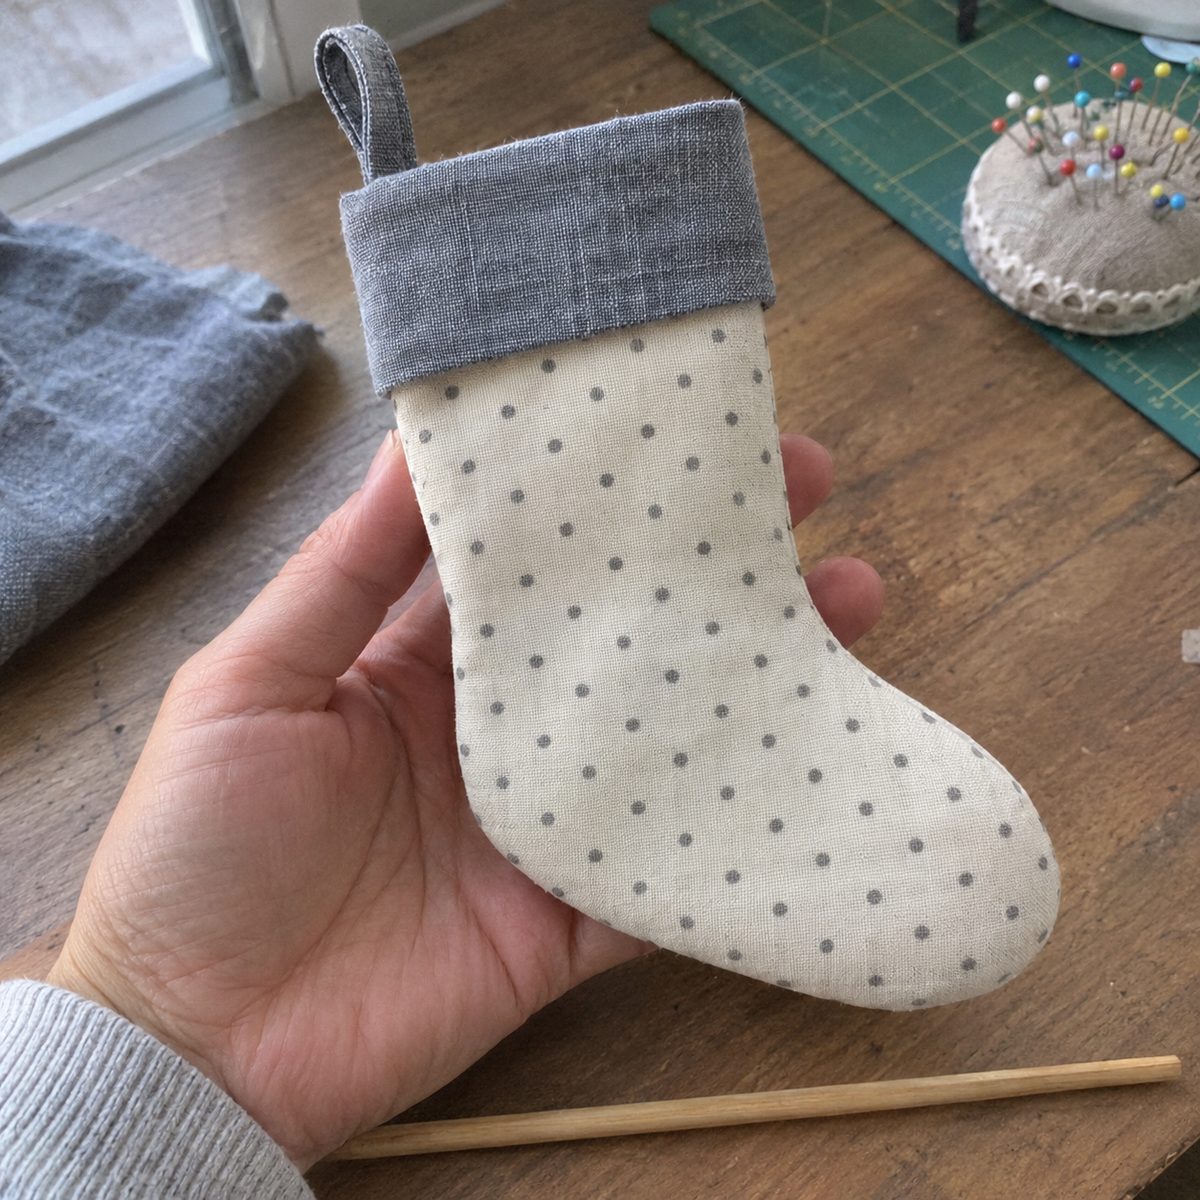
- Turn each stocking through the open top. Push the toe and heel out with the flat end of a chopstick, not the point. A point goes straight through 1/8 inch of seam allowance. Roll the seam between your fingers until it sits right on the edge.
- Press the body flat, seam at the edge, then press the cuff down. The side seams inside the cuff are trapped between cuff and body, so they disappear. Use the iron on the cuff fold, not your fingers. A flannel cuff holds a thumbprint.
- If you sewed a loop, tug it. It should be caught solidly in the back seam at the top corner. A loop that pulls out now was not far enough across the seam line.
- Look at the foot. A good one has a round toe, a smooth instep with no little pleats, and a heel that curves without a pucker.
String the garland
- Lay the 12 stockings out in a row and move them around until no two matching prints touch. Point every toe the same direction. Mixed toe directions look like a mistake, not a choice.
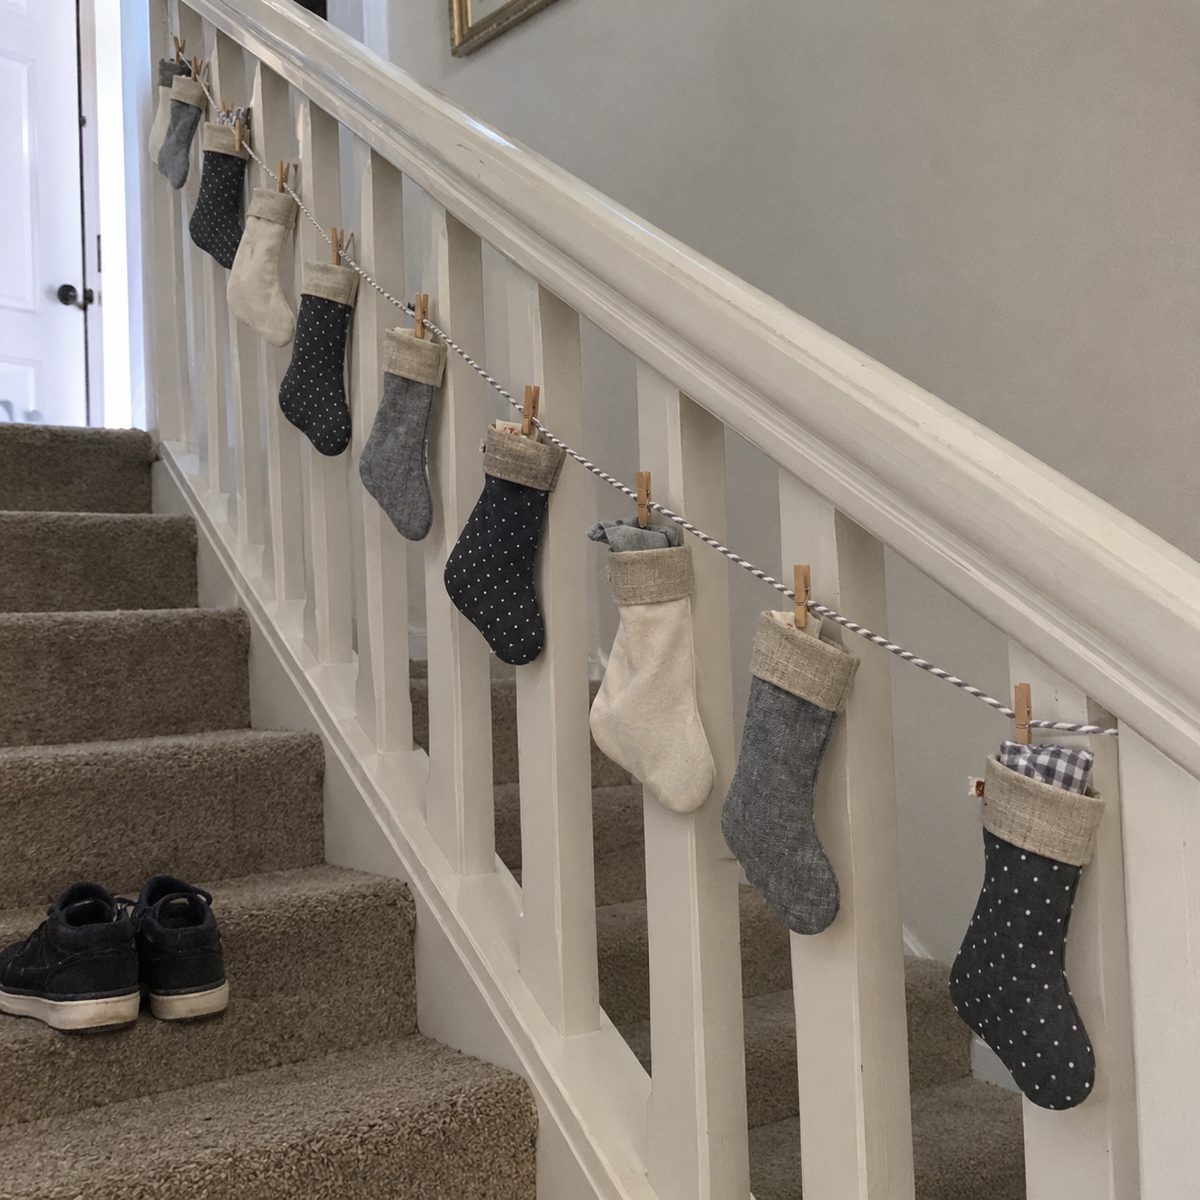
- Cut 7 feet of twine and tie a 2 inch loop at each end. Starting 6 inches in from one loop, mark the cord every 5 inches with a pin. That leaves 1 1/2 inches between stockings. On a stair rail, space them 8 to 10 inches apart instead, so one stocking hangs in each gap between balusters.
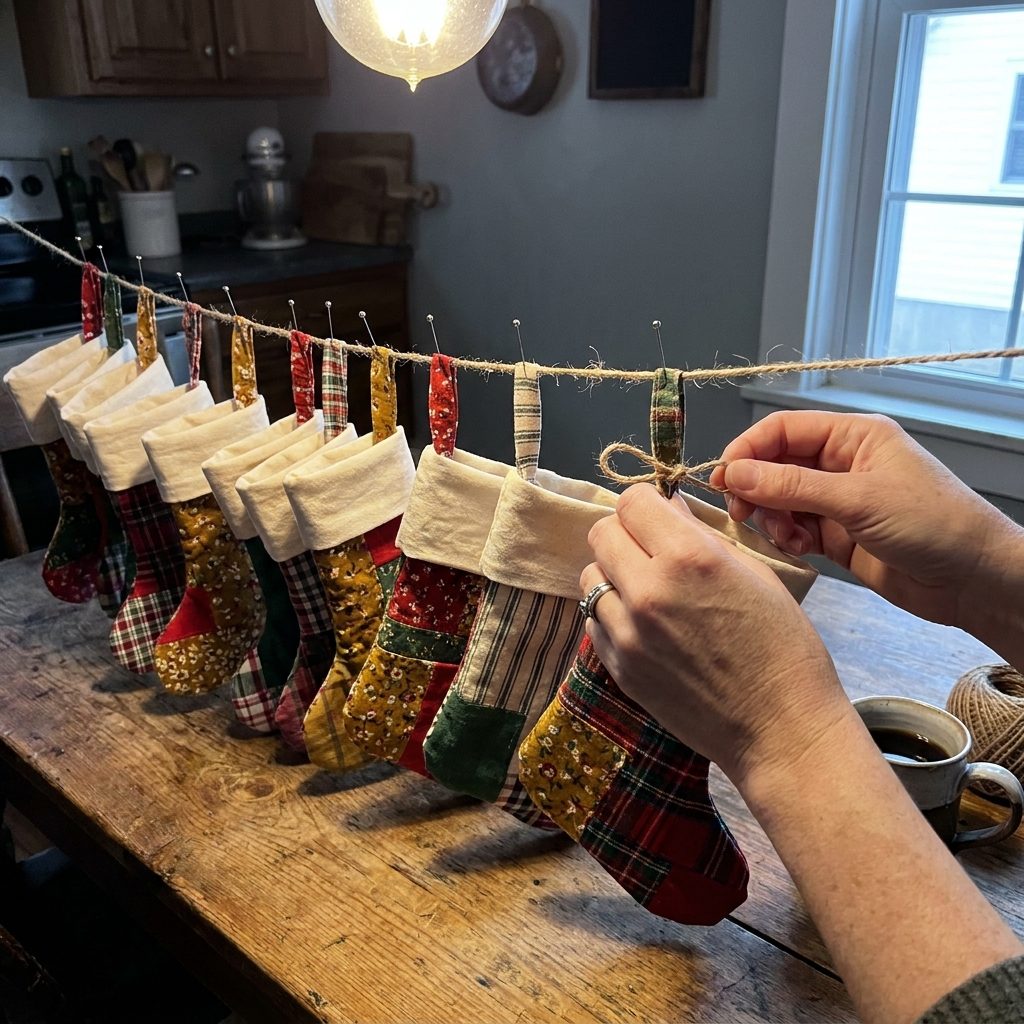
- For sewn loops, thread the cord through each loop in order and tie a small overhand knot in the cord on each side of the loop so it stays at its mark. For clothespins, clip each one through the cuff at the back corner so the pin hides behind the cuff and the stocking hangs straight.
- Hang the cord from two small nails or removable hooks and let it swag about 2 inches in the middle. Jute stretches over the season, so hang it a hair tight.
Fixes for the things that go wrong
The instep has little pleats after turning
Not enough clips, or the clips stopped too far from the stitching. An inside curve has to spread as it turns. Turn the stocking back wrong side out, add clips between the ones you have, and turn it again. The same rule shows up in my notes on why fabric puckers when you sew.
The toe is pointy or lumpy instead of round
The seam allowance is still 1/4 inch in there, folded over on itself. Trim it to 1/8 inch around the whole toe. If you already trimmed and it is still pointy, you pushed it out with something sharp and poked the seam line. Turn it back, finger press the seam, and turn again with a blunt tool.
The cuffs sit at different heights
One cuff was pinned a little below the top edge, or one was cut 1/8 inch narrow and stretched to fit. Rotary cut cuffs from a single strip so they all match, and butt the raw edges hard against the stocking top before the first pin.
Flannel stockings come out different sizes
Flannel grew under the presser foot. Starch each piece before cutting, use a walking foot if you have one, and start sewing along the straight back edge so the stretchiest curve comes last.
Variations and batch ideas
To size up, draw the same shape from a 6 by 9 inch rectangle with a 3 inch toe curve and a 3 3/4 inch wide leg, and cut cuffs at 4 1/2 by 3 3/4 inches. Every measurement scales by one and a half.
For an advent countdown, make 24 and drop a wrapped chocolate or a folded note in each. Skip the numbers. Numerals on a cuff this size are miserable to sew, and the string hangs in order anyway. I use a different cuff fabric on every seventh stocking to mark Sundays, and the kids move a clothespin along the cord as the days pass. Mini clothespins and small candies are a small parts hazard for kids under three, so hang the advent version above toddler reach.
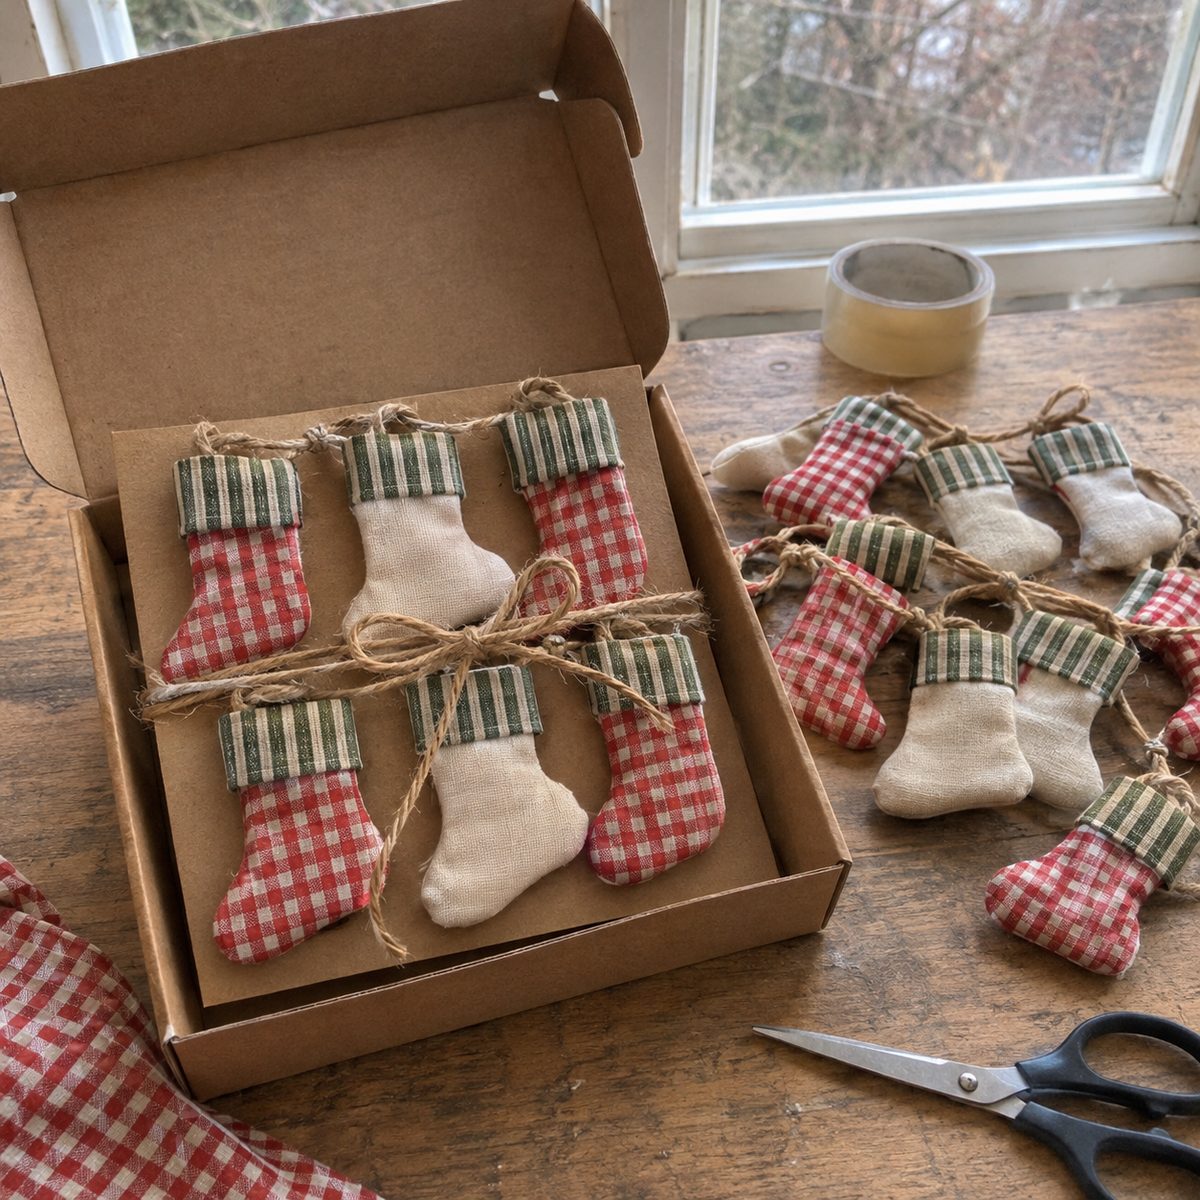
Six stockings on a 4 foot cord, wound around a square of cardboard and tied with the tail of the twine, is a gift people hang the same day. A single one on a 6 inch loop also fits in with the fabric Christmas ornaments on the tree.
Work batches in stages across evenings. Cut all the bodies and cuffs in one sitting. Sew the cuffs on the next, in one long chain. Sew and clip the outlines on the third, turn and press on the fourth. A garland of 12 runs about 4 hours this way, and 24 for advent runs 7. The Christmas sewing projects list has more to make from the same two fat quarters.
Frequently asked questions
Can I sew the mini stockings by hand?
Yes. Use a backstitch 1/4 inch from the edge with about 10 stitches to the inch, and keep the stitches tight around the toe so the trimming does not loosen them. Figure 40 minutes per stocking by hand instead of 20, which makes a garland of 12 a two-evening project.
Where did stockings on a mantel come from?
The custom traces back to the St. Nicholas legend of gold dropped into stockings left drying by the fire, which is why the history of the Christmas stocking is tied to the hearth. The mini garland only borrows the shape, though a wrapped candy in each one does tend to disappear by morning.
What twine works best for the garland?
Three-ply jute for the red check and scrappy versions, since it has the weight to hold a swag and looks right against cotton. Baker’s twine is thinner and suits the Scandinavian set, but it needs an extra hook across a long mantel. Skip ribbon unless it is wired, since loose ribbon sags within a day.
Twelve of these on a string make a room look done for the season, and they pack flat in a sandwich bag for next year. Keep the template in the bag with them. Next November you will be cutting before the coffee is ready.