
Fabric ornaments are the one Christmas project where the scrap bin is an advantage. Every piece on this list fits inside a 7-inch square, most take under 40 minutes, and the finished ornaments hold up year after year in a way paper and glitter never do.
The 25 ornaments below are grouped loosely from classic to woodland, with the materials, cut sizes and steps for each. Pick three or four shapes, cut a dozen of each from the same handful of prints, and you’ll have a tree that looks collected rather than bought.
1. Folded Fabric Star
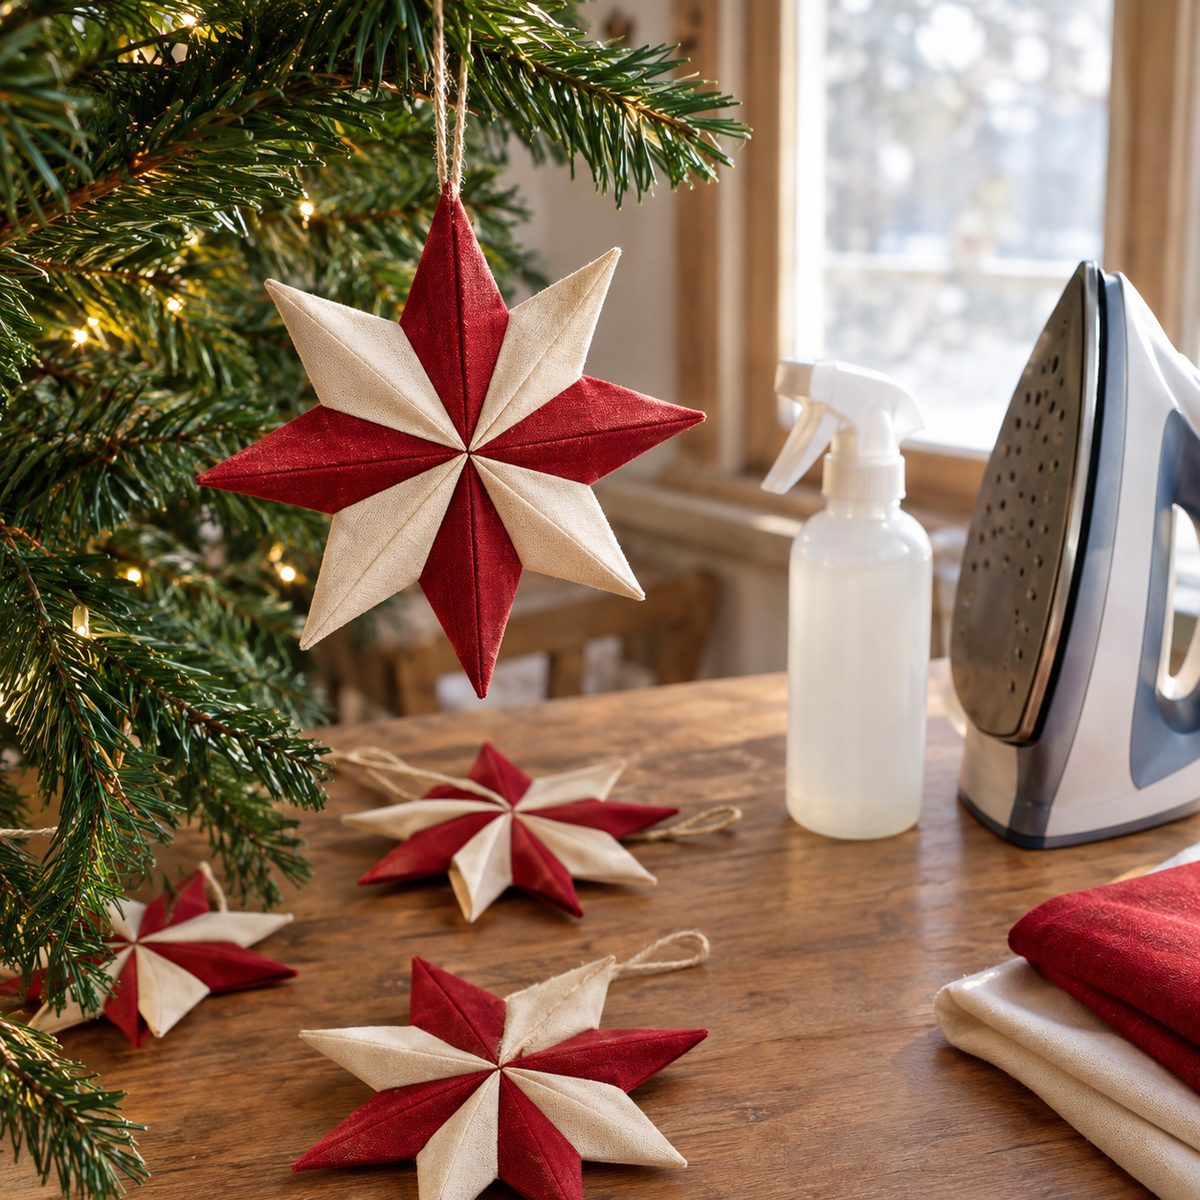
Time: 30 minutes each. Skill: Beginner.
The Scandinavian folded star is the ornament everyone stops to look at, and it uses four 5-inch squares, a 3-inch circle of felt for the back, and a needle and thread. Starch the squares first so the folds stay crisp.
- Fold each square in half, then fold the two top corners down to the center to make a point, like a paper airplane.
- Fold the outer edges in once more to sharpen the point and press.
- Tack the four points together at the center with a few stitches, then stitch the back of each point to the felt circle.
- Add a second layer of four smaller 3.5-inch points on top for a layered star, and sew a ribbon loop to the back.
Two colors, one for each layer, make the shape read clearly from across the room.
2. Patchwork Ball Ornament
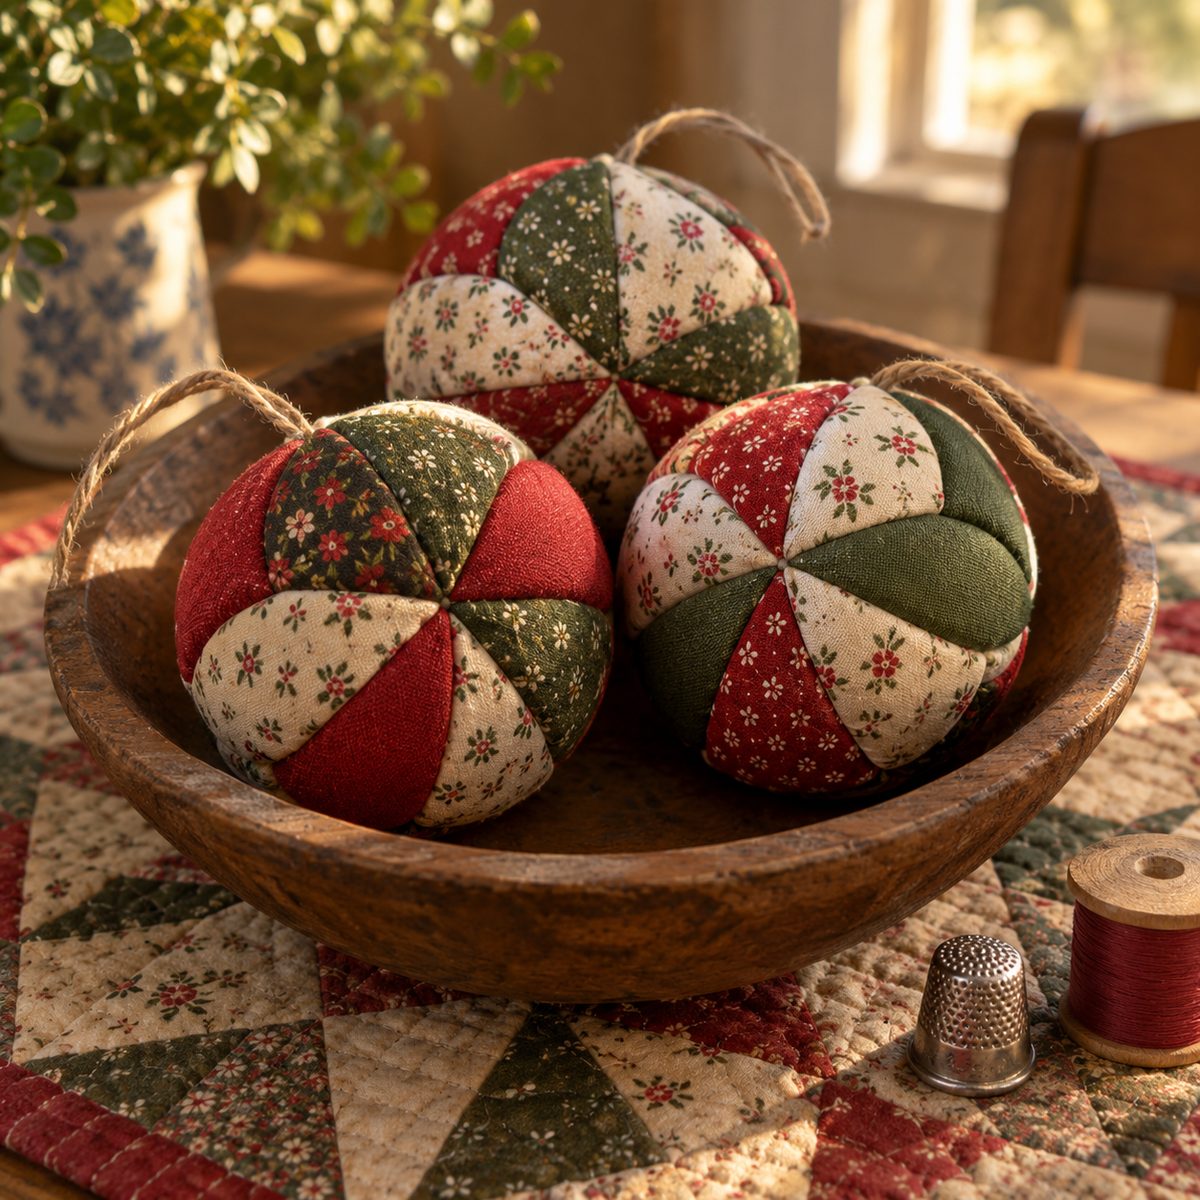
Time: 45 minutes each. Skill: Confident beginner.
A stuffed patchwork ball shows off six different scraps at once. Cut six petal shapes, each 2 inches wide at the middle and 5 inches tall, from six coordinating cottons, and keep a handful of fiberfill and 8 inches of ribbon nearby.
- Sew the petals together along their long curved sides with a 1/4-inch seam, right sides together, stopping 1/4 inch from each tip.
- Join the last petal to the first, leaving a 1.5-inch gap in that final seam.
- Turn right side out, stuff firmly, and slip-stitch the gap closed.
- Pull a thread through the top point, add the ribbon loop, and finish with a small button over the stitches.
If the tips look puckered, trim the seam allowance to 1/8 inch near the points before turning.
3. Scrap Fabric Heart
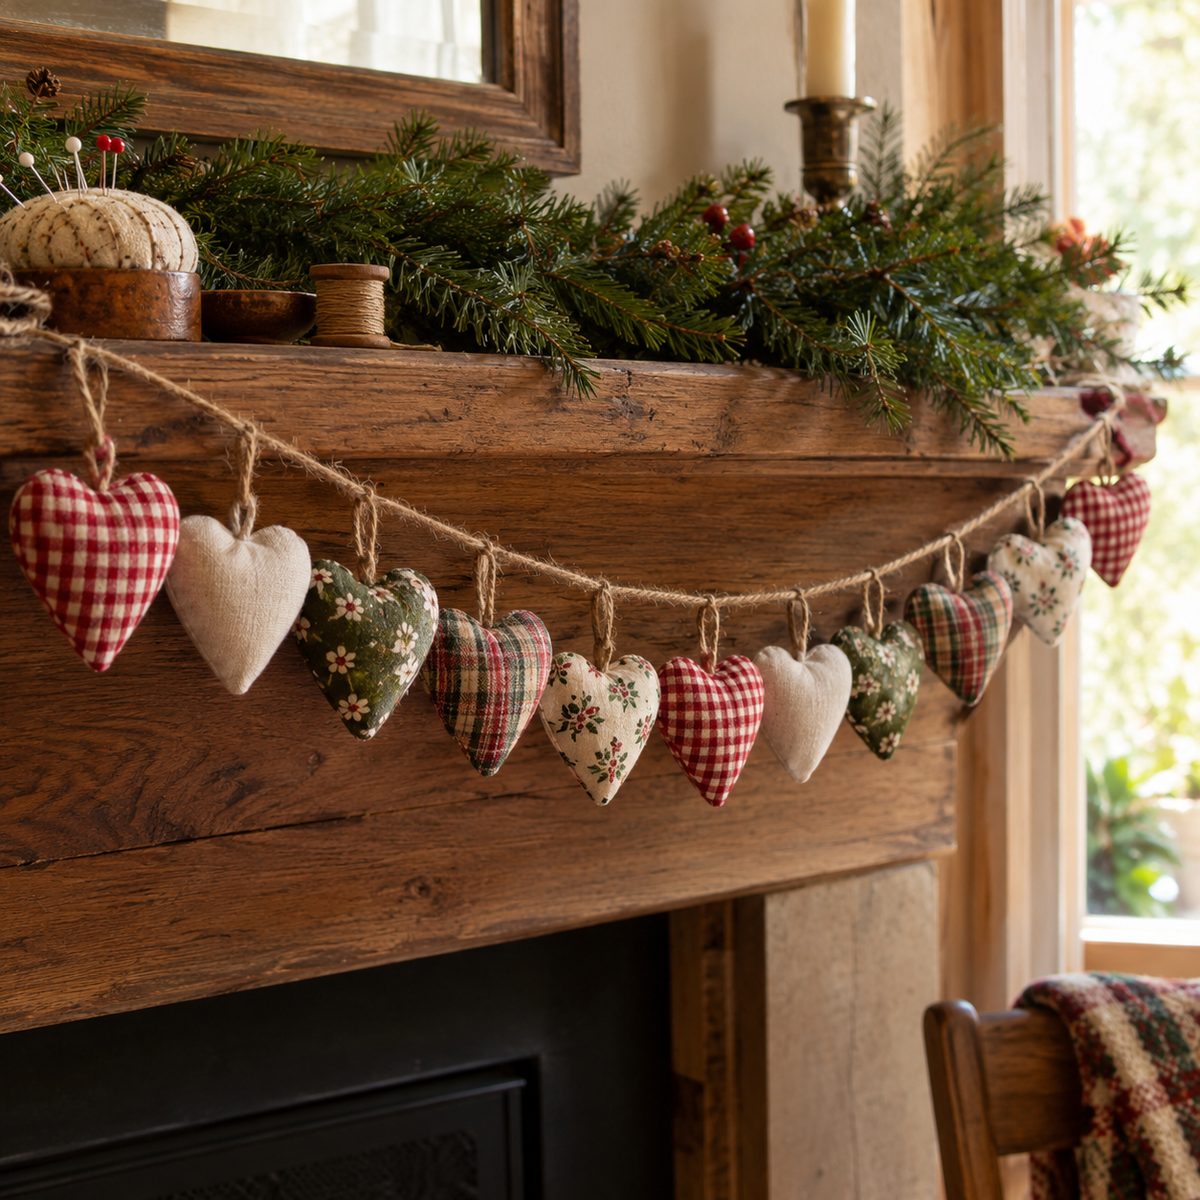
Time: 15 minutes each. Skill: Beginner.
Stuffed hearts are the fastest ornament on this list and the best way to use up the tiniest pieces. Each heart takes two 4-inch squares, a pinch of fiberfill, and 6 inches of twine.
- Trace a 3.5-inch heart on the wrong side of one square and layer it right sides together with the second.
- Sew on the line with a short stitch, leaving a 1-inch gap on one straight side.
- Trim to 1/8 inch, clip into the top notch, turn and stuff lightly.
- Close the gap by hand and stitch the twine loop into the dip at the top.
Browse the scrap fabric projects list if you still have a pile left after the hearts.
4. Mini Gnome Ornament

Time: 40 minutes each. Skill: Confident beginner.
A palm-sized gnome brings the Scandinavian trend down to ornament scale. You need a 5 x 6-inch piece of felt or wool for the hat, a 4-inch square of cotton for the body, a 2 x 3-inch scrap of faux fur or fleece for the beard, a 12 mm wooden bead for the nose, and rice plus fiberfill for weight.
- Sew the body square into a tube, gather the bottom, fill with 2 tablespoons of rice then fiberfill, and gather the top closed.
- Cut a tall triangle hat 5 inches high with a 5-inch base, sew the long edge into a cone, and turn.
- Cut a beard shape from the fur, 3 inches wide at the top, and glue or stitch it to the front of the body.
- Glue the bead nose at the top of the beard, pull the hat down over everything, and tack it in place with a loop of thread at the tip.
Flop the hat tip to one side and tack it so the gnome hangs with a little attitude.
5. Little Fabric House
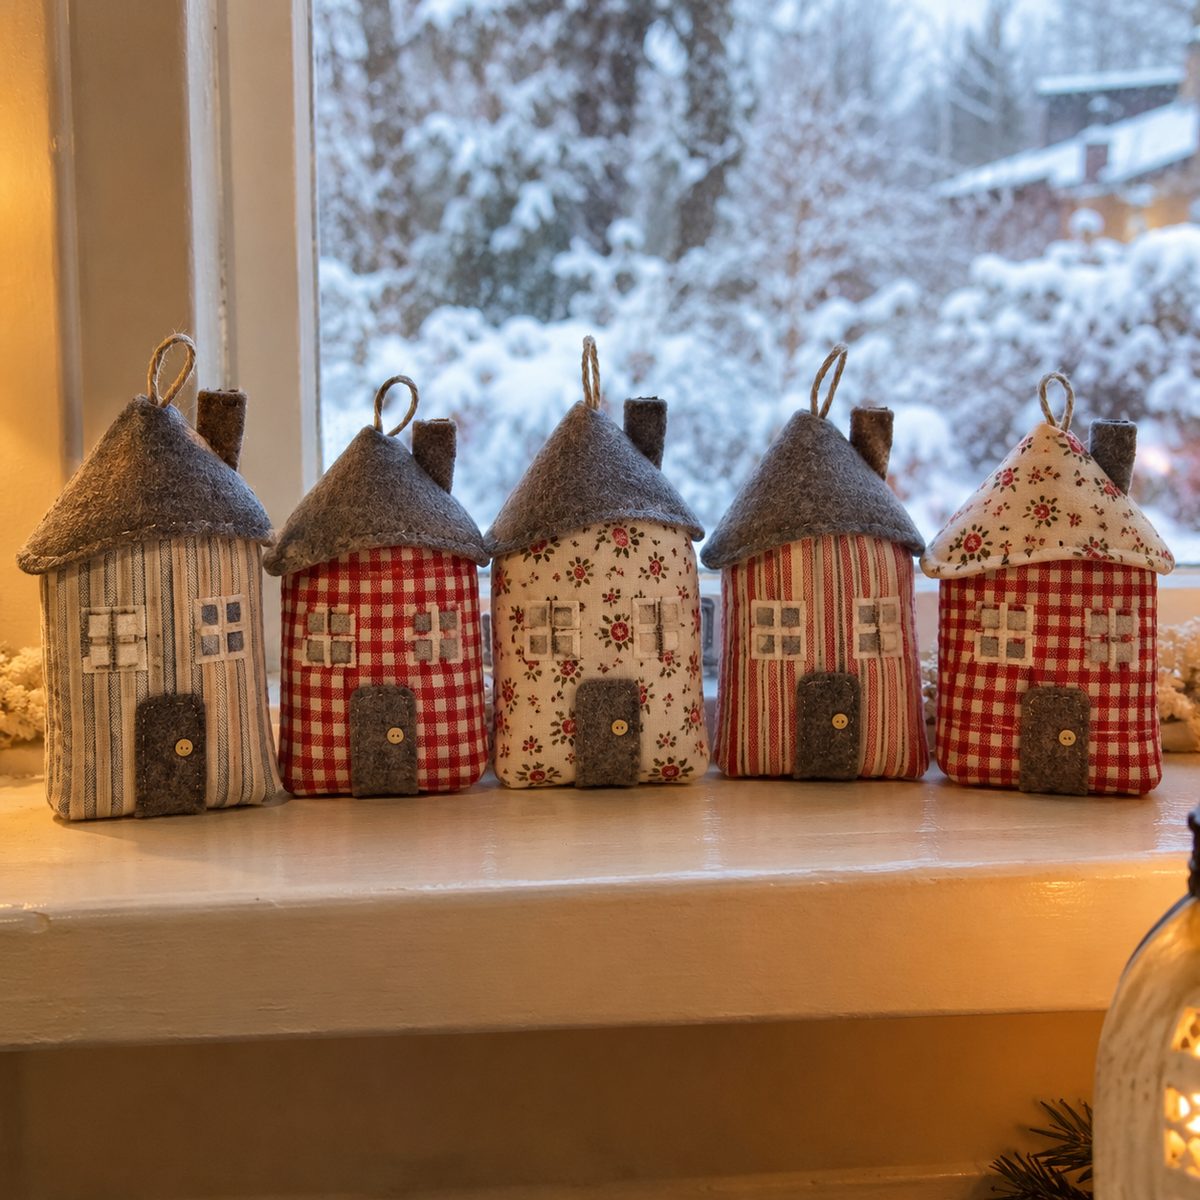
Time: 35 minutes each. Skill: Beginner.
A row of stuffed fabric houses looks like a village along the branches. Cut a house shape 3 inches wide and 4.5 inches tall, with a pointed roof, twice from cotton, plus a felt roof piece and a tiny felt door and window.
- Stitch the felt door and window to the front piece with a few hand stitches before assembling.
- Lay the two house pieces right sides together and sew around with a 1/4-inch seam, leaving the bottom open.
- Turn, press, stuff, and sew the bottom closed by hand.
- Fold the felt roof over the peak and whipstitch it on, catching a ribbon loop at the top.
Use ticking stripe, gingham and small florals so each house in the row is different.
6. Keepsake Shirt Ornament
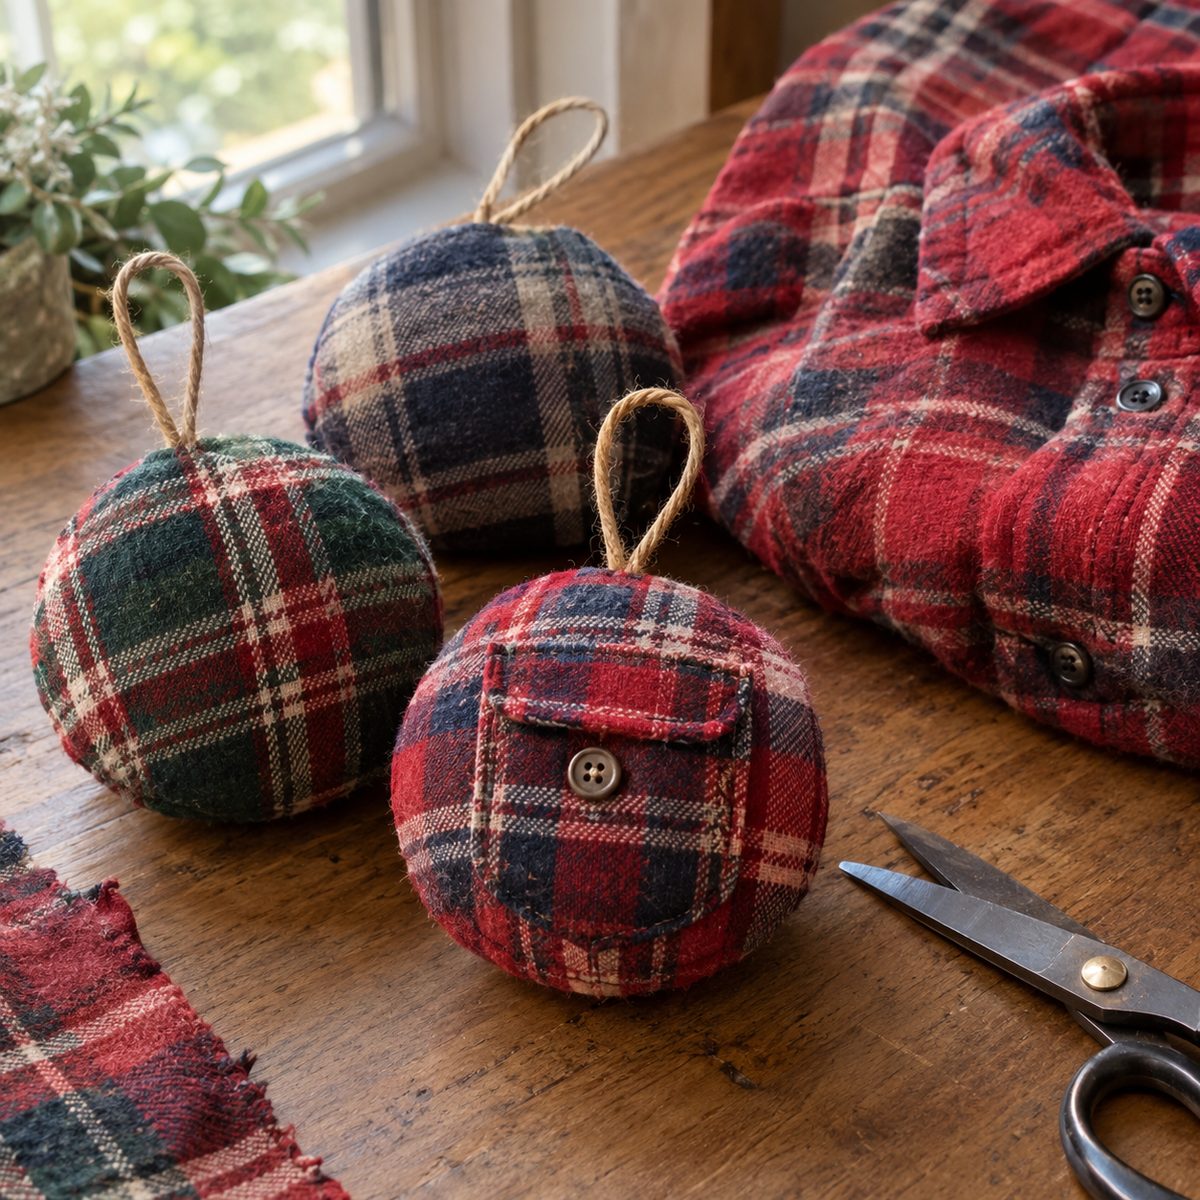
Time: 30 minutes each. Skill: Beginner.
A ball ornament sewn from a loved one’s flannel shirt turns a closet item into something the family looks for every year. One shirt yields ten or more. Cut a 7-inch circle around the pocket, plus a plain 7-inch circle for the back, and have fiberfill and ribbon ready.
- Hand-sew a running stitch 1/4 inch from the edge of each circle, pull to gather into a cup, and stuff firmly.
- Pull the gathers closed on each half and knot off.
- Place the two halves gathered-sides together and whipstitch around the seam.
- Cover the seam with a strip of ribbon and add a hanging loop at the top.
Center a button or the pocket flap on the front so the detail that made the shirt recognizable stays visible.
7. Stuffed Five-Point Star

Time: 25 minutes each. Skill: Beginner.
A plump five-point star in linen or ticking is the quieter cousin of the folded star. Each one needs two 6-inch squares, fiberfill, and twine.
- Trace a 5-inch star and sew the two squares right sides together on the line, leaving a 1.5-inch gap on one side.
- Trim to 1/8 inch and clip into each inner corner right up to the stitching.
- Turn with a chopstick, poking each point out fully, and stuff.
- Slip-stitch the gap closed and sew a twine loop to one point.
Rough-cut linen frays beautifully, so leave a 1/4-inch raw edge and top-stitch instead of turning if you want a rustic finish. Our guide to choosing fabric covers which linens behave.
8. Fabric Candy Cane

Time: 20 minutes each. Skill: Beginner.
Striped fabric candy canes bend into shape around a pipe cleaner and never go stale. Cut a 2.5 x 9-inch strip of red and white stripe cut on the bias so the stripes spiral, plus one chenille stem.
- Fold the strip in half lengthwise, right sides together, and sew the long edge with a 1/4-inch seam, rounding one end.
- Turn with a loop turner and press flat.
- Slide the chenille stem inside and stuff a little fiberfill around it with a chopstick.
- Fold the open end in and stitch closed, then bend the top into a hook.
Cut the strip on the bias and the stripes twist like the real thing.
9. Mini Mitten Pair

Time: 25 minutes per pair. Skill: Beginner.
A pair of tiny mittens joined by a string looks sweet on the tree and even better tied onto a gift. Each pair uses a 6 x 8-inch piece of wool or flannel, a 1 x 7-inch strip of contrasting fleece for cuffs, and 10 inches of baker’s twine.
- Trace a 3-inch mitten twice, flip the template, and trace twice more so you get a left and a right.
- Sew each pair right sides together with a 1/4-inch seam, leaving the wrist open, and clip the thumb curve.
- Turn, press, and whipstitch a folded fleece cuff around each wrist.
- Stitch one end of the twine inside each cuff so the mittens hang as a pair.
Wool blanket scraps hold their shape best. If you’re using felt, this note on sewing felt on a machine will save you a few skipped stitches.
10. Fabric Bird Ornament
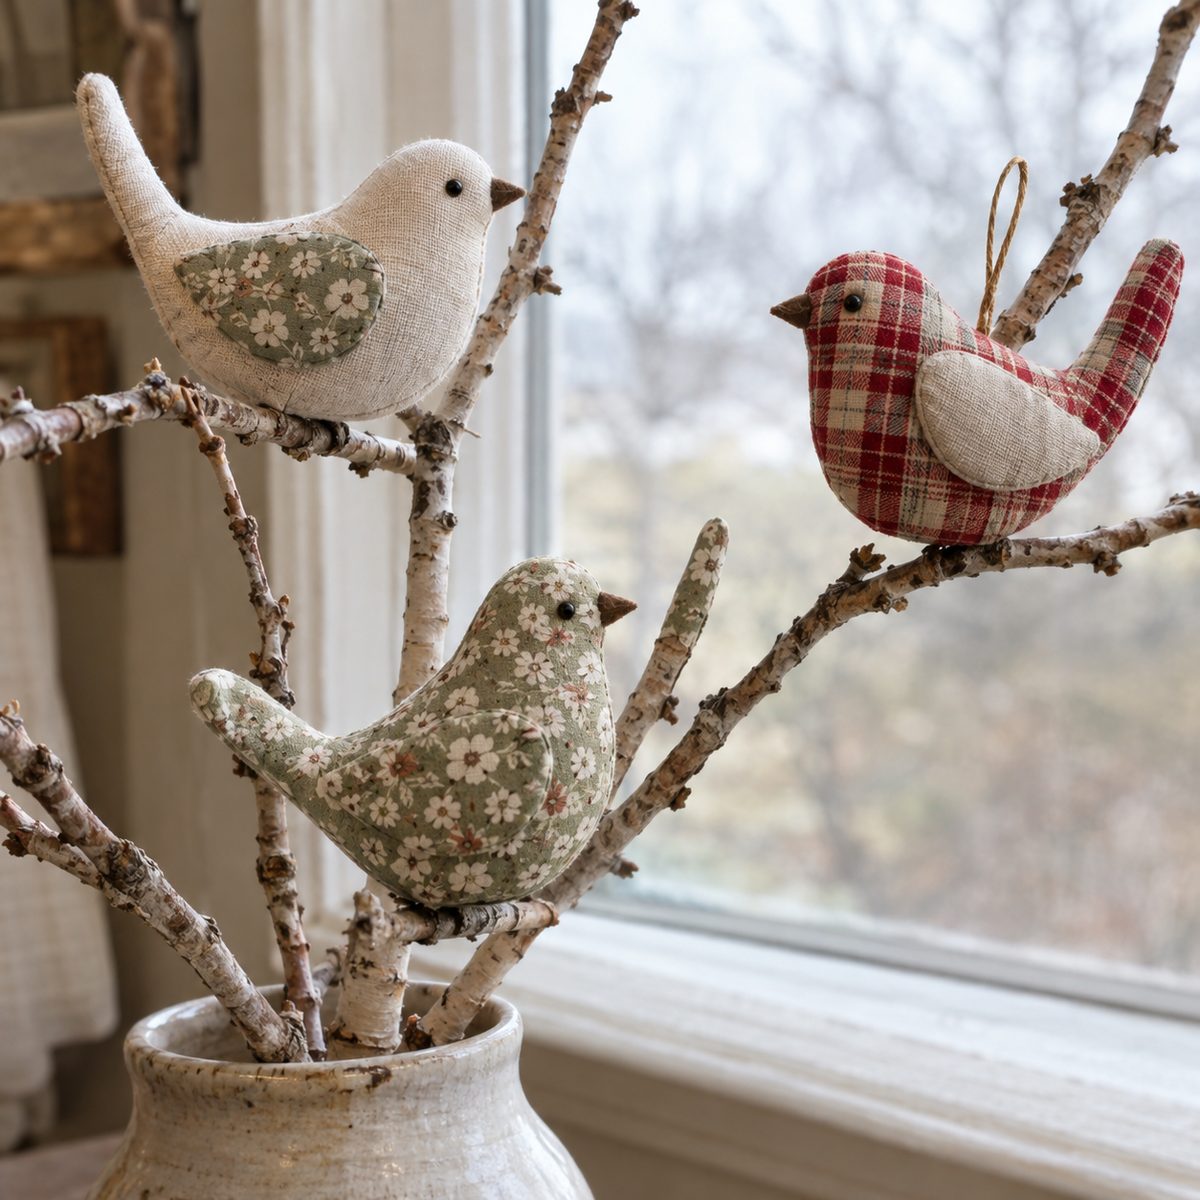
Time: 40 minutes each. Skill: Confident beginner.
The classic three-piece stuffed bird has a rounded body and a tail that sticks up, and it sits beautifully on a branch. You need two mirrored side pieces about 5 inches long and one underbody gusset, cut from a 7 x 10-inch scrap, plus fiberfill and thread.
- Sew the gusset to the belly edge of one side piece from beak to tail, right sides together, then sew the other side piece to the opposite edge of the gusset.
- Sew the two sides together along the back from beak to tail, leaving a 1.5-inch gap in the middle.
- Clip the curves, turn, and stuff until the body is round and firm.
- Close the gap, add two French knots for eyes, and stitch a thread loop at the center of the back.
Linen and small-scale prints suit the shape; large florals get lost on a bird this small.
11. Mini Cone Tree
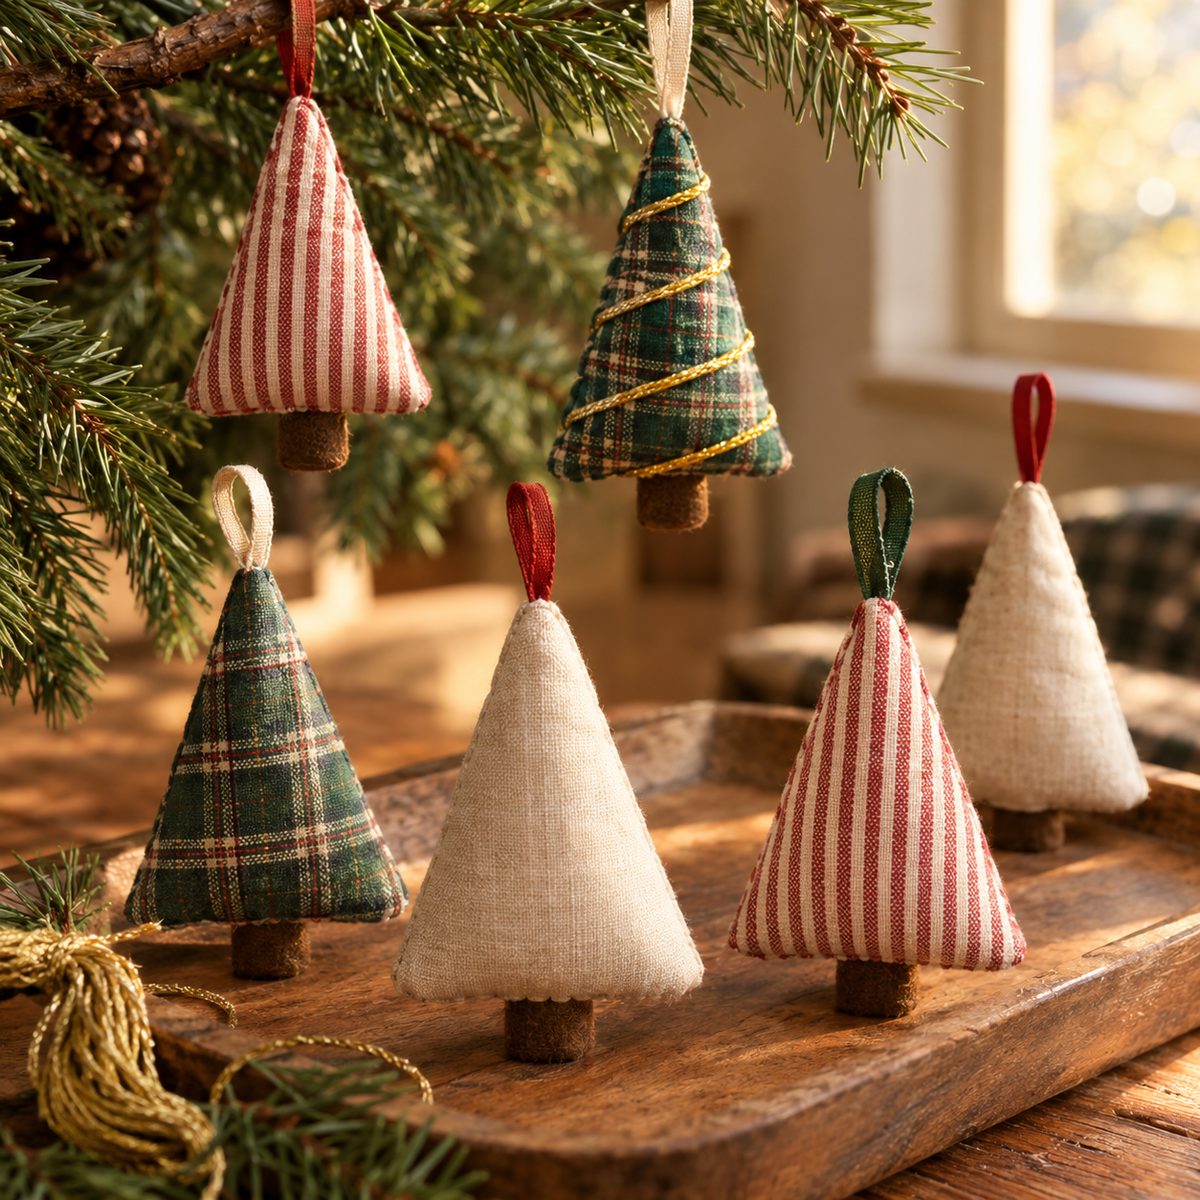
Time: 20 minutes each. Skill: Beginner.
A stuffed cone tree hangs upside down from its tip or stands on a shelf. Each one takes a quarter-circle of fabric with a 5-inch radius, a 3-inch felt circle for the base, fiberfill and ribbon.
- Fold the quarter-circle in half, right sides together, and sew the straight edge with a 1/4-inch seam to make a cone.
- Turn, press the seam, and stuff firmly through the open base.
- Fold a ribbon loop into the tip as you close it with a few stitches, or add the loop by hand afterward.
- Whipstitch the felt circle over the base to seal in the stuffing.
Wrap a strand of embroidery floss around the cone in a spiral and tack it down for a garland effect.
12. Layered Felt Snowflake
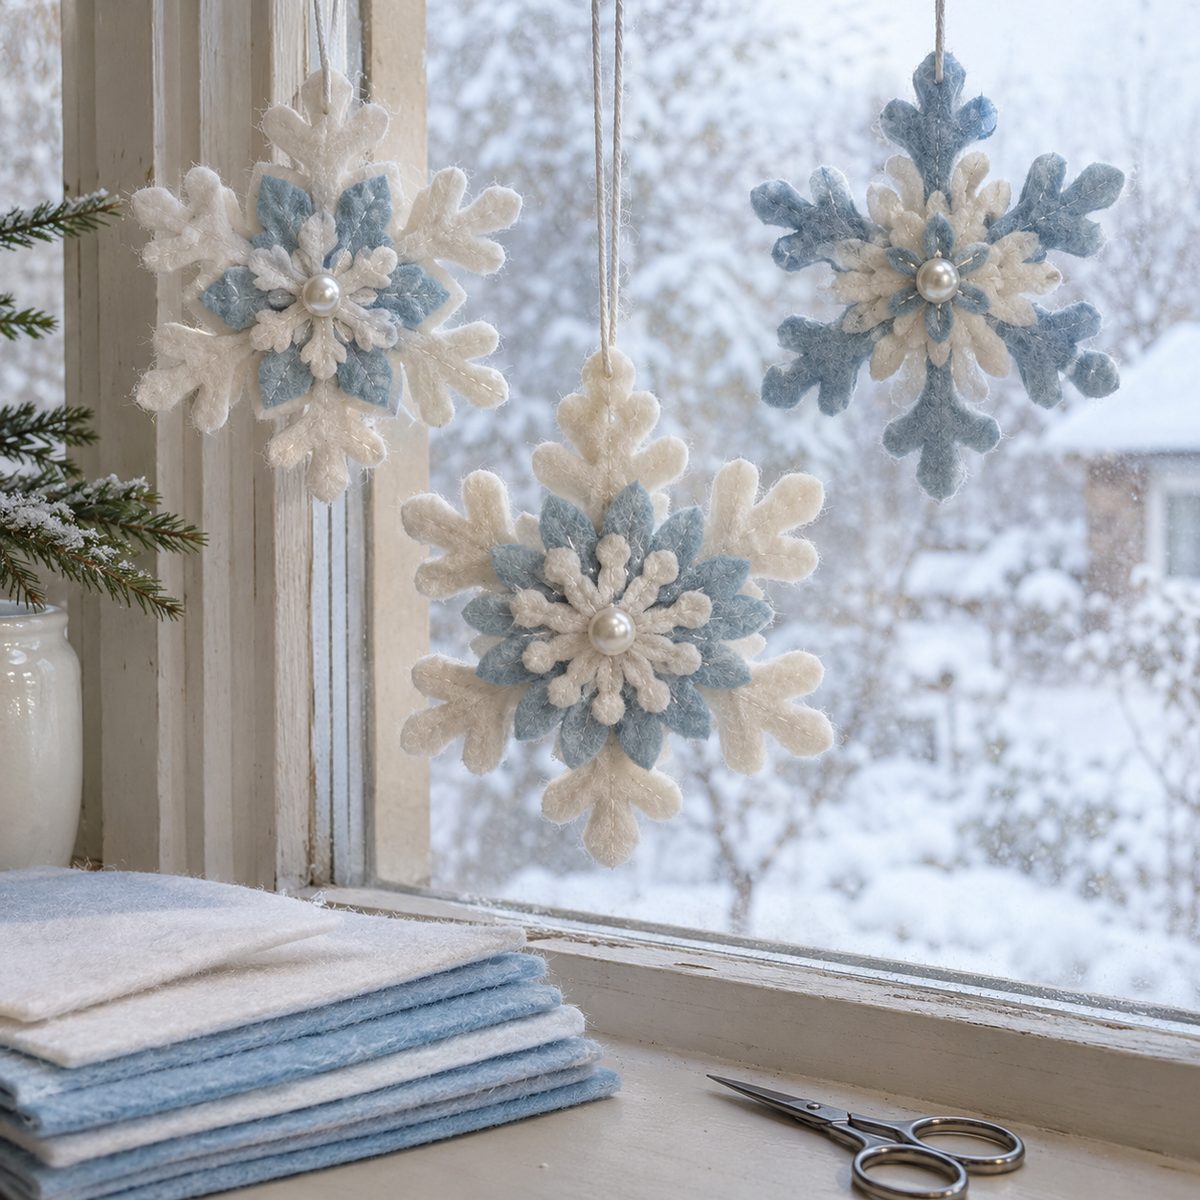
Time: 30 minutes each. Skill: Beginner.
Felt snowflakes layer two or three cut shapes with a button in the center, and the machine does all the holding. You need two 4-inch squares of white or cream wool felt, a 3-inch square of pale blue, a button, and a ribbon loop.
- Fold each square into quarters and cut a simple snowflake, the way you would with paper.
- Unfold and stack the layers, largest at the bottom, turning each so the points fall between the ones below.
- Sew through the center with a button on top, catching all the layers.
- Stitch a ribbon loop to one point.
Wool-blend felt cuts crisply and won’t pill; craft felt gets fuzzy by the second Christmas.
13. Yo-Yo Tree Ornament
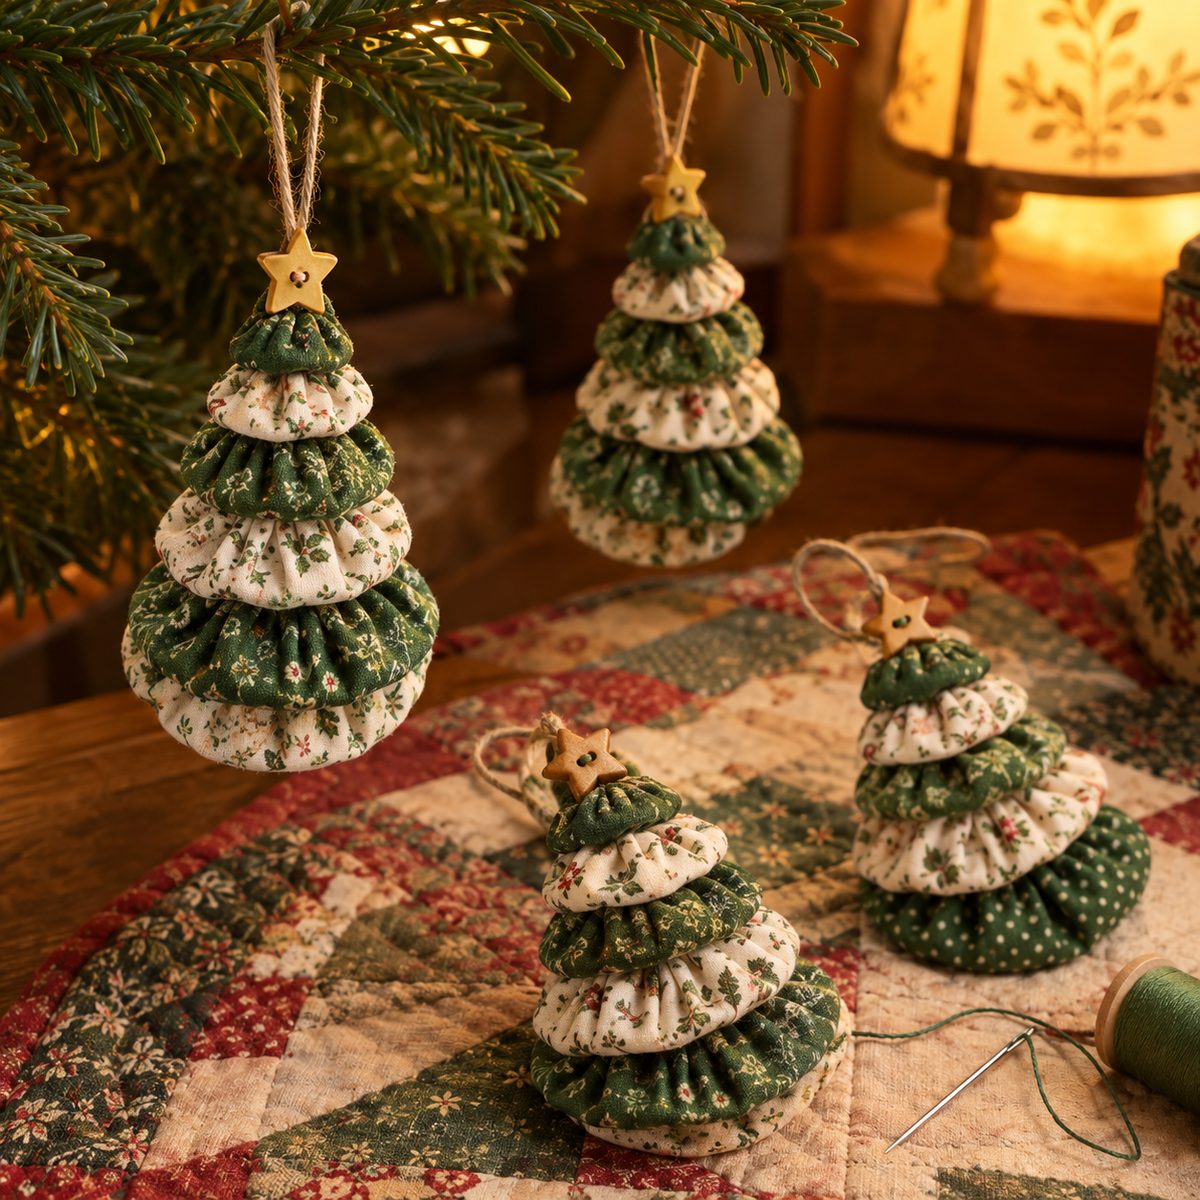
Time: 45 minutes each. Skill: Beginner.
Stacked fabric yo-yos in shrinking sizes make a tree with real texture, and the whole thing is hand-sewn in front of a movie. Cut circles of 5, 4.5, 4, 3.5, 3, and 2.5 inches from green prints, plus a small star button and 8 inches of ribbon.
- Fold the edge of each circle under 1/4 inch and sew a running stitch around it with doubled thread.
- Pull tight to gather, flatten, and knot off; repeat for all six.
- Thread a long needle up through the center of the yo-yos from largest to smallest.
- Stitch the button on top, run the ribbon loop through it, and tack the layers so they don’t spin.
A 1-inch wooden bead between each yo-yo opens the stack up into a tiered tree.
14. Hexie Ornament
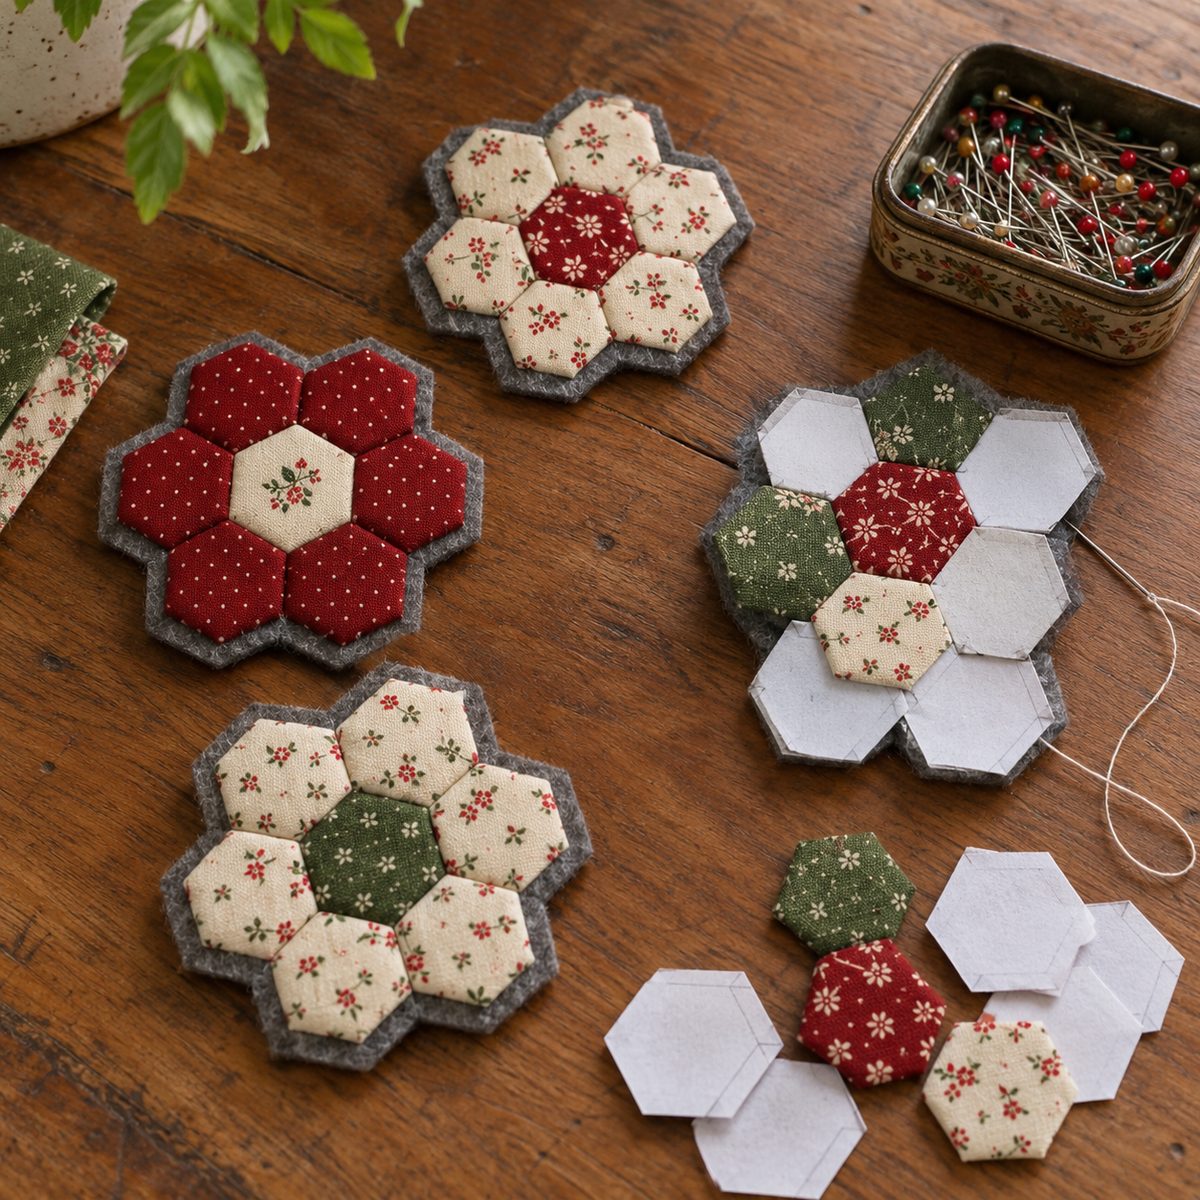
Time: 1 hour each. Skill: Confident beginner.
English paper piecing hexagons become a padded ornament when you join seven into a flower and back it with felt. You need seven 1-inch hexagon paper templates, seven 2.5-inch scraps, a 5-inch piece of felt, thin batting and thread.
- Baste each scrap over a paper template, folding the edges to the back.
- Whipstitch six hexagons around a center one to make a flower, then remove the papers.
- Trace the flower onto batting and felt, cut both, and layer the felt, batting and flower.
- Blanket-stitch around the edge through all layers, slipping a ribbon loop into the top.
Low-loft batting keeps the ornament flat; the batting guide explains which weight to pick.
15. Selvage Tree
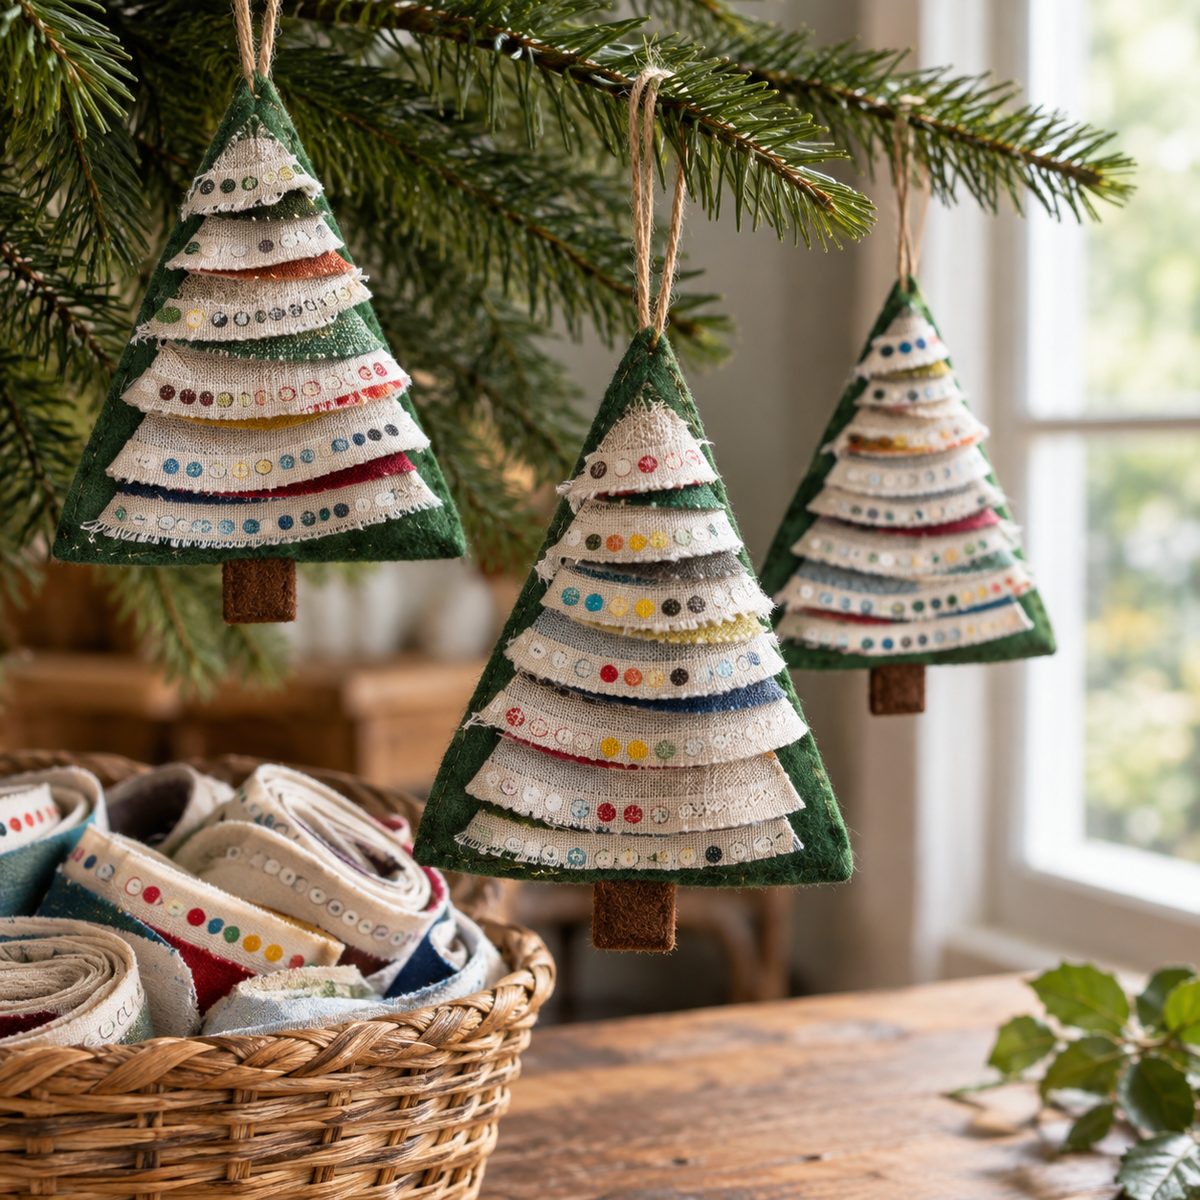
Time: 30 minutes each. Skill: Beginner.
Those printed fabric edges you’ve been saving finally have a job. A selvage tree layers strips onto a felt triangle like shingles. Cut a 4 x 5-inch felt triangle, gather eight to ten selvage strips, and keep a 1-inch piece of brown felt for the trunk.
- Starting at the bottom of the triangle, lay a selvage strip across and sew it down along its top edge.
- Overlap the next strip so it covers the stitching, and keep going to the top.
- Trim the sides flush with the felt triangle.
- Sew the felt trunk to the back at the bottom and a thread loop at the top.
Mix the white selvage edges with the printed color bands so the tree reads like stripes.
16. Mini Quilt Ornament
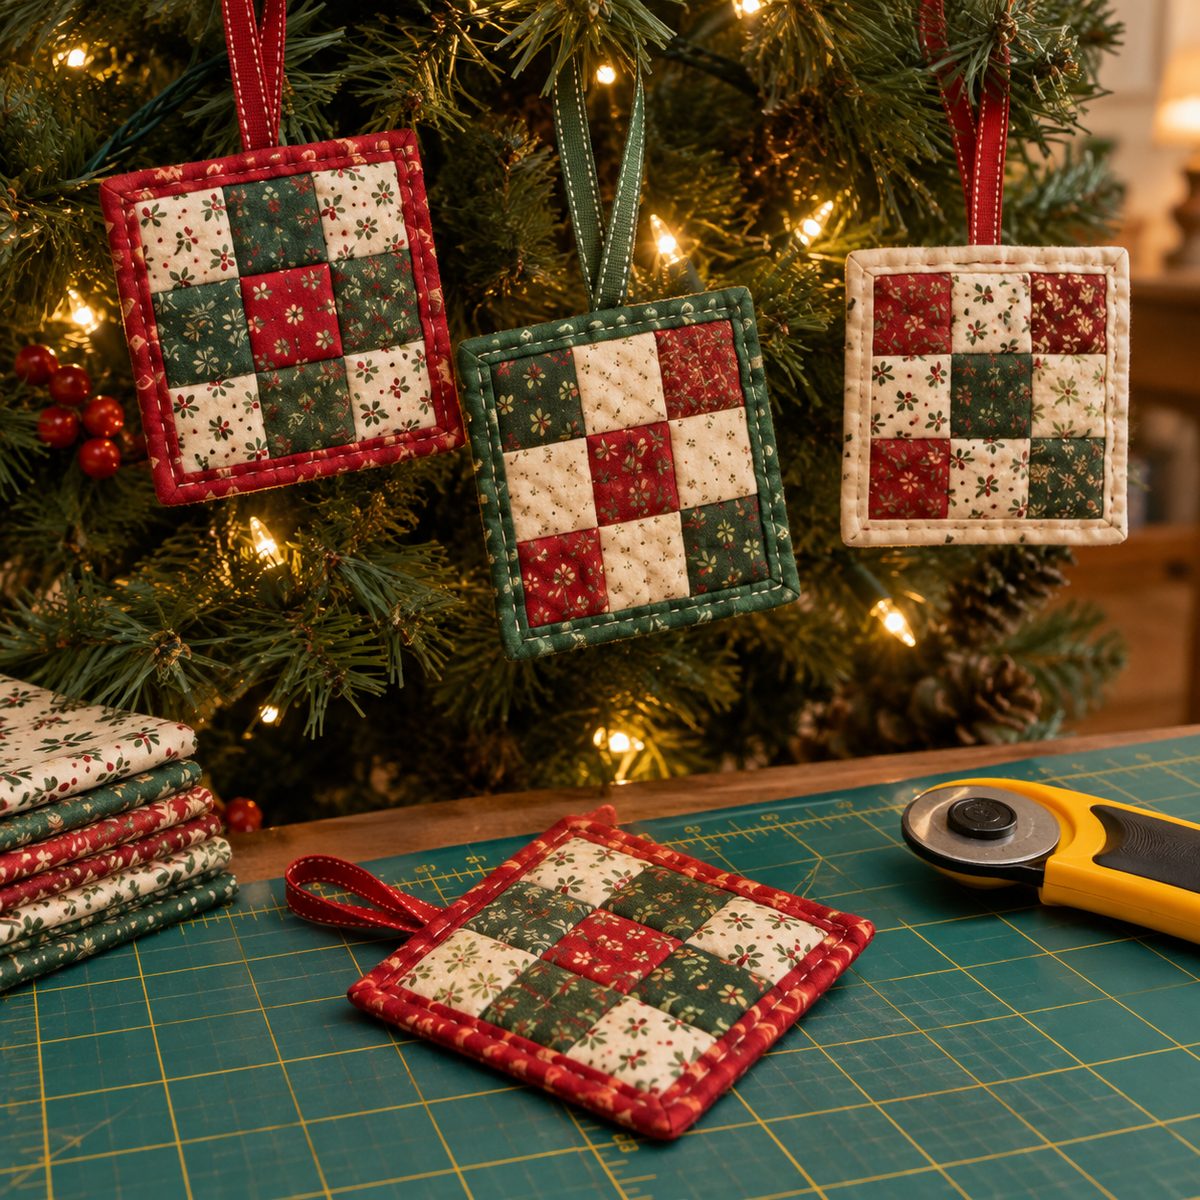
Time: 45 minutes each. Skill: Confident beginner.
A 4-inch nine-patch, quilted and bound, is a tiny quilt for the tree and a good use of leftover blocks. You need nine 1.5-inch squares, a 4.5-inch square of backing and one of batting, and a 1.25 x 20-inch binding strip.
- Sew the nine squares into three rows and the rows into a block with 1/4-inch seams, pressing seams in opposite directions.
- Layer backing, batting and block, and quilt diagonally through the squares.
- Trim square and sew the binding to the front, folding the corners.
- Fold the binding to the back, slip-stitch it down, and sew a ribbon loop into one corner.
If the binding is new to you, this walkthrough on joining binding strips keeps the corners tidy.
17. Mini Fabric Wreath
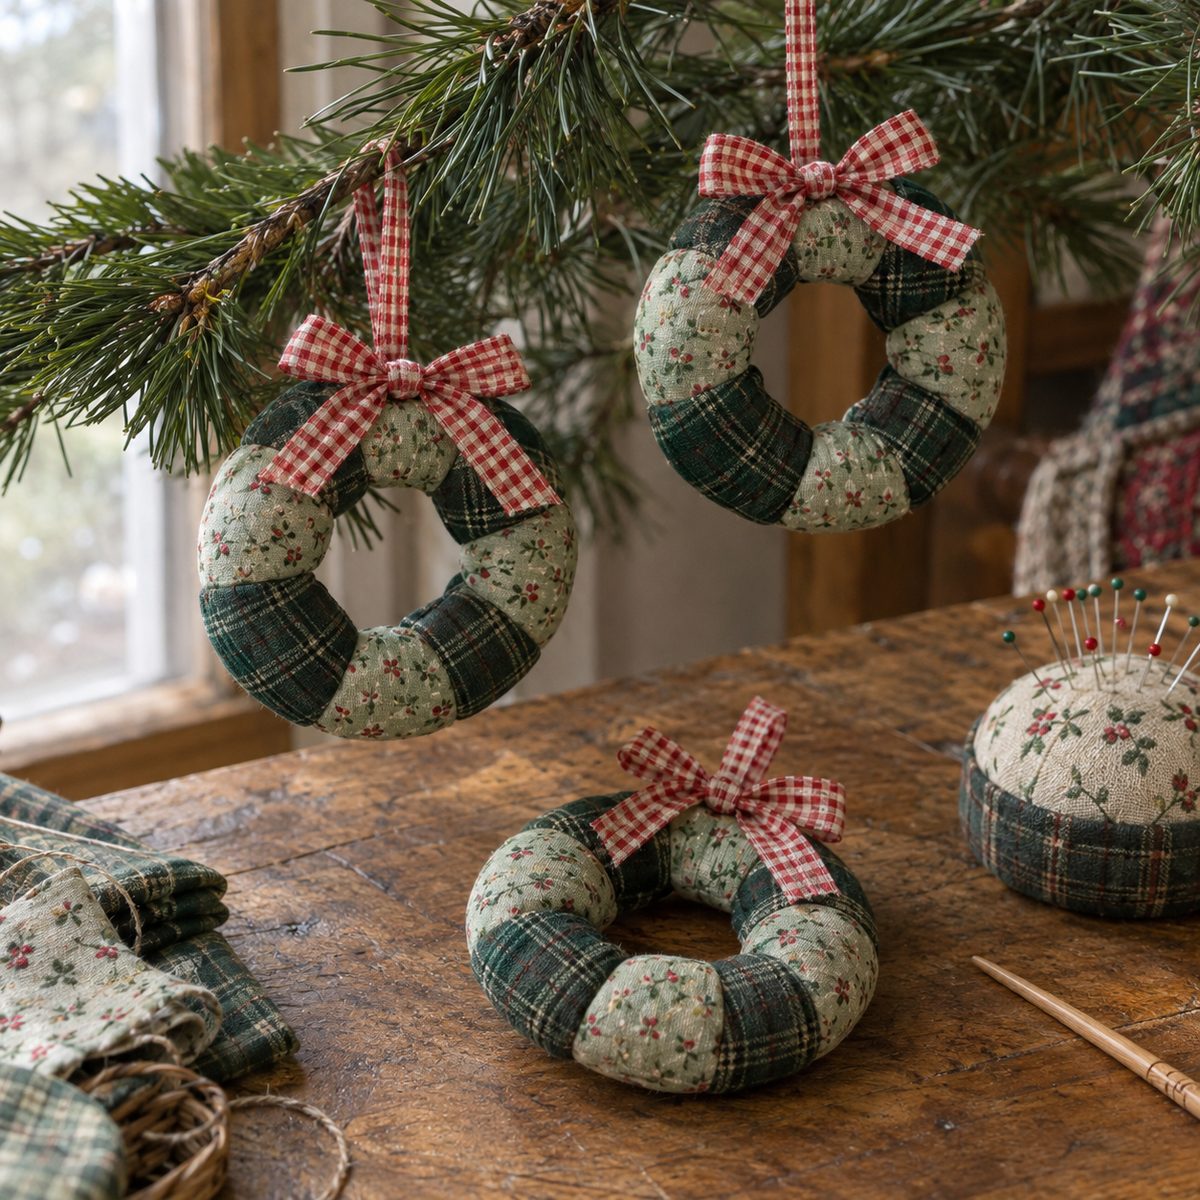
Time: 25 minutes each. Skill: Beginner.
A stuffed fabric ring looks like a tiny wreath and takes a single 3 x 14-inch strip of green print, a bit of fiberfill, and a scrap of red for a bow.
- Fold the strip in half lengthwise, right sides together, and sew the long edge with a 1/4-inch seam.
- Turn the tube, stuff it loosely with a chopstick, and bend it into a ring.
- Tuck one raw end inside the other and slip-stitch the join.
- Tie a bow from a 1 x 8-inch strip of red cotton, stitch it over the join, and add a hanging loop behind it.
A strip of dark green plaid with a red gingham bow gives the most wreath-like result.
18. Felt Gingerbread House

Time: 40 minutes each. Skill: Beginner.
A flat felt gingerbread house with rickrack icing and button gumdrops is an ornament kids can help with. Cut a house 3.5 inches wide and 4.5 inches tall twice from brown wool felt, plus white rickrack, a few tiny buttons and a white felt door and window.
- Sew the rickrack along the roofline of the front piece by hand or with a narrow zigzag.
- Stitch on the door, window and buttons with white thread.
- Layer the front onto the back piece, wrong sides together, and blanket-stitch around the edge with white floss, leaving a 1-inch gap.
- Stuff lightly, close the gap, and tie a ribbon loop through the peak.
Keep the stuffing thin so the house stays flat enough to hang straight.
19. Fabric Bell Ornament

Time: 30 minutes each. Skill: Beginner.
A stuffed bell with a bead clapper is a shape you don’t see often, and it’s simple. Cut a bell shape 3 inches wide and 3.5 inches tall twice from cotton, and keep a 10 mm bead, 8 inches of ribbon and fiberfill nearby.
- Sew the two bell pieces right sides together with a 1/4-inch seam, leaving the flat bottom edge open.
- Clip the curves, turn and press, then stuff firmly.
- Fold the bottom edge in and sew it closed by hand.
- Thread the bead onto a short length of embroidery floss, knot it, and stitch it to the bottom center; add the ribbon loop to the top.
Gold lamé or a metallic-flecked cotton on one side makes the bell catch the tree lights.
20. Stuffed Snowman
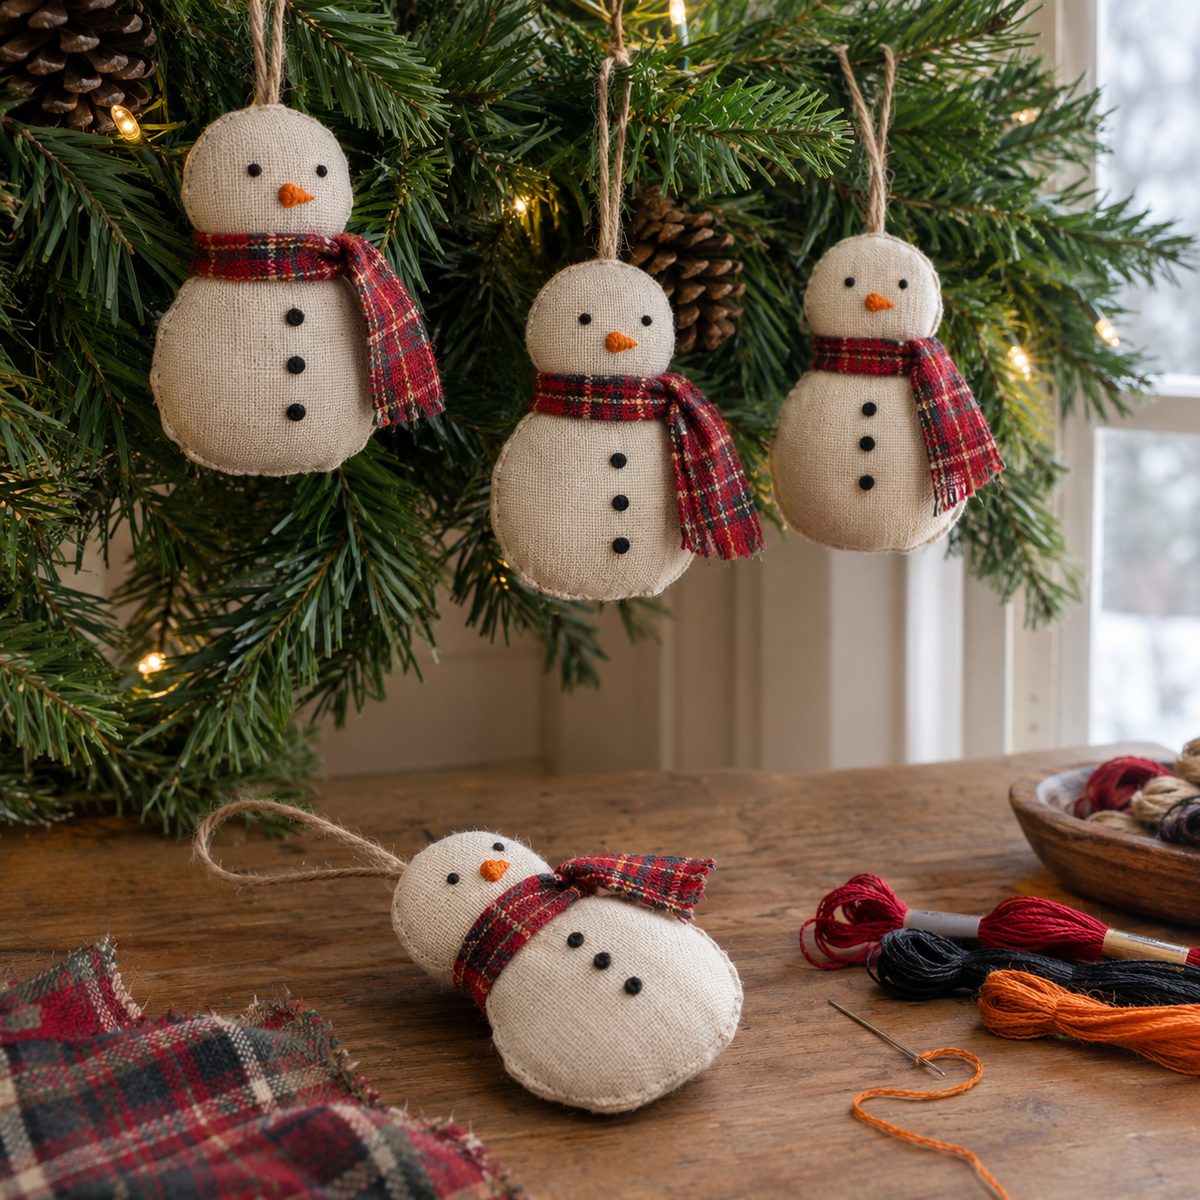
Time: 35 minutes each. Skill: Beginner.
A two-ball snowman in cream linen with a tiny scarf hangs flat against the branches. You need a 6 x 10-inch piece of cream linen or white flannel, a 1/2 x 6-inch scrap of plaid for the scarf, black and orange embroidery floss, and fiberfill.
- Trace a snowman outline, a 2.5-inch head on a 3.5-inch body, twice on the fabric and sew the pieces right sides together, leaving a 1.5-inch gap on one side.
- Clip into the neck curves, turn, stuff and close the gap.
- Embroider two French knot eyes, a tiny orange carrot nose and three black knots for buttons.
- Tie the plaid scarf around the neck and sew a thread loop to the top of the head.
Pull the thread tight across the neck from front to back before stuffing the head so the two sections stay defined.
21. Tiny Quilted Pillow

Time: 20 minutes each. Skill: Beginner.
Three-inch pillows with a ribbon loop are the ornament for every orphan quilt block and test swatch in your drawer. Trim a block or scrap to 3.5 inches, cut a matching backing, and keep fiberfill and ribbon handy.
- Pin the ribbon loop to the front piece at one corner, pointing inward.
- Sew front and back right sides together with a 1/4-inch seam, leaving 1.5 inches open on one side.
- Clip the corners, turn and stuff softly.
- Slip-stitch the gap and, if you like, tie a bow of twine around the pillow like a gift.
Quilt the front with a few hand stitches in perle cotton before assembling for extra texture.
22. Fabric Acorn Ornament

Time: 20 minutes each. Skill: Beginner.
Fabric acorns suit a woodland tree and bridge the gap between the fall mantel and Christmas. Cut a 3-inch circle of linen for the body and a 2.5 x 4-inch strip of brown corduroy or wool for the cap, plus a 1-inch twig or a bit of brown felt for the stem.
- Gather the linen circle with a running stitch, stuff firmly, and pull closed.
- Sew the cap strip into a ring, gather one edge tightly, and fit it over the gathered top of the body.
- Stitch the cap to the body around its lower edge.
- Glue or stitch the twig stem at the top and add a thread loop beside it.
A real twig stem and a corduroy cap make it hard to tell these from the ones on the ground.
23. Fabric Mushroom Ornament
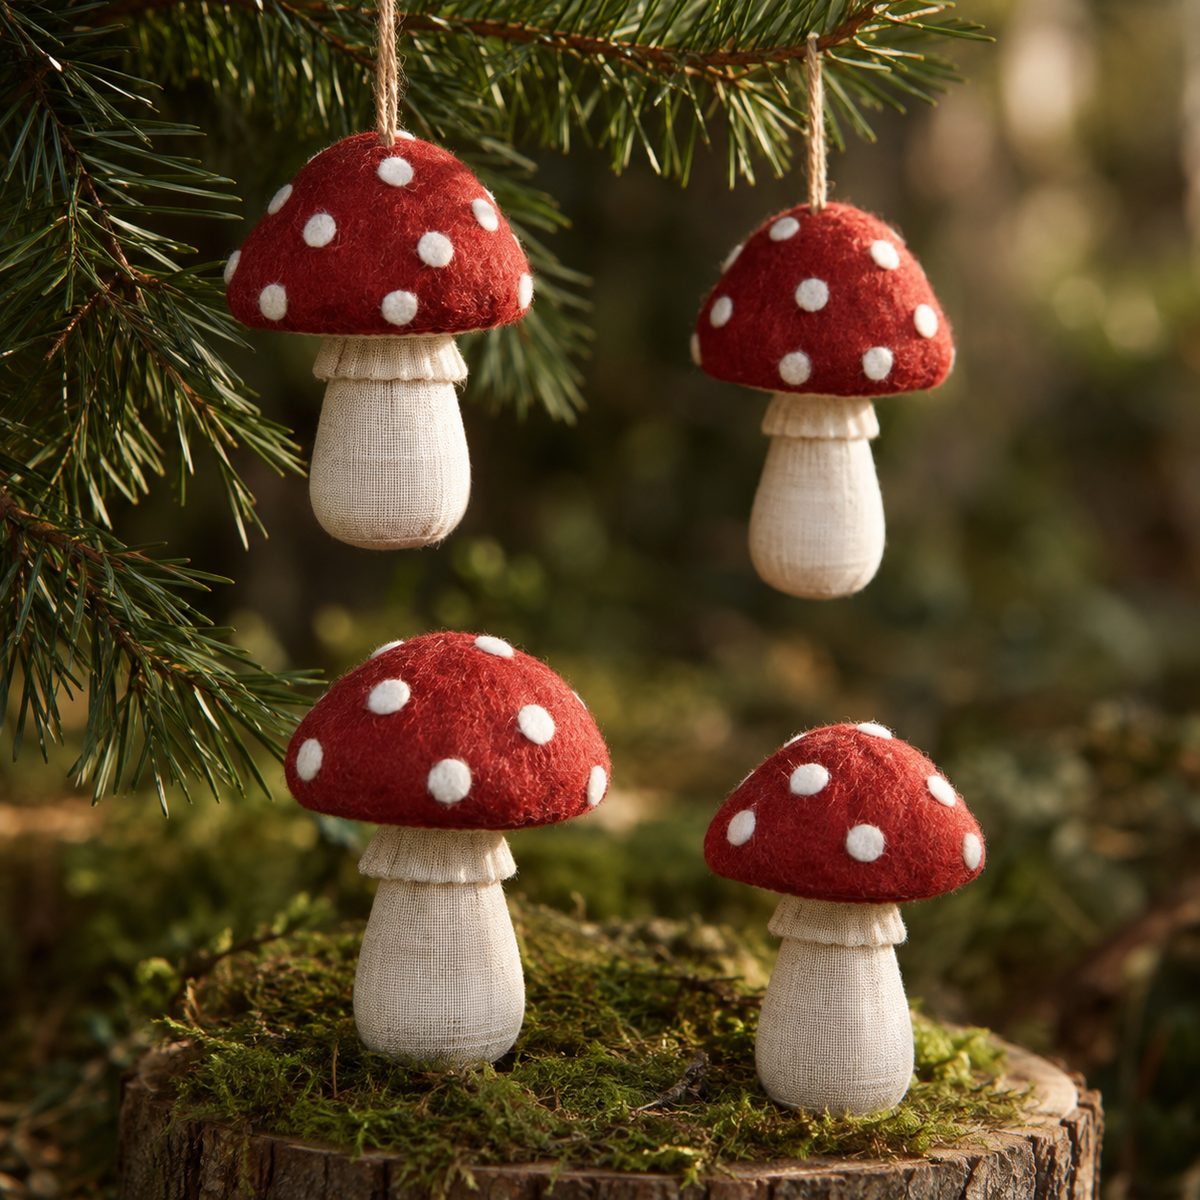
Time: 30 minutes each. Skill: Confident beginner.
Red-capped toadstools are everywhere this year and they sew up from a 4-inch circle of red cotton, a 3-inch circle of cream, a 2 x 4-inch strip of cream linen for the stem, white felt dots, and fiberfill.
- Sew the red and cream circles right sides together, leaving 1.5 inches open, turn, stuff and close to make the cap.
- Sew the stem strip into a tube, close one end, stuff, and gather the other end.
- Stitch the gathered end of the stem to the cream underside of the cap.
- Glue or stitch white felt dots on the red top and add a thread loop at the cap’s center.
Red-and-white gingham instead of solid red makes the mushroom look hand-made rather than toy-like.
24. Fabric Angel Ornament

Time: 40 minutes each. Skill: Confident beginner.
A cone-bodied angel with lace wings has been on trees for a century and still looks fresh in linen. You need a quarter-circle of cream linen with a 4-inch radius, a 1-inch wooden bead for the head, a 4-inch piece of 2-inch-wide lace for the wings, and gold thread.
- Sew the quarter-circle into a cone, turn, and stuff the body lightly.
- Glue or stitch the bead head to the tip of the cone.
- Gather the lace at its center with a few stitches to make two wings and sew them to the back.
- Twist gold thread into a halo, tack it to the bead, and add a thread loop behind the head.
A few strands of embroidery floss glued around the bead make simple hair.
25. Rag Ball Ornament
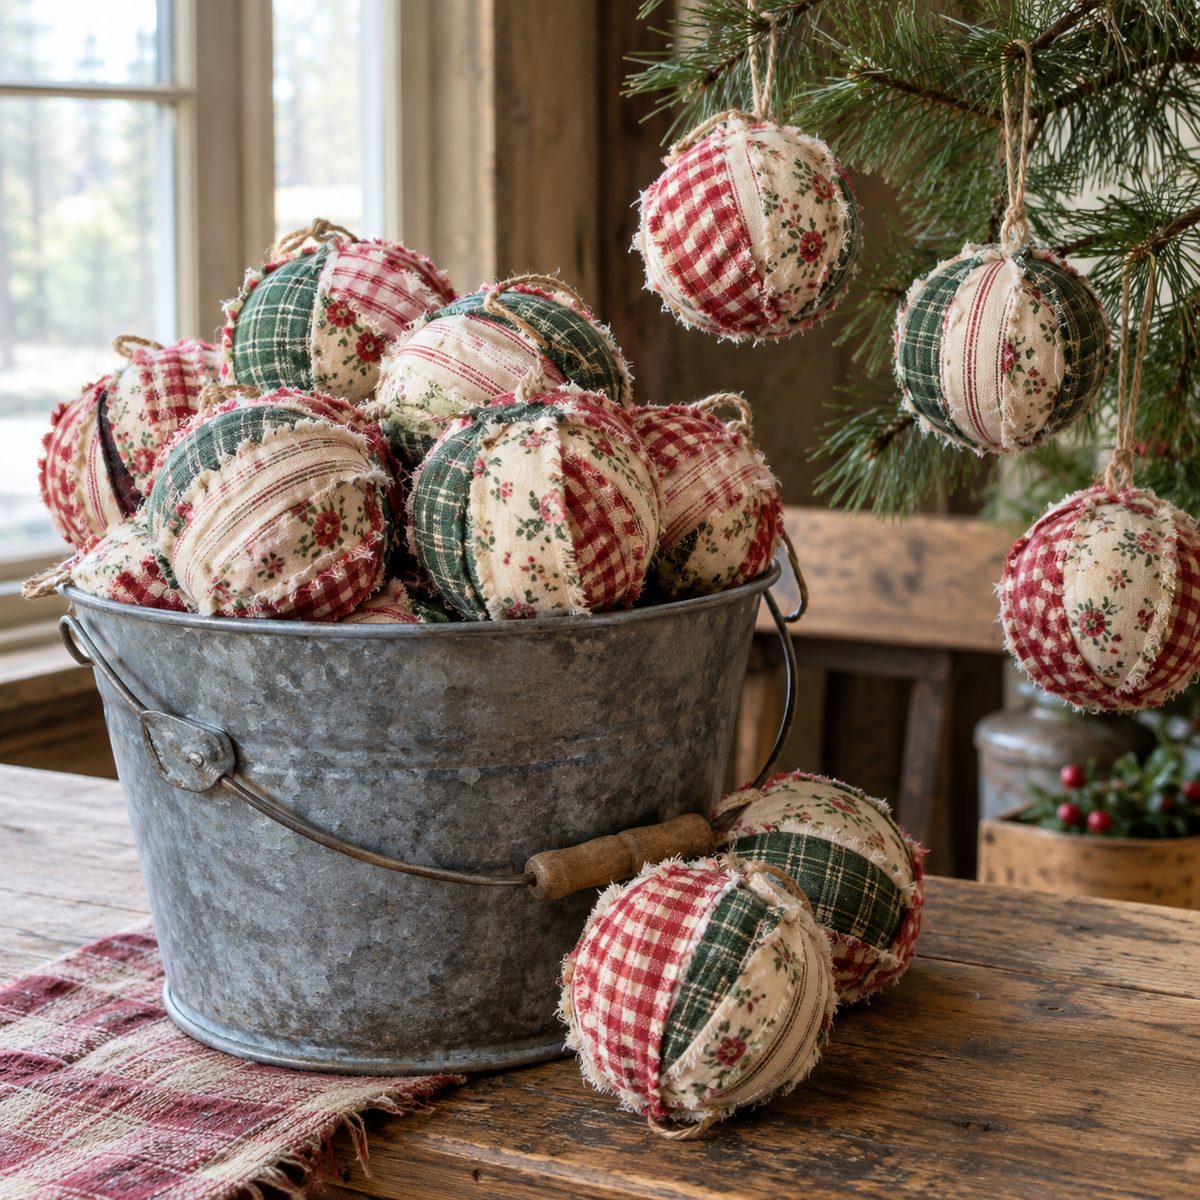
Time: 25 minutes each. Skill: Beginner.
Rag balls use up the strips left after everything else and look like something from an old farmhouse. Tear six to eight 1 x 12-inch strips of cotton, and have a 2-inch foam ball or a tight wad of batting plus thread.
- Pin the end of one strip to the ball and wrap it around, overlapping as you go.
- When the strip runs out, pin and stitch the end down, then start the next strip in a new direction.
- Keep wrapping until no ball shows, stitching ends down as you go.
- Tie a strip into a loop, knot it to the top with a few stitches, and let the torn edges fray.
Keep tearing strips from the same prints to make a rag garland or the rag wreath in our Christmas sewing projects list.
Fill the Tree One Scrap at a Time
The quickest way through this list is in batches: cut ten hearts, ten stars and ten cone trees in one sitting, then sew them assembly-line style while the kettle boils. Keep a small basket by the chair for the hand-finishing, and by the second weekend of December the branches will be full. The best part comes next year, when the box opens and every one of them still looks new.