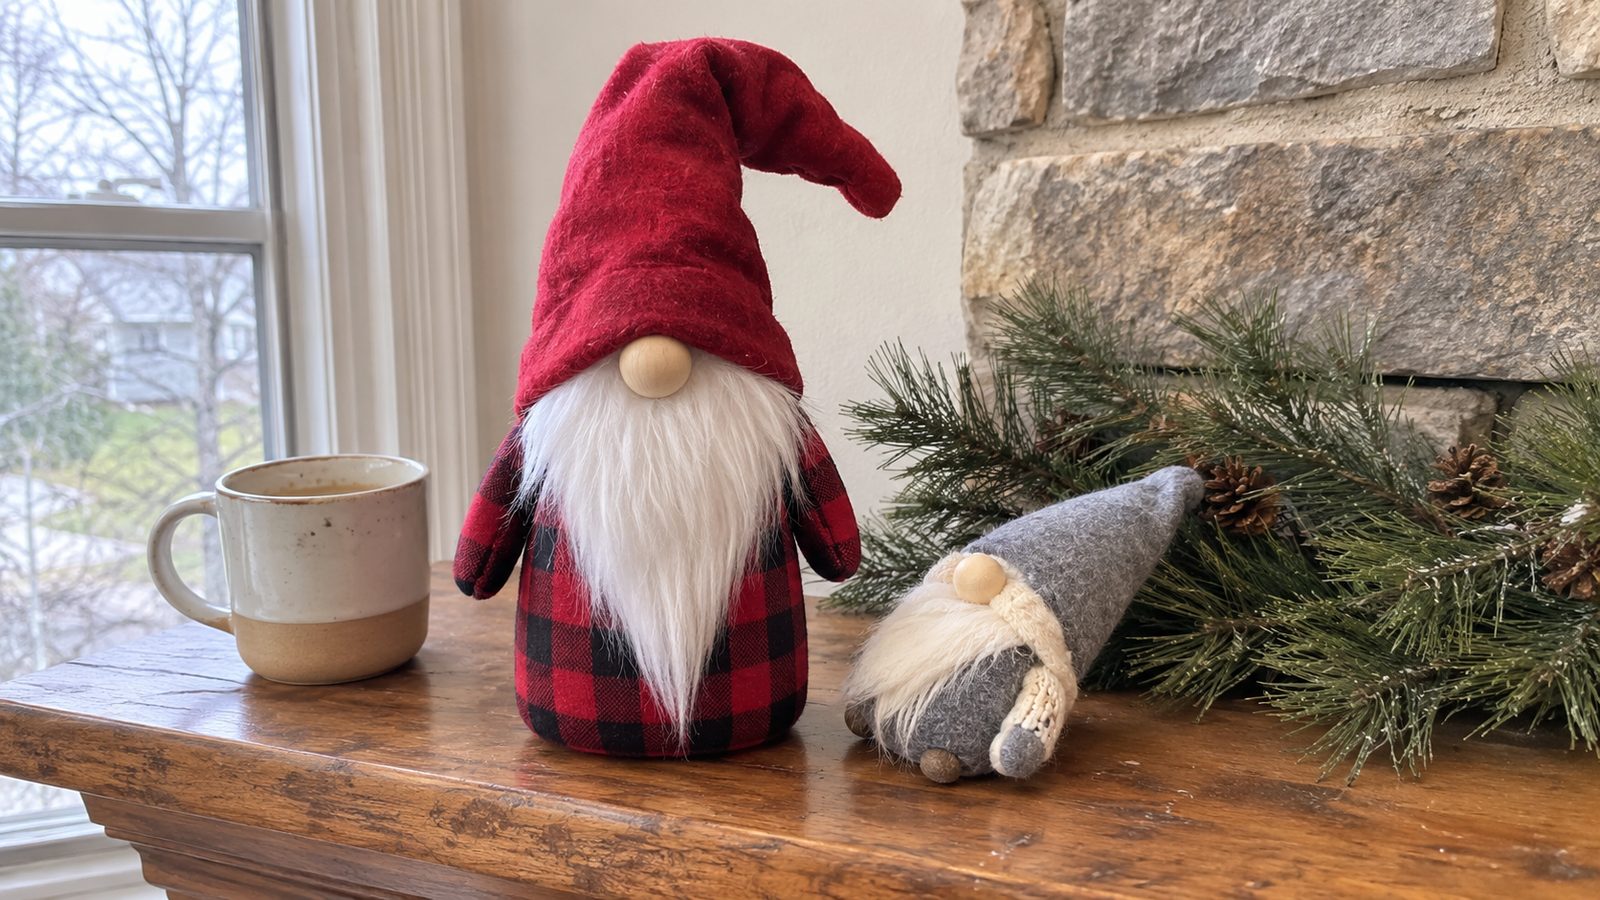
A fabric gnome is a weighted cone of cotton or flannel with a fur beard, a bead nose, and a hat tall enough to cover everything but the nose. The Scandinavian tomte is the model, and the shape forgives a lot because there is no face to get right. Plan on an hour and a half for the first one and under an hour after that.
It is a confident-beginner project. Straight seams, one circle sewn into a tube, and some hand stitching.
The one thing that makes it come out well is the weight in the base. A gnome with rice in the bottom and fiberfill above it sits flat, holds its hat up, and does not tip when the cat walks past. All fiberfill and it slumps within a week.
What you’ll need
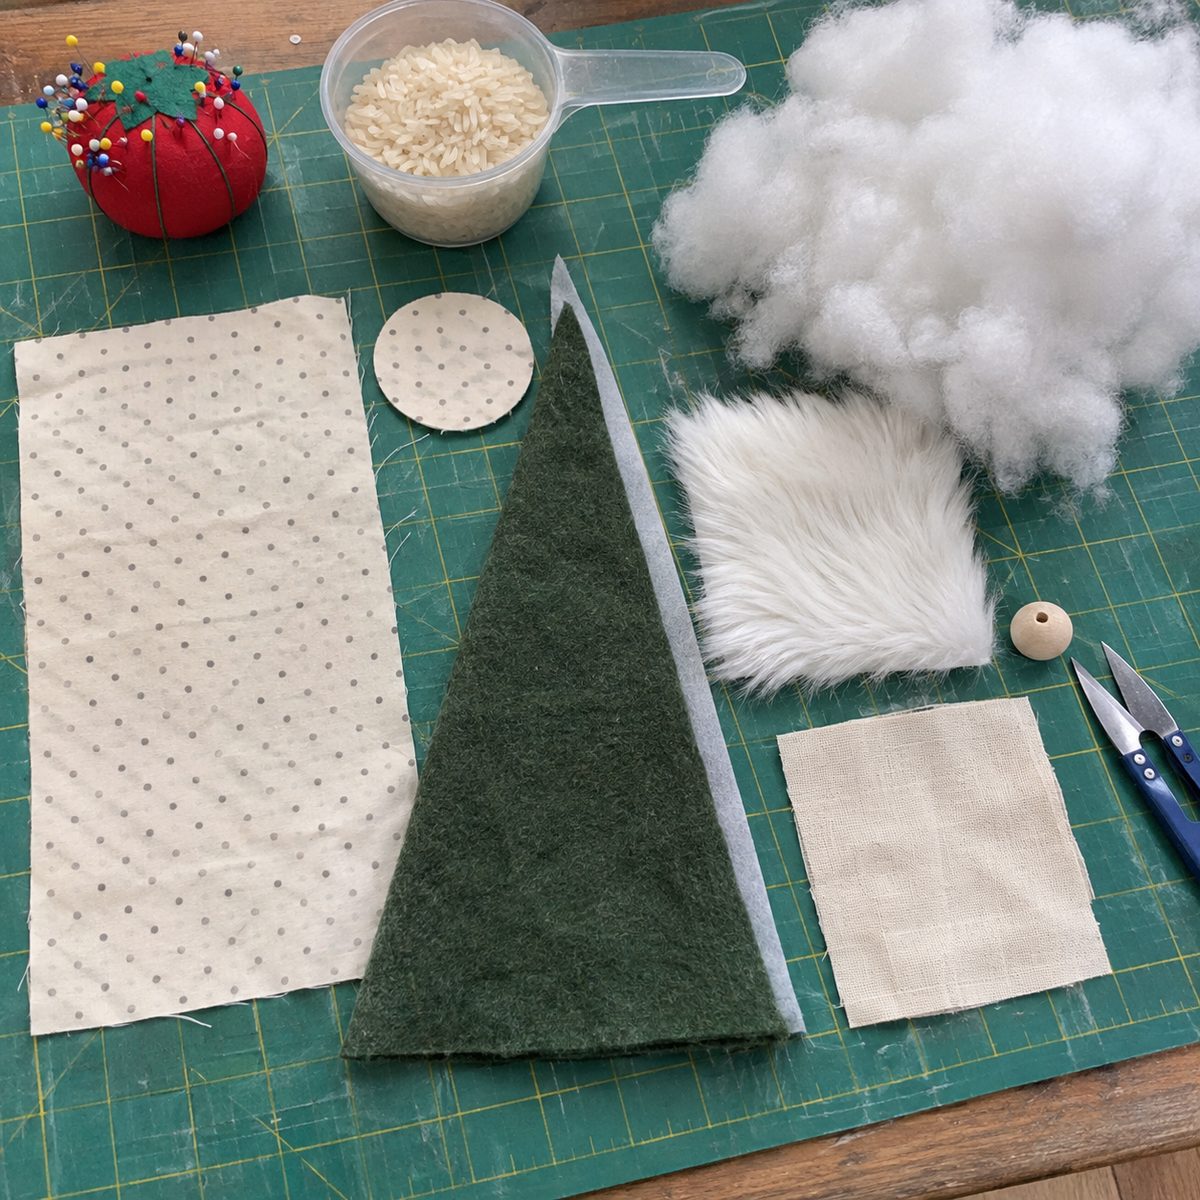
- Body fabric: 1/4 yard of quilting cotton or flannel (a fat quarter makes one standard gnome plus a mini)
- Hat fabric: 1/4 yard of a contrasting cotton or flannel, or one 9 by 12 inch sheet of wool-blend felt
- Medium-weight fusible interfacing, a 10 by 10 inch piece (Pellon SF101 or similar), plus an optional 9 by 12 inch craft felt sheet for a rolled cone
- Faux fur, a 5 by 6 inch piece in white, cream, or gray, or a 9 by 12 inch sheet of cream felt for a cut-strip beard
- One 20mm (about 3/4 inch) unfinished wooden bead for the nose, or a 2 1/2 inch circle of peach cotton and a pinch of stuffing
- Rice, dried beans, or poly pellets: 3/4 cup for a standard gnome, 2 tablespoons for a mini, plus a 6 inch square of muslin to hold it
- Polyester fiberfill, about two loose handfuls per standard gnome
- All-purpose thread to match the body, a hand needle, Fray Check or washable fabric glue, and 8 inches of twine for an ornament loop
| Piece | Cut size | Qty |
|---|---|---|
| Body, standard | 10 by 7 1/2 inch rectangle (10 inches across) | 1 |
| Base circle, standard | 3 1/2 inch circle | 1 |
| Hat, standard | Triangle 11 inches across the bottom, 8 inches tall to the point | 1 fabric, 1 interfacing |
| Beard, standard | 4 by 5 inch faux fur, trimmed to a rounded point | 1 |
| Nose, standard (fabric version) | 2 1/2 inch circle | 1 |
| Weight pouch | 6 inch square of muslin (4 inch square for a mini) | 1 |
| Body, mini ornament | 6 by 4 1/2 inch rectangle (6 inches across) | 1 |
| Base circle, mini | 2 1/4 inch circle | 1 |
| Hat, mini | Triangle 6 1/2 inches across the bottom, 5 inches tall | 1 fabric, 1 interfacing |
| Beard, mini | 2 by 2 1/2 inch faux fur | 1 |
| Nose, mini | 12mm bead, or a 1 1/2 inch circle | 1 |
The standard gnome finishes about 9 to 10 inches tall with the hat tip folded over. The mini finishes about 5 inches.
Fabric and prep
Quilting cotton is the easiest body fabric. Flannel is softer and hides the top gathers better, but it stretches on the bias, so cut it on grain.
For the hat, cotton with interfacing gives a crisp cone you can bend into a slouch. Wool-blend felt stands up on its own and you can leave the brim raw. Craft felt is thin and shows every lump underneath.
Buy fur by the 1/4 yard with a pile 1 1/2 to 2 inches long. Short sherpa pile looks like a bath mat, not a beard.
No prewashing, since a rice-weighted gnome never sees the washer. Press the fabric flat and trace circles with a mug (about 3 1/2 inches) or a spice jar lid (about 2 1/4 inches) on the wrong side. Mark the hat triangle with a ruler: the 11 inch bottom edge first, then the point 8 inches straight up from its middle.
Sew the body and weight the base
- Fold the body rectangle in half, right sides together, so the two 7 1/2 inch edges meet. Sew that edge with a 1/4 inch seam at stitch length 2.5 with an 80/12 universal needle. Press the seam open.
- Pin the base circle to one end of the tube, right sides together, pins every 3/4 inch. Sew with a 1/4 inch seam, slowly, stopping with the needle down every few stitches to turn. From the outside the base should be a smooth round disc with no tucks.
- Hand-sew a running stitch with doubled thread 1/4 inch below the raw top edge, stitches about 1/4 inch long. Leave the tail hanging. Turn right side out and push the base seam out with a chopstick.
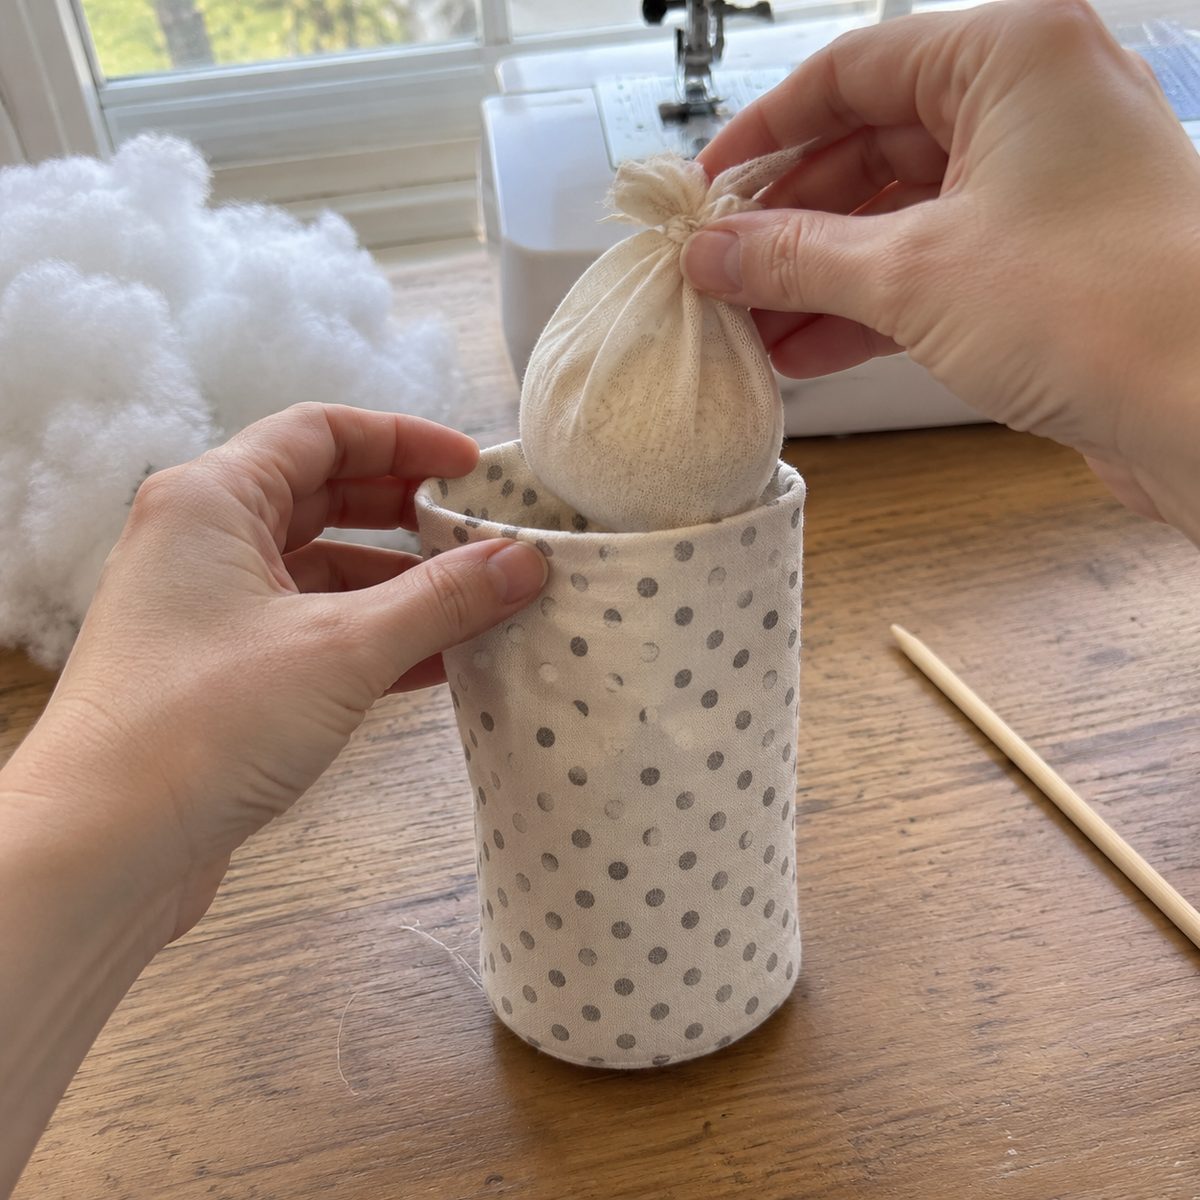
- Pour 3/4 cup of rice into the center of the muslin square, gather the corners, wrap thread around the neck five times, and knot. Drop the pouch in, neck up, and flatten it against the base with your fingers. The body should stand up by itself now.
- Add fiberfill above the pouch in small handfuls, edges first and center last, until the sides are firm and the tube stands straight with no waist. Stop 1 inch below the gathering stitches, pull the thread tight, poke the raw edges inside, and lock with four stitches across the hole. The top will be a puckered dome. The hat covers all of it.
Make the nose and attach the beard
- For a bead nose, mark a spot 2 1/2 inches below the top gathers, opposite the body seam. With a knotted doubled strand, come up through the body at the mark, through the bead, back down a hair to one side, and repeat three times. Pull snug so the bead sinks slightly into the fabric.
- For a fabric nose, run a gathering stitch 1/4 inch inside the circle, pull it into a cup, pack in a marble-sized pinch of fiberfill, pull tight, and knot. Ladder stitch the gathered side to the body at the same mark. It should be a firm ball standing well out from the body.
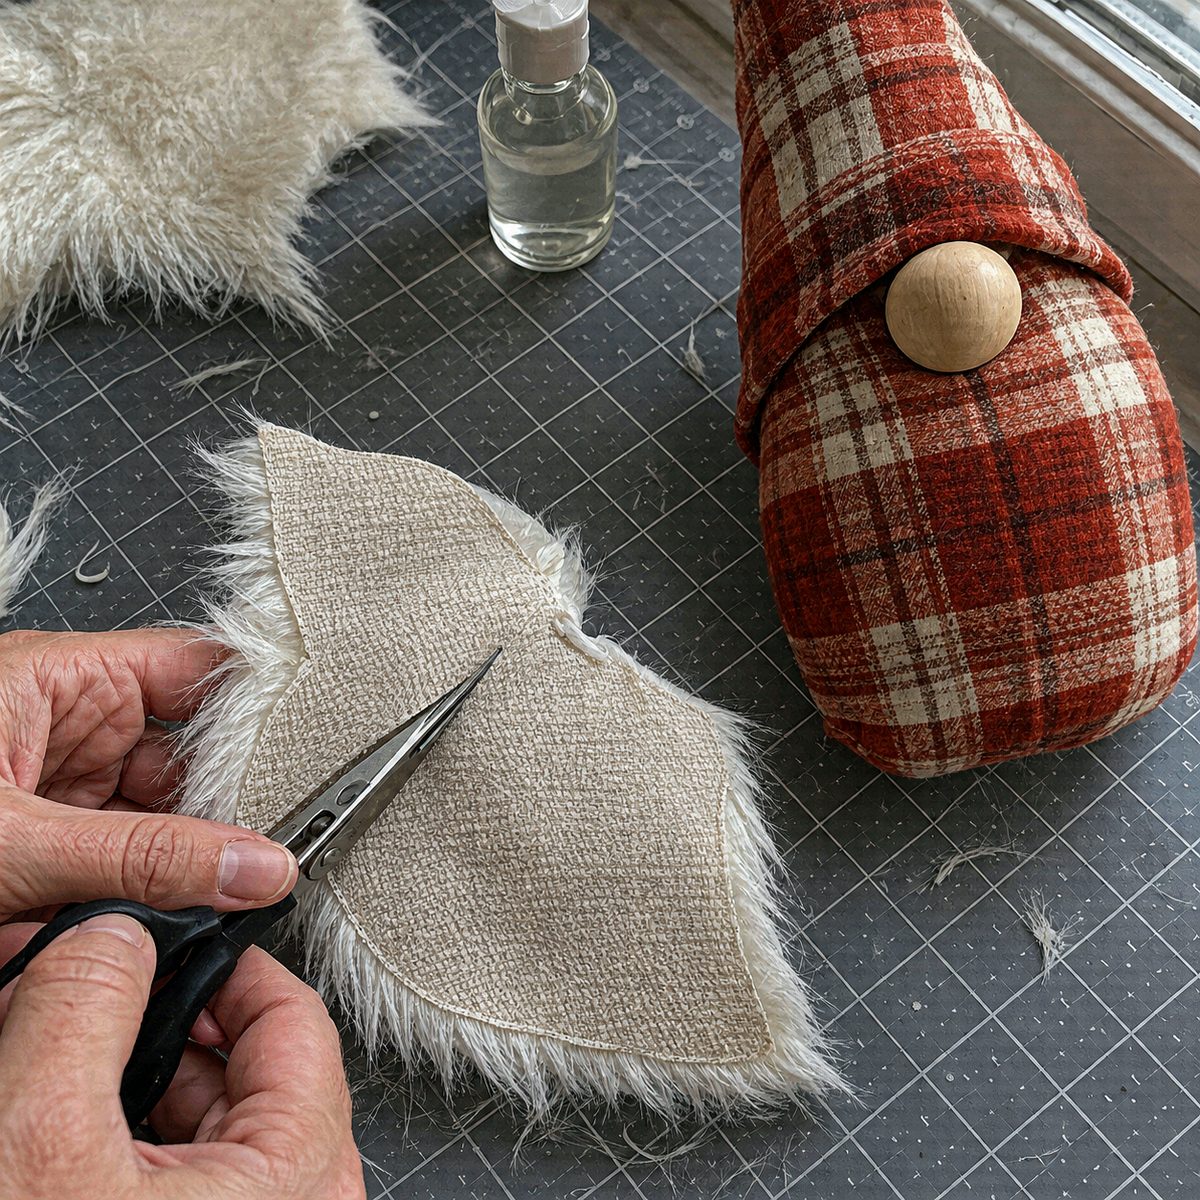
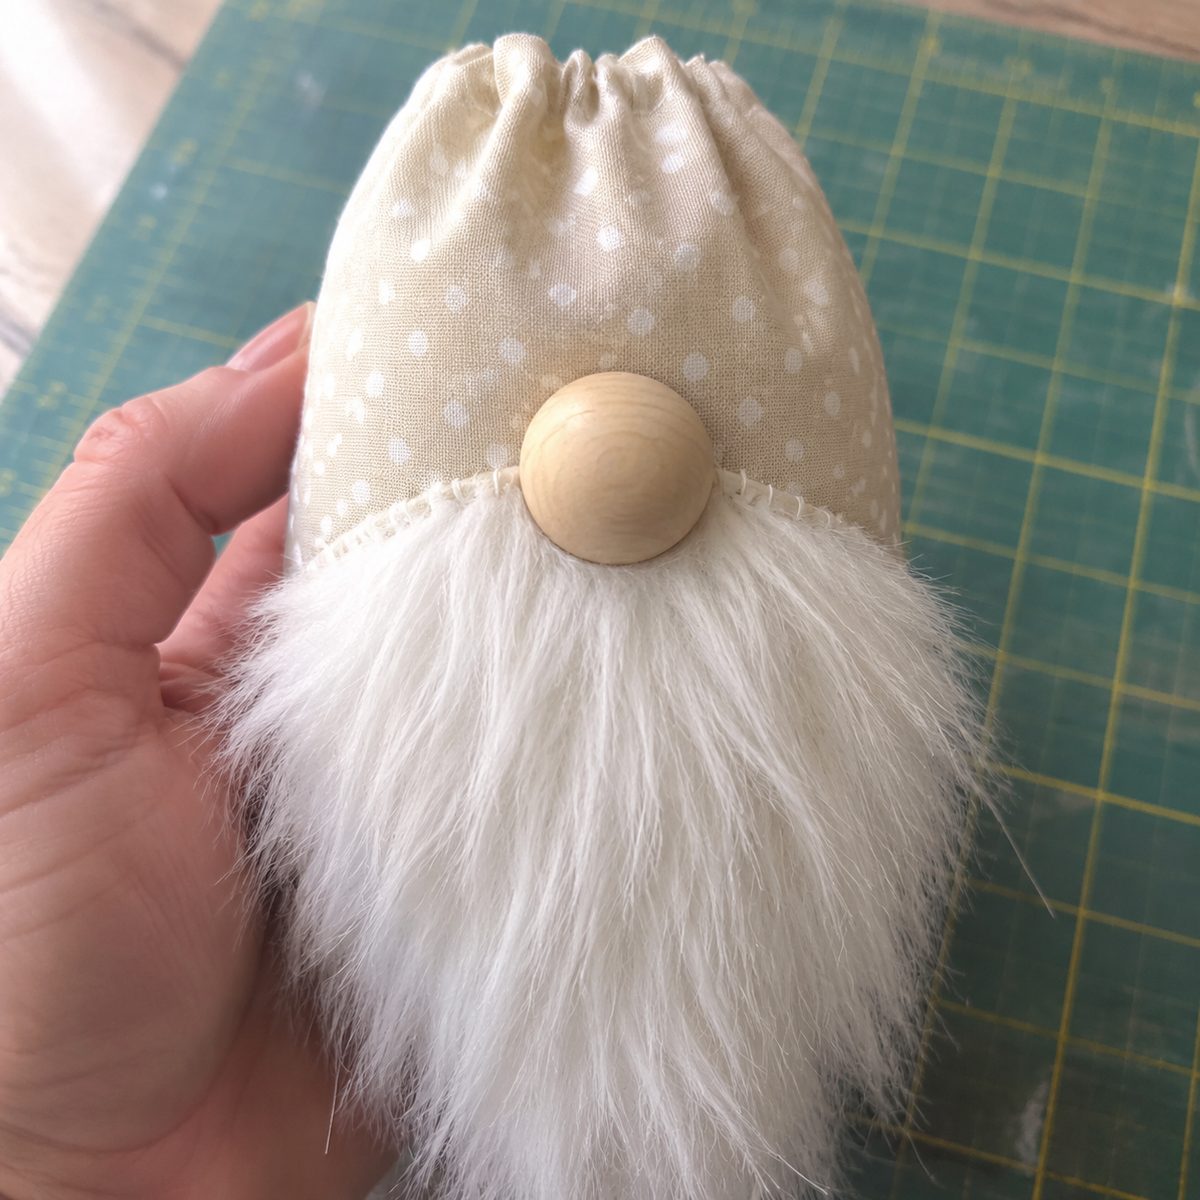
- Flip the fur to the woven backing side and draw the beard: 4 inches across the top, tapering to a rounded point 5 inches down. Cut with only the tips of your scissors, sliding the lower blade under the pile and cutting just the backing. You should hear a quiet snip and see almost no fur fall.
- Run a thin line of Fray Check or fabric glue along the cut edge of the backing, back side only, and let it dry 10 minutes. This is the step that stops shedding.
- Set the beard with its top edge snug under the nose, pile pointing down, and pin through the backing. Whipstitch the top edge to the body with stitches 1/4 inch apart, catching only the backing and a thread or two of body fabric. Add three stab stitches down each side, then brush the fur over the stitches with a pin.
- For a felt beard, cut a 4 by 5 inch rectangle, leave a 3/4 inch band uncut along the top, snip strips 1/8 inch wide up from the bottom, trim to a point, and sew the band under the nose.
Sew and stiffen the hat
A limp hat is the most common reason a homemade gnome looks homemade. If you have not fused interfacing before, my post on what interfacing is and which weight to buy covers it.
- Fuse the interfacing triangle to the wrong side of the hat fabric with a dry iron, 10 to 15 seconds per spot, lifting rather than sliding. Let it cool flat. The piece should feel like light card and hold a crease. Skip this for wool felt.
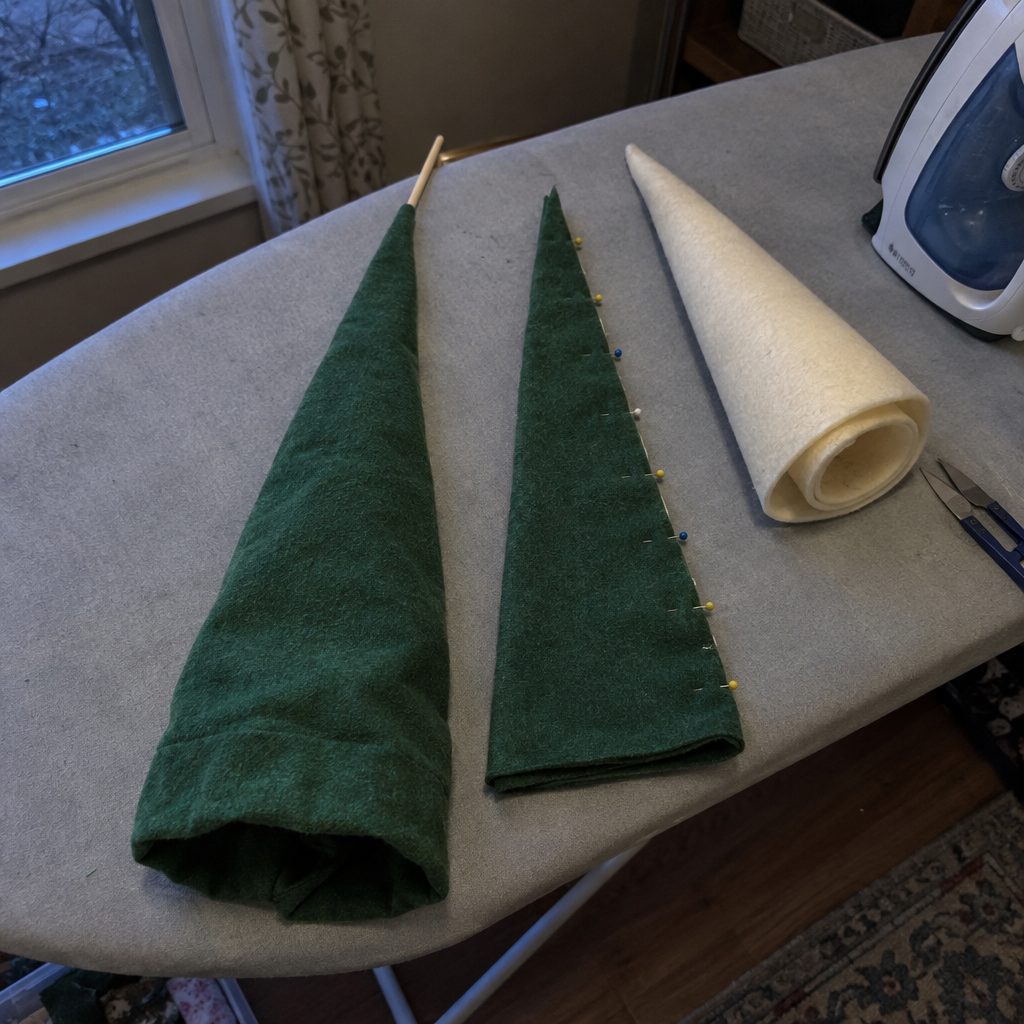
- Fold the triangle in half, right sides together, matching the two long edges. Sew from the bottom up to the point with a 1/4 inch seam, dropping the stitch length to 1.8 for the last inch. Trim the seam allowance to 1/8 inch for that last inch and clip the corner at an angle.
- Turn right side out and work the point out with a chopstick, pushing gently. A sharp point means you trimmed enough. A rounded one means seam allowance is bunched in the tip.
- Press 1/4 inch of the brim to the wrong side and stitch it down, or leave a felt brim raw. The hat should slide over your fist with a little room.
- For a point that stands straight up, roll the craft felt sheet into a tight cone, trim it to fit, and push it in so the felt tip fills the fabric tip. For a floppy tomte slouch, skip the cone and push a pinch of fiberfill into the top 2 inches only.
Put the gnome together
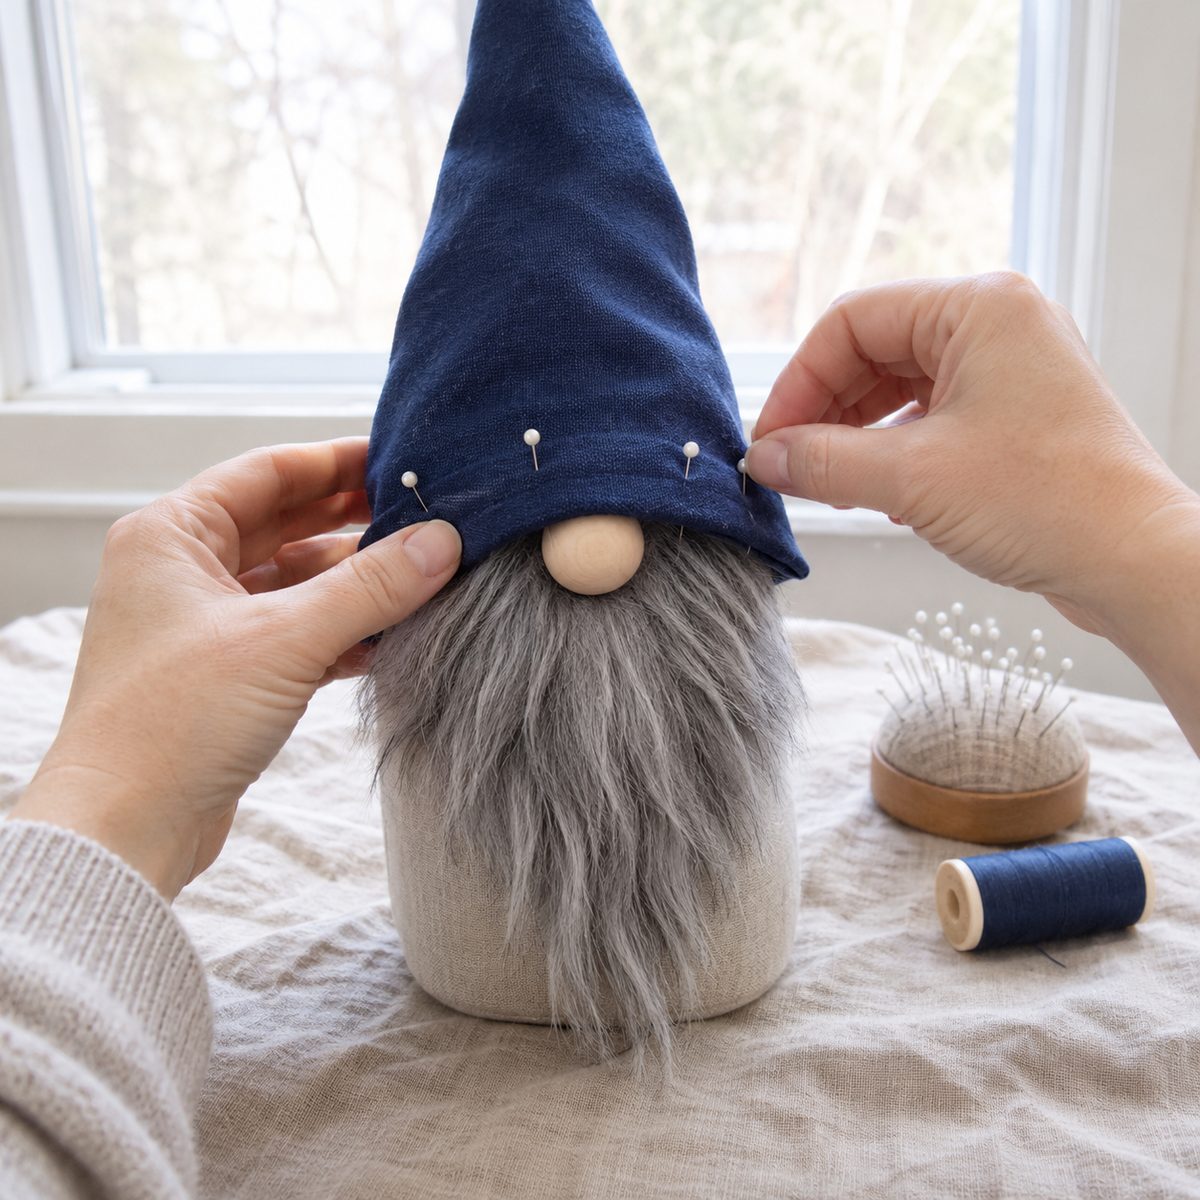
- Pull the hat down over the body until the brim covers the top third of the nose. Everything above the nose should disappear: gathers, beard stitches, all of it.
- Pin the brim in four places, then stand the gnome up and look at it from the front at table level. The nose should be centered under the hat and the beard centered under the nose. Shift the hat, not the beard.
- Hand-stitch the brim to the body all the way around with stitches 1/2 inch apart, going through the brim, through the beard backing where it crosses the beard, and into the body. Hide the knot under the brim at the back.
- For a mini ornament, fold the twine in half and sew the ends into the hat tip with four stitches before you fold the tip.
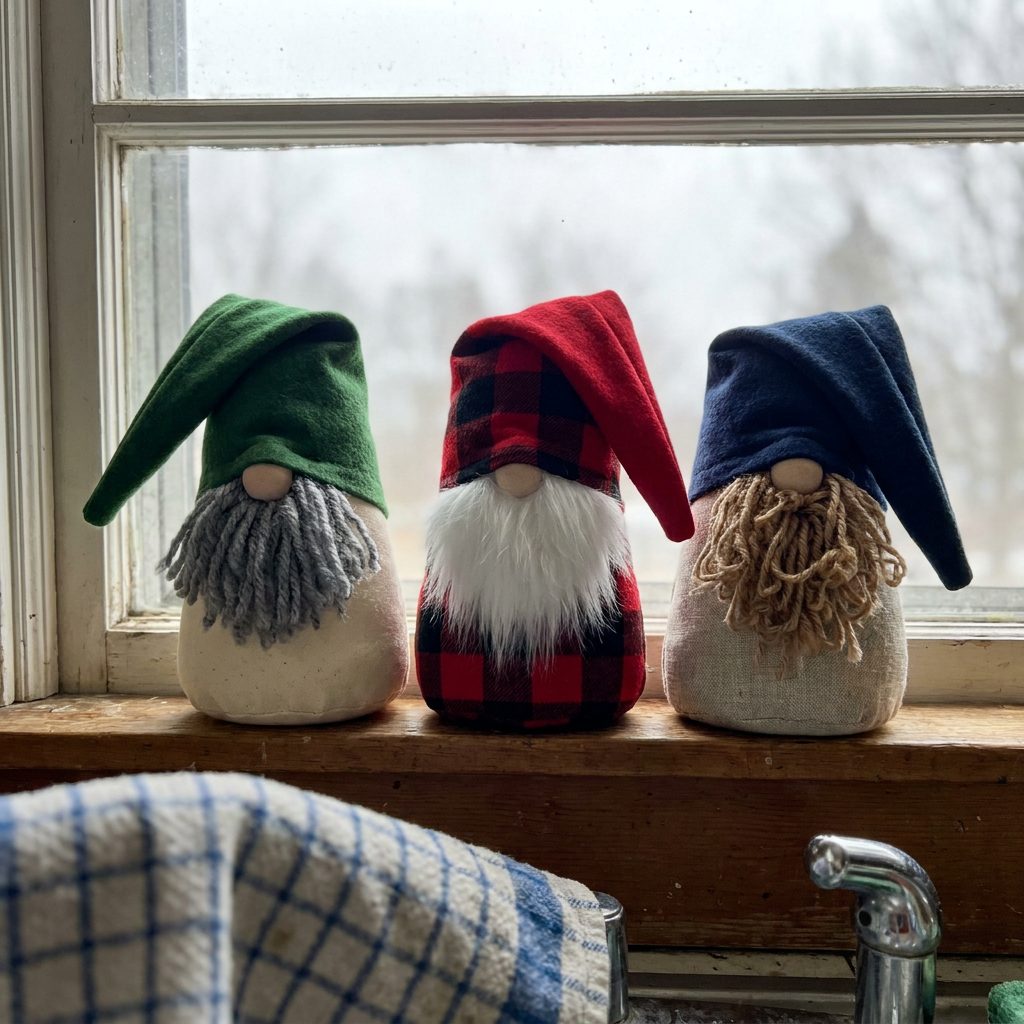
- Fold the point of the hat to one side and tack it with two stitches, or leave it standing if you used the felt cone. Done.
Fixes for the things that go wrong
The gnome leans or tips over
The weight is not flat, or there is not enough of it. Push a chopstick in beside the pouch and work it flat against the base, then pack fiberfill firmly around it so it cannot shift. If it still leans, open the top gathers and add a second small pouch.
The beard sheds fur everywhere
The cut went through the pile, or the backing edge never got sealed. Flip the beard up, run Fray Check along the back edge, let it dry, and brush off loose fibers with a toothbrush.
The hat point is rounded or droops the wrong way
Too much seam allowance in the tip, or no stiffening. Turn the hat wrong side out, trim the last inch of seam allowance to 1/8 inch, and turn again. For droop, add the felt cone or a pinch of fiberfill in the top 2 inches, then tack the fold where you want it.
The base circle has tucks and the gnome rocks
You sewed the circle too fast and let the tube fold under the foot. Unpick the tucked stretch, re-pin every 1/2 inch, and sew it again with the needle down and the foot lifted every few stitches to pivot.
Variations and seasonal swaps
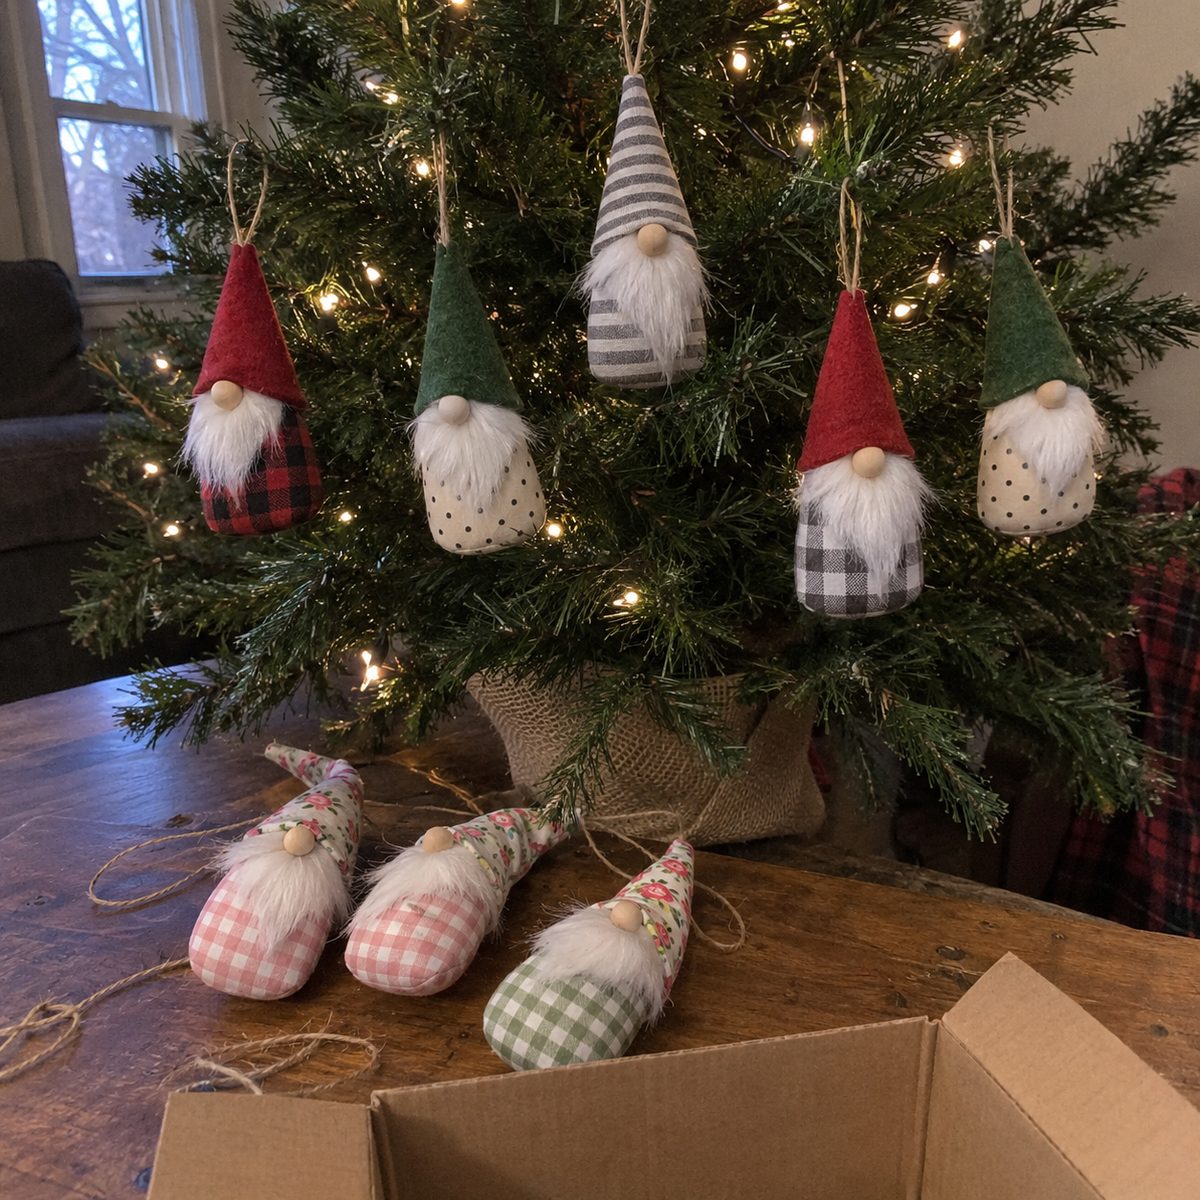
For Christmas, I use red and black buffalo check for the body with a plain red flannel hat and a white beard, the version in my Christmas sewing projects list. Cream body, forest green hat, and gray beard looks more Scandinavian and calmer on a mantel. Minis in the same fabrics hang on the tree with the rest of your fabric Christmas ornaments.
The same pattern turns into spring or Halloween decor by changing fabric and nothing else. Pastel gingham body, a tiny floral hat, and a felt flower on the brim is an Easter gnome. A black and orange ticking body with a pointed black felt hat and a gray beard belongs with the Halloween sewing projects.
The bead nose is a small part. The CPSC counts anything that fits inside a 1 1/4 inch cylinder as a choking hazard for children under three. For a nursery or a house with toddlers, use the stuffed fabric nose, sew the beard rather than glue it, and fill the base with fiberfill or a double-bagged pouch of poly pellets.
To make a batch, cut for six at once and sew in stages: bodies one evening, hats the next, then beards and noses in front of a movie. The rice is the same kind I use in a rice heating pad, but a gnome stored in a damp garage can draw pantry moths, so use poly pellets for anything headed into long-term storage.
Frequently asked questions
Can I make a fabric gnome from a sock instead?
You can, but it is a different project. A sock body is limp, stretches as it ages. A sewn cotton body holds a true cone, takes any fabric, and gives a flat base for the rice pouch.
Why a tomte and not a garden gnome?
The tomte or nisse of Nordic folklore is a small house spirit in a red cap and a long beard who looks after the farm and expects porridge at Christmas. The hat-over-the-eyes look is what makes the sewn version easy, since there is no face to embroider.
Can I wash a fabric gnome?
Not with rice inside. Rice swells and sours when wet, and faux fur mats in a washer. Spot clean the body with a damp cloth and brush the beard with a soft toothbrush. If you need washable, use poly pellets in a tightly sewn pouch, a felt-strip beard, and a cool hand wash.
Your first gnome will take the full hour and a half because of the beard. After that the hands remember. Make the mini next, and by the third one you will be eyeing every fat quarter in the house for a hat.